Garlic Aioli Sauce: Prepare to elevate your culinary creations with this creamy, dreamy, and intensely flavorful condiment! Have you ever wondered how to transform a simple sandwich or crudité platter into a gourmet experience? The answer lies in a dollop of perfectly made aioli. This isn’t just mayonnaise with garlic; it’s a symphony of flavors that will awaken your taste buds.
Aioli, with its roots deeply embedded in the Mediterranean culinary tradition, particularly in Provence, France, and Catalonia, Spain, has been a staple for centuries. The name itself, derived from the words “ail” (garlic) and “oli” (oil), hints at its simple yet profound composition. Traditionally, it was made using a mortar and pestle, a testament to the patience and dedication of cooks past. While modern methods offer convenience, the essence of aioli remains the same: a celebration of garlic’s pungent power.
People adore Garlic Aioli Sauce for its incredible versatility and the way it effortlessly enhances a wide range of dishes. Its rich, garlicky flavor and smooth, velvety texture make it an irresistible accompaniment to everything from grilled vegetables and roasted meats to crispy fries and seafood. The best part? It’s surprisingly easy to make at home, allowing you to customize the intensity of the garlic to your liking. So, ditch the store-bought stuff and let’s embark on a journey to create the ultimate aioli that will have everyone begging for the recipe!

Ingredients:
- 1 cup mayonnaise (preferably homemade or high-quality store-bought)
- 4-6 cloves garlic, minced (adjust to your preference)
- 1 tablespoon lemon juice, freshly squeezed
- 1 tablespoon extra virgin olive oil
- 1/4 teaspoon salt, or to taste
- 1/8 teaspoon black pepper, freshly ground, or to taste
- Optional: Pinch of cayenne pepper for a little heat
- Optional: 1 teaspoon Dijon mustard for added tang
- Optional: 1 tablespoon finely chopped fresh parsley or chives for garnish
Preparing the Garlic Aioli:
Alright, let’s get started on making this amazing garlic aioli! It’s surprisingly simple, and the flavor payoff is huge. I promise, once you try homemade aioli, you’ll never go back to the jarred stuff.
- Mince the Garlic: The first step is to mince your garlic. Now, I know some people are tempted to use a garlic press, but for aioli, I really recommend mincing it finely with a knife. A garlic press can sometimes make the garlic bitter, and we want a smooth, creamy aioli with a lovely garlic flavor, not a harsh one. Aim for a very fine mince. If you’re feeling ambitious, you can even make a garlic paste by adding a pinch of salt to the minced garlic and using the flat side of your knife to smear it across your cutting board until it forms a paste. This will ensure the garlic incorporates perfectly into the aioli.
- Combine the Ingredients: In a medium-sized bowl, add the mayonnaise, minced garlic (or garlic paste), lemon juice, and olive oil. Don’t be shy with the garlic! I usually start with 4 cloves and then taste and add more if I want a stronger garlic flavor. The lemon juice adds a brightness that really complements the garlic.
- Season and Adjust: Now, add the salt and pepper. Remember, you can always add more, but you can’t take it away, so start with the recommended amounts and then taste and adjust as needed. This is where you can also add a pinch of cayenne pepper if you want a little kick. I love a little heat in my aioli, but it’s totally optional.
- Whisk it All Together: Using a whisk, thoroughly combine all the ingredients until they are smooth and creamy. Make sure there are no lumps of mayonnaise or garlic. The aioli should be a uniform color and consistency.
- Taste and Adjust (Again!): This is the most important step! Taste your aioli and see what you think. Does it need more garlic? Add another clove, minced very finely. Does it need more lemon juice? Add a little more, a few drops at a time. Does it need more salt or pepper? Adjust accordingly. The beauty of homemade aioli is that you can customize it to your exact preferences.
- Optional Additions: If you’re feeling fancy, you can add a teaspoon of Dijon mustard for a little extra tang. The Dijon mustard also helps to emulsify the aioli and give it a smoother texture. You can also stir in a tablespoon of finely chopped fresh parsley or chives for a pop of color and freshness.
- Chill and Let the Flavors Meld: This is crucial! Cover the bowl with plastic wrap and refrigerate the aioli for at least 30 minutes, or even better, for an hour or two. This allows the flavors to meld together and the garlic to mellow out a bit. The aioli will also thicken up slightly in the refrigerator.
Serving Suggestions:
Okay, your aioli is ready! Now, what to do with it? The possibilities are endless! Here are some of my favorite ways to use garlic aioli:
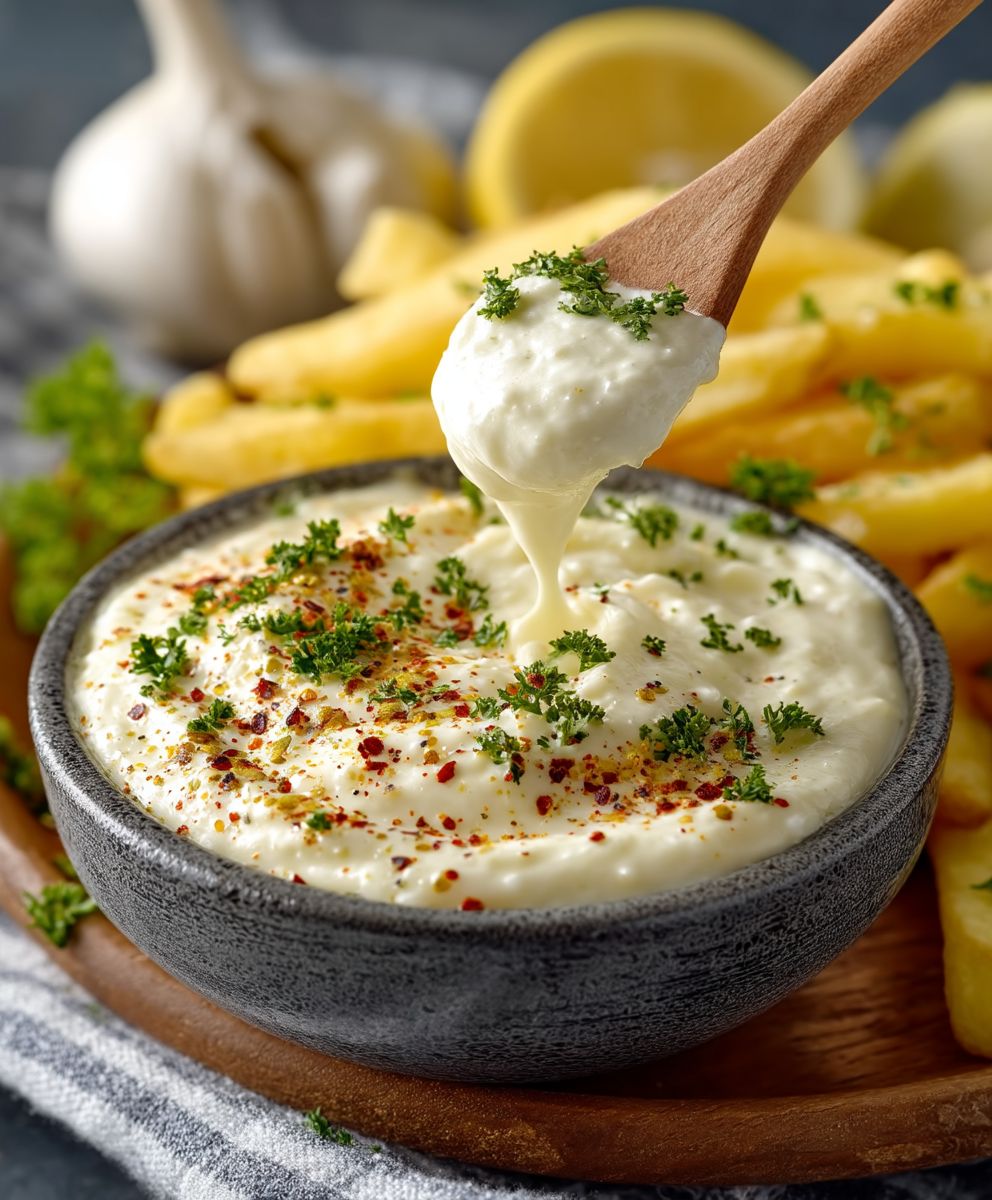
- As a Dip: Serve it as a dip for crudités (raw vegetables like carrots, celery, cucumbers, and bell peppers), French fries, sweet potato fries, or roasted potatoes. It’s also amazing with grilled artichokes.
- As a Spread: Use it as a spread on sandwiches, burgers, or wraps. It adds a ton of flavor and moisture. Try it on a turkey sandwich with avocado and sprouts, or on a grilled chicken burger with lettuce and tomato.
- As a Sauce: Drizzle it over grilled fish, chicken, or vegetables. It’s especially good with grilled asparagus, roasted Brussels sprouts, or pan-seared salmon.
- With Seafood: It’s a classic accompaniment to seafood dishes like shrimp scampi, crab cakes, or fried calamari.
- In Deviled Eggs: Add a spoonful of aioli to your deviled egg filling for a garlicky twist.
- As a Salad Dressing: Thin it out with a little olive oil and lemon juice and use it as a creamy salad dressing.
Tips and Tricks for the Best Aioli:
Here are a few extra tips and tricks to ensure your garlic aioli is perfect every time:
- Use High-Quality Mayonnaise: The mayonnaise is the base of the aioli, so it’s important to use a good one. I prefer homemade mayonnaise, but if you’re using store-bought, choose a high-quality brand that you like the taste of.
- Adjust the Garlic to Your Taste: Some people love a strong garlic flavor, while others prefer a more subtle taste. Start with 4 cloves of garlic and then add more to taste.
- Use Fresh Lemon Juice: Fresh lemon juice is essential for the bright, tangy flavor of aioli. Bottled lemon juice just doesn’t compare.
- Don’t Over-Process the Garlic: As I mentioned earlier, avoid using a garlic press, as it can make the garlic bitter. Mince it finely with a knife or make a garlic paste.
- Let the Flavors Meld: Refrigerating the aioli for at least 30 minutes allows the flavors to meld together and the garlic to mellow out. This is a crucial step for the best flavor.
- Store Properly: Store leftover aioli in an airtight container in the refrigerator for up to 3-4 days.
- Experiment with Flavors: Once you’ve mastered the basic garlic aioli, feel free to experiment with other flavors. Try adding roasted red peppers, sun-dried tomatoes, herbs like rosemary or thyme, or even a little sriracha for a spicy kick.
Troubleshooting:
Sometimes, things don’t go exactly as planned. Here are a few common problems you might encounter when making aioli and how to fix them:
- Aioli is Too Thick: If your aioli is too thick, add a little bit of lemon juice or olive oil, a teaspoon at a time, until it reaches the desired consistency.
- Aioli is Too Thin: If your aioli is too thin, you can try adding a little more mayonnaise. However, be careful not to add too much, as this can make the aioli taste bland.
- Aioli is Too Garlicky: If your aioli is too garlicky, there’s not much you can do to remove the garlic flavor. However, you can try adding a little more lemon juice or mayonnaise to balance it out. Next time, start with less garlic.
- Aioli is Bitter: If your aioli is bitter, it’s likely due to the garlic. As I mentioned earlier, avoid using a garlic press, as it can make the garlic bitter. Also, make sure you’re using fresh garlic.
Variations:
Want to spice things up? Here are a few variations on the classic garlic aioli:
- Spicy Aioli: Add a pinch of cayenne pepper or a dash of your favorite hot sauce for a spicy kick.
- Roasted Red Pepper Aioli: Add 1/4 cup of roasted red peppers, drained and chopped, to the aioli.
- Sun-Dried Tomato Aioli: Add 1/4 cup of sun-dried tomatoes, packed in oil, drained and chopped, to the aioli.
- Herb Aioli: Add 1 tablespoon of finely chopped fresh herbs, such as rosemary, thyme, or basil, to the aioli.
- Lemon-Herb Aioli: Add the zest of one lemon and 1 tablespoon of finely chopped fresh herbs to the aioli.
- Smoked Paprika Aioli: Add 1/2 teaspoon of smoked paprika to the aioli for a smoky flavor.
I hope you enjoy this recipe for garlic aioli! It’s a simple but incredibly versatile sauce that can elevate so many dishes. Don’t be afraid to experiment with different flavors and find your perfect aioli recipe. Happy cooking!
Conclusion:
This Garlic Aioli Sauce isn’t just another condiment; it’s a flavor explosion waiting to happen, a versatile powerhouse that will elevate your meals from ordinary to extraordinary. I truly believe this is a must-try recipe for anyone who loves bold, delicious flavors and appreciates the magic of homemade sauces. The creamy texture, the pungent garlic, the subtle tang – it all comes together in perfect harmony.
Why is it a must-try? Because it’s incredibly easy to make, requiring minimal ingredients and effort. Forget those store-bought aiolis that are often bland and filled with preservatives. This homemade version is bursting with fresh, vibrant flavor that you simply can’t replicate with pre-made options. Plus, you have complete control over the ingredients, allowing you to tailor it to your exact taste preferences.
But the real magic lies in its versatility. This Garlic Aioli Sauce is so much more than just a dip. Imagine slathering it on grilled burgers for an extra layer of savory goodness. Picture dipping crispy french fries, sweet potato fries, or even roasted vegetables into its creamy embrace. It’s the perfect accompaniment to seafood, adding a zesty kick to grilled shrimp, pan-seared scallops, or even a simple piece of baked cod.
And the possibilities don’t stop there! Use it as a spread for sandwiches and wraps, adding a burst of flavor to your lunchtime routine. Drizzle it over roasted chicken or pork for a restaurant-worthy meal. Mix it into potato salad or coleslaw for a creamy, garlicky twist on classic sides. You can even thin it out with a little lemon juice and olive oil to create a delicious salad dressing.
Looking for variations? Feel free to experiment with different herbs and spices. Add a pinch of smoked paprika for a smoky depth, a sprinkle of cayenne pepper for a touch of heat, or some chopped fresh herbs like parsley, chives, or dill for a burst of freshness. For a vegan version, simply substitute the mayonnaise with a vegan mayonnaise alternative. You can also adjust the amount of garlic to your liking – add more for a bolder flavor or less for a more subtle taste.
Serving suggestions are endless! I personally love serving it with grilled artichokes, using it as a dipping sauce for chicken wings, or spreading it on a toasted baguette for a simple yet satisfying appetizer. It’s also fantastic with eggs – try it on a breakfast sandwich or as a topping for scrambled eggs.
I’m confident that once you try this recipe, you’ll be hooked. It’s a game-changer in the kitchen, a simple sauce that can transform your meals and impress your friends and family. So, what are you waiting for? Gather your ingredients, follow the easy steps, and prepare to be amazed by the incredible flavor of this homemade Garlic Aioli Sauce.
I truly hope you give this recipe a try. And when you do, I would absolutely love to hear about your experience! Share your photos, your variations, and your serving suggestions in the comments below. Let me know what you think and how you’re using this delicious sauce to elevate your meals. Happy cooking!
Garlic Aioli Sauce: The Ultimate Guide to Making Perfect Aioli
Creamy, flavorful garlic aioli made from scratch. Perfect as a dip, spread, or sauce for countless dishes!
Ingredients
- 1 cup mayonnaise (preferably homemade or high-quality store-bought)
- 4-6 cloves garlic, minced (adjust to your preference)
- 1 tablespoon lemon juice, freshly squeezed
- 1 tablespoon extra virgin olive oil
- 1/4 teaspoon salt, or to taste
- 1/8 teaspoon black pepper, freshly ground, or to taste
- Pinch of cayenne pepper for a little heat
- 1 teaspoon Dijon mustard for added tang
- 1 tablespoon finely chopped fresh parsley or chives for garnish
Instructions
- Mince the Garlic: Mince garlic finely with a knife. Avoid using a garlic press, as it can make the garlic bitter. For a smoother aioli, create a garlic paste by adding a pinch of salt to the minced garlic and smearing it across your cutting board with the flat side of your knife.
- Combine the Ingredients: In a medium-sized bowl, add the mayonnaise, minced garlic (or garlic paste), lemon juice, and olive oil.
- Season and Adjust: Add the salt and pepper. Add cayenne pepper if desired.
- Whisk it All Together: Using a whisk, thoroughly combine all the ingredients until they are smooth and creamy.
- Taste and Adjust (Again!): Taste and adjust seasonings as needed. Add more garlic, lemon juice, salt, or pepper to your preference.
- Optional Additions: Add Dijon mustard for tang. Stir in fresh parsley or chives for color and freshness.
- Chill and Let the Flavors Meld: Cover the bowl with plastic wrap and refrigerate the aioli for at least 30 minutes, or up to 2 hours, to allow the flavors to meld.
Notes
- Use high-quality mayonnaise for the best flavor.
- Adjust the amount of garlic to your taste.
- Use fresh lemon juice.
- Refrigerate for at least 30 minutes to allow flavors to meld.
- Store leftover aioli in an airtight container in the refrigerator for up to 3-4 days.
- Experiment with flavors like roasted red peppers, sun-dried tomatoes, or herbs.
- If the aioli is too thick, add a little lemon juice or olive oil.
- If the aioli is too thin, add a little more mayonnaise.
- If the aioli is too garlicky, add more lemon juice or mayonnaise to balance it out.