• Skip to primary navigation
  • Skip to main content
  • Skip to primary sidebar
Homesmad

Homesmad

  • Home
  • Breakfast & Brunch
  • Appetizers & Snacks
  • Dinner
  • Dessert
  • About
  • Privacy Policy
  • Contact
Homesmad
  • Home
  • Breakfast & Brunch
  • Appetizers & Snacks
  • Dinner
  • Dessert
  • About
  • Privacy Policy
  • Contact

Get Crispy Air Fryer Apple Fries! Easy & Healthy Snack

December 2, 2025 by Lily author

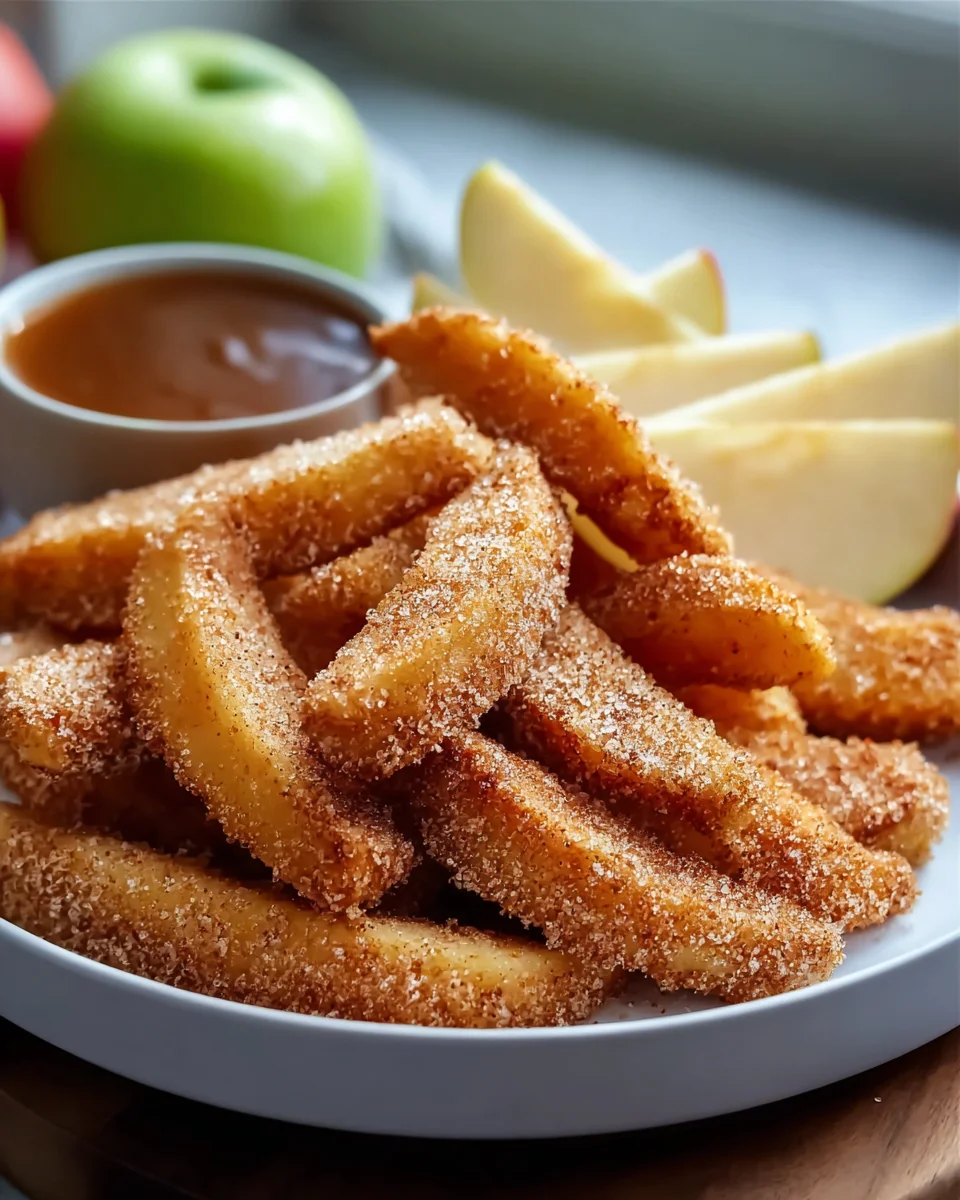
Crispy Air Fryer Apple Fries are about to revolutionize your snack game, offering a delightful twist on a classic comfort food that’s both healthier and incredibly satisfying. Forget traditional potato fries for a moment, because what I’m thrilled to share with you today is a sweet and savory sensation that promises to become your new favorite treat. Imagine perfectly tender apple sticks, seasoned with a hint of cinnamon and sugar, emerging from your air fryer with an irresistible golden crispness on the outside.

I simply adore how this dish perfectly marries the natural sweetness and slight tartness of apples with that gratifying crunch we all crave. It’s a fantastic, low-guilt alternative to more indulgent desserts, making it ideal for a quick snack, a unique side dish, or even a light breakfast. Apples have long held a cherished place in kitchens worldwide, transforming into pies, crumbles, and strudels that evoke warmth and nostalgia. This recipe for Crispy Air Fryer Apple Fries builds upon that rich heritage, offering a modern, convenient, and incredibly delicious way to enjoy the fruit’s timeless appeal.

You’ll be amazed at how simple it is to achieve such extraordinary results, creating a snack that appeals to both kids and adults alike.

Get ready to discover your new go-to recipe for a perfectly sweet and crispy treat!

Get Crispy Air Fryer Apple Fries! Easy & Healthy Snack this RECIPE

Ingredients:

  • For the Apples:
    • 3-4 medium-sized firm apples (such as Honeycrisp, Gala, Fuji, or Granny Smith for a tarter flavor)
    • 1 tablespoon fresh lemon juice (optional, to prevent browning)
  • For the Wet Coating:
    • 1 large egg
    • 2 tablespoons milk (any kind, dairy or non-dairy)
    • 1/2 teaspoon pure vanilla extract
  • For the Dry Coating:
    • 1/2 cup all-purpose flour
    • 1/4 cup granulated sugar
    • 2 tablespoons light brown sugar, packed
    • 1 teaspoon ground cinnamon
    • 1/4 teaspoon ground nutmeg
    • Pinch of salt (about 1/8 teaspoon, important for flavor balance)
  • For Air Frying:
    • Cooking spray or 1-2 teaspoons neutral oil (like canola, grapeseed, or vegetable oil)
  • For Serving (Optional Toppings):
    • Powdered sugar, for dusting
    • Caramel sauce or chocolate syrup, for drizzling
    • Whipped cream or a scoop of vanilla ice cream
    • A sprinkle of extra cinnamon or a dash of apple pie spice

Preparing Your Apples for Crispy Air Fryer Apple Fries

  1. Selecting Your Apples: First things first, let’s talk about the stars of our show – the apples! For truly Crispy Air Fryer Apple Fries, you’ll want to choose apples that are firm and hold their shape well during cooking. Varieties like Honeycrisp, Gala, Fuji, or even a slightly tart Granny Smith work wonderfully. Granny Smiths will give you a lovely tangy contrast to the sweet coating, while Honeycrisps offer a naturally sweet and crisp starting point. Avoid overly soft or mealy apples, as they tend to become mushy rather than wonderfully crisp in the air fryer. I usually go for 3-4 medium-sized apples, which yields a generous batch.
  2. Washing and Peeling: Begin by thoroughly washing your chosen apples under cool running water. While you can leave the peels on for extra fiber and a rustic look, I personally prefer to peel them for these “fries.” Peeling ensures a more uniform texture and allows the coating to adhere better, contributing significantly to that desired crispy exterior. Use a vegetable peeler to carefully remove all the skin from each apple.
  3. Corning the Apples: Next, we need to remove the core. You can use an apple corer for a neat hole straight through the center, or simply use a sharp paring knife. If using a knife, carefully cut the apple into quarters and then slice out the core and any seeds from each quarter. Be mindful of your fingers!
  4. Slicing for Fry-Like Shapes: This is a crucial step for achieving that “fry” look and feel. Take each apple quarter and slice it lengthwise into even strips, resembling French fries. Aim for a thickness of about 1/4 to 1/2 inch. Consistency is key here! If your apple fries are all roughly the same size, they will cook evenly, ensuring every single piece reaches that perfect level of tenderness on the inside and crispiness on the outside. Thinner slices will cook faster and be crisper, while thicker ones will be softer in the middle. Experiment to find your perfect balance.
  5. Preventing Browning (Optional but Recommended): As you slice the apples, you’ll notice they start to brown when exposed to air. To keep them looking fresh and appealing, place the sliced apple pieces into a bowl and toss them gently with 1 tablespoon of fresh lemon juice. This simple step helps to slow down the oxidation process, keeping your apple fries looking vibrant and appetizing. Don’t overdo the lemon juice, or it can make the apples too tart; just a light coating is perfect.
  6. Patting Dry – The Secret to Crispiness: This is arguably one of the most important steps for achieving truly Crispy Air Fryer Apple Fries. Once your apples are sliced and potentially coated in lemon juice, you must pat them thoroughly dry. Using paper towels or a clean kitchen towel, gently blot away as much surface moisture as possible. Excess moisture is the enemy of crispiness! If the apples are wet, the coating won’t adhere properly, and they’ll steam rather than crisp up in the air fryer. Take your time with this step – a dry apple surface is paramount for that golden, crunchy exterior we’re aiming for.

Creating the Flavorful Coating for Your Apple Fries

  1. Preparing the Wet Mixture: In a medium-sized shallow bowl, crack your large egg. Add the 2 tablespoons of milk and 1/2 teaspoon of pure vanilla extract. Use a fork or a small whisk to beat these ingredients together until they are well combined and smooth. This wet mixture will act as the “glue” that helps the flavorful dry coating adhere to our apple fries. The vanilla extract adds a lovely aromatic sweetness that complements the apples beautifully.
  2. Preparing the Dry Coating: In another medium-sized shallow bowl or a pie plate (which works perfectly for dredging), combine all the ingredients for the dry coating. This includes 1/2 cup all-purpose flour, 1/4 cup granulated sugar, 2 tablespoons packed light brown sugar, 1 teaspoon ground cinnamon, 1/4 teaspoon ground nutmeg, and a small pinch of salt (about 1/8 teaspoon).
  3. Why Each Ingredient Matters:

    • The flour provides the structural base for the crispy crust.
    • Granulated sugar contributes to sweetness and helps with browning.
    • Brown sugar adds a deeper, molasses-like sweetness and a slight chewiness, enhancing the overall flavor profile significantly.
    • Cinnamon and nutmeg are classic apple companions, infusing our fries with warm, inviting autumnal spices. These spices are essential for that comforting apple pie flavor.
    • The pinch of salt might seem small, but it’s incredibly important. It doesn’t make the fries salty; instead, it balances and enhances all the other sweet and spicy flavors, making them pop. Never skip the salt in sweet recipes!

    Use a fork or a whisk to thoroughly combine all these dry ingredients. Make sure there are no lumps of brown sugar and that the spices are evenly distributed throughout the flour mixture. This ensures every apple fry gets a consistent, delicious coating.

Dredging and Prepping for the Air Fryer

  1. Coating the Apple Fries: Now for the fun part – getting those apples ready for their crispy transformation! Working in small batches (about 8-10 apple slices at a time) to avoid overcrowding, first dip the apple slices into the wet egg mixture. Ensure each piece is fully coated, letting any excess drip off back into the bowl. You want a thin, even layer.
  2. Moving to the Dry Coating: Immediately after the wet dip, transfer the wet apple slices into the bowl with the dry coating mixture. Use your free hand (or a fork) to gently toss and press the dry mixture onto the apple slices. Make sure every surface of the apple fry is completely covered with the spiced flour mixture. A good, even coating is crucial for developing that amazing crispy texture and delivering all those wonderful flavors. Once coated, gently shake off any excess dry mixture.
  3. Preparing Your Air Fryer: While you’re coating the apples, it’s a great idea to preheat your air fryer. Preheat it to 375°F (190°C) for about 5 minutes. Preheating is often overlooked but it’s a vital step for achieving truly Crispy Air Fryer Apple Fries. A hot air fryer basket helps the coating to set immediately and begin crisping up, rather than slowly drying out.
  4. Arranging in the Air Fryer Basket: Once your air fryer is preheated, lightly spray the bottom of the air fryer basket with cooking spray, or brush it with a tiny bit of neutral oil. This prevents sticking and also aids in browning. Carefully arrange the coated apple fries in a single layer in the air fryer basket. Do not overcrowd the basket! This is another critical tip for crispiness. If the fries are piled on top of each other, they will steam instead of air fry, resulting in a soggy rather than crispy outcome. Work in batches as necessary.
  5. A Light Oil Spray: Once the apple fries are arranged, give them a light, even spray of cooking oil or brush them very lightly with oil. This helps the coating get wonderfully golden brown and crunchy. This thin layer of oil is what truly promotes that fried texture we’re after, making them incredibly delicious and satisfying.

Air Frying for Ultimate Crispiness

  1. The Initial Fry: Place the basket back into the preheated air fryer. Air fry at 375°F (190°C) for 6-8 minutes. During this initial phase, the coating will begin to set, and the apples will start to soften slightly. You’ll notice the edges beginning to turn a lighter golden color.
  2. Shaking for Evenness: After the initial 6-8 minutes, carefully pull out the air fryer basket. Give it a good shake to redistribute the apple fries, or use tongs to flip each piece individually. This ensures all sides get exposed to the circulating hot air, promoting even cooking and browning. This shaking/flipping step is incredibly important for consistent crispiness across all your Crispy Air Fryer Apple Fries.
  3. The Second Fry for Perfection: Return the basket to the air fryer and continue to air fry for another 5-7 minutes, or until the apple fries are beautifully golden brown and reach your desired level of crispiness. The exact cooking time can vary slightly depending on your air fryer model, the thickness of your apple slices, and how soft you prefer the apple inside.

    • Visual Cues: Look for a deep golden-brown color on the coating.
    • Texture Check: The exterior should feel firm and crispy to the touch.
    • Internal Doneness: The apple inside should be tender but still have a slight bite – not mushy.

    You might even hear a slight crackle as you take them out, a sure sign of success!

  4. Batch Cooking: If you have more batches to cook, repeat the process from steps 13-17, arranging the apple fries in a single layer and lightly spraying with oil for each subsequent batch. Ensure you don’t overload the air fryer, as this will compromise the crispiness of your earlier batches.

Serving Your Delicious Crispy Air Fryer Apple Fries

  1. Immediate Gratification: Once each batch is done, carefully transfer the hot Crispy Air Fryer Apple Fries to a serving plate or a wire rack set over a baking sheet (a wire rack helps maintain crispiness by allowing air circulation underneath).
  2. The Final Flourish (Optional but Highly Recommended): For that classic “fry” presentation and an extra touch of sweetness, lightly dust the warm apple fries with powdered sugar. You can use a small sieve or a powdered sugar shaker for an even coating. The heat from the fries will slightly melt the powdered sugar, creating a delightful glaze.
  3. Dipping Delights: These apple fries are absolutely divine on their own, but they also pair wonderfully with dipping sauces. Consider serving them with a side of warm caramel sauce, chocolate syrup, a dollop of whipped cream, or even a scoop of vanilla ice cream for an indulgent dessert experience. For a lighter option, a Greek yogurt dip sweetened with a little maple syrup and a dash of cinnamon would be fantastic.
  4. Enjoy While Warm: Like traditional French fries, Crispy Air Fryer Apple Fries are best enjoyed warm, fresh out of the air fryer. The crispiness is at its peak immediately after cooking. While they are still delicious cooled, they do tend to soften slightly over time. So gather your loved ones and dig in right away! These are perfect for a unique snack, a fun dessert, or even a creative breakfast side. They are an absolutely delightful and healthier way to enjoy a sweet treat!

Get Crispy Air Fryer Apple Fries! Easy & Healthy Snack

Conclusion:

If there’s one recipe I truly believe deserves a permanent spot in your culinary repertoire, it’s this one. I’ve shared countless recipes over the years, but the sheer delight and simplicity of transforming humble apples into golden, tender-on-the-inside, and gloriously crispy treats never ceases to amaze me. This isn’t just another snack; it’s a revelation, proving once again the genius of the air fryer. Forget soggy, forget greasy; we’re talking about pure, unadulterated apple goodness with that satisfying crunch that’s usually reserved for much more complicated, and often less healthy, deep-fried delights.

The beauty of these fries lies not only in their incredible taste and texture but also in their effortless preparation. Seriously, just a few minutes of prep, a quick toss with some warming spices, and your air fryer does all the heavy lifting. It’s a fantastic way to enjoy a sweet treat without the guilt, offering a healthier alternative to traditional fried snacks or heavy desserts. Think of them as your guilt-free indulgence, a vibrant burst of flavor that satisfies that craving for something both sweet and excitingly textured. Whether you’re looking for a quick after-school snack, a unique dessert to impress dinner guests, or just something delightful to munch on while relaxing, these fries tick all the boxes. From the very first bite, I guarantee you’ll understand why these Crispy Air Fryer Apple Fries are so special, quickly becoming a family favorite that you’ll return to again and again.

Delicious Serving Suggestions and Creative Variations

But the journey doesn’t end when they come out of the air fryer! Part of the joy of these apple fries is their incredible adaptability. For a truly classic experience, a simple dusting of powdered sugar or a generous sprinkle of cinnamon-sugar mixture right after they’re cooked elevates their natural sweetness and gives them a beautiful finish. Imagine dipping them into a rich, velvety caramel sauce, a decadent chocolate ganache, or even a dollop of Greek yogurt mixed with a touch of honey for a lighter, tangy contrast. They make an absolutely divine accompaniment to a scoop of premium vanilla bean ice cream, creating a warm and cold sensation that’s simply irresistible, especially when drizzled with a little maple syrup or a sprinkle of toasted pecans. For a more indulgent dessert, try pairing them with whipped cream and a sprinkle of crushed graham crackers or walnuts for added texture.

Don’t hesitate to experiment with the spices, either. While cinnamon is a perennial favorite and always a winner, a pinch of nutmeg, allspice, or even a tiny touch of ground ginger can transform the flavor profile, adding depth and warmth that perfectly complements the apple. For an unexpected twist, a tiny sprinkle of cardamom can introduce an exotic, fragrant note that’s absolutely captivating and will have everyone asking for your secret ingredient. And for those who enjoy a hint of contrast, a very light dusting of flaky sea salt can surprisingly enhance the sweetness and complexity, creating a delightful sweet-and-salty interplay that keeps you reaching for more. While apples are the undeniable star of this recipe, the air frying method itself is so versatile that you might find yourself wondering what other fruits could benefit from similar treatment down the line!

Your Turn: Try, Share, and Inspire!

Now, it’s your turn. I’ve shared my enthusiasm, my tips, and my favorite ways to enjoy these fantastic fries, but the true magic happens when you bring them to life in your own kitchen. I wholeheartedly encourage you to carve out a little time this week, grab some crisp, sweet apples, and embark on this simple culinary adventure. You’ll be amazed at how quickly and easily you can create something so incredibly satisfying and universally loved. Don’t just take my word for it; experience the crispy joy for yourself! And when you do, please, please share your experience with me! What kind of apples did you use? Did you discover a new favorite dip? Did you come up with a brilliant new spice combination or a serving suggestion I haven’t even thought of yet? Your culinary adventures inspire me and our entire community of food lovers. Post your photos, leave a comment below, or tag us on social media. Let’s celebrate the simple pleasure of making and sharing delicious food together. I am genuinely excited for you to discover your new favorite snack or dessert. Happy air frying!


Crispy Air Fryer Apple Fries

Crispy Air Fryer Apple Fries are a delightful, healthier twist on classic comfort food, perfect for revolutionizing your snack game. This sweet and savory sensation features tender apple sticks seasoned with cinnamon and sugar, air-fried to an irresistible golden crispness. I first made these on a chilly fall afternoon with a couple of apples and a craving for something cozy. The air fryer had already become my go-to, but I wasn’t prepared for how good these would turn out. One bite, and I knew they were going to be a staple snack! They perfectly marry the natural sweetness and slight tartness of apples with that gratifying crunch we all crave. It’s a fantastic, low-guilt alternative to indulgent desserts, ideal for a quick snack, unique side, or light breakfast. Customize them to your heart’s content with various dipping sauces and apple varieties. Whether for a playful party appetizer, a fun after-school treat, or a light dessert, these apple fries check every box. Trust me, once you try them, you’ll be making them again and again.

Prep Time
20 Minutes
Cook Time
15 Minutes
Total Time
35 Minutes
Servings
4 servings

Ingredients


Instructions


Important Information

Nutrition Facts (Per Serving)

It is important to consider this information as approximate and not to use it as definitive health advice.

Allergy Information

Please check ingredients for potential allergens and consult a health professional if in doubt.

« Previous Post
Homemade Honey Cinnamon Oatmeal Bread: Easy & Delicious!
Next Post »
Creamy Garlic Parmesan Chicken & Cheesy Twisted Pasta

If you enjoyed this…

Cottage Cheese Protein Brownies: The Ultimate Guilt-Free Recipe

Mini Sugar Cookies: Easy, Sweet & Bite-Sized Treat!

Lemon Cream Cheese Bread: The Ultimate Baking Guide

Primary Sidebar

Browse by Diet

BreakfastDinnerLunchDessertAppetizer

Sweet Peach Yogurt Parfait Delight

One of my fondest memories is from a lazy summer afternoon spent at my grandmother’s house. The sun filtered through the kitchen window, casting a warm glow over the table where she would create her culinary magic. It was during one of those blissful moments that I first tasted her Peach Yogurt Parfait with Honey and Granola. The sweet aroma of ripe peaches mingling with creamy yogurt and the crunch of granola was nothing short of heavenly. It felt like summer captured in a bowl, and I still remember the joy of diving in with a spoon, each layer revealing a new burst of flavor.

When I think about that parfait, I can almost hear the gentle hum of the bees outside, reminding me of the floral notes that honey brings to every bite. The vibrant yellows and soft oranges of the peaches contrast beautifully with the creamy white yogurt and the golden crunch of granola. It’s a dish that not only looks delightful but also tastes like a celebration of fresh, wholesome ingredients.

What makes my version of this Peach Yogurt Parfait special is the careful balance of flavors and textures. I use ripe, juicy peaches, drizzled with locally sourced honey, and a homemade granola that’s bursting with nuts and seeds for an extra crunch. It’s a simple dish, but every layer is crafted with love and attention.

Let me show you exactly how to make this delightful parfait, so you can bring a bit of that summer magic into your kitchen!

Sweet Peach Yogurt Parfait Delight

Why You’ll Love This Recipe

  • Delightfully creamy texture from the Greek yogurt, paired with the juicy sweetness of fresh peaches.
  • Ready in under 20 minutes, making it a quick and satisfying breakfast or snack option.
  • Budget-friendly, using common ingredients that you may already have in your pantry.
  • Customizable with your favorite granola and nuts, allowing you to tailor each parfait to your taste.
  • Perfectly balanced flavors with the bright acidity of lemon juice and the sweetness of honey enhancing the peaches.

Ingredients

  • For the Parfait:
  • 2 cups plain Greek yogurt (or vanilla yogurt for a sweeter option)
  • 2 large ripe peaches, diced (about 2 cups)
  • 1 tablespoon fresh lemon juice (to prevent browning of peaches)
  • 2 tablespoons honey (plus more for drizzling)
  • 1 teaspoon vanilla extract (optional for extra flavor)
  • For the Granola:
  • 1 cup granola (store-bought or homemade; see notes for a simple granola recipe)
  • 1/4 cup sliced almonds (optional for added crunch)
  • 1/4 cup shredded coconut (optional for added flavor)

Let’s dive into some key ingredients that make this Peach Yogurt Parfait so delightful! First, the Greek yogurt is not only creamy but also packed with protein, making it a satisfying option for breakfast or a snack. If you’re looking for a sweeter option, you can easily substitute it with vanilla yogurt, though it may alter the overall flavor balance. Next, the ripe peaches are the star of the show; their natural sweetness shines through, so I recommend choosing peaches that yield slightly to pressure, indicating they’re perfectly ripe. If peaches aren’t in season, feel free to use nectarines or even frozen peaches—just thaw them before use. Finally, honey adds a lovely floral sweetness that ties everything together. If you prefer, maple syrup can serve as a delicious substitute.

Step-by-Step Instructions

  1. Start by preparing the peaches. Wash them thoroughly, then slice and dice them into bite-sized pieces. In a medium bowl, toss the diced peaches with 1 tablespoon of fresh lemon juice to prevent browning. Set aside for about 5 minutes while the lemon juice works its magic.
  2. In a separate bowl, combine the Greek yogurt, 2 tablespoons of honey, and 1 teaspoon of vanilla extract if using. Stir the mixture until smooth and thoroughly blended. This should take about a minute. Avoid overmixing to maintain the creaminess of the yogurt.
  3. Now it’s time to layer your parfait. Grab a clear glass or bowl to showcase your beautiful creation. Start with a generous spoonful of the yogurt mixture at the bottom—about 1/4 cup will do. Use a spoon to spread it evenly.
  4. Add a layer of the diced peaches over the yogurt, ensuring they cover the yogurt completely. You might want to use about half of what you have prepared—roughly 1 cup. This layer should be visually appealing, so arrange the peaches neatly.
  5. Sprinkle 1/4 cup of granola over the peaches. This adds a delightful crunch. Make sure to distribute it evenly to ensure every bite has that satisfying texture. Avoid packing it down too tightly, as you want it to maintain its crunch.
  6. Repeat the layers: spoon in another 1/4 cup of yogurt, followed by another cup of peaches, and another sprinkle of granola. You should have at least two layers, but feel free to add more depending on your glass size.
  7. Finish off your parfait with a drizzle of honey on top for added sweetness and a touch of elegance. If you’re using sliced almonds or shredded coconut, sprinkle them on top now. It adds a lovely visual contrast and extra flavor.
  8. Serve immediately or refrigerate for up to 30 minutes before serving to allow the flavors to meld together. However, I recommend enjoying it fresh to maintain the granola’s crunch.

Pro Tips for the Best Peach Yogurt Parfait With Honey And Granola

  • Make sure to choose ripe peaches for the best flavor and texture. A common mistake is using unripe fruit, which can lead to a less enjoyable parfait. Look for peaches that are fragrant and slightly soft to the touch.
  • Use a clear glass to assemble your parfait; this not only makes for a beautiful presentation but also allows you to see the colorful layers, which adds to the enjoyment of eating it.
  • For an even creamier texture, consider whipping the Greek yogurt with a hand mixer for a couple of minutes before layering. This small adjustment makes a huge difference in mouthfeel.
  • Be mindful of the granola-to-yogurt ratio. Too much granola can overwhelm the parfait, while too little can make it feel too creamy. Aim for about 1/4 cup of granola per layer for the perfect balance.
  • If you’re making this for a gathering, consider preparing the yogurt and peaches ahead of time and layering them just before serving. This ensures the granola stays crunchy!

Variations & Serving Ideas

There are so many ways to get creative with your Peach Yogurt Parfait! For a tropical twist, swap out the peaches for mangoes or pineapples and top with coconut flakes. If you prefer a berry flavor, mix in some blueberries or strawberries with the peaches for added color and taste. For a nutty version, incorporate chopped walnuts or pecans instead of almonds.

As for serving ideas, this parfait pairs beautifully with a side of scrambled eggs for a hearty breakfast or fresh fruit salad for a light lunch. You might also enjoy it alongside whole grain toast with almond butter for an energizing snack. The contrast of flavors and textures will elevate your meal experience!

Storage, Make-Ahead & Reheating

The Peach Yogurt Parfait is best enjoyed fresh, but you can prepare some components ahead of time. Store the layered parfait in an airtight container in the refrigerator for up to 24 hours. However, be cautious; the granola may lose its crunch if stored too long. You can freeze the yogurt and peach mixture for up to 2 months; just remember to thaw it in the refrigerator overnight before serving.

If you plan to enjoy this dish the next day, it can taste even better as the flavors meld together. Just remember to add the granola right before serving to keep its delightful crunch!

Frequently Asked Questions

Can I make Peach Yogurt Parfait With Honey And Granola ahead of time?

Yes — in fact, it tastes even better the next day as the flavors meld. However, I recommend waiting to add the granola until just before serving to maintain its crunch.

What can I substitute for Greek yogurt?

If you prefer a lighter option, you can substitute Greek yogurt with regular yogurt or a dairy-free alternative like coconut yogurt. Just remember that this may alter the creaminess and flavor profile slightly.

Can I use frozen peaches for this parfait?

Absolutely! Just make sure to thaw the frozen peaches before using them. They will still add great flavor, though the texture may be slightly softer than fresh peaches.

How do I make the parfait vegan?

To make a vegan version, substitute the Greek yogurt with a plant-based yogurt alternative, and replace honey with maple syrup or agave nectar. This keeps the parfait sweet while adhering to a vegan diet.

What other fruits can I use in this recipe?

You can mix and match fruits based on your preference. Try using strawberries, blueberries, raspberries, or even bananas. Just make sure to adjust the lemon juice as needed to prevent browning.

Sweet Peach Yogurt Parfait Delight

Final Thoughts

The Peach Yogurt Parfait with Honey and Granola is a delightful blend of creamy yogurt, sweet peaches, and crunchy granola that creates a satisfying and nourishing treat. Each layer bursts with flavor, making it a perfect choice for breakfast or a light dessert.

This is the kind of recipe I come back to again and again, especially when I want something refreshing and wholesome to start my day. The harmony of sweet and tart flavors, combined with the delightful crunch, never fails to lift my spirits!

I encourage you to give this parfait a try and indulge in its comforting goodness. Feel free to share your results or even add your own twist—perhaps a sprinkle of cinnamon or a handful of nuts. Enjoy creating your perfect parfait!

Print
clock clock iconcutlery cutlery iconflag flag iconfolder folder iconinstagram instagram iconpinterest pinterest iconfacebook facebook iconprint print iconsquares squares iconheart heart iconheart solid heart solid icon

Peach Yogurt Parfait


  • Author: Lily author
  • Total Time: 15 minutes
  • Yield: 4 servings 1x
Pin Recipe
Print Recipe

Description

This Peach Yogurt Parfait combines creamy Greek yogurt, juicy peaches, and crunchy granola for a delightful treat. It’s a perfect breakfast or snack that captures the essence of summer in every bite.


Ingredients

Scale
  • For the Parfait:
  • 2 cups plain Greek yogurt (or vanilla yogurt for a sweeter option)
  • 2 large ripe peaches, diced (about 2 cups)
  • 1 tablespoon fresh lemon juice (to prevent browning of peaches)
  • 2 tablespoons honey (plus more for drizzling)
  • 1 teaspoon vanilla extract (optional for extra flavor)
  • For the Granola:
  • 1 cup granola (store-bought or homemade; see notes for a simple granola recipe)
  • 1/4 cup sliced almonds (optional for added crunch)
  • 1/4 cup shredded coconut (optional for added flavor)

Instructions

  1. Start by preparing the peaches. Wash them thoroughly, then slice and dice them into bite-sized pieces. In a medium bowl, toss the diced peaches with 1 tablespoon of fresh lemon juice to prevent browning. Set aside for about 5 minutes while the lemon juice works its magic.
  2. In a separate bowl, combine the Greek yogurt, 2 tablespoons of honey, and 1 teaspoon of vanilla extract if using. Stir the mixture until smooth and thoroughly blended. This should take about a minute. Avoid overmixing to maintain the creaminess of the yogurt.
  3. Now it’s time to layer your parfait. Grab a clear glass or bowl to showcase your beautiful creation. Start with a generous spoonful of the yogurt mixture at the bottom—about 1/4 cup will do. Use a spoon to spread it evenly.
  4. Add a layer of the diced peaches over the yogurt, ensuring they cover the yogurt completely. You might want to use about half of what you have prepared—roughly 1 cup. This layer should be visually appealing, so arrange the peaches neatly.
  5. Sprinkle 1/4 cup of granola over the peaches. This adds a delightful crunch. Make sure to distribute it evenly to ensure every bite has that satisfying texture. Avoid packing it down too tightly, as you want it to maintain its crunch.
  6. Repeat the layers: spoon in another 1/4 cup of yogurt, followed by another cup of peaches, and another sprinkle of granola. You should have at least two layers, but feel free to add more depending on your glass size.
  7. Finish off your parfait with a drizzle of honey on top for added sweetness and a touch of elegance. If you’re using sliced almonds or shredded coconut, sprinkle them on top now. It adds a lovely visual contrast and extra flavor.
  8. Serve immediately or refrigerate for up to 30 minutes before serving to allow the flavors to meld together. However, I recommend enjoying it fresh to maintain the granola’s crunch.
  • Prep Time: 15 mins
  • Cook Time: 0 mins
  • Category: Breakfast
  • Method: No-cook
  • Cuisine: American

Nutrition

  • Serving Size: 1 parfait
  • Calories: 250
  • Sugar: 20 g
  • Sodium: 50 mg
  • Fat: 5 g
  • Saturated Fat: 2 g
  • Unsaturated Fat: 3 g
  • Trans Fat: 0 g
  • Carbohydrates: 40 g
  • Fiber: 3 g
  • Protein: 10 g
  • Cholesterol: 10 mg

Keywords: Choose ripe peaches for the best flavor and texture. Use a clear glass for a beautiful presentation. For creaminess, consider whipping the yogurt before layering. Be mindful of the granola-to-yogurt ratio. Prepare yogurt and peaches ahead of time for gatherings, layering just before serving.

Did you make this recipe?

Share a photo and tag us — we can't wait to see what you've made!

Sun-Kissed Frozen Orange Cream Slush

As a child, summer days felt like they lasted forever. I remember the sticky heat wrapping around me as I played outside, my laughter mingling with the sounds of the neighborhood. But nothing could cool me down quite like the moment I’d spot my grandmother, laboring over her blender, whipping up her famous Frozen Orange Creamsicle Slush. That vibrant orange treat, with its frosty texture and sweet citrus aroma, was like a burst of sunshine in a cup. Just one sip, and I could feel the coolness wash over me, sparking pure joy.

This Frozen Orange Creamsicle Slush has a way of making you feel like a kid again. Its creamy, dreamy consistency is a delightful balance of bright orange and soft vanilla, inviting you to dive right in. The refreshing tang of orange dances on your tongue, while the smooth creaminess envelops you in a comforting embrace. It’s a nostalgic treat that’s perfect for hot summer afternoons or anytime you need a little pick-me-up.

What makes my version of this slush stand out is the addition of a hint of vanilla bean, which elevates the flavor and adds an extra layer of richness. Plus, it’s super easy to whip up with just a few simple ingredients that you probably already have on hand! So, if you’re ready to relive those sun-soaked memories, let me show you exactly how to make it.

Sun-Kissed Frozen Orange Cream Slush

Why You’ll Love This Recipe

  • Each slush is a perfect blend of creamy vanilla and zesty orange, creating a nostalgic flavor reminiscent of summer days.
  • This refreshing treat is ready in under 15 minutes, making it an ideal quick dessert for unexpected guests or hot afternoons.
  • With just 8 simple ingredients, it’s budget-friendly, ensuring you don’t have to break the bank to enjoy a delicious slush.
  • The slush has a perfectly smooth texture, thanks to the combination of ice and ice cream, providing a delightful contrast to the bright citrus flavors.
  • It’s highly customizable; you can easily adjust the sweetness and add fresh herbs for a unique twist that suits your taste.

Ingredients

  • 2 cups orange juice (freshly squeezed or store-bought)
  • 1 cup vanilla ice cream
  • 1 cup crushed ice
  • 1/2 cup milk (whole or 2%)
  • 1/4 cup granulated sugar (adjust based on sweetness preference)
  • 1 teaspoon vanilla extract
  • Zest of 1 orange (for added flavor)
  • Fresh orange slices and mint leaves (for garnish)

The star of this Frozen Orange Creamsicle Slush is the orange juice, which provides the vibrant, citrusy base. Freshly squeezed juice will yield the brightest flavor, but store-bought options can be just as convenient. If you’re opting for store-bought, choose 100% pure juice with no added sugars for the best results. Another essential ingredient is the vanilla ice cream; it adds creaminess and sweetness. You can substitute it with dairy-free ice cream if you’re looking for a vegan option. Whole or 2% milk complements the ice cream, creating a smooth blend. If you want a lower-calorie version, almond or oat milk can be good alternatives.

Lastly, the granulated sugar can be adjusted based on your sweetness preference. If you prefer a more natural sweetener, consider using honey or agave syrup. The orange zest enhances the flavor profile, providing an aromatic pop that brings the whole slush together. Don’t skip it! It adds an extra layer of brightness that makes this slush truly special.

Step-by-Step Instructions

  1. Start by preparing your ingredients. Gather 2 cups of orange juice, 1 cup of vanilla ice cream, and 1 cup of crushed ice. Make sure the ice is finely crushed, as larger chunks can make blending difficult.
  2. In a blender, combine the orange juice, vanilla ice cream, crushed ice, and 1/2 cup of milk. Add 1/4 cup of granulated sugar and 1 teaspoon of vanilla extract. If you like a sweeter slush, consider adding a bit more sugar at this stage.
  3. Add the zest of 1 orange to the blender. This step is crucial for enhancing the citrus flavor of your slush. Make sure not to include the bitter white pith—only the flavorful zest.
  4. Blend the mixture on medium-high speed for about 30-45 seconds. Stop once the ingredients are fully combined and the slush has a smooth, even consistency. If you notice large chunks of ice, blend for an additional 10-15 seconds. Avoid over-blending, as this can make the slush too liquidy.
  5. Once blended, taste the slush. If it needs more sweetness, add a little more sugar and blend for a few more seconds. If it’s too thick, you can add a splash of milk to reach your desired consistency.
  6. Pour the slush into glasses. This recipe typically serves 4, but you can easily double it for larger gatherings. Use a spoon to help guide the slush into the glasses if needed.
  7. Garnish each serving with fresh orange slices and mint leaves. The mint not only adds a pop of color but also a refreshing aroma that complements the citrus flavors beautifully.
  8. Serve immediately and enjoy! If you’ve made extra, you can refrigerate it for a short time, but it’s best enjoyed fresh.

Pro Tips for the Best Frozen Orange Creamsicle Slush

  • Don’t skip the orange zest! It’s a game-changer for flavor. Always zest before juicing to make it easier.
  • Use a high-powered blender for the best texture. A standard blender may struggle with ice, leading to uneven consistency. If you have a food processor, that can work too, but ensure the ice is finely crushed.
  • Adjust the ice-to-liquid ratio carefully. If your slush is too thick, it won’t blend well. Start with less ice and add more until you reach your preferred texture.
  • Be cautious with the sugar! Always start with the lower amount, as you can easily add more, but it’s hard to fix an overly sweet slush.
  • For a fun twist, consider adding a splash of coconut milk or a handful of fresh fruit like strawberries or pineapple. This not only enhances the flavor but also adds a beautiful color contrast.

Variations & Serving Ideas

There are countless ways to put a spin on your Frozen Orange Creamsicle Slush. Consider making a tropical version by adding in some pineapple juice or coconut milk for a delightful tropical twist. If you’re feeling adventurous, try incorporating a handful of frozen mango or peach slices for added sweetness. For a lighter version, swap out the vanilla ice cream for Greek yogurt for a creamy yet tangy alternative.

As for serving ideas, this refreshing slush pairs wonderfully with light summer dishes like grilled chicken skewers, fish tacos, or a simple salad topped with citrus vinaigrette. The bright, zesty flavors of the slush complement these dishes perfectly, making them an ideal pairing for a sunny day.

Storage, Make-Ahead & Reheating

This Frozen Orange Creamsicle Slush is best enjoyed fresh, but if you have leftovers, you can store them in an airtight container in the fridge for up to 2 days. Just keep in mind that the slush may lose some of its texture over time as the ice melts. It doesn’t freeze well, as the ice will turn into a solid block. If you must freeze it, blend again after thawing to restore the slushy consistency. This treat is best the day you make it, as the flavors meld together beautifully overnight, enhancing its deliciousness.

Frequently Asked Questions

Can I make Frozen Orange Creamsicle Slush ahead of time?

Yes — in fact, it tastes even better the next day as the flavors meld. However, it’s best to enjoy it fresh, as the texture can change if stored for too long. If you need to prepare it ahead, keep it in the fridge and re-blend before serving.

What kind of orange juice should I use?

For the best flavor, use freshly squeezed orange juice. However, if you’re short on time, opt for 100% pure store-bought juice without added sugars. This will ensure that your slush remains flavorful and refreshing.

Can I substitute the vanilla ice cream?

Absolutely! If you’re looking for a dairy-free option, coconut milk ice cream or a non-dairy vanilla ice cream can work wonderfully. They will still provide the creamy texture and sweetness you desire.

How can I adjust the sweetness of my slush?

You can easily adjust the sweetness by modifying the amount of sugar added. Start with 1/4 cup and taste the mixture before blending. If you prefer it sweeter, add more sugar gradually until it reaches your desired level.

What should I do if my slush is too thick?

If your slush is too thick, simply add a splash of milk or orange juice and blend again. This will help achieve a more drinkable consistency while maintaining the slushy texture. Adjust gradually to reach your preferred thickness.

Sun-Kissed Frozen Orange Cream Slush

Final Thoughts

The Frozen Orange Creamsicle Slush is a delightful blend of refreshing citrus and creamy goodness, making it a perfect treat for warm days or any time you crave a taste of nostalgia. The way the bright orange flavor dances with the creamy texture truly elevates this slush, transforming it into a satisfying escape from the everyday.

This is the kind of recipe I come back to again and again, especially when I’m looking to cool down or impress guests at a summer gathering. It’s simple to make and always brings smiles all around! I encourage you to try this recipe for yourself—don’t hesitate to share your results or even put your own spin on it. Happy slushing!

Print
clock clock iconcutlery cutlery iconflag flag iconfolder folder iconinstagram instagram iconpinterest pinterest iconfacebook facebook iconprint print iconsquares squares iconheart heart iconheart solid heart solid icon

Frozen Orange Creamsicle Slush


  • Author: Lily author
  • Total Time: 15 minutes
  • Yield: 4 servings 1x
Pin Recipe
Print Recipe

Description

This Frozen Orange Creamsicle Slush is a refreshing treat that combines creamy vanilla and zesty orange flavors. Perfect for hot summer days, it brings back nostalgic memories with every sip.


Ingredients

Scale
  • 2 cups orange juice (freshly squeezed or store-bought)
  • 1 cup vanilla ice cream
  • 1 cup crushed ice
  • 1/2 cup milk (whole or 2%)
  • 1/4 cup granulated sugar (adjust based on sweetness preference)
  • 1 teaspoon vanilla extract
  • Zest of 1 orange (for added flavor)
  • Fresh orange slices and mint leaves (for garnish)

Instructions

  1. Start by preparing your ingredients. Gather 2 cups of orange juice, 1 cup of vanilla ice cream, and 1 cup of crushed ice. Make sure the ice is finely crushed, as larger chunks can make blending difficult.
  2. In a blender, combine the orange juice, vanilla ice cream, crushed ice, and 1/2 cup of milk. Add 1/4 cup of granulated sugar and 1 teaspoon of vanilla extract. If you like a sweeter slush, consider adding a bit more sugar at this stage.
  3. Add the zest of 1 orange to the blender. This step is crucial for enhancing the citrus flavor of your slush. Make sure not to include the bitter white pith—only the flavorful zest.
  4. Blend the mixture on medium-high speed for about 30-45 seconds. Stop once the ingredients are fully combined and the slush has a smooth, even consistency. If you notice large chunks of ice, blend for an additional 10-15 seconds. Avoid over-blending, as this can make the slush too liquidy.
  5. Once blended, taste the slush. If it needs more sweetness, add a little more sugar and blend for a few more seconds. If it’s too thick, you can add a splash of milk to reach your desired consistency.
  6. Pour the slush into glasses. This recipe typically serves 4, but you can easily double it for larger gatherings. Use a spoon to help guide the slush into the glasses if needed.
  7. Garnish each serving with fresh orange slices and mint leaves. The mint not only adds a pop of color but also a refreshing aroma that complements the citrus flavors beautifully.
  8. Serve immediately and enjoy! If you’ve made extra, you can refrigerate it for a short time, but it's best enjoyed fresh.
  • Prep Time: 15 min
  • Cook Time: 0 min
  • Category: Dessert
  • Method: Blending
  • Cuisine: American

Nutrition

  • Serving Size: 1 serving
  • Calories: 200
  • Sugar: 30 g
  • Sodium: 50 mg
  • Fat: 5 g
  • Saturated Fat: 3 g
  • Unsaturated Fat: 2 g
  • Trans Fat: 0 g
  • Carbohydrates: 40 g
  • Fiber: 1 g
  • Protein: 2 g
  • Cholesterol: 20 mg

Keywords: Don't skip the orange zest! It's a game-changer for flavor. Always zest before juicing to make it easier.

Did you make this recipe?

Share a photo and tag us — we can't wait to see what you've made!

Zesty Lemon Poppy Seed Delight

One rainy afternoon, I found myself in my grandmother’s cozy kitchen, the kind that always smelled like warmth and love. She was whipping up her famous Lemon Poppy Seed Loaf, a recipe that had been passed down through generations. As the batter came together, the zesty aroma of fresh lemons filled the air, mingling perfectly with the nutty fragrance of poppy seeds. I can still picture her, apron-clad, as she expertly drizzled a vibrant citrus icing over the loaf, creating a glossy, sun-kissed finish that beckoned us to dive in. It was a moment that sparked my own passion for baking, and this recipe has become a cherished staple in my home ever since.

When you take a bite of this Lemon Poppy Seed Loaf, it’s like a burst of sunshine on your palate. The loaf is beautifully golden, with a tender crumb that melts in your mouth. Each slice is speckled with tiny poppy seeds, adding a delightful crunch that contrasts beautifully with the tangy sweetness of the lemon. And that citrus icing? It’s the finishing touch that elevates this loaf from ordinary to extraordinary, with its bright, zesty flavor dancing on your taste buds.

This recipe stands out because it embraces simplicity while delivering on flavor. I’ve added a hint of vanilla to the batter, enhancing the overall taste and making it even more indulgent. Trust me, once you make this Lemon Poppy Seed Loaf With Citrus Icing, it’ll become a go-to in your baking repertoire.

So, let me show you exactly how to make it!

Zesty Lemon Poppy Seed Delight

Why You’ll Love This Recipe

  • Moist and tender crumb that melts in your mouth, thanks to the perfect balance of butter and buttermilk.
  • Bright, zesty lemon flavor paired with crunchy poppy seeds, creating a delightful texture and taste experience.
  • Easy to whip up in just about an hour, perfect for last-minute gatherings or a cozy afternoon treat.
  • Budget-friendly with everyday ingredients, making it an accessible option for all home bakers.
  • The citrus icing adds a sweet tang that elevates the loaf, turning a simple recipe into a showstopper!

Ingredients

  • 1 ½ cups (190g) all-purpose flour
  • 1 teaspoon baking powder
  • ½ teaspoon baking soda
  • ½ teaspoon salt
  • 3 tablespoons poppy seeds
  • ½ cup (115g) unsalted butter, softened to room temperature
  • 1 cup (200g) granulated sugar
  • 2 large eggs
  • 1 teaspoon vanilla extract
  • 1 teaspoon lemon zest (from about 1 medium lemon)
  • ½ cup (120ml) buttermilk
  • 2 tablespoons fresh lemon juice

For the Citrus Icing:

  • 1 cup (120g) powdered sugar
  • 2 tablespoons fresh lemon juice
  • 1 tablespoon orange juice
  • 1 teaspoon lemon zest (for garnish, optional)

Let’s dive into the key ingredients that make this Lemon Poppy Seed Loaf so special. The all-purpose flour provides the structure and base for the loaf, while the baking powder and baking soda ensure it rises perfectly, giving the loaf a light texture. For a gluten-free variation, you could substitute the flour with a gluten-free all-purpose blend. Poppy seeds not only add a delightful crunch but also contribute to the unique flavor profile that pairs well with the citrus notes.

Unsalted butter is crucial for achieving the buttery richness that makes this loaf so moist. If you’re looking for a dairy-free option, coconut oil or a vegan butter can be used instead. The buttermilk is another essential component, providing acidity that activates the baking soda for a fluffy texture. If you don’t have buttermilk on hand, you can easily make a substitute by mixing ½ cup of milk with 1 tablespoon of vinegar or lemon juice and letting it sit for about 5 minutes.

Step-by-Step Instructions

  1. Preheat your oven to 350°F (175°C). Grease a 9×5-inch loaf pan or line it with parchment paper for easy removal later.
  2. In a medium mixing bowl, whisk together 1 ½ cups of all-purpose flour, 1 teaspoon of baking powder, ½ teaspoon of baking soda, ½ teaspoon of salt, and 3 tablespoons of poppy seeds. This helps to evenly distribute the baking agents and ensures a uniform rise.
  3. In a large mixing bowl, cream together ½ cup of softened unsalted butter and 1 cup of granulated sugar using an electric mixer on medium speed for about 3-4 minutes, until the mixture is light and fluffy. Make sure to scrape down the sides of the bowl occasionally.
  4. Add 2 large eggs, 1 teaspoon of vanilla extract, and 1 teaspoon of lemon zest to the creamed butter and sugar, mixing until fully combined. You want a smooth consistency, so ensure there are no lumps of butter.
  5. In a small bowl, combine ½ cup of buttermilk and 2 tablespoons of fresh lemon juice. Alternately add the dry ingredients and buttermilk mixture to the butter mixture, starting and ending with the dry ingredients. Mix just until combined; do not overmix, as this can lead to a dense loaf.
  6. Pour the batter into the prepared loaf pan. Smooth the top with a spatula, ensuring it’s even. Bake in the preheated oven for 50-60 minutes, or until a toothpick inserted in the center comes out clean. The edges should be lightly golden brown, and the center should feel just set.
  7. Once baked, remove the loaf from the oven and allow it to cool in the pan for about 10 minutes. Then, transfer it to a wire rack to cool completely. Resist the urge to slice too soon, as it will be crumbly if it’s still warm.
  8. While the loaf is cooling, prepare the citrus icing. In a medium bowl, whisk together 1 cup of powdered sugar, 2 tablespoons of fresh lemon juice, and 1 tablespoon of orange juice until smooth. If the icing is too thick, you can add a little more juice to reach your desired consistency.
  9. Once the loaf is completely cool, drizzle the citrus icing over the top. If you like, sprinkle with an additional teaspoon of lemon zest for an extra pop of flavor and color.

Pro Tips for the Best Lemon Poppy Seed Loaf With Citrus Icing

  • Be careful not to overmix your batter; this is a common mistake that can lead to a dense loaf. Mix just until the dry ingredients are incorporated for a light and fluffy texture.
  • Use room temperature ingredients, especially the butter and eggs. This helps to create a smoother batter and ensures even baking. Take your eggs out of the fridge about 30 minutes before you start.
  • For a more pronounced lemon flavor, consider adding a little lemon extract in addition to the zest and juice. Just a half teaspoon can elevate the citrus notes significantly.
  • When measuring your flour, spoon it into the measuring cup and level it off with a knife instead of scooping directly from the bag. This prevents packing and ensures you don’t end up with a dry loaf.
  • Invest in a good quality loaf pan; it makes a difference in heat distribution, which ensures even baking. If your pan is dark-coated, reduce the oven temperature by 25°F to prevent over-browning.

Variations & Serving Ideas

For a delightful twist, consider adding blueberries or raspberries to the batter for a fruity burst of flavor. You can also experiment with different citrus fruits—try lime or grapefruit zest and juice for a refreshing change. For a healthier option, substitute half of the all-purpose flour with whole wheat flour for added fiber without compromising too much on texture.

This Lemon Poppy Seed Loaf pairs beautifully with a light salad, such as a mixed greens salad with a vinaigrette, or a cup of tea for a cozy afternoon treat. It also complements a creamy cheese platter, as the acidity of the loaf balances rich cheeses perfectly. Lastly, a scoop of vanilla ice cream on the side creates a delightful contrast of temperatures and flavors!

Storage, Make-Ahead & Reheating

This Lemon Poppy Seed Loaf can be stored at room temperature for up to 3 days if wrapped tightly in plastic wrap. If you want to keep it longer, it freezes well for up to 3 months. To freeze, wrap the loaf tightly in plastic wrap and then in aluminum foil to prevent freezer burn.

When you’re ready to enjoy it again, simply thaw it in the fridge overnight. Reheat individual slices in the microwave for 15-20 seconds or in a toaster oven until warmed through. Interestingly, many people find that this loaf tastes even better the next day, as the flavors have time to meld!

Frequently Asked Questions

Can I make Lemon Poppy Seed Loaf With Citrus Icing ahead of time?

Yes — in fact, it tastes even better the next day! You can make the loaf a day in advance, allowing the flavors to develop. Just be sure to store it in an airtight container to maintain its moisture.

Can I substitute the poppy seeds?

Absolutely! If you don’t have poppy seeds on hand or prefer an alternative, you can use sesame seeds for a similar crunch or omit them entirely for a smooth loaf.

What can I use instead of buttermilk?

If you don’t have buttermilk, you can easily create a substitute by mixing ½ cup of milk (dairy or plant-based) with 1 tablespoon of vinegar or lemon juice. Let it sit for 5 minutes before using in the recipe.

How can I make this recipe gluten-free?

To make a gluten-free version of this Lemon Poppy Seed Loaf, substitute the all-purpose flour with a gluten-free all-purpose flour blend. Just ensure that the blend contains a binding agent like xanthan gum for the best results.

What is the best way to store leftover loaf?

Leftover Lemon Poppy Seed Loaf should be stored in an airtight container at room temperature for up to 3 days. For longer storage, wrap it tightly and freeze for up to 3 months. Thaw it before serving for the best texture.

Zesty Lemon Poppy Seed Delight

Final Thoughts

The Lemon Poppy Seed Loaf with Citrus Icing is truly a delightful treat that brings a burst of brightness to any occasion. The zesty lemon flavor combined with the subtle crunch of poppy seeds creates a satisfying balance, while the citrus icing adds a touch of sweetness that perfectly complements the loaf’s tanginess.

This is the kind of recipe I come back to again and again, especially when I want to brighten up a gloomy day or celebrate a small victory. The aroma that fills the kitchen as it bakes is absolutely heavenly! I encourage you to give this recipe a try; you might just find it becoming a beloved staple in your home. Don’t forget to share your results or even add your own unique twist—I can’t wait to see what you create!

Print
clock clock iconcutlery cutlery iconflag flag iconfolder folder iconinstagram instagram iconpinterest pinterest iconfacebook facebook iconprint print iconsquares squares iconheart heart iconheart solid heart solid icon

Lemon Poppy Seed Loaf


  • Author: Lily author
  • Total Time: 25 minute
  • Yield: 1 loaf 1x
Pin Recipe
Print Recipe

Description

This Lemon Poppy Seed Loaf is a delightful treat that combines zesty lemon flavor with crunchy poppy seeds. Topped with a citrus icing, it’s perfect for any occasion.


Ingredients

Scale
  • 1 ½ cups (190g) all-purpose flour
  • 1 teaspoon baking powder
  • ½ teaspoon baking soda
  • ½ teaspoon salt
  • 3 tablespoons poppy seeds
  • ½ cup (115g) unsalted butter, softened to room temperature
  • 1 cup (200g) granulated sugar
  • 2 large eggs
  • 1 teaspoon vanilla extract
  • 1 teaspoon lemon zest (from about 1 medium lemon)
  • ½ cup (120ml) buttermilk
  • 2 tablespoons fresh lemon juice
  • 1 cup (120g) powdered sugar
  • 2 tablespoons fresh lemon juice
  • 1 tablespoon orange juice
  • 1 teaspoon lemon zest (for garnish, optional)

Instructions

  1. Preheat your oven to 350°F (175°C). Grease a 9×5-inch loaf pan or line it with parchment paper for easy removal later.
  2. In a medium mixing bowl, whisk together 1 ½ cups of all-purpose flour, 1 teaspoon of baking powder, ½ teaspoon of baking soda, ½ teaspoon of salt, and 3 tablespoons of poppy seeds. This helps to evenly distribute the baking agents and ensures a uniform rise.
  3. In a large mixing bowl, cream together ½ cup of softened unsalted butter and 1 cup of granulated sugar using an electric mixer on medium speed for about 3-4 minutes, until the mixture is light and fluffy. Make sure to scrape down the sides of the bowl occasionally.
  4. Add 2 large eggs, 1 teaspoon of vanilla extract, and 1 teaspoon of lemon zest to the creamed butter and sugar, mixing until fully combined. You want a smooth consistency, so ensure there are no lumps of butter.
  5. In a small bowl, combine ½ cup of buttermilk and 2 tablespoons of fresh lemon juice. Alternately add the dry ingredients and buttermilk mixture to the butter mixture, starting and ending with the dry ingredients. Mix just until combined; do not overmix, as this can lead to a dense loaf.
  6. Pour the batter into the prepared loaf pan. Smooth the top with a spatula, ensuring it’s even. Bake in the preheated oven for 50-60 minutes, or until a toothpick inserted in the center comes out clean. The edges should be lightly golden brown, and the center should feel just set.
  7. Once baked, remove the loaf from the oven and allow it to cool in the pan for about 10 minutes. Then, transfer it to a wire rack to cool completely. Resist the urge to slice too soon, as it will be crumbly if it’s still warm.
  8. While the loaf is cooling, prepare the citrus icing. In a medium bowl, whisk together 1 cup of powdered sugar, 2 tablespoons of fresh lemon juice, and 1 tablespoon of orange juice until smooth. If the icing is too thick, you can add a little more juice to reach your desired consistency.
  9. Once the loaf is completely cool, drizzle the citrus icing over the top. If you like, sprinkle with an additional teaspoon of lemon zest for an extra pop of flavor and color.
  • Prep Time: 15 mins
  • Cook Time: 50-60 mins
  • Category: Dessert
  • Method: Baking
  • Cuisine: American

Nutrition

  • Serving Size: 1 slice
  • Calories: 200
  • Sugar: 15 g
  • Sodium: 150 mg
  • Fat: 8 g
  • Saturated Fat: 5 g
  • Unsaturated Fat: 3 g
  • Trans Fat: 0 g
  • Carbohydrates: 30 g
  • Fiber: 1 g
  • Protein: 3 g
  • Cholesterol: 40 mg

Keywords: Be careful not to overmix your batter; this is a common mistake that can lead to a dense loaf. Use room temperature ingredients for a smoother batter and even baking.

Did you make this recipe?

Share a photo and tag us — we can't wait to see what you've made!

  • Privacy Policy
  • Terms Of Service
  • Contact
  • About
  • GDPR

Copyright © 2025 Homesmad