Ground Beef Enchiladas: Just the name conjures up images of warm, cheesy comfort food, doesn’t it? I’m thrilled to share my family’s recipe for this classic dish, a guaranteed crowd-pleaser that’s perfect for weeknight dinners or weekend gatherings. Forget bland, boring enchiladas – these are bursting with flavor and are surprisingly simple to make!
Enchiladas have a rich history, tracing back to ancient Mayan times when corn tortillas were filled with small fish. Over centuries, the dish evolved, incorporating new ingredients and flavors as it spread throughout Mexico and eventually into the United States. Today, enchiladas represent a celebration of Mexican culinary heritage, a testament to the enduring appeal of simple, wholesome ingredients transformed into something truly special.
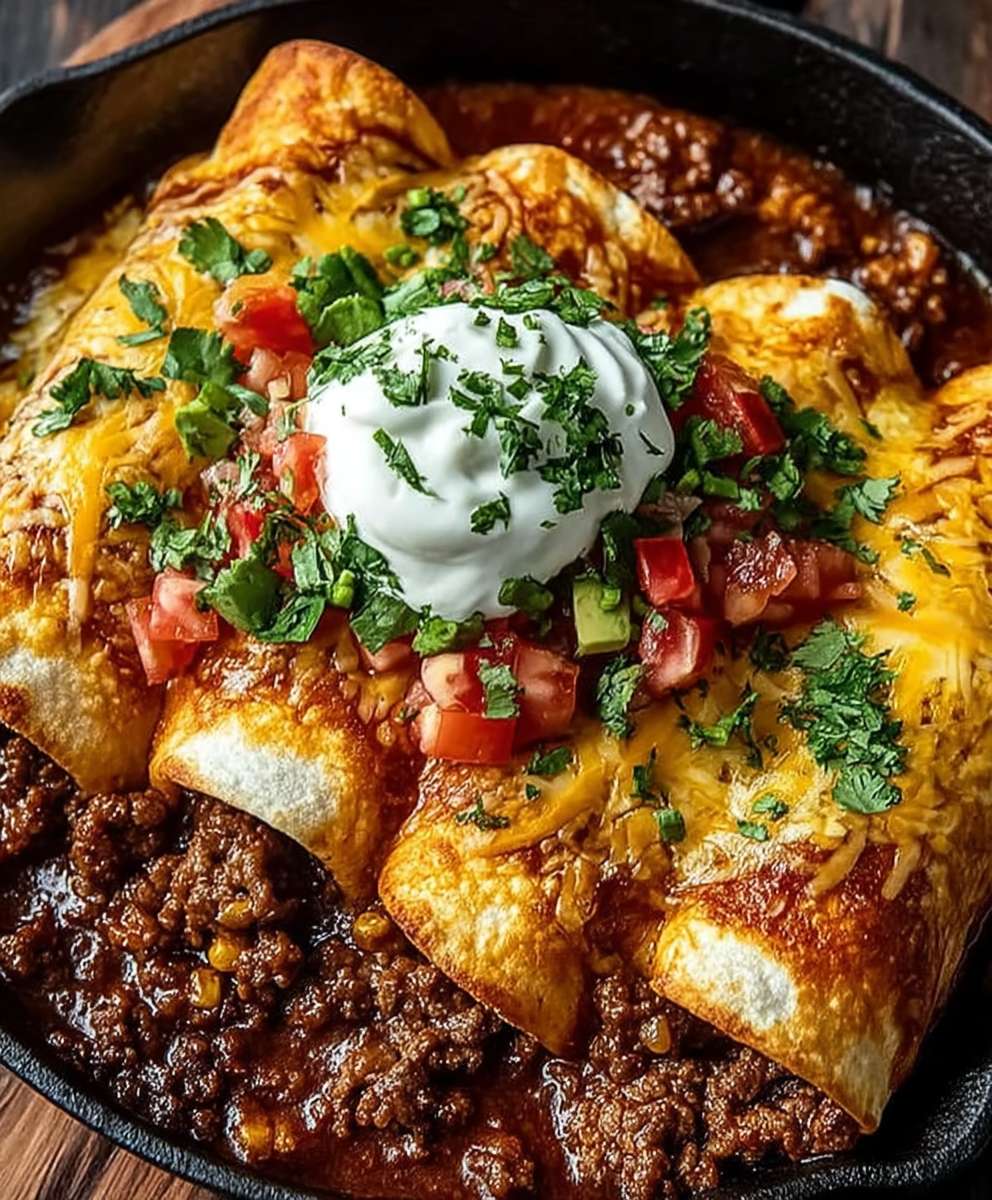
What is it about Ground Beef Enchiladas that makes them so irresistible? I think it’s the perfect combination of textures and tastes. The savory, seasoned ground beef filling, the soft corn tortillas, the tangy enchilada sauce, and the gooey, melted cheese all come together in a symphony of deliciousness. Plus, they’re incredibly versatile! You can customize the filling with your favorite vegetables, adjust the spice level to your liking, and even use different types of cheese. They are also a fantastic make-ahead meal. Assemble them earlier in the day and bake them when you’re ready to eat. So, are you ready to create some magic in your kitchen? Let’s get started!

Ingredients:
- 1 tablespoon olive oil
- 1 large onion, chopped
- 2 cloves garlic, minced
- 1.5 pounds ground beef
- 1 teaspoon chili powder
- 1 teaspoon cumin
- 1/2 teaspoon smoked paprika
- 1/4 teaspoon cayenne pepper (optional, for heat)
- 1/2 teaspoon dried oregano
- 1/2 teaspoon salt, or to taste
- 1/4 teaspoon black pepper, or to taste
- 1 (15 ounce) can tomato sauce
- 1 (10 ounce) can diced tomatoes and green chilies, undrained (like Rotel)
- 1 cup beef broth
- 12 corn tortillas
- 2 cups shredded cheddar cheese, divided
- 2 cups shredded Monterey Jack cheese, divided
- 1 (28 ounce) can red enchilada sauce
- Optional toppings: sour cream, guacamole, chopped cilantro, sliced green onions
Preparing the Ground Beef Filling
Okay, let’s get started with the heart of our enchiladas – the flavorful ground beef filling! This is where we build the foundation of deliciousness, so pay attention to those spices!
- Sauté the Aromatics: First, grab a large skillet and heat the olive oil over medium heat. Once the oil is shimmering, add the chopped onion and cook until it’s softened and translucent, about 5-7 minutes. Stir it occasionally to prevent burning. Next, add the minced garlic and cook for another minute until fragrant. Be careful not to burn the garlic, as it can become bitter.
- Brown the Ground Beef: Now, add the ground beef to the skillet. Use a spatula to break it up into smaller pieces. Cook the beef until it’s browned all over, making sure to drain off any excess grease. Nobody wants greasy enchiladas! I usually tilt the pan and spoon the grease out.
- Spice it Up!: This is where the magic happens! Add the chili powder, cumin, smoked paprika, cayenne pepper (if you’re feeling brave!), oregano, salt, and pepper to the skillet. Stir everything together well to ensure the beef is evenly coated with the spices. Cook for another minute or two, allowing the spices to bloom and release their flavors. The aroma should be amazing at this point!
- Simmer in Sauce: Pour in the tomato sauce, diced tomatoes and green chilies (undrained – we want that extra flavor!), and beef broth. Stir everything together and bring the mixture to a simmer. Reduce the heat to low, cover the skillet, and let it simmer for at least 15 minutes, or even longer if you have the time. The longer it simmers, the more the flavors will meld together. Stir occasionally to prevent sticking. The mixture should thicken slightly.
- Taste and Adjust: Give the filling a taste and adjust the seasonings as needed. Maybe it needs a little more salt, a pinch more chili powder, or a dash of cayenne for extra heat. This is your chance to customize it to your liking!
Warming the Tortillas
Warming the tortillas is a crucial step to prevent them from cracking when you roll them. Trust me, you don’t want to skip this!
- Choose Your Method: There are a few ways to warm your tortillas. My favorite is to lightly char them over an open gas flame, but you can also use a dry skillet or the microwave.
- Open Flame Method: If using a gas stove, turn a burner to medium-low. Using tongs, carefully place a tortilla directly on the flame for a few seconds per side, until it’s slightly charred and pliable. Be careful not to burn it!
- Skillet Method: If using a skillet, heat a dry skillet over medium heat. Place a tortilla in the skillet and cook for about 15-20 seconds per side, until it’s warmed through and pliable.
- Microwave Method: If using the microwave, wrap a stack of tortillas in a damp paper towel and microwave for about 30-60 seconds, or until they’re warmed through.
- Keep Warm: As you warm the tortillas, stack them on a plate and cover them with a clean kitchen towel to keep them warm and pliable.
Assembling the Enchiladas
Now for the fun part – assembling the enchiladas! This is where all your hard work comes together.
- Preheat the Oven: Preheat your oven to 350°F (175°C).
- Prepare the Baking Dish: Lightly grease a 9×13 inch baking dish with cooking spray.
- Assemble the Enchiladas: Spread a thin layer of enchilada sauce on the bottom of the baking dish. This will prevent the enchiladas from sticking.
- Fill and Roll: Take a warmed tortilla and spoon about 1/4 cup of the ground beef filling down the center. Sprinkle with a mixture of cheddar and Monterey Jack cheese. Roll the tortilla up tightly and place it seam-side down in the prepared baking dish.
- Repeat: Repeat the filling and rolling process with the remaining tortillas and filling, arranging them snugly in the baking dish.
- Top with Sauce and Cheese: Pour the remaining enchilada sauce evenly over the enchiladas, making sure they’re all well coated. Sprinkle the remaining cheddar and Monterey Jack cheese evenly over the top. Don’t be shy with the cheese!
Baking the Enchiladas
Almost there! Now it’s time to bake those beauties until they’re bubbly and golden brown.
- Bake: Cover the baking dish with aluminum foil and bake for 20 minutes.
- Uncover and Bake: Remove the foil and bake for another 10-15 minutes, or until the cheese is melted, bubbly, and lightly golden brown. Keep an eye on them to prevent burning.
- Let Rest: Remove the enchiladas from the oven and let them rest for a few minutes before serving. This will allow the filling to set slightly and prevent them from falling apart when you serve them.
Serving and Enjoying
Finally, the moment we’ve all been waiting for – serving and enjoying your homemade ground beef enchiladas!
- Garnish (Optional): Garnish with your favorite toppings, such as sour cream, guacamole, chopped cilantro, and sliced green onions.
- Serve: Serve the enchiladas hot and enjoy! They’re delicious on their own, or you can serve them with a side of rice and beans for a complete meal.
- Storage: Leftover enchiladas can be stored in the refrigerator for up to 3 days. Reheat them in the oven or microwave.
Tips and Variations:
- Spice Level: Adjust the amount of chili powder and cayenne pepper to your liking. If you prefer a milder flavor, omit the cayenne pepper altogether.
- Cheese: Feel free to use your favorite type of cheese. Pepper jack cheese would add a nice kick!
- Vegetarian Option: Substitute the ground beef with cooked lentils or black beans for a vegetarian version.
- Make Ahead: You can assemble the enchiladas ahead of time and store them in the refrigerator until you’re ready to bake them. Just add a few extra minutes to the baking time.
- Freezing: Enchiladas freeze well. Assemble them, but don’t bake. Wrap tightly in plastic wrap and then foil. Freeze for up to 3 months. Thaw overnight in the refrigerator before baking as directed.
Enjoy your delicious homemade Ground Beef Enchiladas! I hope you love them as much as I do!
Conclusion:
And there you have it! These Ground Beef Enchiladas are truly a must-try for anyone craving a comforting, flavorful, and relatively easy weeknight meal. From the savory, perfectly seasoned ground beef filling to the rich and tangy enchilada sauce, every bite is an explosion of deliciousness. I know I’m biased, but I genuinely believe this recipe will become a family favorite in your household, just as it has in mine.
What makes these enchiladas so special? It’s the combination of simple ingredients, carefully balanced flavors, and the sheer satisfaction of creating something so delicious from scratch. Forget those bland, pre-made enchiladas you find in the freezer aisle. This recipe allows you to control every aspect of the dish, ensuring a fresh and flavorful experience every time. Plus, the aroma that fills your kitchen while they’re baking is simply irresistible!
But the best part? This recipe is incredibly versatile! Feel free to experiment with different variations to suit your taste preferences. For a spicier kick, add a pinch of cayenne pepper to the ground beef mixture or use a hotter enchilada sauce. If you’re looking for a vegetarian option, simply substitute the ground beef with black beans, lentils, or a mixture of your favorite vegetables. You could even add some corn or bell peppers to the ground beef filling for extra texture and flavor.
Serving Suggestions:
These Ground Beef Enchiladas are fantastic on their own, but they’re even better when paired with some delicious sides. I personally love serving them with a dollop of sour cream or Greek yogurt, a sprinkle of fresh cilantro, and a side of guacamole. A simple green salad or some Mexican rice also complements the dish perfectly. And don’t forget the hot sauce! A few dashes of your favorite hot sauce will add an extra layer of heat and complexity to the flavors.
Variations to Explore:
* Creamy Enchiladas: Stir in a cup of sour cream or cream cheese into the enchilada sauce for a richer, creamier texture.
* Chicken Enchiladas: Substitute the ground beef with shredded cooked chicken for a lighter option.
* Cheese Lover’s Enchiladas: Add extra cheese! Sprinkle a generous amount of shredded cheese both inside the enchiladas and on top before baking. A blend of cheddar, Monterey Jack, and Colby cheese works wonderfully.
* Spicy Enchiladas: Add diced jalapeños or serrano peppers to the ground beef filling for a fiery kick.
* Green Chile Enchiladas: Use a green chile enchilada sauce instead of the traditional red sauce for a different flavor profile.
Don’t be afraid to get creative and make these enchiladas your own!
I truly hope you give this recipe a try. I’m confident that you’ll love it as much as I do. And more importantly, I’d love to hear about your experience! Did you make any modifications? What were your favorite toppings? What did your family think? Share your photos and comments in the comments section below. Your feedback is invaluable and helps me continue to improve and create even more delicious recipes for you. So, gather your ingredients, preheat your oven, and get ready to enjoy the best Ground Beef Enchiladas you’ve ever tasted! Happy cooking!
Ground Beef Enchiladas: Easy Recipe & Best Tips
Flavorful ground beef enchiladas with a cheesy, saucy filling, perfect for a satisfying weeknight meal.
Ingredients
Instructions
Recipe Notes
- Spice Level: Adjust the amount of chili powder and cayenne pepper to your liking. If you prefer a milder flavor, omit the cayenne pepper altogether.
- Cheese: Feel free to use your favorite type of cheese. Pepper jack cheese would add a nice kick!
- Vegetarian Option: Substitute the ground beef with cooked lentils or black beans for a vegetarian version.
- Make Ahead: You can assemble the enchiladas ahead of time and store them in the refrigerator until you’re ready to bake them. Just add a few extra minutes to the baking time.
- Freezing: Enchiladas freeze well. Assemble them, but don’t bake. Wrap tightly in plastic wrap and then foil. Freeze for up to 3 months. Thaw overnight in the refrigerator before baking as directed.