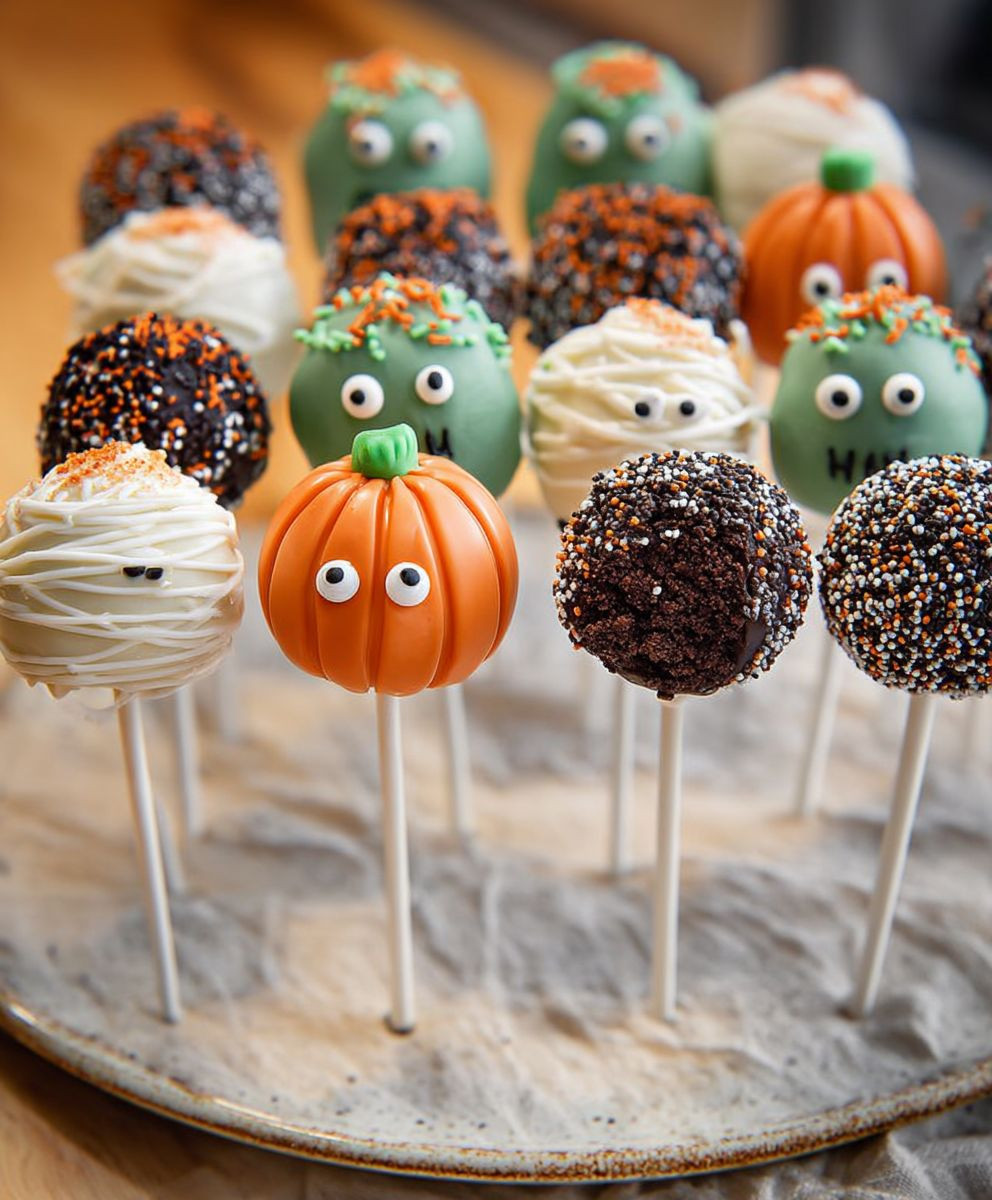
Halloween Cake Pops: Get ready to conjure up some spooky sweetness! Imagine biting into a moist, flavorful cake ball, coated in vibrant, ghoulishly decorated chocolate. These aren’t just desserts; they’re edible works of art that will be the star of any Halloween gathering.
While cake pops themselves are a relatively modern invention, the idea of adorning treats for special occasions has deep roots in many cultures. Think of the intricately decorated gingerbread houses of Christmas or the beautifully painted Easter eggs. Halloween Cake Pops carry on this tradition, allowing us to express our creativity and celebrate the season with delicious, bite-sized delights.
What makes these treats so irresistible? It’s the perfect combination of textures and flavors. The tender, crumbly cake contrasts beautifully with the smooth, hardened chocolate shell. Plus, they’re incredibly convenient! No need for forks or plates – just grab and go. Whether you’re hosting a monster mash or simply want to surprise your little goblins, these Halloween Cake Pops are guaranteed to be a crowd-pleaser. Let’s get baking!
Ingredients:
- For the Cake:
- 1 box (15.25 oz) chocolate cake mix (plus ingredients called for on the box, usually eggs, oil, and water)
- For the Frosting:
- 1 cup (2 sticks) unsalted butter, softened
- 3 cups powdered sugar
- 1/4 cup milk
- 1 teaspoon vanilla extract
- Orange food coloring (gel is preferred for vibrant color)
- For the Candy Coating:
- 1 bag (12 oz) orange candy melts
- 1 tablespoon vegetable shortening (optional, for smoother consistency)
- For Decoration:
- Lollipop sticks
- Black decorating gel
- White sprinkles (ghost-shaped or round)
- Candy eyes
Baking the Cake:
Okay, let’s get started! First, we need to bake the cake. This is the foundation of our spooky-cute cake pops, so let’s make sure it’s nice and moist.
- Prepare the Cake Batter: Follow the instructions on the back of your chocolate cake mix box. Usually, this involves combining the cake mix with eggs, oil, and water. Make sure to mix everything well until you have a smooth batter. Don’t overmix, though, or your cake might be tough.
- Bake the Cake: Pour the batter into a greased and floured 9×13 inch baking pan. Bake according to the box instructions. The baking time will vary depending on your oven, but it’s usually around 25-30 minutes. To check if the cake is done, insert a toothpick into the center. If it comes out clean, it’s ready!
- Cool the Cake: Let the cake cool completely in the pan before moving on to the next step. This is important because we don’t want to crumble a warm cake. I usually let it cool for at least an hour.
Making the Frosting:
While the cake is cooling, let’s whip up some delicious orange frosting. This will bind the cake crumbs together and add a burst of flavor.
- Cream the Butter: In a large bowl, beat the softened butter with an electric mixer until it’s light and fluffy. This usually takes about 2-3 minutes.
- Add Powdered Sugar: Gradually add the powdered sugar, one cup at a time, beating well after each addition. Be careful not to add it all at once, or you’ll end up with a cloud of powdered sugar!
- Add Milk and Vanilla: Pour in the milk and vanilla extract. Beat until the frosting is smooth and creamy.
- Add Food Coloring: Add orange food coloring, a few drops at a time, until you reach your desired shade of orange. Remember, a little goes a long way, especially with gel food coloring.
Creating the Cake Pop Mixture:
Now for the fun part – crumbling the cake and mixing it with the frosting! This is where the magic happens, and our cake pops start to take shape.
- Crumble the Cake: Once the cake is completely cool, crumble it into a large bowl. You can use your hands or a fork to do this. Make sure there are no large chunks of cake remaining.
- Add Frosting: Add the orange frosting to the crumbled cake, a little at a time, mixing well after each addition. You want the mixture to be moist enough to hold its shape, but not too wet. I usually start with about half of the frosting and add more as needed.
- Mix Well: Use your hands or a spoon to thoroughly mix the cake and frosting until it forms a cohesive mixture. It should be similar to playdough in consistency.
Shaping the Cake Pops:
Time to get our hands dirty and form those adorable cake pops! This is where you can get creative and make them any shape you like, but for Halloween, round or slightly oval shapes work best.
- Scoop the Mixture: Use a cookie scoop or a spoon to scoop out equal portions of the cake mixture. I usually aim for about 1-inch balls.
- Roll into Balls: Roll each portion of cake mixture between your palms to form a smooth ball.
- Chill the Cake Balls: Place the cake balls on a baking sheet lined with parchment paper. Cover them with plastic wrap and chill in the refrigerator for at least 30 minutes. This will help them firm up and make them easier to dip.
Dipping and Decorating:
The final step – dipping the cake pops in candy melts and decorating them with spooky Halloween details! This is where your creativity can really shine.
- Melt the Candy Melts: In a microwave-safe bowl, melt the orange candy melts according to the package instructions. I usually microwave them in 30-second intervals, stirring in between, until they are completely melted and smooth. If the candy melts are too thick, you can add a tablespoon of vegetable shortening to thin them out.
- Dip the Lollipop Sticks: Dip the tip of each lollipop stick into the melted candy melts and then insert it halfway into a chilled cake ball. This will help the stick adhere to the cake pop.
- Dip the Cake Pops: Dip each cake pop into the melted candy melts, making sure to completely coat it. Gently tap off any excess candy melts.
- Decorate Immediately: While the candy coating is still wet, decorate the cake pops with white sprinkles, candy eyes, and black decorating gel. You can use the black decorating gel to draw spooky faces or spiderwebs.
- Let Set: Place the decorated cake pops on a baking sheet lined with parchment paper or insert them into a styrofoam block to let the candy coating set completely. This usually takes about 30 minutes.
Decoration Ideas:
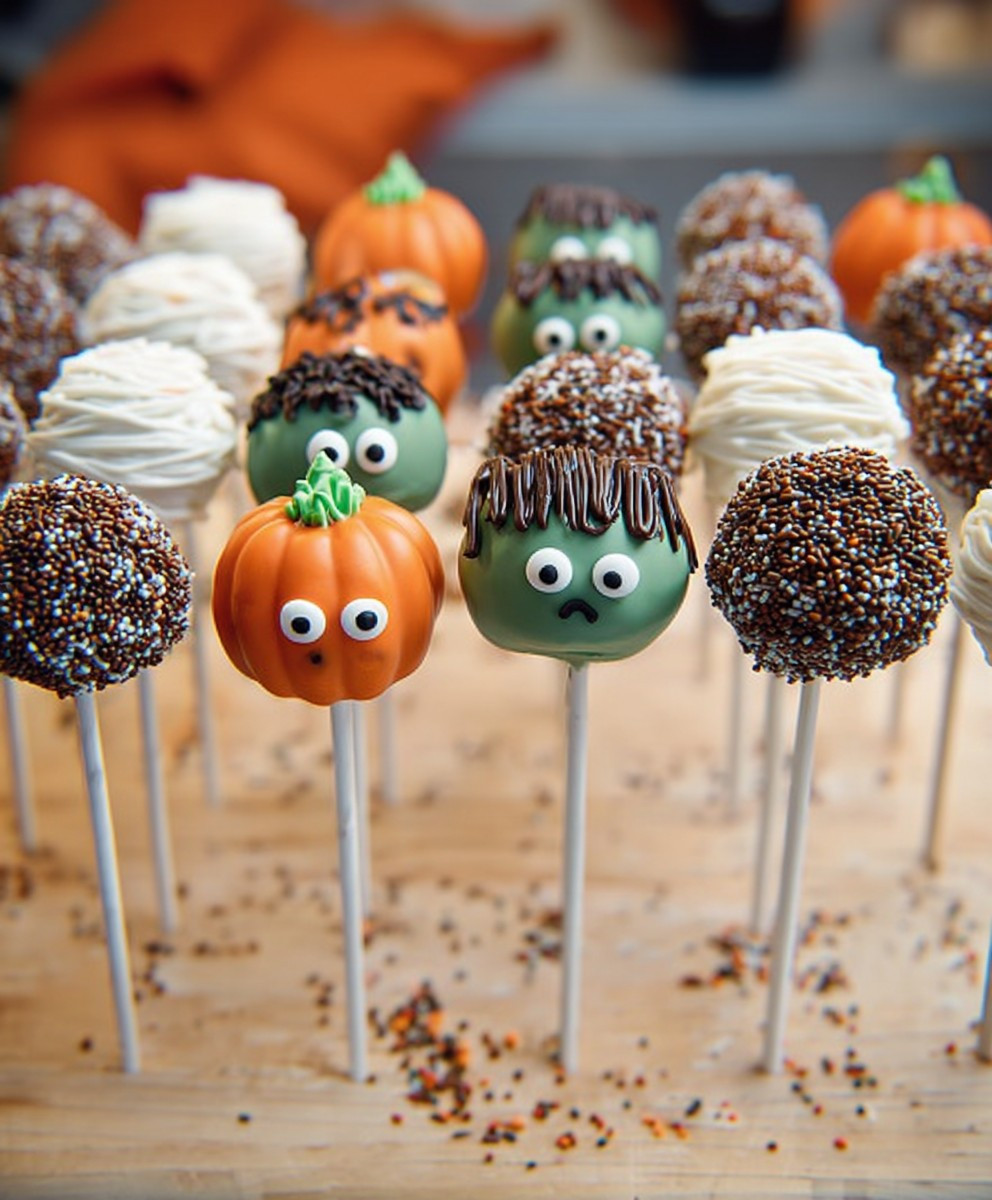
- Ghost Cake Pops: Use white sprinkles and candy eyes to create ghost-like cake pops.
- Spiderweb Cake Pops: Use black decorating gel to draw a spiderweb on the orange candy coating.
- Monster Cake Pops: Use candy eyes and different colored sprinkles to create monster-themed cake pops.
- Pumpkin Cake Pops: Use green decorating gel to create a stem on top of the orange cake pops to resemble pumpkins.
Tips and Tricks:
- Don’t Overbake the Cake: Overbaking the cake will result in dry cake pops.
- Chill the Cake Balls: Chilling the cake balls before dipping them will help them stay on the lollipop sticks.
- Use a Double Boiler: If you don’t have a microwave, you can melt the candy melts in a double boiler.
- Work Quickly: The candy coating will start to set quickly, so work quickly when decorating the cake pops.
- Store Properly: Store the cake pops in an airtight container at room temperature for up to 3 days.
And there you have it – delicious and spooky Halloween cake pops! These are perfect for Halloween parties, school events, or just a fun treat for the family. Enjoy!
Conclusion:
So there you have it! These Halloween Cake Pops are more than just a treat; they’re a fun, festive, and utterly delicious way to celebrate the spooky season. I truly believe this recipe is a must-try for anyone looking to add a touch of homemade magic to their Halloween festivities. They’re surprisingly easy to make, even for beginner bakers, and the decorating possibilities are endless, making them a fantastic activity to do with kids or a group of friends.
Think about it: moist, flavorful cake, coated in creamy, colorful candy melts, and adorned with spooky sprinkles and edible decorations. What’s not to love? Forget the store-bought candies this year and impress your guests with these adorable and delectable cake pops. They’re guaranteed to be a hit at any Halloween party, bake sale, or even just as a special treat for your family.
But the fun doesn’t stop there! Feel free to get creative with your serving suggestions and variations. For a sophisticated touch, try drizzling your cake pops with dark chocolate and sprinkling them with sea salt. Or, for a kid-friendly option, dip them in white chocolate and decorate them with colorful candies and sprinkles. You could even create different flavor combinations by using different types of cake, such as red velvet or chocolate fudge.
Serving Suggestions:
* Arrange your finished cake pops in a decorative cake pop stand for an eye-catching display.
* Wrap individual cake pops in cellophane bags and tie them with festive ribbons for party favors.
* Serve them alongside other Halloween treats, such as cookies, brownies, and cupcakes, for a complete dessert spread.
* Pair them with a glass of cold milk or a warm cup of hot chocolate for the ultimate Halloween indulgence.
Variations:
* Experiment with different candy melt colors to create unique and spooky designs.
* Use different types of sprinkles, such as Halloween-themed sprinkles, edible glitter, or chocolate shavings.
* Add edible decorations, such as candy eyes, gummy worms, or fondant shapes, to personalize your cake pops.
* Try using different types of cake, such as red velvet, chocolate fudge, or spice cake, to create different flavor combinations.
* Infuse the cake with different flavors, such as pumpkin spice or apple cider, for a seasonal twist.
I’m so excited for you to try this recipe and create your own spooky masterpieces! I know you’ll have a blast making these Halloween Cake Pops, and I can’t wait to see what you come up with.
So, grab your ingredients, preheat your oven, and get ready to unleash your inner baker. Don’t be afraid to experiment with different flavors, colors, and decorations to create cake pops that are truly unique to you.
And most importantly, don’t forget to share your creations with me! I’d love to see your photos and hear about your experience making these Halloween Cake Pops. You can tag me on social media using [Your Social Media Handle] or leave a comment below. I’m always looking for new ideas and inspiration, and I can’t wait to see what you come up with. Happy baking, and Happy Halloween!
Halloween Cake Pops: Spooky & Delicious Treats You'll Love
Spooky-cute Halloween cake pops! Chocolate cake mixed with orange frosting, dipped in candy melts, and decorated with ghosts, spiderwebs, and monster faces. A fun and festive treat!
Ingredients
Instructions
Recipe Notes
- Don’t Overbake the Cake: Overbaking the cake will result in dry cake pops.
- Chill the Cake Balls: Chilling the cake balls before dipping them will help them stay on the lollipop sticks.
- Use a Double Boiler: If you don’t have a microwave, you can melt the candy melts in a double boiler.
- Work Quickly: The candy coating will start to set quickly, so work quickly when decorating the cake pops.
- Store Properly: Store the cake pops in an airtight container at room temperature for up to 3 days.
- Decoration Ideas: Ghost Cake Pops, Spiderweb Cake Pops, Monster Cake Pops, Pumpkin Cake Pops.

