Halloween Chicken Parm Sliders—what a truly fantastic and engaging concept for the spooky season! I am genuinely thrilled to introduce you to a recipe that promises to be the absolute star of your upcoming Halloween gatherings, blending beloved comfort food with playful festivity. This innovative dish takes the classic, universally adored flavors of chicken parmesan and masterfully transforms them into charming, bite-sized sliders, perfectly suited for the lively, often chaotic, atmosphere of October 31st.
The profound appeal of these sliders extends far beyond their captivating theme. They offer a delightful symphony of textures and tastes: the satisfying crunch of perfectly breaded chicken, the rich, savory warmth of marinara sauce, and the irresistible gooeyness of melted cheese, all nestled within a soft, toasted slider bun. It’s a combination designed to evoke pure culinary joy.
Why Halloween Chicken Parm Sliders Are a Must-Make This Season
For those of us hosting or attending parties, the convenience of a slider is simply unparalleled. Forget the struggle with large, messy sandwiches; these mini marvels are effortlessly portable, allowing guests to mingle and enjoy the festivities without missing a beat. They perfectly embody the spirit of Halloween – fun, approachable, and utterly delicious. I find that a dish like these Halloween Chicken Parm Sliders, which combines nostalgic comfort with a festive twist, becomes an instant favorite, creating delightful memories alongside all the ghostly fun.
Ingredients:
- For the Crispy Chicken Cutlets:
- 2 large boneless, skinless chicken breasts (approximately 1.5 lbs total), trimmed of any fat and carefully cut into 8-10 smaller, slider-sized cutlets. Aim for pieces that will fit neatly on your slider buns.
- 1 cup all-purpose flour, seasoned with 1 teaspoon fine sea salt and 1/2 teaspoon freshly ground black pepper. This initial seasoning for the flour is crucial for a flavorful crust.
- 2 large eggs, lightly beaten with 1 tablespoon of cold water or milk. This egg wash acts as the perfect glue for our breading.
- 1.5 cups panko breadcrumbs, seasoned generously with 1 teaspoon garlic powder, 1/2 teaspoon onion powder, 1/4 teaspoon dried oregano, and 1/4 teaspoon red pepper flakes (omit if you prefer no heat, but a little spice can be fun!).
- 1/2 cup finely grated Parmesan cheese, divided. We’ll use 1/4 cup for mixing into the breadcrumbs and the remaining 1/4 cup for sprinkling on top of our sliders.
- 2-3 cups neutral oil for frying, such as canola, vegetable, or peanut oil. We need enough to comfortably shallow-fry our chicken.
- Additional salt and freshly ground black pepper, to taste, for seasoning the chicken itself before breading.
- For the “Bloody” Marinara Sauce:
- 1 tablespoon extra virgin olive oil.
- 1 small yellow onion, very finely minced. A fine mince ensures it melts into the sauce without noticeable chunks.
- 2 cloves garlic, minced. Garlic is a non-negotiable for a good marinara!
- 1 (28 ounce) can crushed tomatoes. This forms the rich, thick base of our sauce.
- 1 (15 ounce) can tomato sauce. This adds a smoother texture and depth.
- 1/2 cup chicken broth or water. This helps thin the sauce to the perfect consistency and adds flavor.
- 1 teaspoon dried oregano. Classic Italian herb.
- 1/2 teaspoon dried basil. Another essential for a true marinara.
- 1/4 teaspoon red pepper flakes (optional, but highly recommended for a subtle warmth).
- 1 teaspoon granulated sugar. This little secret ingredient helps to balance the acidity of the tomatoes and enhances their natural sweetness.
- Salt and freshly ground black pepper, to taste. Seasoning in layers is key to flavor development.
- Optional: A handful of fresh basil or parsley leaves, roughly chopped, for garnish at the end.
- For Assembly & Spooky Halloween Decoration:
- 1 (12-pack) of slider buns. Brioche or potato buns work exceptionally well for their softness and slight sweetness.
- 8 ounces fresh mozzarella cheese, thinly sliced or shredded. Fresh mozzarella melts beautifully and provides that quintessential gooey texture. Provolone cheese can also be used here for a sharper flavor.
- 4-6 slices of provolone cheese, for cutting into adorable (or spooky!) ghost shapes. This is an optional, but very fun, Halloween touch!
- 12 large black olives, pitted. These will be transformed into eerie “eyes” for our sliders. You can use smaller olives if you prefer a less dramatic look.
- Optional: A tiny bit of melted butter or olive oil for brushing the tops of the buns before baking, for a golden finish.
Phase 1: Preparing the Spooky Crispy Chicken Cutlets
- Pound the Chicken to Perfection: Let’s start by getting our chicken ready! Lay your individual slider-sized chicken cutlets between two sheets of plastic wrap or inside a large freezer bag. Using the flat side of a meat mallet or a heavy-bottomed pan, gently but firmly pound each piece of chicken to an even thickness of about 1/4 to 1/2 inch. This step is incredibly important for ensuring that all your chicken pieces cook evenly and quickly, and it also helps to tenderize the meat, making each bite incredibly juicy. Once pounded, lightly season both sides of the chicken with a pinch of salt and freshly ground black pepper. This foundational seasoning will ensure your chicken is flavorful from the inside out, not just on the crust.
- Set Up Your Efficient Breading Station: To make the breading process smooth and mess-free, set up three shallow dishes or pie plates in a row. In the first dish, place your seasoned all-purpose flour. Make sure it’s spread out evenly. In the second dish, whisk together your two large eggs with 1 tablespoon of water or milk until the mixture is light yellow and thoroughly combined. This creates our sticky base for the breadcrumbs. In the third dish, combine your panko breadcrumbs with 1/4 cup of the grated Parmesan cheese, garlic powder, onion powder, dried oregano, and those optional red pepper flakes. Mix these ingredients thoroughly to ensure every crumb is coated with flavor. Having an organized breading station like this makes the process so much more enjoyable and efficient, resulting in perfectly coated chicken every time.
- Expertly Breading the Chicken: Now for the coating! Take one pounded chicken cutlet and first dredge it completely in the seasoned flour, making sure it’s entirely covered. Gently shake off any excess flour – we want a thin, even coat here, not a thick cakey layer. Next, dip the floured chicken into the egg wash, allowing any excess to drip back into the dish. The egg wash is our magical adhesive! Finally, transfer the chicken to the panko breadcrumb mixture. Press the breadcrumbs firmly onto all sides of the chicken, ensuring a thick, even, and complete coating. Don’t be shy here; the more breadcrumbs, the crispier your Halloween Chicken Parm Sliders will be! Place the breaded cutlet on a wire rack set over a baking sheet. Repeat this process for all remaining chicken pieces. Letting the breaded chicken rest on the rack for at least 15-20 minutes before frying helps the coating adhere even better, preventing it from flaking off during cooking.
- Preheat the Oil for Frying: In a large, sturdy skillet or a Dutch oven, pour in enough neutral oil (like canola, vegetable, or peanut oil) to reach a depth of about 1/2 to 1 inch. Place the skillet over medium-high heat and allow the oil to preheat to a temperature of 350-375°F (175-190°C). If you have a kitchen thermometer, it’s incredibly helpful here to ensure the oil is at the perfect temperature. If you don’t have a thermometer, you can test the oil by dropping a tiny pinch of the breadcrumb mixture into it; it should sizzle vigorously and turn golden brown within 20-30 seconds. If it browns too quickly, your oil is too hot; if it barely sizzles, it’s not hot enough. Achieving the right oil temperature is key to crispy, non-greasy chicken.
- Fry the Crispy Chicken Cutlets: Carefully, using tongs, place 2-3 breaded chicken cutlets into the hot oil, ensuring not to overcrowd the pan. Overcrowding will significantly drop the oil temperature, leading to greasy, soggy chicken rather than beautifully crisp cutlets. Fry the chicken for approximately 3-4 minutes per side, or until they are a gorgeous golden brown, wonderfully crispy, and cooked through to an internal temperature of 165°F (74°C). The vibrant golden color is your visual cue for perfection! Gently flip the cutlets with your tongs to cook the other side. Once cooked, immediately transfer the crispy chicken cutlets to a clean wire rack placed over a baking sheet lined with paper towels. This setup allows any excess oil to drain away, maintaining that incredible crispiness. Season the freshly fried chicken lightly with an extra pinch of salt as soon as it comes out of the oil—this little trick enhances the flavor even further. Continue frying the remaining cutlets in batches, adjusting the heat as necessary to maintain a consistent oil temperature.
Phase 2: Simmering the “Bloody” Marinara Sauce
- Sauté the Flavorful Aromatics: While your chicken is resting, let’s get started on our rich marinara sauce, which will serve as the “blood” for our spooky Halloween Chicken Parm Sliders! In a medium-sized saucepan, heat 1 tablespoon of extra virgin olive oil over medium heat. Add your finely minced yellow onion and cook, stirring occasionally, until it softens and becomes wonderfully translucent, a process that usually takes about 5-7 minutes. You’ll notice a delightful aroma starting to fill your kitchen as the onions sweeten. Next, add the minced garlic and cook for just another minute until it becomes fragrant. Be very careful not to let the garlic burn, as burnt garlic can impart a bitter taste to your delicious sauce.
- Combine and Introduce the Tomato Goodness: Pour in the 28-ounce can of crushed tomatoes and the 15-ounce can of tomato sauce. These two tomato products give us a fantastic base with both texture and smoothness. Stir in the 1/2 cup of chicken broth or water; this will help achieve the perfect saucy consistency. Now, add your dried oregano, dried basil, the optional red pepper flakes for a subtle kick, and that essential teaspoon of granulated sugar. Stir all these ingredients together thoroughly until they are well combined. The sugar is a brilliant little trick here; it acts as a flavor balancer, cutting through the acidity of the tomatoes and really coaxing out their natural sweetness, resulting in a more rounded and deeply flavored sauce.
- Simmer to Perfection and Develop Deep Flavor: Bring the marinara sauce to a gentle simmer, then immediately reduce the heat to low. Partially cover the saucepan with a lid, leaving a small gap for steam to escape. Let the sauce gently simmer for at least 20-30 minutes, or even longer if you have the time! The longer this “bloody” marinara sauce simmers, the more the flavors will meld and deepen, creating a truly rich and robust taste that is absolutely essential for our Halloween Chicken Parm Sliders. Stir the sauce occasionally to prevent any sticking to the bottom of the pan. Towards the end of the simmering time, give it a taste and adjust the seasoning with salt and freshly ground black pepper as needed. You are looking for a vibrant, rich, and perfectly balanced sauce that will beautifully complement our crispy chicken. If the sauce seems a little too thick for your liking, you can always add another splash of chicken broth or water to reach your desired consistency.
Phase 3: Assembling Your Spooky Halloween Chicken Parm Sliders
- Prepare Your Slider Buns: While your sauce is simmering, preheat your oven to 375°F (190°C). Carefully slice your slider buns in half horizontally, aiming for an even cut. Many slider bun packs come with the buns connected, which is perfect! Keep them connected if they are, as this makes the assembly process much, much easier. If you want to add an extra layer of texture and prevent your buns from getting too soggy, you can lightly toast the cut sides of the buns in a dry skillet over medium heat for a minute or two, or under the broiler for about 30-60 seconds, watching them carefully to prevent burning. This step is entirely optional but highly recommended for an even better slider experience.
- Arrange for Seamless Assembly: Once your buns are ready, place the bottom halves of your slider buns in a single layer on a large baking sheet. If your buns are the pull-apart variety, simply place the entire connected sheet of bottom buns onto the baking sheet. This method allows you to assemble all your Halloween Chicken Parm Sliders at once, making the process quick and efficient.
- Layer with Our “Bloody” Marinara Sauce: Now it’s time to start building these delicious Halloween treats! Spoon a thin, even layer of our wonderfully rich and “bloody” marinara sauce over the bottom halves of the buns. We want enough sauce to provide a burst of flavor in every bite, but not so much that it overwhelms the other ingredients or makes the buns overly soggy. A good rule of thumb is a tablespoon or two per bun, spreading it almost to the edges.
- Add the Star – Our Crispy Chicken: On top of the marinara sauce, carefully place one crispy chicken cutlet on each slider bun. If any of your chicken pieces are slightly too large for the buns, you can trim them a bit to ensure a perfect fit. Each slider deserves its own perfectly sized, crispy piece of chicken to truly shine in these Halloween Chicken Parm Sliders! Arrange them neatly so they form a single layer over the sauce.
- More Sauce and Melty Cheese: Now, for the critical next layer of flavor and gooeyness! Spoon another generous tablespoon or two of our simmering marinara sauce over each chicken cutlet. This second layer of sauce ensures a fantastic tomato flavor throughout the slider. Immediately follow this with a slice or a good sprinkle of the fresh mozzarella cheese over each chicken piece. If you saved some of the grated Parmesan cheese, sprinkle a tiny bit of that over the mozzarella as well for an extra punch of salty, nutty flavor. This combination of cheeses will melt together beautifully, creating that irresistible, stringy chicken parm effect.
- Add the Spooktacular Halloween Touches (Don’t Skip the Fun!): This is where we transform our delicious sliders into truly festive Halloween Chicken Parm Sliders! If you’re going for the ghost effect, take your slices of provolone cheese and use a small ghost-shaped cookie cutter (or carefully cut out ghost shapes freehand with a small knife). Place one or two of these cheesy ghosts on top of some of the melted mozzarella, letting them peek out mischievously. For the ultimate “eyeball” effect, take your pitted black olives and carefully slice each one in half crosswise. Place two olive halves on top of each slider, positioning them so they resemble spooky eyes peeking out from under the melting cheese. This simple yet incredibly effective step elevates your sliders from merely delicious to spectacularly festive and perfectly themed for Halloween!
- Top and Prepare for Baking: Carefully place the top halves of your slider buns over the cheese-topped chicken. If you want your buns to have a lovely golden sheen and slightly crispier texture, you can lightly brush the tops with a tiny bit of melted butter or olive oil. This step is optional but adds a professional touch. Once all the tops are on, loosely cover the entire baking sheet with aluminum foil. This helps to steam the buns slightly and ensures the cheese melts perfectly without the buns browning too quickly.
- Bake the Sliders to Gooey Perfection: Transfer the baking sheet with your covered Halloween Chicken Parm Sliders to your preheated oven. Bake for approximately 15-20 minutes, or until the cheese is wonderfully melted, bubbly, and gooey, and the buns are lightly toasted and warmed through. If you desire the tops of your buns to be a little more golden brown and slightly crispy, you can remove the aluminum foil for the last 5 minutes of baking. Keep a close eye on them during this final stage to prevent over-browning.
- Serve Immediately and Garnish: Once these fantastic Halloween Chicken Parm Sliders emerge from the oven, allow them to rest on the baking sheet for just a few minutes before serving. This brief resting period allows the cheese to set slightly, making them easier to handle and preventing everything from sliding apart. You can either carefully separate them into individual sliders using a serrated knife or serve them as an impressive pull-apart tray, allowing everyone to grab their own spooky treat. For a final flourish and a pop of freshness, garnish with a sprinkle of fresh chopped parsley or basil, if desired. These sliders are absolutely best served immediately, while the chicken is still crispy, the cheese is wonderfully gooey and stringy, and the buns are perfectly warm. Get ready for some truly spooky and utterly delicious bites!

Conclusion:
So, there you have it! Our delightful journey through creating these incredible and utterly irresistible sandwiches culminates here. I truly believe these aren’t just any sliders; they are a culinary experience, especially when you’re looking to bring a touch of fun and flavor to your table. They manage to be both incredibly comforting and excitingly playful, striking that perfect balance that makes them an absolute crowd-pleaser. From the perfectly crispy chicken cutlets to the rich, bubbling marinara and the generous blanket of melted mozzarella, all nestled within soft, toasted slider buns, every bite is a celebration of classic flavors in a wonderfully convenient package. I’ve personally seen them vanish from platters at an alarming speed, and it’s a testament to their universal appeal!
What makes this particular recipe a profound must-try is its brilliant combination of simplicity and gourmet satisfaction. You get all the hearty, savory goodness of a traditional chicken parmigiana without the need for forks and knives, making them ideal for mingling, casual gatherings, or even just a relaxed family meal when you want something special without the fuss. The process itself is immensely rewarding, and the end result is a testament to how humble ingredients, when treated with a little love and attention, can create something truly extraordinary. They are wonderfully satisfying, easy to handle, and packed with so much flavor that they leave a lasting impression on everyone who tries them. I’m confident that once you make these, they’ll become a staple in your recipe rotation for many years to come.
Serving Suggestions & Delightful Variations:
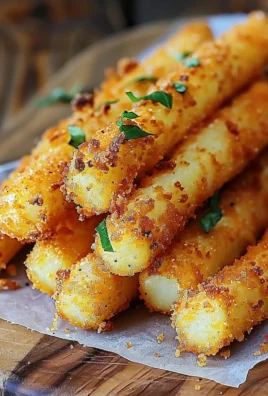
Now that you’ve mastered the art of assembling these beauties, let’s talk about how to make them shine even brighter on your table. For a complete and balanced meal, I love pairing these sliders with a crisp, refreshing side salad. A simple mixed green salad with a light lemon vinaigrette or even a classic Caesar salad would provide a lovely contrast to the rich flavors of the chicken parm. If you’re looking to lean into the comfort food vibe, a generous side of garlic parmesan fries, sweet potato wedges, or even a hearty bowl of pasta salad would be fantastic accompaniments. Don’t forget a small bowl of extra marinara for dipping; it’s always a huge hit!
But the fun doesn’t have to stop there! One of the things I adore most about this recipe is its incredible versatility. Feel free to get creative and tailor them to your personal preferences or what you have on hand. For instance, while mozzarella is classic, you could experiment with adding a slice of provolone for a sharper flavor, or even a sprinkle of smoked gouda for an unexpected twist. If you enjoy a bit of heat, a pinch of red pepper flakes stirred into your marinara sauce or a thin slice of pickled jalapeño added to each slider before baking will definitely give them a delightful kick. For those looking for a lighter alternative, grilled chicken breasts could be used instead of breaded and fried, or even ground chicken patties seasoned Italian-style. And for your vegetarian friends, consider substituting the chicken with breaded eggplant slices or even thick-cut portobello mushrooms for a plant-based twist that’s equally delicious. Imagine serving them on mini brioche buns for a touch of sweetness, or perhaps on whole wheat slider buns if you’re aiming for a slightly healthier profile. The possibilities are truly endless!
Beyond the Spooky Season:
While these sliders are absolutely perfect for October festivities, their appeal certainly isn’t limited to Halloween. They are fantastic for game day gatherings, birthday parties, potlucks, or any casual get-together where delicious, easy-to-eat food is appreciated. Simply adjust any themed garnishes, and you have a universally loved dish that’s perfect for any time of year. Their portability and ease of serving make them an excellent choice for a wide array of occasions, guaranteeing happy faces and satisfied appetites no matter the event.
So, my fellow food enthusiasts, I implore you to roll up your sleeves and give this recipe a try. I truly believe that the moment you pull these golden, cheesy marvels from the oven, the aroma alone will fill your kitchen with joy, and the first bite will confirm why I’m so passionate about them. There’s something profoundly satisfying about creating such a fantastic dish from scratch, and I promise you, the effort is minimal compared to the incredible flavors you’ll achieve.
Your culinary adventure awaits! I am absolutely thrilled for you to embark on this delicious journey. Once you’ve made and enjoyed them, please, do me a huge favor and share your experience! Snap a photo of your magnificent creations, tell us about any fun variations you tried, or simply let us know how much everyone loved them. Your feedback and shared moments are incredibly valuable and truly bring this recipe to life for our entire community. I’m genuinely excited to see your delicious results and hear all about your take on these phenomenal Halloween Chicken Parm Sliders. Happy cooking, and even happier eating!
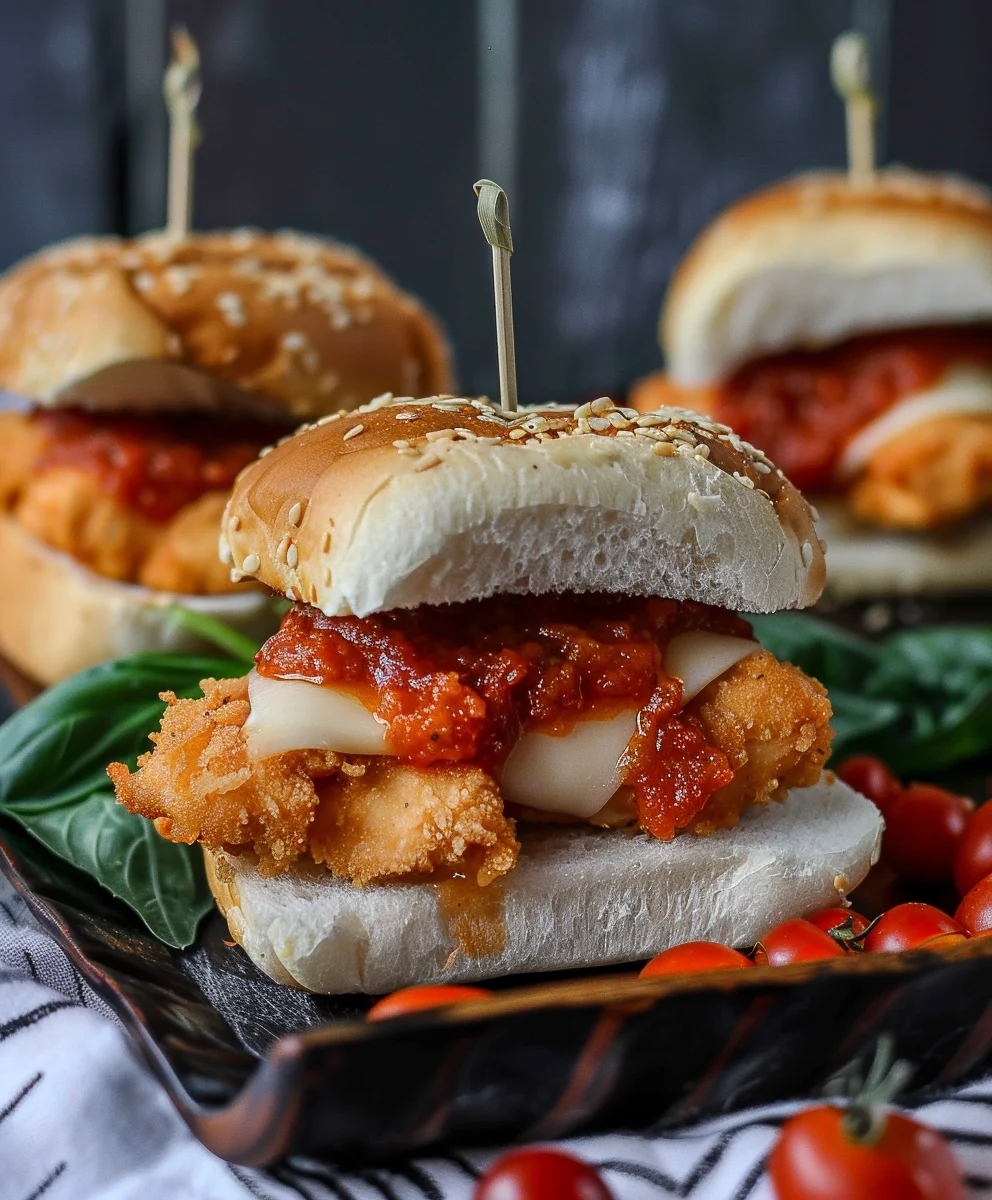
Halloween Chicken Parm Sliders: Spooky & Delicious!
Spooky and delicious Halloween Chicken Parm Sliders featuring crispy chicken tenders, ‘bloody’ marinara, melty mozzarella, and eerie olive ‘eyes’ on soft slider buns. Perfect for festive gatherings!
Ingredients
-
8 frozen chicken tenders
-
8 slider buns
-
8 slices Mozzarella cheese
-
¾ cup Marinara sauce
-
16 green olives stuffed with pimento
Instructions
-
Step 1
Cook 8 frozen chicken tenders according to package directions (e.g., bake or air fry) until crispy and heated through. Set aside. -
Step 2
Preheat oven to 375°F (190°C). Warm ¾ cup marinara sauce in a small saucepan over low heat until simmering. -
Step 3
Carefully slice 8 slider buns horizontally. Place the bottom halves in a single layer on a large baking sheet. -
Step 4
Spread a thin, even layer of the warmed marinara sauce over each bottom bun half. -
Step 5
Place one cooked chicken tender on top of the marinara sauce on each bun. -
Step 6
Top each chicken tender with a slice of Mozzarella cheese. -
Step 7
For spooky decoration, halve 16 green olives. Place two olive halves on top of the cheese on each slider to create eerie ‘eyes’. -
Step 8
Place the top halves of the slider buns over the assembled sliders. Loosely cover the baking sheet with aluminum foil. -
Step 9
Bake for 10-15 minutes, or until the cheese is wonderfully melted and bubbly, and the buns are warmed through. For a golden top, remove the foil for the last 5 minutes of baking if desired. -
Step 10
Allow to rest for a few minutes before serving. Enjoy your spooky and utterly delicious Halloween Chicken Parm Sliders immediately!
Important Information
Nutrition Facts (Per Serving)
It is important to consider this information as approximate and not to use it as definitive health advice.
Allergy Information
Please check ingredients for potential allergens and consult a health professional if in doubt.