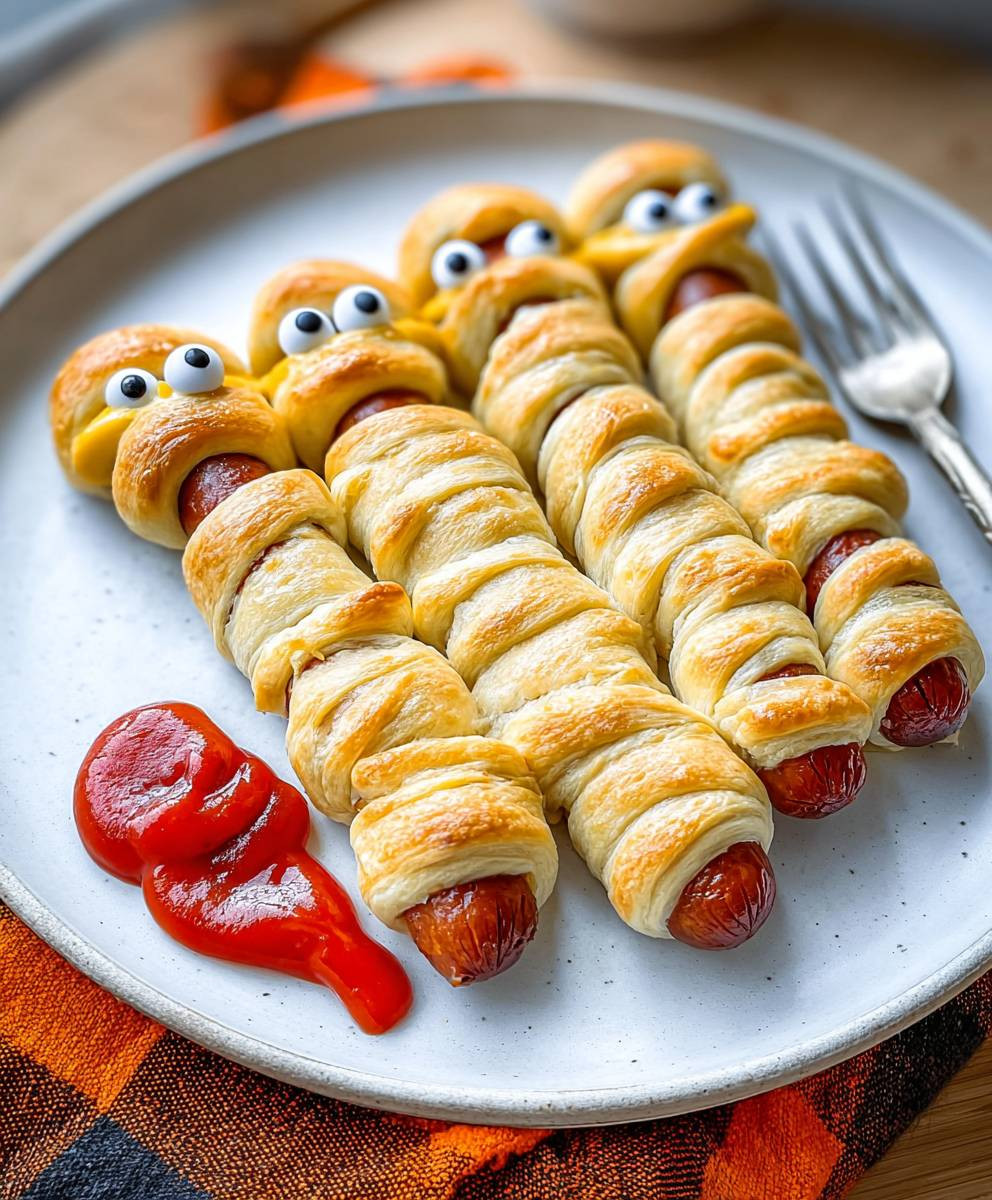
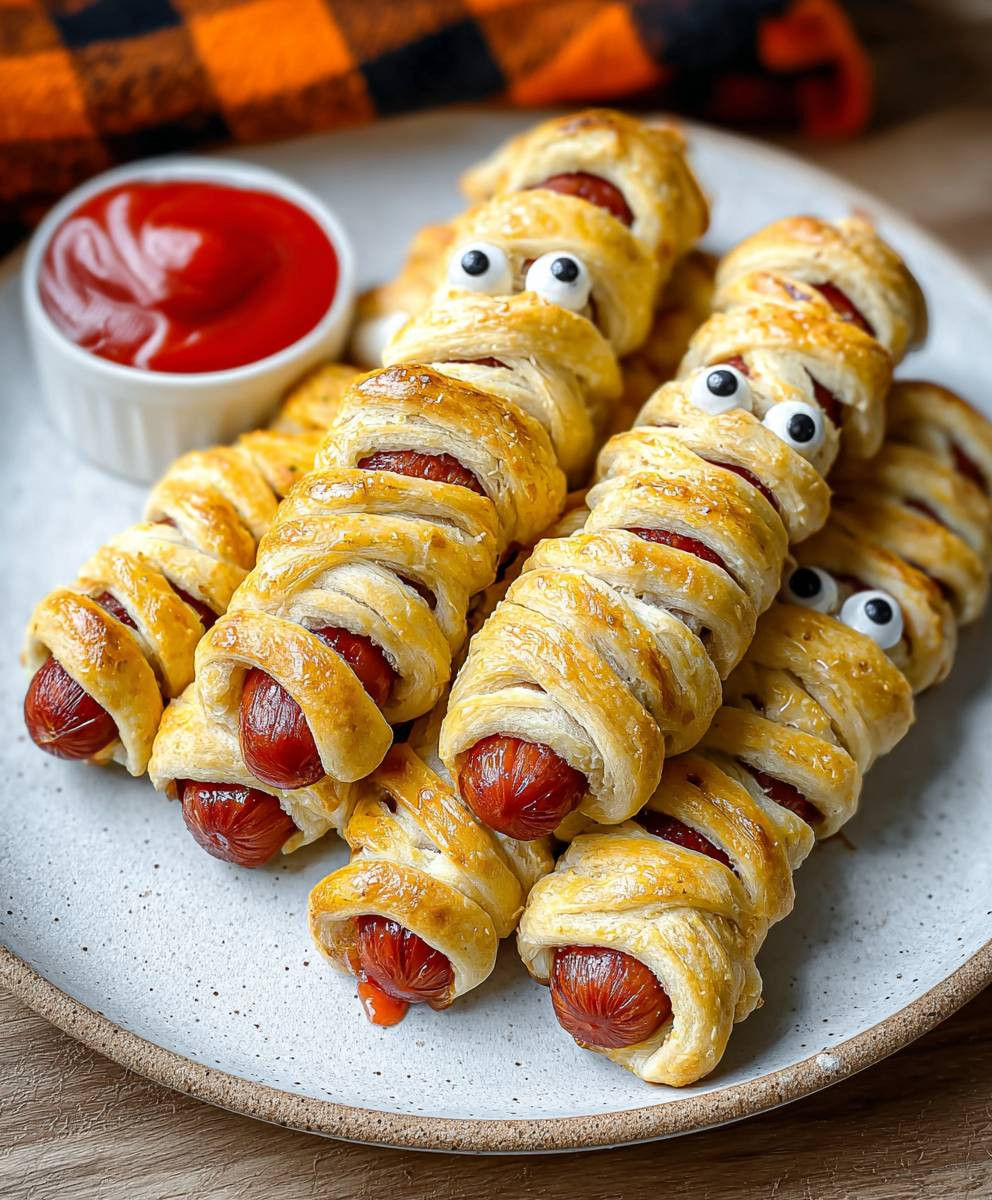
Halloween mummy hot dogs are the spooktacularly delicious treat your Halloween party has been waiting for! Imagine sinking your teeth into a flaky, golden-brown pastry, only to discover a juicy, perfectly cooked hot dog nestled inside. It’s a savory surprise that’s guaranteed to be a hit with both kids and adults alike.
While the exact origins of wrapping food in dough stretch back centuries, these playful mummy dogs are a relatively modern invention, born from a desire to make Halloween celebrations even more fun and festive. They’re a creative twist on classic pigs in a blanket, transforming a simple snack into an edible work of art. Think of them as a delicious homage to ancient Egyptian mummies, but far more palatable!
What makes Halloween mummy hot dogs so irresistible? It’s the perfect combination of textures and flavors. The crispy, buttery pastry complements the savory, slightly salty hot dog beautifully. Plus, they’re incredibly easy to make, making them a lifesaver for busy parents or anyone hosting a Halloween bash. Their cute and spooky appearance also adds to their appeal, making them a guaranteed conversation starter. Get ready to unwrap some fun with this easy and crowd-pleasing recipe!
Ingredients:
- 1 package (8 count) hot dogs
- 1 package (14.1 oz) refrigerated pizza dough
- 1 egg, beaten
- Mustard or ketchup, for serving (optional)
- Candy eyes (optional)
Preparing the Mummy Wraps
Okay, let’s get started! The key to adorable mummy hot dogs is in the dough. We want those strips to look like bandages, so a little patience goes a long way. Don’t worry if they’re not perfect; mummies aren’t exactly known for their pristine bandages, right?
- Preheat your oven to 375°F (190°C). This is important! We want the dough to cook evenly and get that golden-brown color we’re looking for. Line a baking sheet with parchment paper. This will prevent the hot dogs from sticking and make cleanup a breeze. Trust me, you’ll thank me later.
- Prepare the pizza dough. Lightly flour a clean surface. Unroll the pizza dough and gently stretch it out a bit. Using a pizza cutter or a sharp knife, cut the dough into thin strips, about ¼ inch wide. The thinner the strips, the more realistic your mummy bandages will look. Don’t worry about making them perfectly uniform; slightly uneven strips will add to the mummy’s character.
- Wrap the hot dogs. Now comes the fun part! Take one hot dog and begin wrapping it with the dough strips. Start near the bottom of the hot dog and overlap the strips as you work your way up. Leave a small space near the top of the hot dog unwrapped – this will be where we add the eyes later. Don’t wrap the dough too tightly; you want to leave some room for the hot dog to expand as it cooks. Vary the direction of the strips as you wrap to create a more haphazard, mummy-like appearance. Some strips can go straight across, while others can be angled. This will make your mummies look more authentic.
- Repeat for all hot dogs. Continue wrapping the remaining hot dogs with the dough strips until they are all transformed into little mummies. If you have any leftover dough strips, you can use them to add extra layers of bandages to some of the mummies for a more textured look.
Baking the Mummy Hot Dogs
Now that our mummies are all wrapped up, it’s time to bake them to golden-brown perfection. This step is relatively hands-off, so you can relax for a bit while the oven does its magic.
- Place the wrapped hot dogs on the prepared baking sheet. Make sure to space them out evenly so they have enough room to bake properly. This will also prevent them from sticking together.
- Brush with egg wash. In a small bowl, whisk the egg until it’s smooth. Using a pastry brush, lightly brush the dough-wrapped hot dogs with the beaten egg. This will give them a beautiful golden-brown color and a slightly glossy finish. Don’t skip this step; it really makes a difference in the final appearance.
- Bake for 12-15 minutes, or until golden brown. Place the baking sheet in the preheated oven and bake for 12-15 minutes, or until the dough is golden brown and cooked through. Keep a close eye on them, as baking times may vary depending on your oven. You want the dough to be fully cooked, but not burnt.
- Let cool slightly. Once the mummy hot dogs are done baking, remove them from the oven and let them cool on the baking sheet for a few minutes before transferring them to a serving plate. This will prevent them from sticking to the plate and make them easier to handle.
Adding the Mummy’s Eyes (and Serving!)
The final touch! What’s a mummy without its eyes? This is where you can get creative and add some personality to your little mummies. I like to use candy eyes, but you can also use dots of mustard or ketchup if you prefer.
- Add the eyes. While the hot dogs are still slightly warm, gently press two candy eyes into the unwrapped space at the top of each hot dog. The warmth will help the eyes adhere to the dough. If you’re using mustard or ketchup, use a toothpick to carefully create two small dots for the eyes.
- Serve and enjoy! Serve the mummy hot dogs immediately with your favorite condiments, such as mustard, ketchup, or relish. They’re perfect for a Halloween party, a spooky dinner, or a fun snack.
Tips and Variations:
- Cheese Mummies: Add a slice of cheese under the dough strips before baking for a cheesy surprise.
- Spicy Mummies: Use spicy hot dogs or add a pinch of cayenne pepper to the dough for a kick.
- Vegetarian Mummies: Use vegetarian hot dogs for a meat-free option.
- Garlic Herb Dough: Mix garlic powder, dried herbs (like oregano or basil), and a pinch of salt into the pizza dough before cutting it into strips for added flavor.
- Different Doughs: Experiment with different types of dough, such as crescent roll dough or puff pastry, for a different texture and flavor.
- Make-Ahead Option: You can wrap the hot dogs with the dough strips ahead of time and store them in the refrigerator until you’re ready to bake them. Just add a few extra minutes to the baking time.
- Dipping Sauces: Serve with a variety of dipping sauces, such as barbecue sauce, ranch dressing, or honey mustard, for added flavor and fun.
Troubleshooting:
- Dough not sticking: Make sure the hot dogs are dry before wrapping them with the dough. You can also lightly brush the hot dogs with a little bit of egg wash to help the dough adhere.
- Dough browning too quickly: If the dough is browning too quickly, tent the baking sheet with aluminum foil to prevent it from burning.
- Hot dogs splitting: To prevent the hot dogs from splitting, make sure not to wrap the dough too tightly. You can also poke a few small holes in the hot dogs with a fork before wrapping them.
- Eyes falling off: Make sure the hot dogs are still slightly warm when you add the candy eyes. You can also use a small dab of frosting or melted chocolate to help the eyes adhere.
I hope you enjoy making these spooky and delicious mummy hot dogs! They’re a fun and easy treat that’s perfect for Halloween or any time you want to add a little bit of fun to your meal. Happy cooking!

Conclusion:
So there you have it! These Halloween mummy hot dogs are more than just a spooky snack; they’re a guaranteed hit at any Halloween gathering, a fun activity for kids, and a delicious way to celebrate the season. I truly believe this recipe is a must-try because it perfectly balances ease of preparation with impressive presentation. Forget spending hours slaving away in the kitchen – these mummies come together in minutes, leaving you more time to enjoy the festivities. Plus, who can resist a hot dog wrapped in flaky, golden-brown pastry?
Why are these Mummy Dogs a Must-Try?
They’re incredibly simple, even for novice cooks. The ingredient list is short and sweet, and the steps are straightforward. The visual impact is huge – these little mummies are undeniably adorable and will definitely impress your guests. And, most importantly, they taste fantastic! The combination of a savory hot dog and buttery crescent roll is a classic for a reason.
But the fun doesn’t stop there! Feel free to get creative with your mummy dogs.
Serving Suggestions and Variations:
* Dipping Sauces: Offer a variety of dipping sauces like ketchup, mustard, BBQ sauce, or even a spicy sriracha mayo for those who like a little kick.
* Cheese-Stuffed Mummies: Before wrapping the hot dogs, slice them lengthwise and stuff them with your favorite cheese, like cheddar, mozzarella, or even a jalapeno jack for extra flavor.
* Mini Mummies: Use cocktail sausages instead of full-sized hot dogs for bite-sized mummy appetizers. Perfect for parties!
* Vegetarian Option: Substitute vegetarian hot dogs for a meat-free version that everyone can enjoy.
* Garlic Herb Crust: Brush the crescent roll dough with melted butter and sprinkle with garlic powder and dried herbs before wrapping the hot dogs for an extra layer of flavor.
* “Bandage” Variations: Instead of cutting strips, try using a pizza cutter to create thinner, more irregular “bandages” for a more realistic mummy look. You can even lightly score the dough with a knife to create texture.
* Eyes: While mustard is the classic choice for eyes, you can also use small dots of ketchup, black sesame seeds, or even tiny pieces of black olive.
These are just a few ideas to get you started. The beauty of this recipe is that it’s so adaptable. Don’t be afraid to experiment and make it your own!
Now it’s your turn!
I’m so excited for you to try this recipe for Halloween mummy hot dogs. I know you and your family will love them. They’re the perfect combination of spooky, fun, and delicious. Once you’ve made them, I’d love to hear about your experience. Did you try any of the variations? Did you have any trouble with the recipe? What did your guests think?
Please share your photos and stories in the comments below! I can’t wait to see your spooky creations. Happy Halloween and happy cooking! I hope this recipe brings a little extra fun and deliciousness to your Halloween celebrations. Enjoy!
Halloween Mummy Hot Dogs: Spooky Fun Food Recipe
Spooky and fun mummy hot dogs, perfect for Halloween! Hot dogs wrapped in pizza dough bandages, baked to golden perfection, and finished with candy eyes.
Ingredients
Instructions
Recipe Notes
- Cheese Mummies: Add a slice of cheese under the dough strips before baking.
- Spicy Mummies: Use spicy hot dogs or add a pinch of cayenne pepper to the dough.
- Vegetarian Mummies: Use vegetarian hot dogs.
- Garlic Herb Dough: Mix garlic powder, dried herbs (like oregano or basil), and a pinch of salt into the pizza dough before cutting it into strips.
- Different Doughs: Experiment with different types of dough, such as crescent roll dough or puff pastry.
- Make-Ahead Option: You can wrap the hot dogs with the dough strips ahead of time and store them in the refrigerator until you’re ready to bake them. Just add a few extra minutes to the baking time.
- Dipping Sauces: Serve with a variety of dipping sauces, such as barbecue sauce, ranch dressing, or honey mustard.


