• Skip to primary navigation
  • Skip to main content
  • Skip to primary sidebar
Homesmad

Homesmad

  • Home
  • Breakfast & Brunch
  • Appetizers & Snacks
  • Dinner
  • Dessert
  • About
  • Privacy Policy
  • Contact
Homesmad
  • Home
  • Breakfast & Brunch
  • Appetizers & Snacks
  • Dinner
  • Dessert
  • About
  • Privacy Policy
  • Contact

Honey Garlic Ground Turkey: Easy & Flavorful Dinner!

November 26, 2025 by Lily author

Honey Garlic Ground Turkey Recipe – are you ready to transform your weeknight dinner routine with a dish that’s bursting with flavor, incredibly easy to make, and perfectly aligned with your healthy eating goals? I know I am!

This delightful creation has quickly become a go-to in my kitchen, and for good reason. While the specific concept of lean ground turkey bathed in a sticky, savory-sweet glaze might be a modern culinary marvel, the classic pairing of sweet honey and pungent garlic has a rich and storied past, gracing tables and tantalizing taste buds across countless cultures for centuries. From savory Asian glazes to Mediterranean marinades, it’s a flavor profile universally adored and deeply comforting.

So, why has this particular dish captured the hearts of so many home cooks, including mine? It’s the perfect harmony of sweet and savory, a dynamic duo that elevates humble ground turkey from a simple protein to a truly crave-worthy experience. People adore this dish for its incredible versatility, allowing it to shine beautifully in lettuce wraps, alongside fluffy steamed rice, or even as a vibrant topping for salads. Beyond its deliciousness, it’s remarkably quick to prepare, often coming together in under 30 minutes, making it an absolute lifesaver for those busy evenings when you still want to serve something wholesome and deeply satisfying. From its effortless preparation to its universally appealing taste, this Honey Garlic Ground Turkey Recipe is truly a culinary gem that I’m thrilled to share with you today.

Honey Garlic Ground Turkey: Easy & Flavorful Dinner! this RECIPE

Ingredients:

Crafting this incredible Honey Garlic Ground Turkey Recipe starts with having all your wonderful ingredients ready to go. I find that gathering everything beforehand, a practice known as “mise en place,” makes the cooking process so much smoother and more enjoyable. Here’s what you’ll need for this flavor-packed dish:

  • For the Ground Turkey:
    • 1 ½ lbs (approx. 680g) Ground Turkey: I usually opt for lean ground turkey (93% lean / 7% fat) as it’s a healthier choice and still provides fantastic flavor without excessive grease. However, you can use 85% or 90% lean if you prefer a richer taste; just be prepared to drain a little more fat after browning. This is the star of our show, so choose a good quality package!
    • 1 tablespoon Olive Oil or Avocado Oil: I like a neutral-flavored oil with a high smoke point for browning the turkey. Olive oil, avocado oil, or even grapeseed oil works wonderfully here to prevent sticking and ensure a beautiful sear.
  • For the Aromatics:
    • 1 medium Yellow Onion: Finely chopped. This adds a foundational sweetness and depth to the dish. Don’t skip it; it truly elevates the overall flavor profile.
    • 4-5 cloves Garlic: Minced. Garlic is absolutely essential for our honey garlic sauce. The more, the merrier, in my opinion! Freshly minced garlic provides the best punch, so avoid pre-minced jars if you can.
    • 1 tablespoon Fresh Ginger: Grated or finely minced. Fresh ginger brings a delightful warmth and zest that perfectly complements the garlic and honey. I always keep a knob of ginger in my fridge just for recipes like this.
  • For the Irresistible Honey Garlic Sauce:
    • ½ cup Low-Sodium Soy Sauce: I always recommend low-sodium so you can control the saltiness yourself. If you only have regular soy sauce, you might want to slightly reduce the amount or taste and adjust. For a gluten-free option, tamari works perfectly.
    • ½ cup Honey: This is where the “honey” in our Honey Garlic Ground Turkey Recipe truly shines! It provides that signature sweetness and helps create a lovely glaze. Any good quality honey will do; local honey often has the best flavor.
    • 2 tablespoons Rice Vinegar: Unseasoned rice vinegar is best. It adds a crucial touch of acidity that balances the sweetness of the honey and the richness of the soy sauce. It brightens up the entire dish.
    • 1-2 teaspoons Sriracha (or other hot sauce): This is optional, but I highly recommend it for a little kick! Start with 1 teaspoon and add more if you like things spicier. It’s not just about heat; it also adds another layer of complex flavor.
    • 1 tablespoon Cornstarch: This is our secret weapon for thickening the sauce, giving it that perfect glossy, clingy texture. It ensures every piece of ground turkey is beautifully coated.
    • 2 tablespoons Water (cold): Mixed with the cornstarch to create a slurry. Using cold water prevents lumps from forming, which is key for a smooth sauce.
  • For Garnish (Highly Recommended!):
    • 2-3 Green Onions (Scallions): Thinly sliced. These add a pop of fresh color, a mild oniony bite, and a wonderful aromatic finish.
    • 1 tablespoon Toasted Sesame Seeds: For a delightful nutty crunch and a beautiful visual appeal. You can toast them yourself in a dry pan for a few minutes until fragrant, or buy them pre-toasted.

Essential Kitchen Tools:

Before we dive into the fun part of cooking, let’s quickly review the tools you’ll find most useful for this Honey Garlic Ground Turkey Recipe. Having these on hand will make your cooking experience seamless and enjoyable:

  • Large Skillet or Wok: A non-stick skillet (10-12 inches) or a wok is ideal for browning the ground turkey and simmering the sauce. Its generous surface area allows the turkey to cook evenly without steaming.
  • Cutting Board: Essential for safely chopping your onion, mincing garlic, and grating ginger.
  • Sharp Chef’s Knife: A good knife makes all the difference when prepping your aromatics.
  • Small Bowl and Whisk/Fork: For mixing the cornstarch slurry and whisking together the sauce ingredients.
  • Spatula or Wooden Spoon: For breaking up the ground turkey as it cooks and stirring the ingredients.
  • Measuring Cups and Spoons: Accuracy is key for the sauce, so have these at the ready!
  • Grater (optional, for ginger): A microplane grater works wonders for ginger, making it incredibly fine and easy to incorporate.

Getting Started: Preparing Your Ingredients for the Honey Garlic Ground Turkey Recipe

My favorite part of cooking is often the preparation because it feels like building the foundation for something delicious. For this Honey Garlic Ground Turkey Recipe, a little prep work goes a long way in ensuring smooth sailing once you start cooking. Let’s get everything ready!

  1. Chop the Onion: Take your yellow onion, peel it, and dice it finely. Aim for small, even pieces so they cook down quickly and meld seamlessly into the dish without being overly noticeable as individual chunks.
  2. Mince the Garlic: Peel your garlic cloves. Using a garlic press is quick, or you can finely mince them with your chef’s knife. Remember, fresh garlic offers the best flavor here.
  3. Grate the Ginger: Using a microplane or the smallest side of a box grater, grate your fresh ginger. Peeling it first is optional; sometimes, I just grate it with the skin on if it’s very thin. You want about a tablespoon of finely grated ginger.
  4. Prepare the Sauce: In a medium bowl or a large liquid measuring cup, combine the low-sodium soy sauce, honey, rice vinegar, and sriracha (if using). Whisk these ingredients together until they are well combined and the honey has dissolved into the other liquids. This is the heart of our honey garlic flavor, so make sure it’s thoroughly mixed.
  5. Make the Cornstarch Slurry: In a separate small bowl, whisk together the cold water and cornstarch until no lumps remain. This is crucial for thickening our sauce later, so ensure it’s smooth. Set aside with your whisked sauce.
  6. Slice the Garnish: If you’re using green onions for garnish, thinly slice them. Separate the white and light green parts from the darker green tops; sometimes I use the whites for a bit more flavor during cooking and save the darker green for garnish. Toast your sesame seeds in a dry pan over medium heat for 2-3 minutes, shaking frequently, until lightly golden and fragrant, then set aside.

Pro Tip for Prep!

Having everything prepped and measured makes the cooking process much more relaxing. Trust me, you don’t want to be scrambling to mince garlic while your turkey is browning!

Cooking Up Your Delicious Honey Garlic Ground Turkey

Now for the exciting part – bringing all those wonderful prepped ingredients to life! This section is where your kitchen will start smelling absolutely divine, making everyone eager to try your Honey Garlic Ground Turkey Recipe. Follow these steps carefully for a perfectly cooked and saucy dish.

  1. Brown the Ground Turkey:
    • Place your large skillet or wok over medium-high heat. Add 1 tablespoon of olive oil or avocado oil. Once the oil is shimmering, add your ground turkey to the pan.
    • Using your spatula or wooden spoon, break up the ground turkey into small, even pieces. Allow it to cook, stirring occasionally, until it’s fully browned and no pink remains. This usually takes about 5-7 minutes.
    • Why this step is important: Browning the turkey properly develops a richer flavor and ensures a good texture. Overcrowding the pan can steam the turkey instead of browning it, so make sure your pan is hot enough.
    • If you used a higher fat percentage ground turkey, you might notice a significant amount of rendered fat in the pan. I recommend carefully draining off any excess fat at this point to prevent the dish from becoming greasy. You can use a spoon to scoop it out or tilt the pan and use paper towels to absorb it.
  2. Sauté the Aromatics:
    • Reduce the heat to medium. Add the finely chopped yellow onion to the browned turkey in the skillet. Cook, stirring occasionally, for about 3-4 minutes, until the onion softens and becomes translucent.
    • Next, add the minced garlic and grated ginger to the pan. Stir them in and cook for another 1-2 minutes, until fragrant. Be careful not to burn the garlic, as burnt garlic can taste bitter. The warmth from the pan will quickly release their incredible aromas.
    • The magic of aromatics: This step is where the foundation of our flavor truly builds. The sweetness of the cooked onion, combined with the pungent garlic and zesty ginger, creates an incredible base for the honey garlic sauce.
  3. Add the Honey Garlic Sauce:
    • Give your pre-whisked honey garlic sauce (soy sauce, honey, rice vinegar, sriracha) another quick whisk just to ensure everything is still well combined.
    • Pour the entire sauce mixture over the ground turkey and aromatics in the skillet. Stir everything together well, making sure all the turkey pieces are coated.
    • Bring the sauce to a gentle simmer.
  4. Thicken the Sauce:
    • Once the sauce is simmering, give your cornstarch slurry (cornstarch mixed with cold water) a final stir to recombine any settled cornstarch.
    • Slowly pour the cornstarch slurry into the simmering sauce while stirring continuously. This continuous stirring is important to prevent lumps and ensure even thickening.
    • Continue to stir gently until the sauce thickens to a beautiful, glossy glaze that coats the back of your spoon. This usually takes only 1-2 minutes.
    • Understanding the thickener: Cornstarch needs to be heated to activate its thickening properties. Adding it as a slurry ensures it disperses evenly without clumping. The sauce should be thick enough to cling to the turkey but not overly gummy.
  5. Final Simmer and Taste Test:
    • Once the sauce has thickened, reduce the heat to low and let the Honey Garlic Ground Turkey Recipe simmer for an additional 2-3 minutes. This allows all the flavors to truly meld together and for the turkey to absorb some of that delicious sauce.
    • Taste the dish. This is your chance to adjust! Do you want a little more sweetness? Add a touch more honey. Need more heat? A dash more sriracha. A pinch of salt if using regular soy sauce or if you feel it needs it. Remember, it’s easier to add than to remove!

Achieving the Perfect Glaze:

The goal is a beautiful, sticky glaze. If your sauce is too thick, you can add a tablespoon or two of water or chicken broth until it reaches your desired consistency. If it’s too thin, you can make another small slurry with ½ teaspoon cornstarch and 1 tablespoon water and add it gradually while stirring until it thickens.

Bringing it All Together: Serving and Garnish

Congratulations, you’ve just cooked a fantastic batch of our Honey Garlic Ground Turkey Recipe! Now it’s time to serve it up and add those final touches that make it truly irresistible. Presentation really does make a difference, and a good garnish not only adds visual appeal but also a burst of fresh flavor and texture.

  1. Plate Your Dish:
    • The absolute classic pairing for this dish is steamed white or brown rice. The fluffy grains are perfect for soaking up all that incredible honey garlic sauce. Spoon a generous amount of the saucy ground turkey over your chosen base.
    • Other Serving Ideas: While rice is traditional, don’t feel limited! This versatile dish is also fantastic served with:
      • Quinoa: For a protein-packed, nutty alternative.
      • Cauliflower Rice: A great low-carb option that still soaks up the sauce beautifully.
      • Noodles: Toss it with cooked ramen noodles or stir-fry noodles for a complete meal.
      • Lettuce Wraps: Spoon the mixture into crisp lettuce cups (like butter lettuce or iceberg) for a refreshing, light meal.
      • Steamed Vegetables: Serve alongside a medley of steamed broccoli, snap peas, carrots, or bell peppers for a healthy and colorful plate. You can even toss the vegetables directly into the skillet with the turkey for the last few minutes of cooking if you like.
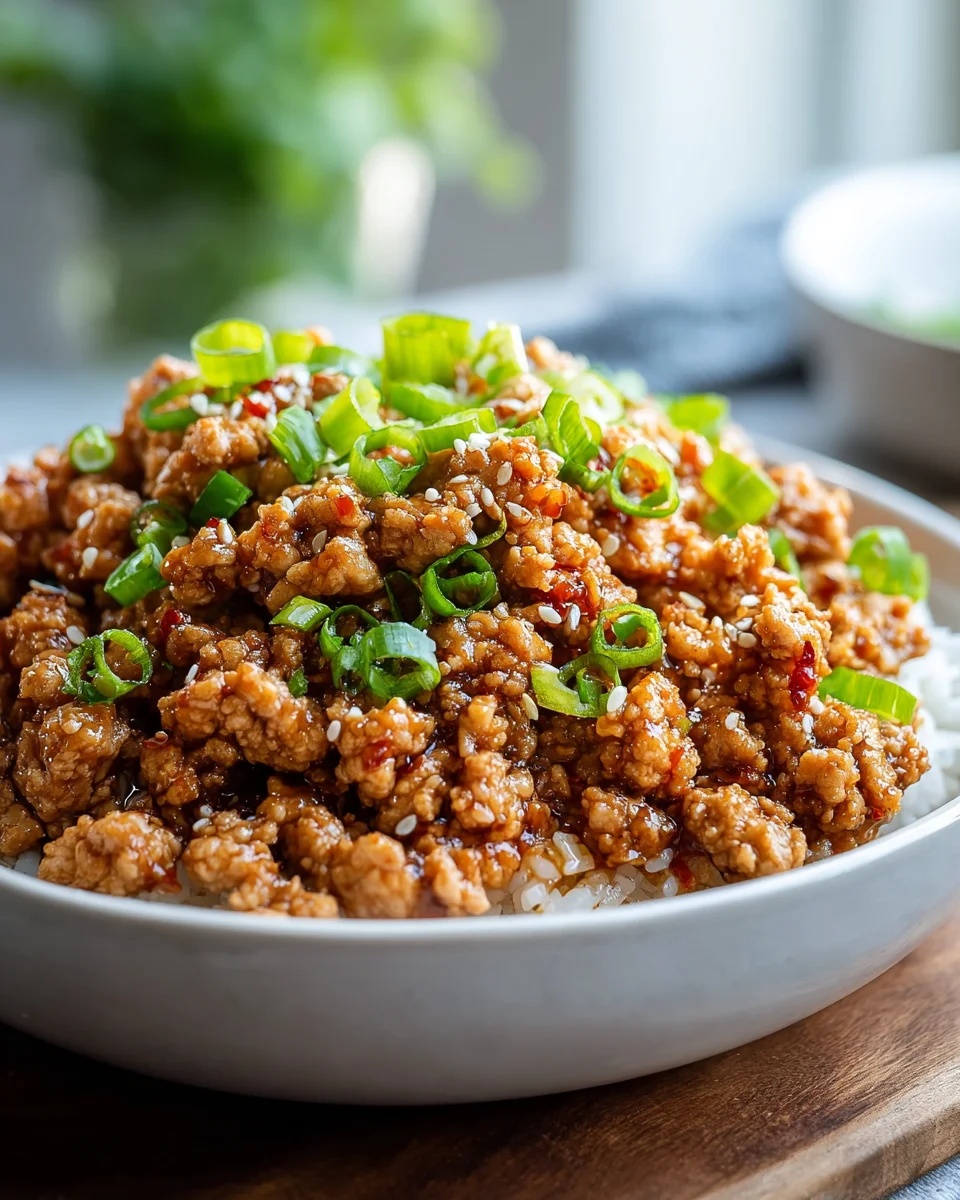
  2. Garnish with Flair:
    • Once plated, sprinkle generously with the sliced green onions. The vibrant green adds a wonderful contrast to the rich brown of the turkey and offers a fresh, mild oniony bite.
    • Follow with a sprinkle of toasted sesame seeds. These not only provide a lovely nutty crunch but also enhance the Asian-inspired aesthetic of the dish.
    • A touch of freshness: Sometimes, I like to add a few red pepper flakes for an extra visual pop and a tiny bit more heat, or a drizzle of sesame oil for an added layer of flavor just before serving.
  3. Serve Immediately:
    • This dish is best enjoyed fresh off the stove while the sauce is warm and glossy. The aromas are at their peak, and the flavors are perfectly balanced.

Why Garnish Matters:

Garnishes aren’t just for show! The fresh green onions provide a textural contrast and a clean finish, while the sesame seeds add a pleasant nuttiness that perfectly complements the savory-sweet profile of the Honey Garlic Ground Turkey Recipe. Don’t skip these simple but impactful additions!

Tips and Variations for Your Honey Garlic Ground Turkey Recipe

One of the things I love most about cooking is the flexibility to make a recipe truly your own. This Honey Garlic Ground Turkey Recipe is already fantastic as written, but here are some tips and variations to help you customize it, enhance the flavors, and even make it fit into different dietary needs or meal prep routines.

Enhancing Flavor and Heat:

  • Spicier Kick: If you’re a fan of heat, don’t hesitate to increase the Sriracha to 3 or even 4 teaspoons. You could also add a pinch of dried red chili flakes along with the garlic and ginger, or even a dash of gochujang (Korean chili paste) for a different kind of spicy depth.
  • Extra Garlic Goodness: For true garlic lovers, feel free to add an extra clove or two of minced garlic. You can never have too much in a “honey garlic” dish, right?
  • Smoky Undertones: A tiny splash of liquid smoke (about ¼ teaspoon) added to the sauce can give it a lovely subtle smoky flavor, which pairs surprisingly well with the honey and soy.

Adding Vegetables for a Complete Meal:

This recipe is incredibly versatile for incorporating extra vegetables. I often do this to boost the nutritional content and make it a one-pan meal. Here’s how you can add them:

  • Stir-Fry Style: After the turkey is browned and drained (if needed), remove it from the pan temporarily. Add a bit more oil, then stir-fry your chosen vegetables (like broccoli florets, sliced bell peppers, snap peas, shredded carrots, or mushrooms) for 3-5 minutes until crisp-tender. Then, add the turkey back to the pan and proceed with adding the sauce and thickening.
  • Quick Cook: For quicker-cooking vegetables like spinach or baby bok choy, you can add them directly to the pan during the last 2-3 minutes of the sauce simmering. They will wilt beautifully and absorb some of the amazing sauce.
  • Roasting: If you prefer roasted veggies, roast them separately and then serve them alongside or tossed with the finished turkey.

Dietary Adjustments & Substitutions:

  • Gluten-Free: Easily make this recipe gluten-free by using tamari instead of regular soy sauce. All other ingredients are naturally gluten-free.
  • Lower Sodium: Stick to low-sodium soy sauce. You can further reduce sodium by using a touch less soy sauce and balancing the flavor with a bit more rice vinegar or a tiny pinch of salt (if needed).
  • Sugar Alternatives: If you need to reduce refined sugar, you could experiment with maple syrup instead of honey for a slightly different, but still delicious, flavor profile.
  • Different Proteins: While this is a Honey Garlic Ground Turkey Recipe, the sauce works beautifully with other ground meats! Ground chicken, lean ground pork, or even crumbled firm tofu (pressed well to remove excess water) would be excellent substitutes. Adjust cooking times as needed for different proteins.

Meal Prep and Storage:

  • Make Ahead: This dish is fantastic for meal prep! Cook a big batch and divide it into individual containers with rice or your preferred base. It holds up wonderfully in the fridge for 3-4 days.
  • Reheating: Reheat portions gently in the microwave or on the stovetop over medium-low heat until warmed through. You might want to add a tablespoon of water or broth if the sauce seems too thick after refrigeration.
  • Freezing: You can absolutely freeze cooked Honey Garlic Ground Turkey Recipe! Allow it to cool completely, then transfer it to freezer-safe containers or bags. It will keep well for up to 3 months. Thaw overnight in the refrigerator before reheating.

Customizing the Sweetness:

The amount of honey provides a lovely balance, but if you prefer a less sweet or more sweet dish, you can adjust the honey. Start with ¼ cup if you want it less sweet and taste before adding more. For extra sweetness, up to ¾ cup can be used, but remember to balance it with enough vinegar and soy sauce.

I hope these tips help you make this Honey Garlic Ground Turkey Recipe your absolute favorite. Don’t be afraid to experiment a little and discover your perfect version!

Honey Garlic Ground Turkey: Easy & Flavorful Dinner!

Conclusion:

Well, my friends, we’ve reached the delicious finale of our culinary journey, and I genuinely hope you’re as excited as I am about what you’ve just learned. This isn’t just another weeknight dinner; it’s a vibrant, flavor-packed experience waiting to happen in your kitchen. I truly believe that once you try this dish, it’s going to earn a permanent spot in your weekly rotation.

Why You’ll Love This Dish

Let’s recap why this particular recipe is an absolute must-try. First and foremost, the flavor profile is simply irresistible. The perfect marriage of sweet honey, pungent garlic, and savory soy sauce creates a glaze that coats every morsel of ground turkey, delivering a taste sensation that’s both comforting and exciting. It’s that perfect balance of sticky, sweet, and umami that leaves you craving more. Beyond the incredible taste, its simplicity and speed are unmatched. In under 20 minutes, you can transform humble ingredients into a restaurant-quality meal. No complicated techniques, no obscure ingredients – just straightforward cooking that yields spectacular results. For those busy evenings when time is a luxury, this recipe is your culinary superhero, swooping in to save dinner without compromising on flavor or nutrition. Ground turkey, being a lean protein, makes this a fantastic lighter alternative to other ground meats, allowing you to enjoy a satisfying meal without any guilt. It truly ticks all the boxes: quick, easy, healthy, and unbelievably delicious. You’ll be amazed at how such minimal effort can produce such a profound depth of flavor. It’s a testament to the power of a few key ingredients working in harmony.

I can confidently say that the Honey Garlic Ground Turkey Recipe is a game-changer. It’s the kind of dish that makes you feel like a gourmet chef, even on your most hectic days. The aroma alone as it cooks will draw everyone to the kitchen, eager to see what deliciousness awaits. It’s also incredibly satisfying, providing a hearty meal that will keep you full and happy without feeling heavy. We all strive for those recipes that deliver maximum impact with minimum fuss, and this one certainly delivers. Trust me, you’ll be patting yourself on the back for choosing such a brilliant and simple meal solution.

Endless Possibilities: Serving Suggestions & Variations

Now that you’re convinced of its deliciousness, let’s talk about how to truly make this recipe your own. One of the best things about this Honey Garlic Ground Turkey Recipe is its incredible versatility. For a classic, comforting meal, serve it over a bed of fluffy steamed white or brown rice, allowing the sauce to meld beautifully with the grains. If you’re looking for a lower-carb option, cauliflower rice is an excellent substitute, soaking up all that wonderful honey garlic goodness. Alternatively, for a noodle night, toss it with some stir-fried ramen or thin rice vermicelli – it’s a delightful change of pace! For a lighter, fresher take, spoon the mixture into crisp lettuce cups, adding a refreshing crunch that perfectly complements the savory turkey.

Don’t stop there with your creativity! Consider pairing it with a side of steamed or roasted vegetables like broccoli, asparagus, or bell peppers; the vibrant colors and fresh flavors will elevate your plate even further. You could even sauté some diced bell peppers, shredded carrots, or spinach directly into the pan with the turkey during the last few minutes of cooking for an all-in-one meal. For those who love a bit of heat, a dash of sriracha or a pinch of red pepper flakes stirred into the sauce can add a fantastic spicy kick. A squeeze of fresh lime juice at the end brightens the entire dish, cutting through the richness with a zesty finish. And for an extra layer of texture and flavor, garnish with toasted sesame seeds and thinly sliced green onions. If you’re ever curious to explore variations beyond ground turkey, this amazing honey garlic sauce base works beautifully with ground chicken or even finely diced tofu, offering even more flexibility for your dietary preferences. It’s truly a recipe that encourages experimentation, so don’t be afraid to try new combinations!

Your Turn to Shine!

So, what are you waiting for? I wholeheartedly encourage you to roll up your sleeves and give this incredible recipe a try this week. I am confident that it will become a new family favorite, a go-to for those busy evenings, or simply a delicious treat when you’re craving something packed with flavor. The satisfaction of creating something so delicious and wholesome with your own hands is truly rewarding.

Once you’ve had the chance to experience the magic of this dish, I would absolutely love to hear about it! Please don’t hesitate to share your cooking adventures, your clever variations, or even just your general thoughts in the comments section below or on your favorite social media platforms. Tag me if you share photos – I get so much joy from seeing your culinary creations come to life! Your feedback and experiences not only inspire me but also help other home cooks in our community discover new ways to enjoy their meals. Happy cooking, and I can’t wait to hear how much you adore this amazing Honey Garlic Ground Turkey Recipe!


Honey Garlic Ground Turkey: Easy & Flavorful Dinner!

Transform your weeknight dinner routine with this incredibly easy and flavorful Honey Garlic Ground Turkey recipe. A perfect harmony of sweet and savory, this dish comes together quickly and is wonderfully versatile, ideal for meal prep or a healthy, satisfying meal.

Prep Time
10 Minutes
Cook Time
15 Minutes
Total Time
25 Minutes
Servings
4 servings

Ingredients


Instructions


Important Information

Nutrition Facts (Per Serving)

It is important to consider this information as approximate and not to use it as definitive health advice.

Allergy Information

Please check ingredients for potential allergens and consult a health professional if in doubt.

« Previous Post
Creamy Garlic Grilled Chicken Broccoli Bowls Recipe
Next Post »
Mini Grilled Cheese Hawaiian Rolls: The Ultimate Recipe!

If you enjoyed this…

Onion Soup Potatoes: A Delicious and Easy Recipe

Pumpkin Feta Pasta: A Delicious & Easy Fall Recipe

Honey Garlic Ground Turkey: Easy & Flavorful Dinner!

Primary Sidebar

Browse by Diet

BreakfastDinnerLunchDessertAppetizer

Sweet Peach Yogurt Parfait Delight

One of my fondest memories is from a lazy summer afternoon spent at my grandmother’s house. The sun filtered through the kitchen window, casting a warm glow over the table where she would create her culinary magic. It was during one of those blissful moments that I first tasted her Peach Yogurt Parfait with Honey and Granola. The sweet aroma of ripe peaches mingling with creamy yogurt and the crunch of granola was nothing short of heavenly. It felt like summer captured in a bowl, and I still remember the joy of diving in with a spoon, each layer revealing a new burst of flavor.

When I think about that parfait, I can almost hear the gentle hum of the bees outside, reminding me of the floral notes that honey brings to every bite. The vibrant yellows and soft oranges of the peaches contrast beautifully with the creamy white yogurt and the golden crunch of granola. It’s a dish that not only looks delightful but also tastes like a celebration of fresh, wholesome ingredients.

What makes my version of this Peach Yogurt Parfait special is the careful balance of flavors and textures. I use ripe, juicy peaches, drizzled with locally sourced honey, and a homemade granola that’s bursting with nuts and seeds for an extra crunch. It’s a simple dish, but every layer is crafted with love and attention.

Let me show you exactly how to make this delightful parfait, so you can bring a bit of that summer magic into your kitchen!

Sweet Peach Yogurt Parfait Delight

Why You’ll Love This Recipe

  • Delightfully creamy texture from the Greek yogurt, paired with the juicy sweetness of fresh peaches.
  • Ready in under 20 minutes, making it a quick and satisfying breakfast or snack option.
  • Budget-friendly, using common ingredients that you may already have in your pantry.
  • Customizable with your favorite granola and nuts, allowing you to tailor each parfait to your taste.
  • Perfectly balanced flavors with the bright acidity of lemon juice and the sweetness of honey enhancing the peaches.

Ingredients

  • For the Parfait:
  • 2 cups plain Greek yogurt (or vanilla yogurt for a sweeter option)
  • 2 large ripe peaches, diced (about 2 cups)
  • 1 tablespoon fresh lemon juice (to prevent browning of peaches)
  • 2 tablespoons honey (plus more for drizzling)
  • 1 teaspoon vanilla extract (optional for extra flavor)
  • For the Granola:
  • 1 cup granola (store-bought or homemade; see notes for a simple granola recipe)
  • 1/4 cup sliced almonds (optional for added crunch)
  • 1/4 cup shredded coconut (optional for added flavor)

Let’s dive into some key ingredients that make this Peach Yogurt Parfait so delightful! First, the Greek yogurt is not only creamy but also packed with protein, making it a satisfying option for breakfast or a snack. If you’re looking for a sweeter option, you can easily substitute it with vanilla yogurt, though it may alter the overall flavor balance. Next, the ripe peaches are the star of the show; their natural sweetness shines through, so I recommend choosing peaches that yield slightly to pressure, indicating they’re perfectly ripe. If peaches aren’t in season, feel free to use nectarines or even frozen peaches—just thaw them before use. Finally, honey adds a lovely floral sweetness that ties everything together. If you prefer, maple syrup can serve as a delicious substitute.

Step-by-Step Instructions

  1. Start by preparing the peaches. Wash them thoroughly, then slice and dice them into bite-sized pieces. In a medium bowl, toss the diced peaches with 1 tablespoon of fresh lemon juice to prevent browning. Set aside for about 5 minutes while the lemon juice works its magic.
  2. In a separate bowl, combine the Greek yogurt, 2 tablespoons of honey, and 1 teaspoon of vanilla extract if using. Stir the mixture until smooth and thoroughly blended. This should take about a minute. Avoid overmixing to maintain the creaminess of the yogurt.
  3. Now it’s time to layer your parfait. Grab a clear glass or bowl to showcase your beautiful creation. Start with a generous spoonful of the yogurt mixture at the bottom—about 1/4 cup will do. Use a spoon to spread it evenly.
  4. Add a layer of the diced peaches over the yogurt, ensuring they cover the yogurt completely. You might want to use about half of what you have prepared—roughly 1 cup. This layer should be visually appealing, so arrange the peaches neatly.
  5. Sprinkle 1/4 cup of granola over the peaches. This adds a delightful crunch. Make sure to distribute it evenly to ensure every bite has that satisfying texture. Avoid packing it down too tightly, as you want it to maintain its crunch.
  6. Repeat the layers: spoon in another 1/4 cup of yogurt, followed by another cup of peaches, and another sprinkle of granola. You should have at least two layers, but feel free to add more depending on your glass size.
  7. Finish off your parfait with a drizzle of honey on top for added sweetness and a touch of elegance. If you’re using sliced almonds or shredded coconut, sprinkle them on top now. It adds a lovely visual contrast and extra flavor.
  8. Serve immediately or refrigerate for up to 30 minutes before serving to allow the flavors to meld together. However, I recommend enjoying it fresh to maintain the granola’s crunch.

Pro Tips for the Best Peach Yogurt Parfait With Honey And Granola

  • Make sure to choose ripe peaches for the best flavor and texture. A common mistake is using unripe fruit, which can lead to a less enjoyable parfait. Look for peaches that are fragrant and slightly soft to the touch.
  • Use a clear glass to assemble your parfait; this not only makes for a beautiful presentation but also allows you to see the colorful layers, which adds to the enjoyment of eating it.
  • For an even creamier texture, consider whipping the Greek yogurt with a hand mixer for a couple of minutes before layering. This small adjustment makes a huge difference in mouthfeel.
  • Be mindful of the granola-to-yogurt ratio. Too much granola can overwhelm the parfait, while too little can make it feel too creamy. Aim for about 1/4 cup of granola per layer for the perfect balance.
  • If you’re making this for a gathering, consider preparing the yogurt and peaches ahead of time and layering them just before serving. This ensures the granola stays crunchy!

Variations & Serving Ideas

There are so many ways to get creative with your Peach Yogurt Parfait! For a tropical twist, swap out the peaches for mangoes or pineapples and top with coconut flakes. If you prefer a berry flavor, mix in some blueberries or strawberries with the peaches for added color and taste. For a nutty version, incorporate chopped walnuts or pecans instead of almonds.

As for serving ideas, this parfait pairs beautifully with a side of scrambled eggs for a hearty breakfast or fresh fruit salad for a light lunch. You might also enjoy it alongside whole grain toast with almond butter for an energizing snack. The contrast of flavors and textures will elevate your meal experience!

Storage, Make-Ahead & Reheating

The Peach Yogurt Parfait is best enjoyed fresh, but you can prepare some components ahead of time. Store the layered parfait in an airtight container in the refrigerator for up to 24 hours. However, be cautious; the granola may lose its crunch if stored too long. You can freeze the yogurt and peach mixture for up to 2 months; just remember to thaw it in the refrigerator overnight before serving.

If you plan to enjoy this dish the next day, it can taste even better as the flavors meld together. Just remember to add the granola right before serving to keep its delightful crunch!

Frequently Asked Questions

Can I make Peach Yogurt Parfait With Honey And Granola ahead of time?

Yes — in fact, it tastes even better the next day as the flavors meld. However, I recommend waiting to add the granola until just before serving to maintain its crunch.

What can I substitute for Greek yogurt?

If you prefer a lighter option, you can substitute Greek yogurt with regular yogurt or a dairy-free alternative like coconut yogurt. Just remember that this may alter the creaminess and flavor profile slightly.

Can I use frozen peaches for this parfait?

Absolutely! Just make sure to thaw the frozen peaches before using them. They will still add great flavor, though the texture may be slightly softer than fresh peaches.

How do I make the parfait vegan?

To make a vegan version, substitute the Greek yogurt with a plant-based yogurt alternative, and replace honey with maple syrup or agave nectar. This keeps the parfait sweet while adhering to a vegan diet.

What other fruits can I use in this recipe?

You can mix and match fruits based on your preference. Try using strawberries, blueberries, raspberries, or even bananas. Just make sure to adjust the lemon juice as needed to prevent browning.

Sweet Peach Yogurt Parfait Delight

Final Thoughts

The Peach Yogurt Parfait with Honey and Granola is a delightful blend of creamy yogurt, sweet peaches, and crunchy granola that creates a satisfying and nourishing treat. Each layer bursts with flavor, making it a perfect choice for breakfast or a light dessert.

This is the kind of recipe I come back to again and again, especially when I want something refreshing and wholesome to start my day. The harmony of sweet and tart flavors, combined with the delightful crunch, never fails to lift my spirits!

I encourage you to give this parfait a try and indulge in its comforting goodness. Feel free to share your results or even add your own twist—perhaps a sprinkle of cinnamon or a handful of nuts. Enjoy creating your perfect parfait!

Print
clock clock iconcutlery cutlery iconflag flag iconfolder folder iconinstagram instagram iconpinterest pinterest iconfacebook facebook iconprint print iconsquares squares iconheart heart iconheart solid heart solid icon

Peach Yogurt Parfait


  • Author: Lily author
  • Total Time: 15 minutes
  • Yield: 4 servings 1x
Pin Recipe
Print Recipe

Description

This Peach Yogurt Parfait combines creamy Greek yogurt, juicy peaches, and crunchy granola for a delightful treat. It’s a perfect breakfast or snack that captures the essence of summer in every bite.


Ingredients

Scale
  • For the Parfait:
  • 2 cups plain Greek yogurt (or vanilla yogurt for a sweeter option)
  • 2 large ripe peaches, diced (about 2 cups)
  • 1 tablespoon fresh lemon juice (to prevent browning of peaches)
  • 2 tablespoons honey (plus more for drizzling)
  • 1 teaspoon vanilla extract (optional for extra flavor)
  • For the Granola:
  • 1 cup granola (store-bought or homemade; see notes for a simple granola recipe)
  • 1/4 cup sliced almonds (optional for added crunch)
  • 1/4 cup shredded coconut (optional for added flavor)

Instructions

  1. Start by preparing the peaches. Wash them thoroughly, then slice and dice them into bite-sized pieces. In a medium bowl, toss the diced peaches with 1 tablespoon of fresh lemon juice to prevent browning. Set aside for about 5 minutes while the lemon juice works its magic.
  2. In a separate bowl, combine the Greek yogurt, 2 tablespoons of honey, and 1 teaspoon of vanilla extract if using. Stir the mixture until smooth and thoroughly blended. This should take about a minute. Avoid overmixing to maintain the creaminess of the yogurt.
  3. Now it’s time to layer your parfait. Grab a clear glass or bowl to showcase your beautiful creation. Start with a generous spoonful of the yogurt mixture at the bottom—about 1/4 cup will do. Use a spoon to spread it evenly.
  4. Add a layer of the diced peaches over the yogurt, ensuring they cover the yogurt completely. You might want to use about half of what you have prepared—roughly 1 cup. This layer should be visually appealing, so arrange the peaches neatly.
  5. Sprinkle 1/4 cup of granola over the peaches. This adds a delightful crunch. Make sure to distribute it evenly to ensure every bite has that satisfying texture. Avoid packing it down too tightly, as you want it to maintain its crunch.
  6. Repeat the layers: spoon in another 1/4 cup of yogurt, followed by another cup of peaches, and another sprinkle of granola. You should have at least two layers, but feel free to add more depending on your glass size.
  7. Finish off your parfait with a drizzle of honey on top for added sweetness and a touch of elegance. If you’re using sliced almonds or shredded coconut, sprinkle them on top now. It adds a lovely visual contrast and extra flavor.
  8. Serve immediately or refrigerate for up to 30 minutes before serving to allow the flavors to meld together. However, I recommend enjoying it fresh to maintain the granola’s crunch.
  • Prep Time: 15 mins
  • Cook Time: 0 mins
  • Category: Breakfast
  • Method: No-cook
  • Cuisine: American

Nutrition

  • Serving Size: 1 parfait
  • Calories: 250
  • Sugar: 20 g
  • Sodium: 50 mg
  • Fat: 5 g
  • Saturated Fat: 2 g
  • Unsaturated Fat: 3 g
  • Trans Fat: 0 g
  • Carbohydrates: 40 g
  • Fiber: 3 g
  • Protein: 10 g
  • Cholesterol: 10 mg

Keywords: Choose ripe peaches for the best flavor and texture. Use a clear glass for a beautiful presentation. For creaminess, consider whipping the yogurt before layering. Be mindful of the granola-to-yogurt ratio. Prepare yogurt and peaches ahead of time for gatherings, layering just before serving.

Did you make this recipe?

Share a photo and tag us — we can't wait to see what you've made!

Sun-Kissed Frozen Orange Cream Slush

As a child, summer days felt like they lasted forever. I remember the sticky heat wrapping around me as I played outside, my laughter mingling with the sounds of the neighborhood. But nothing could cool me down quite like the moment I’d spot my grandmother, laboring over her blender, whipping up her famous Frozen Orange Creamsicle Slush. That vibrant orange treat, with its frosty texture and sweet citrus aroma, was like a burst of sunshine in a cup. Just one sip, and I could feel the coolness wash over me, sparking pure joy.

This Frozen Orange Creamsicle Slush has a way of making you feel like a kid again. Its creamy, dreamy consistency is a delightful balance of bright orange and soft vanilla, inviting you to dive right in. The refreshing tang of orange dances on your tongue, while the smooth creaminess envelops you in a comforting embrace. It’s a nostalgic treat that’s perfect for hot summer afternoons or anytime you need a little pick-me-up.

What makes my version of this slush stand out is the addition of a hint of vanilla bean, which elevates the flavor and adds an extra layer of richness. Plus, it’s super easy to whip up with just a few simple ingredients that you probably already have on hand! So, if you’re ready to relive those sun-soaked memories, let me show you exactly how to make it.

Sun-Kissed Frozen Orange Cream Slush

Why You’ll Love This Recipe

  • Each slush is a perfect blend of creamy vanilla and zesty orange, creating a nostalgic flavor reminiscent of summer days.
  • This refreshing treat is ready in under 15 minutes, making it an ideal quick dessert for unexpected guests or hot afternoons.
  • With just 8 simple ingredients, it’s budget-friendly, ensuring you don’t have to break the bank to enjoy a delicious slush.
  • The slush has a perfectly smooth texture, thanks to the combination of ice and ice cream, providing a delightful contrast to the bright citrus flavors.
  • It’s highly customizable; you can easily adjust the sweetness and add fresh herbs for a unique twist that suits your taste.

Ingredients

  • 2 cups orange juice (freshly squeezed or store-bought)
  • 1 cup vanilla ice cream
  • 1 cup crushed ice
  • 1/2 cup milk (whole or 2%)
  • 1/4 cup granulated sugar (adjust based on sweetness preference)
  • 1 teaspoon vanilla extract
  • Zest of 1 orange (for added flavor)
  • Fresh orange slices and mint leaves (for garnish)

The star of this Frozen Orange Creamsicle Slush is the orange juice, which provides the vibrant, citrusy base. Freshly squeezed juice will yield the brightest flavor, but store-bought options can be just as convenient. If you’re opting for store-bought, choose 100% pure juice with no added sugars for the best results. Another essential ingredient is the vanilla ice cream; it adds creaminess and sweetness. You can substitute it with dairy-free ice cream if you’re looking for a vegan option. Whole or 2% milk complements the ice cream, creating a smooth blend. If you want a lower-calorie version, almond or oat milk can be good alternatives.

Lastly, the granulated sugar can be adjusted based on your sweetness preference. If you prefer a more natural sweetener, consider using honey or agave syrup. The orange zest enhances the flavor profile, providing an aromatic pop that brings the whole slush together. Don’t skip it! It adds an extra layer of brightness that makes this slush truly special.

Step-by-Step Instructions

  1. Start by preparing your ingredients. Gather 2 cups of orange juice, 1 cup of vanilla ice cream, and 1 cup of crushed ice. Make sure the ice is finely crushed, as larger chunks can make blending difficult.
  2. In a blender, combine the orange juice, vanilla ice cream, crushed ice, and 1/2 cup of milk. Add 1/4 cup of granulated sugar and 1 teaspoon of vanilla extract. If you like a sweeter slush, consider adding a bit more sugar at this stage.
  3. Add the zest of 1 orange to the blender. This step is crucial for enhancing the citrus flavor of your slush. Make sure not to include the bitter white pith—only the flavorful zest.
  4. Blend the mixture on medium-high speed for about 30-45 seconds. Stop once the ingredients are fully combined and the slush has a smooth, even consistency. If you notice large chunks of ice, blend for an additional 10-15 seconds. Avoid over-blending, as this can make the slush too liquidy.
  5. Once blended, taste the slush. If it needs more sweetness, add a little more sugar and blend for a few more seconds. If it’s too thick, you can add a splash of milk to reach your desired consistency.
  6. Pour the slush into glasses. This recipe typically serves 4, but you can easily double it for larger gatherings. Use a spoon to help guide the slush into the glasses if needed.
  7. Garnish each serving with fresh orange slices and mint leaves. The mint not only adds a pop of color but also a refreshing aroma that complements the citrus flavors beautifully.
  8. Serve immediately and enjoy! If you’ve made extra, you can refrigerate it for a short time, but it’s best enjoyed fresh.

Pro Tips for the Best Frozen Orange Creamsicle Slush

  • Don’t skip the orange zest! It’s a game-changer for flavor. Always zest before juicing to make it easier.
  • Use a high-powered blender for the best texture. A standard blender may struggle with ice, leading to uneven consistency. If you have a food processor, that can work too, but ensure the ice is finely crushed.
  • Adjust the ice-to-liquid ratio carefully. If your slush is too thick, it won’t blend well. Start with less ice and add more until you reach your preferred texture.
  • Be cautious with the sugar! Always start with the lower amount, as you can easily add more, but it’s hard to fix an overly sweet slush.
  • For a fun twist, consider adding a splash of coconut milk or a handful of fresh fruit like strawberries or pineapple. This not only enhances the flavor but also adds a beautiful color contrast.

Variations & Serving Ideas

There are countless ways to put a spin on your Frozen Orange Creamsicle Slush. Consider making a tropical version by adding in some pineapple juice or coconut milk for a delightful tropical twist. If you’re feeling adventurous, try incorporating a handful of frozen mango or peach slices for added sweetness. For a lighter version, swap out the vanilla ice cream for Greek yogurt for a creamy yet tangy alternative.

As for serving ideas, this refreshing slush pairs wonderfully with light summer dishes like grilled chicken skewers, fish tacos, or a simple salad topped with citrus vinaigrette. The bright, zesty flavors of the slush complement these dishes perfectly, making them an ideal pairing for a sunny day.

Storage, Make-Ahead & Reheating

This Frozen Orange Creamsicle Slush is best enjoyed fresh, but if you have leftovers, you can store them in an airtight container in the fridge for up to 2 days. Just keep in mind that the slush may lose some of its texture over time as the ice melts. It doesn’t freeze well, as the ice will turn into a solid block. If you must freeze it, blend again after thawing to restore the slushy consistency. This treat is best the day you make it, as the flavors meld together beautifully overnight, enhancing its deliciousness.

Frequently Asked Questions

Can I make Frozen Orange Creamsicle Slush ahead of time?

Yes — in fact, it tastes even better the next day as the flavors meld. However, it’s best to enjoy it fresh, as the texture can change if stored for too long. If you need to prepare it ahead, keep it in the fridge and re-blend before serving.

What kind of orange juice should I use?

For the best flavor, use freshly squeezed orange juice. However, if you’re short on time, opt for 100% pure store-bought juice without added sugars. This will ensure that your slush remains flavorful and refreshing.

Can I substitute the vanilla ice cream?

Absolutely! If you’re looking for a dairy-free option, coconut milk ice cream or a non-dairy vanilla ice cream can work wonderfully. They will still provide the creamy texture and sweetness you desire.

How can I adjust the sweetness of my slush?

You can easily adjust the sweetness by modifying the amount of sugar added. Start with 1/4 cup and taste the mixture before blending. If you prefer it sweeter, add more sugar gradually until it reaches your desired level.

What should I do if my slush is too thick?

If your slush is too thick, simply add a splash of milk or orange juice and blend again. This will help achieve a more drinkable consistency while maintaining the slushy texture. Adjust gradually to reach your preferred thickness.

Sun-Kissed Frozen Orange Cream Slush

Final Thoughts

The Frozen Orange Creamsicle Slush is a delightful blend of refreshing citrus and creamy goodness, making it a perfect treat for warm days or any time you crave a taste of nostalgia. The way the bright orange flavor dances with the creamy texture truly elevates this slush, transforming it into a satisfying escape from the everyday.

This is the kind of recipe I come back to again and again, especially when I’m looking to cool down or impress guests at a summer gathering. It’s simple to make and always brings smiles all around! I encourage you to try this recipe for yourself—don’t hesitate to share your results or even put your own spin on it. Happy slushing!

Print
clock clock iconcutlery cutlery iconflag flag iconfolder folder iconinstagram instagram iconpinterest pinterest iconfacebook facebook iconprint print iconsquares squares iconheart heart iconheart solid heart solid icon

Frozen Orange Creamsicle Slush


  • Author: Lily author
  • Total Time: 15 minutes
  • Yield: 4 servings 1x
Pin Recipe
Print Recipe

Description

This Frozen Orange Creamsicle Slush is a refreshing treat that combines creamy vanilla and zesty orange flavors. Perfect for hot summer days, it brings back nostalgic memories with every sip.


Ingredients

Scale
  • 2 cups orange juice (freshly squeezed or store-bought)
  • 1 cup vanilla ice cream
  • 1 cup crushed ice
  • 1/2 cup milk (whole or 2%)
  • 1/4 cup granulated sugar (adjust based on sweetness preference)
  • 1 teaspoon vanilla extract
  • Zest of 1 orange (for added flavor)
  • Fresh orange slices and mint leaves (for garnish)

Instructions

  1. Start by preparing your ingredients. Gather 2 cups of orange juice, 1 cup of vanilla ice cream, and 1 cup of crushed ice. Make sure the ice is finely crushed, as larger chunks can make blending difficult.
  2. In a blender, combine the orange juice, vanilla ice cream, crushed ice, and 1/2 cup of milk. Add 1/4 cup of granulated sugar and 1 teaspoon of vanilla extract. If you like a sweeter slush, consider adding a bit more sugar at this stage.
  3. Add the zest of 1 orange to the blender. This step is crucial for enhancing the citrus flavor of your slush. Make sure not to include the bitter white pith—only the flavorful zest.
  4. Blend the mixture on medium-high speed for about 30-45 seconds. Stop once the ingredients are fully combined and the slush has a smooth, even consistency. If you notice large chunks of ice, blend for an additional 10-15 seconds. Avoid over-blending, as this can make the slush too liquidy.
  5. Once blended, taste the slush. If it needs more sweetness, add a little more sugar and blend for a few more seconds. If it’s too thick, you can add a splash of milk to reach your desired consistency.
  6. Pour the slush into glasses. This recipe typically serves 4, but you can easily double it for larger gatherings. Use a spoon to help guide the slush into the glasses if needed.
  7. Garnish each serving with fresh orange slices and mint leaves. The mint not only adds a pop of color but also a refreshing aroma that complements the citrus flavors beautifully.
  8. Serve immediately and enjoy! If you’ve made extra, you can refrigerate it for a short time, but it's best enjoyed fresh.
  • Prep Time: 15 min
  • Cook Time: 0 min
  • Category: Dessert
  • Method: Blending
  • Cuisine: American

Nutrition

  • Serving Size: 1 serving
  • Calories: 200
  • Sugar: 30 g
  • Sodium: 50 mg
  • Fat: 5 g
  • Saturated Fat: 3 g
  • Unsaturated Fat: 2 g
  • Trans Fat: 0 g
  • Carbohydrates: 40 g
  • Fiber: 1 g
  • Protein: 2 g
  • Cholesterol: 20 mg

Keywords: Don't skip the orange zest! It's a game-changer for flavor. Always zest before juicing to make it easier.

Did you make this recipe?

Share a photo and tag us — we can't wait to see what you've made!

Zesty Lemon Poppy Seed Delight

One rainy afternoon, I found myself in my grandmother’s cozy kitchen, the kind that always smelled like warmth and love. She was whipping up her famous Lemon Poppy Seed Loaf, a recipe that had been passed down through generations. As the batter came together, the zesty aroma of fresh lemons filled the air, mingling perfectly with the nutty fragrance of poppy seeds. I can still picture her, apron-clad, as she expertly drizzled a vibrant citrus icing over the loaf, creating a glossy, sun-kissed finish that beckoned us to dive in. It was a moment that sparked my own passion for baking, and this recipe has become a cherished staple in my home ever since.

When you take a bite of this Lemon Poppy Seed Loaf, it’s like a burst of sunshine on your palate. The loaf is beautifully golden, with a tender crumb that melts in your mouth. Each slice is speckled with tiny poppy seeds, adding a delightful crunch that contrasts beautifully with the tangy sweetness of the lemon. And that citrus icing? It’s the finishing touch that elevates this loaf from ordinary to extraordinary, with its bright, zesty flavor dancing on your taste buds.

This recipe stands out because it embraces simplicity while delivering on flavor. I’ve added a hint of vanilla to the batter, enhancing the overall taste and making it even more indulgent. Trust me, once you make this Lemon Poppy Seed Loaf With Citrus Icing, it’ll become a go-to in your baking repertoire.

So, let me show you exactly how to make it!

Zesty Lemon Poppy Seed Delight

Why You’ll Love This Recipe

  • Moist and tender crumb that melts in your mouth, thanks to the perfect balance of butter and buttermilk.
  • Bright, zesty lemon flavor paired with crunchy poppy seeds, creating a delightful texture and taste experience.
  • Easy to whip up in just about an hour, perfect for last-minute gatherings or a cozy afternoon treat.
  • Budget-friendly with everyday ingredients, making it an accessible option for all home bakers.
  • The citrus icing adds a sweet tang that elevates the loaf, turning a simple recipe into a showstopper!

Ingredients

  • 1 ½ cups (190g) all-purpose flour
  • 1 teaspoon baking powder
  • ½ teaspoon baking soda
  • ½ teaspoon salt
  • 3 tablespoons poppy seeds
  • ½ cup (115g) unsalted butter, softened to room temperature
  • 1 cup (200g) granulated sugar
  • 2 large eggs
  • 1 teaspoon vanilla extract
  • 1 teaspoon lemon zest (from about 1 medium lemon)
  • ½ cup (120ml) buttermilk
  • 2 tablespoons fresh lemon juice

For the Citrus Icing:

  • 1 cup (120g) powdered sugar
  • 2 tablespoons fresh lemon juice
  • 1 tablespoon orange juice
  • 1 teaspoon lemon zest (for garnish, optional)

Let’s dive into the key ingredients that make this Lemon Poppy Seed Loaf so special. The all-purpose flour provides the structure and base for the loaf, while the baking powder and baking soda ensure it rises perfectly, giving the loaf a light texture. For a gluten-free variation, you could substitute the flour with a gluten-free all-purpose blend. Poppy seeds not only add a delightful crunch but also contribute to the unique flavor profile that pairs well with the citrus notes.

Unsalted butter is crucial for achieving the buttery richness that makes this loaf so moist. If you’re looking for a dairy-free option, coconut oil or a vegan butter can be used instead. The buttermilk is another essential component, providing acidity that activates the baking soda for a fluffy texture. If you don’t have buttermilk on hand, you can easily make a substitute by mixing ½ cup of milk with 1 tablespoon of vinegar or lemon juice and letting it sit for about 5 minutes.

Step-by-Step Instructions

  1. Preheat your oven to 350°F (175°C). Grease a 9×5-inch loaf pan or line it with parchment paper for easy removal later.
  2. In a medium mixing bowl, whisk together 1 ½ cups of all-purpose flour, 1 teaspoon of baking powder, ½ teaspoon of baking soda, ½ teaspoon of salt, and 3 tablespoons of poppy seeds. This helps to evenly distribute the baking agents and ensures a uniform rise.
  3. In a large mixing bowl, cream together ½ cup of softened unsalted butter and 1 cup of granulated sugar using an electric mixer on medium speed for about 3-4 minutes, until the mixture is light and fluffy. Make sure to scrape down the sides of the bowl occasionally.
  4. Add 2 large eggs, 1 teaspoon of vanilla extract, and 1 teaspoon of lemon zest to the creamed butter and sugar, mixing until fully combined. You want a smooth consistency, so ensure there are no lumps of butter.
  5. In a small bowl, combine ½ cup of buttermilk and 2 tablespoons of fresh lemon juice. Alternately add the dry ingredients and buttermilk mixture to the butter mixture, starting and ending with the dry ingredients. Mix just until combined; do not overmix, as this can lead to a dense loaf.
  6. Pour the batter into the prepared loaf pan. Smooth the top with a spatula, ensuring it’s even. Bake in the preheated oven for 50-60 minutes, or until a toothpick inserted in the center comes out clean. The edges should be lightly golden brown, and the center should feel just set.
  7. Once baked, remove the loaf from the oven and allow it to cool in the pan for about 10 minutes. Then, transfer it to a wire rack to cool completely. Resist the urge to slice too soon, as it will be crumbly if it’s still warm.
  8. While the loaf is cooling, prepare the citrus icing. In a medium bowl, whisk together 1 cup of powdered sugar, 2 tablespoons of fresh lemon juice, and 1 tablespoon of orange juice until smooth. If the icing is too thick, you can add a little more juice to reach your desired consistency.
  9. Once the loaf is completely cool, drizzle the citrus icing over the top. If you like, sprinkle with an additional teaspoon of lemon zest for an extra pop of flavor and color.

Pro Tips for the Best Lemon Poppy Seed Loaf With Citrus Icing

  • Be careful not to overmix your batter; this is a common mistake that can lead to a dense loaf. Mix just until the dry ingredients are incorporated for a light and fluffy texture.
  • Use room temperature ingredients, especially the butter and eggs. This helps to create a smoother batter and ensures even baking. Take your eggs out of the fridge about 30 minutes before you start.
  • For a more pronounced lemon flavor, consider adding a little lemon extract in addition to the zest and juice. Just a half teaspoon can elevate the citrus notes significantly.
  • When measuring your flour, spoon it into the measuring cup and level it off with a knife instead of scooping directly from the bag. This prevents packing and ensures you don’t end up with a dry loaf.
  • Invest in a good quality loaf pan; it makes a difference in heat distribution, which ensures even baking. If your pan is dark-coated, reduce the oven temperature by 25°F to prevent over-browning.

Variations & Serving Ideas

For a delightful twist, consider adding blueberries or raspberries to the batter for a fruity burst of flavor. You can also experiment with different citrus fruits—try lime or grapefruit zest and juice for a refreshing change. For a healthier option, substitute half of the all-purpose flour with whole wheat flour for added fiber without compromising too much on texture.

This Lemon Poppy Seed Loaf pairs beautifully with a light salad, such as a mixed greens salad with a vinaigrette, or a cup of tea for a cozy afternoon treat. It also complements a creamy cheese platter, as the acidity of the loaf balances rich cheeses perfectly. Lastly, a scoop of vanilla ice cream on the side creates a delightful contrast of temperatures and flavors!

Storage, Make-Ahead & Reheating

This Lemon Poppy Seed Loaf can be stored at room temperature for up to 3 days if wrapped tightly in plastic wrap. If you want to keep it longer, it freezes well for up to 3 months. To freeze, wrap the loaf tightly in plastic wrap and then in aluminum foil to prevent freezer burn.

When you’re ready to enjoy it again, simply thaw it in the fridge overnight. Reheat individual slices in the microwave for 15-20 seconds or in a toaster oven until warmed through. Interestingly, many people find that this loaf tastes even better the next day, as the flavors have time to meld!

Frequently Asked Questions

Can I make Lemon Poppy Seed Loaf With Citrus Icing ahead of time?

Yes — in fact, it tastes even better the next day! You can make the loaf a day in advance, allowing the flavors to develop. Just be sure to store it in an airtight container to maintain its moisture.

Can I substitute the poppy seeds?

Absolutely! If you don’t have poppy seeds on hand or prefer an alternative, you can use sesame seeds for a similar crunch or omit them entirely for a smooth loaf.

What can I use instead of buttermilk?

If you don’t have buttermilk, you can easily create a substitute by mixing ½ cup of milk (dairy or plant-based) with 1 tablespoon of vinegar or lemon juice. Let it sit for 5 minutes before using in the recipe.

How can I make this recipe gluten-free?

To make a gluten-free version of this Lemon Poppy Seed Loaf, substitute the all-purpose flour with a gluten-free all-purpose flour blend. Just ensure that the blend contains a binding agent like xanthan gum for the best results.

What is the best way to store leftover loaf?

Leftover Lemon Poppy Seed Loaf should be stored in an airtight container at room temperature for up to 3 days. For longer storage, wrap it tightly and freeze for up to 3 months. Thaw it before serving for the best texture.

Zesty Lemon Poppy Seed Delight

Final Thoughts

The Lemon Poppy Seed Loaf with Citrus Icing is truly a delightful treat that brings a burst of brightness to any occasion. The zesty lemon flavor combined with the subtle crunch of poppy seeds creates a satisfying balance, while the citrus icing adds a touch of sweetness that perfectly complements the loaf’s tanginess.

This is the kind of recipe I come back to again and again, especially when I want to brighten up a gloomy day or celebrate a small victory. The aroma that fills the kitchen as it bakes is absolutely heavenly! I encourage you to give this recipe a try; you might just find it becoming a beloved staple in your home. Don’t forget to share your results or even add your own unique twist—I can’t wait to see what you create!

Print
clock clock iconcutlery cutlery iconflag flag iconfolder folder iconinstagram instagram iconpinterest pinterest iconfacebook facebook iconprint print iconsquares squares iconheart heart iconheart solid heart solid icon

Lemon Poppy Seed Loaf


  • Author: Lily author
  • Total Time: 25 minute
  • Yield: 1 loaf 1x
Pin Recipe
Print Recipe

Description

This Lemon Poppy Seed Loaf is a delightful treat that combines zesty lemon flavor with crunchy poppy seeds. Topped with a citrus icing, it’s perfect for any occasion.


Ingredients

Scale
  • 1 ½ cups (190g) all-purpose flour
  • 1 teaspoon baking powder
  • ½ teaspoon baking soda
  • ½ teaspoon salt
  • 3 tablespoons poppy seeds
  • ½ cup (115g) unsalted butter, softened to room temperature
  • 1 cup (200g) granulated sugar
  • 2 large eggs
  • 1 teaspoon vanilla extract
  • 1 teaspoon lemon zest (from about 1 medium lemon)
  • ½ cup (120ml) buttermilk
  • 2 tablespoons fresh lemon juice
  • 1 cup (120g) powdered sugar
  • 2 tablespoons fresh lemon juice
  • 1 tablespoon orange juice
  • 1 teaspoon lemon zest (for garnish, optional)

Instructions

  1. Preheat your oven to 350°F (175°C). Grease a 9×5-inch loaf pan or line it with parchment paper for easy removal later.
  2. In a medium mixing bowl, whisk together 1 ½ cups of all-purpose flour, 1 teaspoon of baking powder, ½ teaspoon of baking soda, ½ teaspoon of salt, and 3 tablespoons of poppy seeds. This helps to evenly distribute the baking agents and ensures a uniform rise.
  3. In a large mixing bowl, cream together ½ cup of softened unsalted butter and 1 cup of granulated sugar using an electric mixer on medium speed for about 3-4 minutes, until the mixture is light and fluffy. Make sure to scrape down the sides of the bowl occasionally.
  4. Add 2 large eggs, 1 teaspoon of vanilla extract, and 1 teaspoon of lemon zest to the creamed butter and sugar, mixing until fully combined. You want a smooth consistency, so ensure there are no lumps of butter.
  5. In a small bowl, combine ½ cup of buttermilk and 2 tablespoons of fresh lemon juice. Alternately add the dry ingredients and buttermilk mixture to the butter mixture, starting and ending with the dry ingredients. Mix just until combined; do not overmix, as this can lead to a dense loaf.
  6. Pour the batter into the prepared loaf pan. Smooth the top with a spatula, ensuring it’s even. Bake in the preheated oven for 50-60 minutes, or until a toothpick inserted in the center comes out clean. The edges should be lightly golden brown, and the center should feel just set.
  7. Once baked, remove the loaf from the oven and allow it to cool in the pan for about 10 minutes. Then, transfer it to a wire rack to cool completely. Resist the urge to slice too soon, as it will be crumbly if it’s still warm.
  8. While the loaf is cooling, prepare the citrus icing. In a medium bowl, whisk together 1 cup of powdered sugar, 2 tablespoons of fresh lemon juice, and 1 tablespoon of orange juice until smooth. If the icing is too thick, you can add a little more juice to reach your desired consistency.
  9. Once the loaf is completely cool, drizzle the citrus icing over the top. If you like, sprinkle with an additional teaspoon of lemon zest for an extra pop of flavor and color.
  • Prep Time: 15 mins
  • Cook Time: 50-60 mins
  • Category: Dessert
  • Method: Baking
  • Cuisine: American

Nutrition

  • Serving Size: 1 slice
  • Calories: 200
  • Sugar: 15 g
  • Sodium: 150 mg
  • Fat: 8 g
  • Saturated Fat: 5 g
  • Unsaturated Fat: 3 g
  • Trans Fat: 0 g
  • Carbohydrates: 30 g
  • Fiber: 1 g
  • Protein: 3 g
  • Cholesterol: 40 mg

Keywords: Be careful not to overmix your batter; this is a common mistake that can lead to a dense loaf. Use room temperature ingredients for a smoother batter and even baking.

Did you make this recipe?

Share a photo and tag us — we can't wait to see what you've made!

  • Privacy Policy
  • Terms Of Service
  • Contact
  • About
  • GDPR

Copyright © 2025 Homesmad