• Skip to primary navigation
  • Skip to main content
  • Skip to primary sidebar
Homesmad

Homesmad

  • Home
  • Breakfast & Brunch
  • Appetizers & Snacks
  • Dinner
  • Dessert
  • About
  • Privacy Policy
  • Contact
Homesmad
  • Home
  • Breakfast & Brunch
  • Appetizers & Snacks
  • Dinner
  • Dessert
  • About
  • Privacy Policy
  • Contact

Honey Goat Cheese Grilled Cheese: Sweet & Savory Delight

November 19, 2025 by Lily author

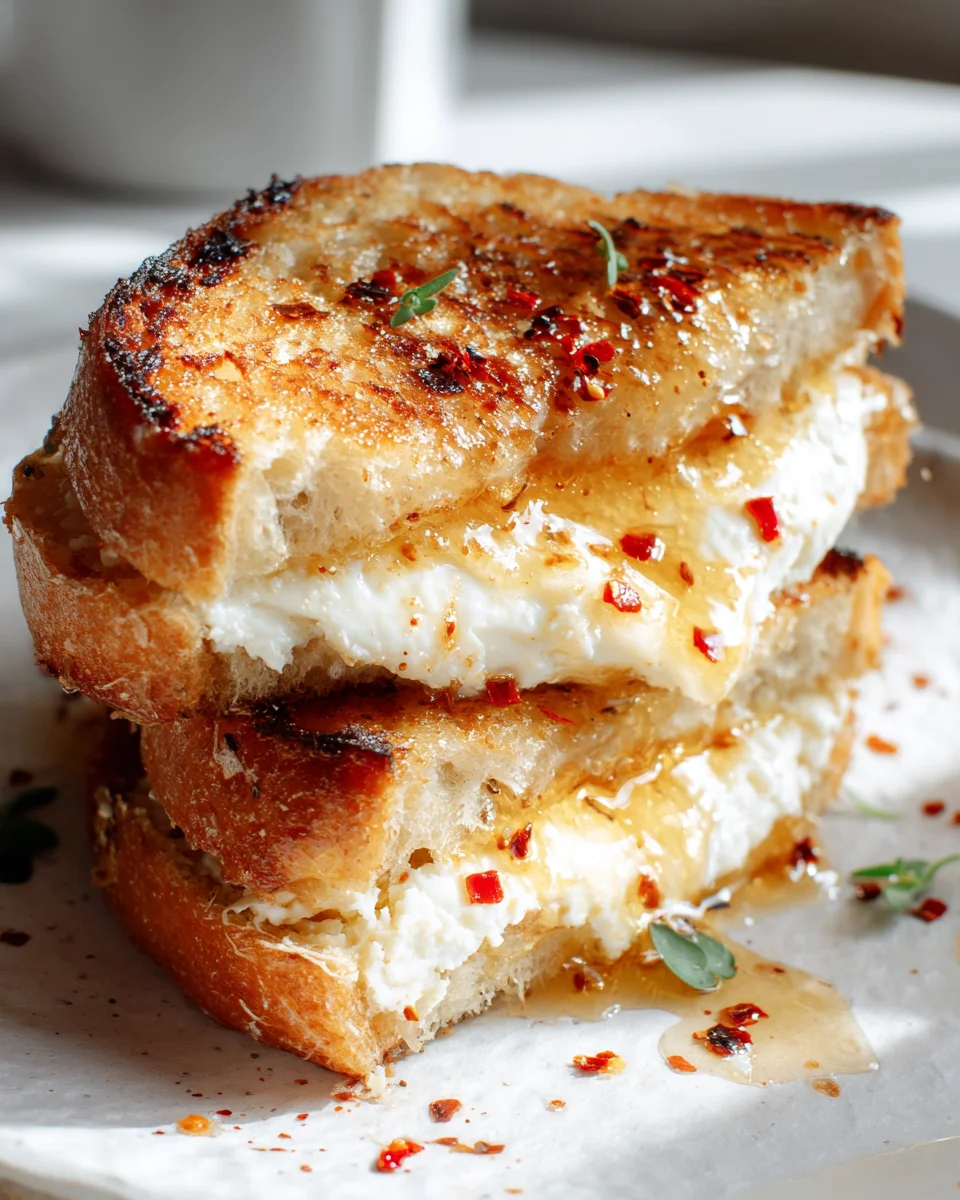
Goat Cheese Grilled Cheese With Honey—a name that promises an extraordinary culinary experience and delivers it with every single bite. Forget everything you thought you knew about the humble grilled cheese sandwich; we’re taking a beloved comfort food and elevating it to gourmet status, transforming it into something truly magnificent. While the classic grilled cheese has been a staple in kitchens worldwide for generations, a symbol of childhood comfort and simple satisfaction, its evolution has seen countless delicious interpretations. This particular rendition showcases how simple ingredients, when paired thoughtfully, can create a sophisticated yet incredibly approachable meal.

What makes this specific dish so utterly irresistible? It’s the harmonious dance of flavors and textures. The tangy, creamy goat cheese melts beautifully, contrasting perfectly with the crisp, buttery bread. Then, the golden drizzle of honey introduces a surprising sweetness that cuts through the richness, creating a complex flavor profile that is both comforting and incredibly exciting. Whether you’re looking for a quick, elegant lunch or a sophisticated twist on a classic dinner, mastering the Goat Cheese Grilled Cheese With Honey is an absolute game-changer in your kitchen repertoire. It’s a recipe that proves that sophisticated dining doesn’t always have to be complicated. With just a few high-quality ingredients, you can craft a sandwich that feels luxurious and deeply satisfying. Get ready to impress your taste buds and perhaps even a few guests with this deceptively simple yet profoundly flavorful creation.

Honey Goat Cheese Grilled Cheese: Sweet & Savory Delight this RECIPE

Ingredients:

Gathering your ingredients is the exciting first step to creating this incredible Goat Cheese Grilled Cheese With Honey. Quality really shines through here, so choose wisely!

  • Artisanal Bread: 8 slices. I highly recommend a sturdy, rustic bread like sourdough, ciabatta, or a good quality country white loaf. These breads have enough structure to hold up to the fillings and toast beautifully, developing a fantastic crispy crust. Avoid thinly sliced sandwich bread; it just won’t give you the same delightful experience.
  • Fresh Goat Cheese (Chèvre): 8 ounces (about 225 grams). Look for a fresh, creamy log of chèvre. Its tangy, bright flavor is the star of our show. Make sure it’s at room temperature for easier spreading.
  • Unsalted Butter: 4-6 tablespoons, softened. Unsalted butter gives you control over the overall saltiness of the dish, and softening it beforehand ensures it spreads easily and evenly across your bread without tearing it.
  • Honey: 4 tablespoons. A good quality, runny honey is essential. Wildflower, clover, or acacia honey all work wonderfully. The sweetness of the honey beautifully balances the tang of the goat cheese. Don’t skimp on quality here; a flavorful honey makes a significant difference.
  • Provolone Cheese (optional but recommended): 4 slices. While the goat cheese is our primary focus, a slice of provolone (or mozzarella, Gruyère, or even a mild white cheddar) adds an extra layer of meltiness and a subtle, complementary flavor that enhances the overall texture of your grilled cheese without overpowering the goat cheese.
  • Fresh Arugula: 1-2 cups. A handful of fresh, peppery arugula added at the end provides a wonderful textural contrast and a slight bitter note that cuts through the richness of the cheese and the sweetness of the honey.
  • Thinly Sliced Red Onion (optional): A few very thin slices. If you love a little pungent kick and crunch, a whisper-thin slice of red onion can be a delightful addition, providing another layer of flavor complexity.
  • Fresh Thyme or Rosemary (optional): A few sprigs, leaves finely chopped. A touch of fresh herbs can elevate your grilled cheese to a gourmet level, adding an aromatic depth that is truly special.
  • Black Pepper: Freshly ground, to taste. A few cracks of black pepper can enhance the savory notes and add a subtle warmth.

Preparing Your Workspace and Ingredients

Before we even think about cooking, let’s get everything organized. This is what we call “mise en place” in the culinary world, and it makes the entire cooking process smoother and more enjoyable. Trust me, having everything prepped and ready will make you feel like a seasoned chef!

  1. Softening the Butter: If your butter isn’t already soft, take it out of the refrigerator about 30-60 minutes before you plan to start cooking. You want it to be spreadable, not melted. If you’re in a hurry, you can carefully microwave it on a very low setting for 10-15 seconds, checking frequently, but be careful not to melt it completely. Alternatively, you can grate cold butter or pound it gently with a rolling pin while it’s still wrapped.
  2. Bringing Goat Cheese to Room Temperature: Similarly, take your log of fresh goat cheese out of the fridge. Room temperature goat cheese is much easier to spread evenly onto your bread without tearing it. It will also melt more uniformly and quickly once on the heat.
  3. Slicing Your Bread: If you’re using a loaf that needs to be sliced, aim for slices that are about 1/2 to 3/4 inch thick. Too thin, and they might fall apart; too thick, and your grilled cheese might take too long to heat through and melt properly. Consistency is key here for even cooking.
  4. Preparing Optional Additions: If you’re using provolone, have your slices ready. If you’re including red onion, slice it as thinly as humanly possible; a mandoline slicer works wonders here, but a sharp knife and a steady hand will do the trick. Wash and dry your arugula. If using fresh herbs, pluck the leaves from their stems and chop them finely. Having these ready means you won’t be scrambling while your beautiful grilled cheese is cooking.
  5. Setting Up Your Pan: Choose a good quality, heavy-bottomed skillet or griddle for cooking. Cast iron is absolutely ideal because it retains heat so well and provides an incredibly even, golden-brown crust. A non-stick pan will also work perfectly fine. Place it on your stovetop and be ready to turn on the heat when we start assembling.

Assembling Your Gourmet Goat Cheese Grilled Cheese Sandwiches

Now for the creative part! Assembling these sandwiches is where the magic begins. You’ll be building layers of flavor that will culminate in a truly spectacular bite.

  1. Butter the Bread: Lay out all 8 slices of bread on a clean work surface. Using an offset spatula, a butter knife, or even your fingers, generously spread the softened butter onto one side of each bread slice. We’re essentially buttering 4 “tops” and 4 “bottoms” that will become the outsides of our sandwiches. Don’t be shy with the butter; it’s what gives us that irresistible golden, crispy crust. Ensure the butter goes right to the edges for maximum deliciousness. This is crucial for achieving that perfect, even browning.
  2. Flip and Spread Goat Cheese: Carefully flip 4 of the buttered slices over so the unbuttered side is facing up. These will be the “bottoms” of your sandwiches. Divide the room-temperature goat cheese evenly among these four slices. Spread it gently and thoroughly from edge to edge. The goal is a uniform layer of creamy, tangy goat cheese. If it’s struggling to spread, you can gently warm your knife under hot water, dry it, and then use it to spread the cheese. This prevents tearing the bread.
  3. Layer Optional Cheeses (if using): If you’re using additional cheese like provolone, lay one slice on top of the goat cheese on each of the four bread slices. This extra layer of cheese will melt wonderfully and provide an additional savory dimension to our Goat Cheese Grilled Cheese With Honey.
  4. Add Your Sweetness: Now, drizzle about 1 tablespoon of honey over the goat cheese and provolone on each sandwich. The honey provides that signature sweet counterpoint to the goat cheese’s tang. You can be generous here, but try to keep it mostly centered to avoid too much oozing out during cooking (though a little ooze is part of the fun!).
  5. Introduce Herbs and Seasoning (optional): If you’re adding fresh thyme, rosemary, or red onion, sprinkle a pinch over the honey and cheese layers now. A light dusting of freshly ground black pepper can also add a delightful complexity.
  6. Top Your Sandwiches: Take the remaining 4 buttered bread slices (the ones with butter on one side, which will be the outside of the sandwich) and place them butter-side up on top of your assembled ingredients. Gently press down on each sandwich to lightly compress the fillings. This helps everything stick together and creates a more compact sandwich for grilling.

Grilling Your Goat Cheese Grilled Cheese to Perfection

This is where the magic truly happens! Grilling your Goat Cheese Grilled Cheese With Honey requires patience and a watchful eye to achieve that golden-brown crust and perfectly melted interior.

  1. Preheat Your Pan: Place your heavy-bottomed skillet or griddle over medium-low heat. This is a critical step! You want the pan to be heated evenly, but not scorching hot. Low and slow is the secret to a perfectly cooked grilled cheese – it allows the bread to toast slowly to a beautiful golden brown while giving the cheese ample time to melt into a gooey, irresistible consistency without burning the bread. Give it about 3-5 minutes to heat up properly. You shouldn’t see smoke.
  2. Place Sandwiches in the Pan: Once your pan is adequately preheated, carefully place the assembled sandwiches into the skillet, ensuring there’s enough space between them for even cooking. Don’t overcrowd the pan; you might need to cook them in batches.
  3. The First Grill: Cook the sandwiches for approximately 4-6 minutes on the first side. This time can vary depending on your stovetop and pan. What you’re looking for is a beautiful, deep golden-brown crust. Gently lift a corner of one sandwich with a spatula to check its progress. If it’s browning too quickly, reduce the heat. If it’s not browning enough after 4-5 minutes, slightly increase the heat. Resist the urge to press down too hard on the sandwiches with your spatula, as this can squeeze out the fillings. A gentle, even pressure is fine, but avoid squashing them.
  4. Flip and Continue Grilling: Once the first side is perfectly golden brown, carefully flip each sandwich over using a wide spatula. Cook for another 4-6 minutes on the second side, or until it matches the golden hue of the first side and the cheese inside is gloriously melted and gooey. You’ll be able to tell the cheese is melting because the sandwich will feel less rigid when you gently press on it, and you might even see a little bit of the honey and cheese gently bubbling or peeking out. The aroma filling your kitchen will be absolutely divine!
  5. Troubleshooting Tips for the Perfect Crust:
    • Too fast browning: If your bread is getting dark too quickly but the cheese isn’t melted, your heat is too high. Remove the sandwiches from the pan, reduce the heat, and let the pan cool slightly before returning them.
    • Not browning enough: If your bread is still pale after 5-6 minutes, your heat is too low. Increase it slightly and be patient.
    • Uneven browning: If you notice some spots are darker than others, your pan might have hot spots. Rotate the sandwiches periodically to encourage even browning.
  6. Check for Doneness: The ultimate sign of a perfect Goat Cheese Grilled Cheese With Honey is a uniformly golden-brown, crispy exterior and a completely melted, oozy interior. The goat cheese should be warm and soft, blending beautifully with the honey.

Finishing Touches and Serving Your Masterpiece

You’ve done the hard work, now it’s time to add those final touches and present your beautiful creation!

  1. Rest the Sandwiches: Once perfectly grilled, transfer the sandwiches from the pan to a cutting board. Let them rest for just 1-2 minutes before slicing. This brief resting period allows the cheese to set slightly and prevents all that delicious gooeyness from oozing out immediately when you cut into it, ensuring a cleaner, more enjoyable eating experience.
  2. Add Fresh Arugula: While the sandwiches are resting, gently separate your fresh arugula leaves. Once the sandwiches are on the cutting board, lift the top piece of bread off each sandwich. Neatly arrange a small handful of fresh arugula on top of the warm, melted goat cheese and honey. The residual heat from the sandwich will slightly wilt the arugula, releasing its peppery flavor. Carefully place the top slice of bread back on. This step adds freshness, color, and a delightful peppery bite that really cuts through the richness.
  3. Slice and Serve: Using a sharp serrated knife, carefully slice each sandwich in half, either diagonally (my preferred method – it just looks fancier and creates a better dipping angle!) or straight down the middle.
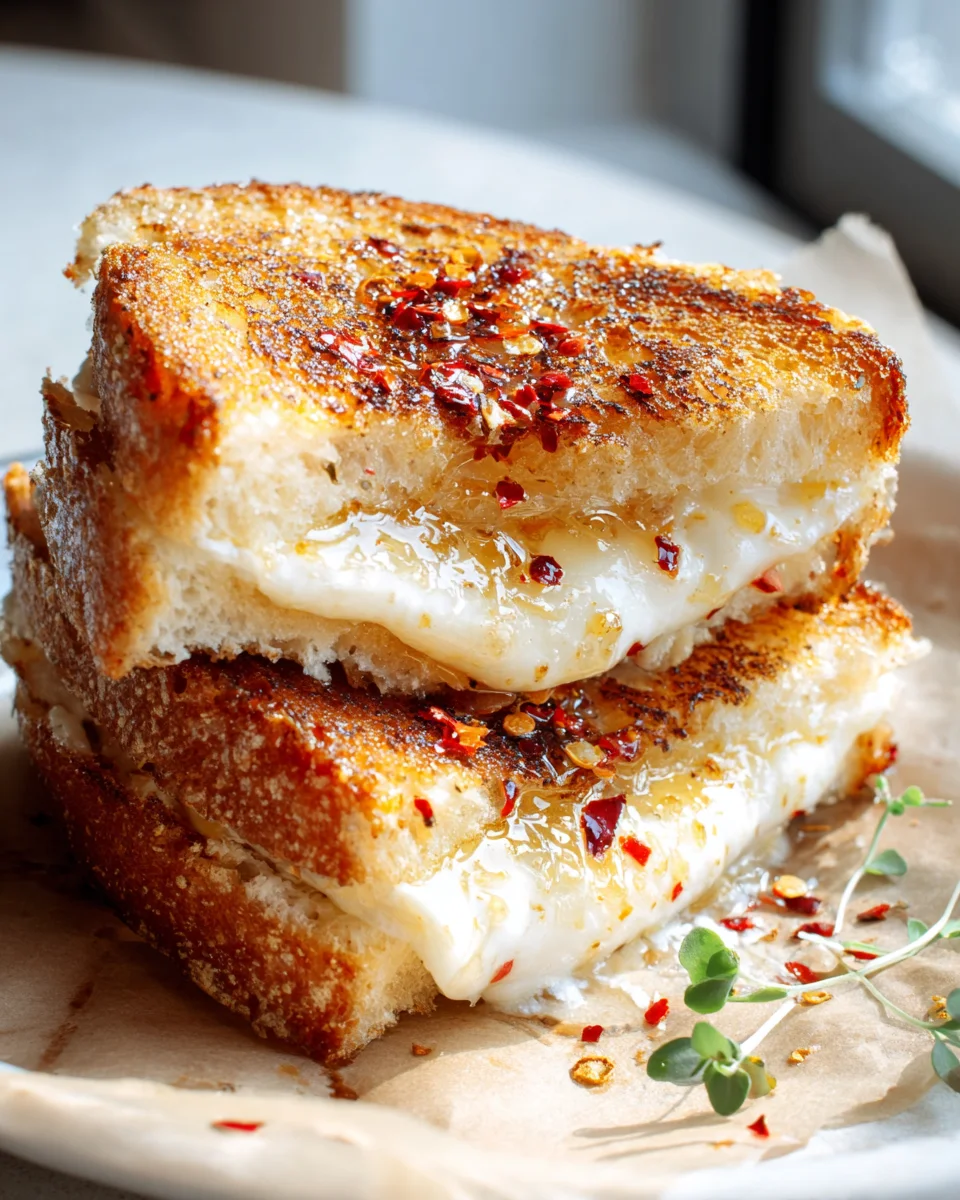
  4. Garnish and Enjoy: Arrange your magnificent Goat Cheese Grilled Cheese With Honey halves on individual plates. For an extra touch of elegance and flavor, you can drizzle a tiny bit more honey over the cut edge of the sandwich, allowing it to tantalize your taste buds even before the first bite. Serve immediately! This grilled cheese is best enjoyed warm, when the cheese is at its meltiest and the bread is at its crispiest.

Serving Suggestions:

This gourmet grilled cheese is substantial enough to be a meal on its own, but it also pairs wonderfully with a light side. Consider serving it with a simple side salad dressed with a vinaigrette to complement its richness, or a cup of your favorite tomato soup for a classic and comforting combination. A glass of crisp white wine, such as a Sauvignon Blanc, also makes a delightful pairing. Enjoy every single bite of this sweet, savory, and utterly irresistible creation!

Honey Goat Cheese Grilled Cheese: Sweet & Savory Delight

Conclusion:

And there you have it, my friends! We’ve reached the delicious culmination of our culinary journey. After exploring the delightful simplicity and gourmet potential of this particular creation, I genuinely believe this recipe is an absolute game-changer for anyone looking to elevate their everyday meals into something truly special. The magic lies in its perfect balance: the creamy, tangy goat cheese, the luxurious sweetness of honey, all encased within perfectly golden, buttery bread. It’s a symphony of flavors and textures that tantalizes the palate in a way few other sandwiches can. This isn’t just another quick bite; it’s a moment of pure, unadulterated comfort and sophistication, all rolled into one humble yet extraordinary package. I’m truly passionate about how incredible this dish is, and I can’t wait for you to experience that same joy.

What makes this creation a non-negotiable addition to your recipe repertoire isn’t just its incredible taste, but also its sheer versatility and ease of preparation. You don’t need to be a gourmet chef to whip up something this impressive. It transforms a simple grilled cheese from a childhood staple into an adult indulgence, a testament to how a few high-quality ingredients can create something truly spectacular. The delightful interplay between the sharp, earthy notes of the goat cheese and the floral, sticky sweetness of the honey provides a contrast that is both surprising and utterly harmonious. Each bite delivers that satisfying crunch from the toasted bread, followed by the warm, melting interior that just sings with flavor. It’s elegant enough for a casual brunch with friends, yet comforting enough for a cozy, quiet evening at home. Trust me when I say, once you’ve tried this, your standards for grilled cheese will be forever changed. The Goat Cheese Grilled Cheese With Honey is not just food; it’s an experience.

Now, let’s talk about how you can make this wonderful dish even more amazing with a few serving suggestions and variations. While it’s utterly divine on its own, pairing it can take your meal to new heights. For a truly classic and comforting combination, serve it alongside a steaming bowl of homemade tomato soup. The acidity of the soup cuts through the richness of the sandwich beautifully, creating a perfect autumnal or winter meal. Alternatively, for a lighter touch, a crisp arugula salad dressed with a simple lemon vinaigrette offers a refreshing counterpoint. Consider adding some thinly sliced apples or pears on the side; their natural sweetness and crunch complement the goat cheese and honey wonderfully. For those who enjoy a little extra oomph, a sprinkle of fresh thyme or rosemary added to the cheese before grilling introduces an aromatic complexity that is simply divine.

Thinking about variations? The possibilities are endless! For a savory twist, a thin slice of prosciutto or crispy bacon layered in can add a fantastic salty crunch. If you’re feeling adventurous, try swapping out a portion of the goat cheese for a mild, creamy brie, or even a touch of cream cheese for an extra smooth texture. Another delightful modification involves spreading a thin layer of fig jam or apricot preserves on one side of the bread instead of, or in addition to, the honey. This introduces a different kind of sweet-fruity complexity that is incredibly sophisticated. And don’t forget the bread itself – while a good sourdough is excellent, a brioche can offer an even richer, sweeter base, or a multigrain can add a lovely nutty texture. If you like a little heat, a tiny pinch of red pepper flakes can provide a subtle, intriguing kick without overwhelming the delicate flavors. These small tweaks can transform the sandwich into something uniquely yours, catering to whatever craving strikes.

So, my dear readers, I implore you: don’t just read about this recipe, make it! Seriously, clear your schedule, gather your ingredients, and give the Goat Cheese Grilled Cheese With Honey a try this week. It’s incredibly satisfying to create something so remarkably delicious with such little effort. I promise you won’t regret it. Once you’ve experienced the sheer delight of that first bite, I would absolutely love to hear from you! Please come back and share your experiences, your favorite variations, or even just a quick note about how much you enjoyed it. Did you serve it with soup? Did you add a secret ingredient? Your feedback and culinary adventures inspire me, and I cherish hearing about how these recipes come to life in your kitchens. Get cooking, enjoy every mouth-watering moment, and let’s celebrate the simple, yet profound, joy of delicious food together!


Honey Goat Cheese Grilled Cheese: Sweet & Savory Delight

Goat Cheese Grilled Cheese With Honey—an extraordinary culinary experience. This beloved comfort food is elevated to gourmet status, transforming it into something truly magnificent with harmonious flavors and textures.

Prep Time
40 Minutes
Cook Time
10 Minutes
Total Time
55 Minutes
Servings
1 serving

Ingredients


Instructions


Important Information

Nutrition Facts (Per Serving)

It is important to consider this information as approximate and not to use it as definitive health advice.

Allergy Information

Please check ingredients for potential allergens and consult a health professional if in doubt.

« Previous Post
Best Red Velvet Cookie Bars Recipe - Quick, Easy, Decadent
Next Post »
Delicious Fall Pasta Salad: Easy & Flavorful Recipe!

If you enjoyed this…

Lemon Garlic Shrimp Orzo

Lemon Garlic Shrimp Orzo

Cajun Corn & Beef Sausage Skillet: Quick & Zesty Meal

Delicious Turkey Sage Stuffed Pumpkins for Fall Feasts

Primary Sidebar

Browse by Diet

BreakfastDinnerLunchDessertAppetizer

Sweet Peach Yogurt Parfait Delight

One of my fondest memories is from a lazy summer afternoon spent at my grandmother’s house. The sun filtered through the kitchen window, casting a warm glow over the table where she would create her culinary magic. It was during one of those blissful moments that I first tasted her Peach Yogurt Parfait with Honey and Granola. The sweet aroma of ripe peaches mingling with creamy yogurt and the crunch of granola was nothing short of heavenly. It felt like summer captured in a bowl, and I still remember the joy of diving in with a spoon, each layer revealing a new burst of flavor.

When I think about that parfait, I can almost hear the gentle hum of the bees outside, reminding me of the floral notes that honey brings to every bite. The vibrant yellows and soft oranges of the peaches contrast beautifully with the creamy white yogurt and the golden crunch of granola. It’s a dish that not only looks delightful but also tastes like a celebration of fresh, wholesome ingredients.

What makes my version of this Peach Yogurt Parfait special is the careful balance of flavors and textures. I use ripe, juicy peaches, drizzled with locally sourced honey, and a homemade granola that’s bursting with nuts and seeds for an extra crunch. It’s a simple dish, but every layer is crafted with love and attention.

Let me show you exactly how to make this delightful parfait, so you can bring a bit of that summer magic into your kitchen!

Sweet Peach Yogurt Parfait Delight

Why You’ll Love This Recipe

  • Delightfully creamy texture from the Greek yogurt, paired with the juicy sweetness of fresh peaches.
  • Ready in under 20 minutes, making it a quick and satisfying breakfast or snack option.
  • Budget-friendly, using common ingredients that you may already have in your pantry.
  • Customizable with your favorite granola and nuts, allowing you to tailor each parfait to your taste.
  • Perfectly balanced flavors with the bright acidity of lemon juice and the sweetness of honey enhancing the peaches.

Ingredients

  • For the Parfait:
  • 2 cups plain Greek yogurt (or vanilla yogurt for a sweeter option)
  • 2 large ripe peaches, diced (about 2 cups)
  • 1 tablespoon fresh lemon juice (to prevent browning of peaches)
  • 2 tablespoons honey (plus more for drizzling)
  • 1 teaspoon vanilla extract (optional for extra flavor)
  • For the Granola:
  • 1 cup granola (store-bought or homemade; see notes for a simple granola recipe)
  • 1/4 cup sliced almonds (optional for added crunch)
  • 1/4 cup shredded coconut (optional for added flavor)

Let’s dive into some key ingredients that make this Peach Yogurt Parfait so delightful! First, the Greek yogurt is not only creamy but also packed with protein, making it a satisfying option for breakfast or a snack. If you’re looking for a sweeter option, you can easily substitute it with vanilla yogurt, though it may alter the overall flavor balance. Next, the ripe peaches are the star of the show; their natural sweetness shines through, so I recommend choosing peaches that yield slightly to pressure, indicating they’re perfectly ripe. If peaches aren’t in season, feel free to use nectarines or even frozen peaches—just thaw them before use. Finally, honey adds a lovely floral sweetness that ties everything together. If you prefer, maple syrup can serve as a delicious substitute.

Step-by-Step Instructions

  1. Start by preparing the peaches. Wash them thoroughly, then slice and dice them into bite-sized pieces. In a medium bowl, toss the diced peaches with 1 tablespoon of fresh lemon juice to prevent browning. Set aside for about 5 minutes while the lemon juice works its magic.
  2. In a separate bowl, combine the Greek yogurt, 2 tablespoons of honey, and 1 teaspoon of vanilla extract if using. Stir the mixture until smooth and thoroughly blended. This should take about a minute. Avoid overmixing to maintain the creaminess of the yogurt.
  3. Now it’s time to layer your parfait. Grab a clear glass or bowl to showcase your beautiful creation. Start with a generous spoonful of the yogurt mixture at the bottom—about 1/4 cup will do. Use a spoon to spread it evenly.
  4. Add a layer of the diced peaches over the yogurt, ensuring they cover the yogurt completely. You might want to use about half of what you have prepared—roughly 1 cup. This layer should be visually appealing, so arrange the peaches neatly.
  5. Sprinkle 1/4 cup of granola over the peaches. This adds a delightful crunch. Make sure to distribute it evenly to ensure every bite has that satisfying texture. Avoid packing it down too tightly, as you want it to maintain its crunch.
  6. Repeat the layers: spoon in another 1/4 cup of yogurt, followed by another cup of peaches, and another sprinkle of granola. You should have at least two layers, but feel free to add more depending on your glass size.
  7. Finish off your parfait with a drizzle of honey on top for added sweetness and a touch of elegance. If you’re using sliced almonds or shredded coconut, sprinkle them on top now. It adds a lovely visual contrast and extra flavor.
  8. Serve immediately or refrigerate for up to 30 minutes before serving to allow the flavors to meld together. However, I recommend enjoying it fresh to maintain the granola’s crunch.

Pro Tips for the Best Peach Yogurt Parfait With Honey And Granola

  • Make sure to choose ripe peaches for the best flavor and texture. A common mistake is using unripe fruit, which can lead to a less enjoyable parfait. Look for peaches that are fragrant and slightly soft to the touch.
  • Use a clear glass to assemble your parfait; this not only makes for a beautiful presentation but also allows you to see the colorful layers, which adds to the enjoyment of eating it.
  • For an even creamier texture, consider whipping the Greek yogurt with a hand mixer for a couple of minutes before layering. This small adjustment makes a huge difference in mouthfeel.
  • Be mindful of the granola-to-yogurt ratio. Too much granola can overwhelm the parfait, while too little can make it feel too creamy. Aim for about 1/4 cup of granola per layer for the perfect balance.
  • If you’re making this for a gathering, consider preparing the yogurt and peaches ahead of time and layering them just before serving. This ensures the granola stays crunchy!

Variations & Serving Ideas

There are so many ways to get creative with your Peach Yogurt Parfait! For a tropical twist, swap out the peaches for mangoes or pineapples and top with coconut flakes. If you prefer a berry flavor, mix in some blueberries or strawberries with the peaches for added color and taste. For a nutty version, incorporate chopped walnuts or pecans instead of almonds.

As for serving ideas, this parfait pairs beautifully with a side of scrambled eggs for a hearty breakfast or fresh fruit salad for a light lunch. You might also enjoy it alongside whole grain toast with almond butter for an energizing snack. The contrast of flavors and textures will elevate your meal experience!

Storage, Make-Ahead & Reheating

The Peach Yogurt Parfait is best enjoyed fresh, but you can prepare some components ahead of time. Store the layered parfait in an airtight container in the refrigerator for up to 24 hours. However, be cautious; the granola may lose its crunch if stored too long. You can freeze the yogurt and peach mixture for up to 2 months; just remember to thaw it in the refrigerator overnight before serving.

If you plan to enjoy this dish the next day, it can taste even better as the flavors meld together. Just remember to add the granola right before serving to keep its delightful crunch!

Frequently Asked Questions

Can I make Peach Yogurt Parfait With Honey And Granola ahead of time?

Yes — in fact, it tastes even better the next day as the flavors meld. However, I recommend waiting to add the granola until just before serving to maintain its crunch.

What can I substitute for Greek yogurt?

If you prefer a lighter option, you can substitute Greek yogurt with regular yogurt or a dairy-free alternative like coconut yogurt. Just remember that this may alter the creaminess and flavor profile slightly.

Can I use frozen peaches for this parfait?

Absolutely! Just make sure to thaw the frozen peaches before using them. They will still add great flavor, though the texture may be slightly softer than fresh peaches.

How do I make the parfait vegan?

To make a vegan version, substitute the Greek yogurt with a plant-based yogurt alternative, and replace honey with maple syrup or agave nectar. This keeps the parfait sweet while adhering to a vegan diet.

What other fruits can I use in this recipe?

You can mix and match fruits based on your preference. Try using strawberries, blueberries, raspberries, or even bananas. Just make sure to adjust the lemon juice as needed to prevent browning.

Sweet Peach Yogurt Parfait Delight

Final Thoughts

The Peach Yogurt Parfait with Honey and Granola is a delightful blend of creamy yogurt, sweet peaches, and crunchy granola that creates a satisfying and nourishing treat. Each layer bursts with flavor, making it a perfect choice for breakfast or a light dessert.

This is the kind of recipe I come back to again and again, especially when I want something refreshing and wholesome to start my day. The harmony of sweet and tart flavors, combined with the delightful crunch, never fails to lift my spirits!

I encourage you to give this parfait a try and indulge in its comforting goodness. Feel free to share your results or even add your own twist—perhaps a sprinkle of cinnamon or a handful of nuts. Enjoy creating your perfect parfait!

Print
clock clock iconcutlery cutlery iconflag flag iconfolder folder iconinstagram instagram iconpinterest pinterest iconfacebook facebook iconprint print iconsquares squares iconheart heart iconheart solid heart solid icon

Peach Yogurt Parfait


  • Author: Lily author
  • Total Time: 15 minutes
  • Yield: 4 servings 1x
Pin Recipe
Print Recipe

Description

This Peach Yogurt Parfait combines creamy Greek yogurt, juicy peaches, and crunchy granola for a delightful treat. It’s a perfect breakfast or snack that captures the essence of summer in every bite.


Ingredients

Scale
  • For the Parfait:
  • 2 cups plain Greek yogurt (or vanilla yogurt for a sweeter option)
  • 2 large ripe peaches, diced (about 2 cups)
  • 1 tablespoon fresh lemon juice (to prevent browning of peaches)
  • 2 tablespoons honey (plus more for drizzling)
  • 1 teaspoon vanilla extract (optional for extra flavor)
  • For the Granola:
  • 1 cup granola (store-bought or homemade; see notes for a simple granola recipe)
  • 1/4 cup sliced almonds (optional for added crunch)
  • 1/4 cup shredded coconut (optional for added flavor)

Instructions

  1. Start by preparing the peaches. Wash them thoroughly, then slice and dice them into bite-sized pieces. In a medium bowl, toss the diced peaches with 1 tablespoon of fresh lemon juice to prevent browning. Set aside for about 5 minutes while the lemon juice works its magic.
  2. In a separate bowl, combine the Greek yogurt, 2 tablespoons of honey, and 1 teaspoon of vanilla extract if using. Stir the mixture until smooth and thoroughly blended. This should take about a minute. Avoid overmixing to maintain the creaminess of the yogurt.
  3. Now it’s time to layer your parfait. Grab a clear glass or bowl to showcase your beautiful creation. Start with a generous spoonful of the yogurt mixture at the bottom—about 1/4 cup will do. Use a spoon to spread it evenly.
  4. Add a layer of the diced peaches over the yogurt, ensuring they cover the yogurt completely. You might want to use about half of what you have prepared—roughly 1 cup. This layer should be visually appealing, so arrange the peaches neatly.
  5. Sprinkle 1/4 cup of granola over the peaches. This adds a delightful crunch. Make sure to distribute it evenly to ensure every bite has that satisfying texture. Avoid packing it down too tightly, as you want it to maintain its crunch.
  6. Repeat the layers: spoon in another 1/4 cup of yogurt, followed by another cup of peaches, and another sprinkle of granola. You should have at least two layers, but feel free to add more depending on your glass size.
  7. Finish off your parfait with a drizzle of honey on top for added sweetness and a touch of elegance. If you’re using sliced almonds or shredded coconut, sprinkle them on top now. It adds a lovely visual contrast and extra flavor.
  8. Serve immediately or refrigerate for up to 30 minutes before serving to allow the flavors to meld together. However, I recommend enjoying it fresh to maintain the granola’s crunch.
  • Prep Time: 15 mins
  • Cook Time: 0 mins
  • Category: Breakfast
  • Method: No-cook
  • Cuisine: American

Nutrition

  • Serving Size: 1 parfait
  • Calories: 250
  • Sugar: 20 g
  • Sodium: 50 mg
  • Fat: 5 g
  • Saturated Fat: 2 g
  • Unsaturated Fat: 3 g
  • Trans Fat: 0 g
  • Carbohydrates: 40 g
  • Fiber: 3 g
  • Protein: 10 g
  • Cholesterol: 10 mg

Keywords: Choose ripe peaches for the best flavor and texture. Use a clear glass for a beautiful presentation. For creaminess, consider whipping the yogurt before layering. Be mindful of the granola-to-yogurt ratio. Prepare yogurt and peaches ahead of time for gatherings, layering just before serving.

Did you make this recipe?

Share a photo and tag us — we can't wait to see what you've made!

Sun-Kissed Frozen Orange Cream Slush

As a child, summer days felt like they lasted forever. I remember the sticky heat wrapping around me as I played outside, my laughter mingling with the sounds of the neighborhood. But nothing could cool me down quite like the moment I’d spot my grandmother, laboring over her blender, whipping up her famous Frozen Orange Creamsicle Slush. That vibrant orange treat, with its frosty texture and sweet citrus aroma, was like a burst of sunshine in a cup. Just one sip, and I could feel the coolness wash over me, sparking pure joy.

This Frozen Orange Creamsicle Slush has a way of making you feel like a kid again. Its creamy, dreamy consistency is a delightful balance of bright orange and soft vanilla, inviting you to dive right in. The refreshing tang of orange dances on your tongue, while the smooth creaminess envelops you in a comforting embrace. It’s a nostalgic treat that’s perfect for hot summer afternoons or anytime you need a little pick-me-up.

What makes my version of this slush stand out is the addition of a hint of vanilla bean, which elevates the flavor and adds an extra layer of richness. Plus, it’s super easy to whip up with just a few simple ingredients that you probably already have on hand! So, if you’re ready to relive those sun-soaked memories, let me show you exactly how to make it.

Sun-Kissed Frozen Orange Cream Slush

Why You’ll Love This Recipe

  • Each slush is a perfect blend of creamy vanilla and zesty orange, creating a nostalgic flavor reminiscent of summer days.
  • This refreshing treat is ready in under 15 minutes, making it an ideal quick dessert for unexpected guests or hot afternoons.
  • With just 8 simple ingredients, it’s budget-friendly, ensuring you don’t have to break the bank to enjoy a delicious slush.
  • The slush has a perfectly smooth texture, thanks to the combination of ice and ice cream, providing a delightful contrast to the bright citrus flavors.
  • It’s highly customizable; you can easily adjust the sweetness and add fresh herbs for a unique twist that suits your taste.

Ingredients

  • 2 cups orange juice (freshly squeezed or store-bought)
  • 1 cup vanilla ice cream
  • 1 cup crushed ice
  • 1/2 cup milk (whole or 2%)
  • 1/4 cup granulated sugar (adjust based on sweetness preference)
  • 1 teaspoon vanilla extract
  • Zest of 1 orange (for added flavor)
  • Fresh orange slices and mint leaves (for garnish)

The star of this Frozen Orange Creamsicle Slush is the orange juice, which provides the vibrant, citrusy base. Freshly squeezed juice will yield the brightest flavor, but store-bought options can be just as convenient. If you’re opting for store-bought, choose 100% pure juice with no added sugars for the best results. Another essential ingredient is the vanilla ice cream; it adds creaminess and sweetness. You can substitute it with dairy-free ice cream if you’re looking for a vegan option. Whole or 2% milk complements the ice cream, creating a smooth blend. If you want a lower-calorie version, almond or oat milk can be good alternatives.

Lastly, the granulated sugar can be adjusted based on your sweetness preference. If you prefer a more natural sweetener, consider using honey or agave syrup. The orange zest enhances the flavor profile, providing an aromatic pop that brings the whole slush together. Don’t skip it! It adds an extra layer of brightness that makes this slush truly special.

Step-by-Step Instructions

  1. Start by preparing your ingredients. Gather 2 cups of orange juice, 1 cup of vanilla ice cream, and 1 cup of crushed ice. Make sure the ice is finely crushed, as larger chunks can make blending difficult.
  2. In a blender, combine the orange juice, vanilla ice cream, crushed ice, and 1/2 cup of milk. Add 1/4 cup of granulated sugar and 1 teaspoon of vanilla extract. If you like a sweeter slush, consider adding a bit more sugar at this stage.
  3. Add the zest of 1 orange to the blender. This step is crucial for enhancing the citrus flavor of your slush. Make sure not to include the bitter white pith—only the flavorful zest.
  4. Blend the mixture on medium-high speed for about 30-45 seconds. Stop once the ingredients are fully combined and the slush has a smooth, even consistency. If you notice large chunks of ice, blend for an additional 10-15 seconds. Avoid over-blending, as this can make the slush too liquidy.
  5. Once blended, taste the slush. If it needs more sweetness, add a little more sugar and blend for a few more seconds. If it’s too thick, you can add a splash of milk to reach your desired consistency.
  6. Pour the slush into glasses. This recipe typically serves 4, but you can easily double it for larger gatherings. Use a spoon to help guide the slush into the glasses if needed.
  7. Garnish each serving with fresh orange slices and mint leaves. The mint not only adds a pop of color but also a refreshing aroma that complements the citrus flavors beautifully.
  8. Serve immediately and enjoy! If you’ve made extra, you can refrigerate it for a short time, but it’s best enjoyed fresh.

Pro Tips for the Best Frozen Orange Creamsicle Slush

  • Don’t skip the orange zest! It’s a game-changer for flavor. Always zest before juicing to make it easier.
  • Use a high-powered blender for the best texture. A standard blender may struggle with ice, leading to uneven consistency. If you have a food processor, that can work too, but ensure the ice is finely crushed.
  • Adjust the ice-to-liquid ratio carefully. If your slush is too thick, it won’t blend well. Start with less ice and add more until you reach your preferred texture.
  • Be cautious with the sugar! Always start with the lower amount, as you can easily add more, but it’s hard to fix an overly sweet slush.
  • For a fun twist, consider adding a splash of coconut milk or a handful of fresh fruit like strawberries or pineapple. This not only enhances the flavor but also adds a beautiful color contrast.

Variations & Serving Ideas

There are countless ways to put a spin on your Frozen Orange Creamsicle Slush. Consider making a tropical version by adding in some pineapple juice or coconut milk for a delightful tropical twist. If you’re feeling adventurous, try incorporating a handful of frozen mango or peach slices for added sweetness. For a lighter version, swap out the vanilla ice cream for Greek yogurt for a creamy yet tangy alternative.

As for serving ideas, this refreshing slush pairs wonderfully with light summer dishes like grilled chicken skewers, fish tacos, or a simple salad topped with citrus vinaigrette. The bright, zesty flavors of the slush complement these dishes perfectly, making them an ideal pairing for a sunny day.

Storage, Make-Ahead & Reheating

This Frozen Orange Creamsicle Slush is best enjoyed fresh, but if you have leftovers, you can store them in an airtight container in the fridge for up to 2 days. Just keep in mind that the slush may lose some of its texture over time as the ice melts. It doesn’t freeze well, as the ice will turn into a solid block. If you must freeze it, blend again after thawing to restore the slushy consistency. This treat is best the day you make it, as the flavors meld together beautifully overnight, enhancing its deliciousness.

Frequently Asked Questions

Can I make Frozen Orange Creamsicle Slush ahead of time?

Yes — in fact, it tastes even better the next day as the flavors meld. However, it’s best to enjoy it fresh, as the texture can change if stored for too long. If you need to prepare it ahead, keep it in the fridge and re-blend before serving.

What kind of orange juice should I use?

For the best flavor, use freshly squeezed orange juice. However, if you’re short on time, opt for 100% pure store-bought juice without added sugars. This will ensure that your slush remains flavorful and refreshing.

Can I substitute the vanilla ice cream?

Absolutely! If you’re looking for a dairy-free option, coconut milk ice cream or a non-dairy vanilla ice cream can work wonderfully. They will still provide the creamy texture and sweetness you desire.

How can I adjust the sweetness of my slush?

You can easily adjust the sweetness by modifying the amount of sugar added. Start with 1/4 cup and taste the mixture before blending. If you prefer it sweeter, add more sugar gradually until it reaches your desired level.

What should I do if my slush is too thick?

If your slush is too thick, simply add a splash of milk or orange juice and blend again. This will help achieve a more drinkable consistency while maintaining the slushy texture. Adjust gradually to reach your preferred thickness.

Sun-Kissed Frozen Orange Cream Slush

Final Thoughts

The Frozen Orange Creamsicle Slush is a delightful blend of refreshing citrus and creamy goodness, making it a perfect treat for warm days or any time you crave a taste of nostalgia. The way the bright orange flavor dances with the creamy texture truly elevates this slush, transforming it into a satisfying escape from the everyday.

This is the kind of recipe I come back to again and again, especially when I’m looking to cool down or impress guests at a summer gathering. It’s simple to make and always brings smiles all around! I encourage you to try this recipe for yourself—don’t hesitate to share your results or even put your own spin on it. Happy slushing!

Print
clock clock iconcutlery cutlery iconflag flag iconfolder folder iconinstagram instagram iconpinterest pinterest iconfacebook facebook iconprint print iconsquares squares iconheart heart iconheart solid heart solid icon

Frozen Orange Creamsicle Slush


  • Author: Lily author
  • Total Time: 15 minutes
  • Yield: 4 servings 1x
Pin Recipe
Print Recipe

Description

This Frozen Orange Creamsicle Slush is a refreshing treat that combines creamy vanilla and zesty orange flavors. Perfect for hot summer days, it brings back nostalgic memories with every sip.


Ingredients

Scale
  • 2 cups orange juice (freshly squeezed or store-bought)
  • 1 cup vanilla ice cream
  • 1 cup crushed ice
  • 1/2 cup milk (whole or 2%)
  • 1/4 cup granulated sugar (adjust based on sweetness preference)
  • 1 teaspoon vanilla extract
  • Zest of 1 orange (for added flavor)
  • Fresh orange slices and mint leaves (for garnish)

Instructions

  1. Start by preparing your ingredients. Gather 2 cups of orange juice, 1 cup of vanilla ice cream, and 1 cup of crushed ice. Make sure the ice is finely crushed, as larger chunks can make blending difficult.
  2. In a blender, combine the orange juice, vanilla ice cream, crushed ice, and 1/2 cup of milk. Add 1/4 cup of granulated sugar and 1 teaspoon of vanilla extract. If you like a sweeter slush, consider adding a bit more sugar at this stage.
  3. Add the zest of 1 orange to the blender. This step is crucial for enhancing the citrus flavor of your slush. Make sure not to include the bitter white pith—only the flavorful zest.
  4. Blend the mixture on medium-high speed for about 30-45 seconds. Stop once the ingredients are fully combined and the slush has a smooth, even consistency. If you notice large chunks of ice, blend for an additional 10-15 seconds. Avoid over-blending, as this can make the slush too liquidy.
  5. Once blended, taste the slush. If it needs more sweetness, add a little more sugar and blend for a few more seconds. If it’s too thick, you can add a splash of milk to reach your desired consistency.
  6. Pour the slush into glasses. This recipe typically serves 4, but you can easily double it for larger gatherings. Use a spoon to help guide the slush into the glasses if needed.
  7. Garnish each serving with fresh orange slices and mint leaves. The mint not only adds a pop of color but also a refreshing aroma that complements the citrus flavors beautifully.
  8. Serve immediately and enjoy! If you’ve made extra, you can refrigerate it for a short time, but it's best enjoyed fresh.
  • Prep Time: 15 min
  • Cook Time: 0 min
  • Category: Dessert
  • Method: Blending
  • Cuisine: American

Nutrition

  • Serving Size: 1 serving
  • Calories: 200
  • Sugar: 30 g
  • Sodium: 50 mg
  • Fat: 5 g
  • Saturated Fat: 3 g
  • Unsaturated Fat: 2 g
  • Trans Fat: 0 g
  • Carbohydrates: 40 g
  • Fiber: 1 g
  • Protein: 2 g
  • Cholesterol: 20 mg

Keywords: Don't skip the orange zest! It's a game-changer for flavor. Always zest before juicing to make it easier.

Did you make this recipe?

Share a photo and tag us — we can't wait to see what you've made!

Zesty Lemon Poppy Seed Delight

One rainy afternoon, I found myself in my grandmother’s cozy kitchen, the kind that always smelled like warmth and love. She was whipping up her famous Lemon Poppy Seed Loaf, a recipe that had been passed down through generations. As the batter came together, the zesty aroma of fresh lemons filled the air, mingling perfectly with the nutty fragrance of poppy seeds. I can still picture her, apron-clad, as she expertly drizzled a vibrant citrus icing over the loaf, creating a glossy, sun-kissed finish that beckoned us to dive in. It was a moment that sparked my own passion for baking, and this recipe has become a cherished staple in my home ever since.

When you take a bite of this Lemon Poppy Seed Loaf, it’s like a burst of sunshine on your palate. The loaf is beautifully golden, with a tender crumb that melts in your mouth. Each slice is speckled with tiny poppy seeds, adding a delightful crunch that contrasts beautifully with the tangy sweetness of the lemon. And that citrus icing? It’s the finishing touch that elevates this loaf from ordinary to extraordinary, with its bright, zesty flavor dancing on your taste buds.

This recipe stands out because it embraces simplicity while delivering on flavor. I’ve added a hint of vanilla to the batter, enhancing the overall taste and making it even more indulgent. Trust me, once you make this Lemon Poppy Seed Loaf With Citrus Icing, it’ll become a go-to in your baking repertoire.

So, let me show you exactly how to make it!

Zesty Lemon Poppy Seed Delight

Why You’ll Love This Recipe

  • Moist and tender crumb that melts in your mouth, thanks to the perfect balance of butter and buttermilk.
  • Bright, zesty lemon flavor paired with crunchy poppy seeds, creating a delightful texture and taste experience.
  • Easy to whip up in just about an hour, perfect for last-minute gatherings or a cozy afternoon treat.
  • Budget-friendly with everyday ingredients, making it an accessible option for all home bakers.
  • The citrus icing adds a sweet tang that elevates the loaf, turning a simple recipe into a showstopper!

Ingredients

  • 1 ½ cups (190g) all-purpose flour
  • 1 teaspoon baking powder
  • ½ teaspoon baking soda
  • ½ teaspoon salt
  • 3 tablespoons poppy seeds
  • ½ cup (115g) unsalted butter, softened to room temperature
  • 1 cup (200g) granulated sugar
  • 2 large eggs
  • 1 teaspoon vanilla extract
  • 1 teaspoon lemon zest (from about 1 medium lemon)
  • ½ cup (120ml) buttermilk
  • 2 tablespoons fresh lemon juice

For the Citrus Icing:

  • 1 cup (120g) powdered sugar
  • 2 tablespoons fresh lemon juice
  • 1 tablespoon orange juice
  • 1 teaspoon lemon zest (for garnish, optional)

Let’s dive into the key ingredients that make this Lemon Poppy Seed Loaf so special. The all-purpose flour provides the structure and base for the loaf, while the baking powder and baking soda ensure it rises perfectly, giving the loaf a light texture. For a gluten-free variation, you could substitute the flour with a gluten-free all-purpose blend. Poppy seeds not only add a delightful crunch but also contribute to the unique flavor profile that pairs well with the citrus notes.

Unsalted butter is crucial for achieving the buttery richness that makes this loaf so moist. If you’re looking for a dairy-free option, coconut oil or a vegan butter can be used instead. The buttermilk is another essential component, providing acidity that activates the baking soda for a fluffy texture. If you don’t have buttermilk on hand, you can easily make a substitute by mixing ½ cup of milk with 1 tablespoon of vinegar or lemon juice and letting it sit for about 5 minutes.

Step-by-Step Instructions

  1. Preheat your oven to 350°F (175°C). Grease a 9×5-inch loaf pan or line it with parchment paper for easy removal later.
  2. In a medium mixing bowl, whisk together 1 ½ cups of all-purpose flour, 1 teaspoon of baking powder, ½ teaspoon of baking soda, ½ teaspoon of salt, and 3 tablespoons of poppy seeds. This helps to evenly distribute the baking agents and ensures a uniform rise.
  3. In a large mixing bowl, cream together ½ cup of softened unsalted butter and 1 cup of granulated sugar using an electric mixer on medium speed for about 3-4 minutes, until the mixture is light and fluffy. Make sure to scrape down the sides of the bowl occasionally.
  4. Add 2 large eggs, 1 teaspoon of vanilla extract, and 1 teaspoon of lemon zest to the creamed butter and sugar, mixing until fully combined. You want a smooth consistency, so ensure there are no lumps of butter.
  5. In a small bowl, combine ½ cup of buttermilk and 2 tablespoons of fresh lemon juice. Alternately add the dry ingredients and buttermilk mixture to the butter mixture, starting and ending with the dry ingredients. Mix just until combined; do not overmix, as this can lead to a dense loaf.
  6. Pour the batter into the prepared loaf pan. Smooth the top with a spatula, ensuring it’s even. Bake in the preheated oven for 50-60 minutes, or until a toothpick inserted in the center comes out clean. The edges should be lightly golden brown, and the center should feel just set.
  7. Once baked, remove the loaf from the oven and allow it to cool in the pan for about 10 minutes. Then, transfer it to a wire rack to cool completely. Resist the urge to slice too soon, as it will be crumbly if it’s still warm.
  8. While the loaf is cooling, prepare the citrus icing. In a medium bowl, whisk together 1 cup of powdered sugar, 2 tablespoons of fresh lemon juice, and 1 tablespoon of orange juice until smooth. If the icing is too thick, you can add a little more juice to reach your desired consistency.
  9. Once the loaf is completely cool, drizzle the citrus icing over the top. If you like, sprinkle with an additional teaspoon of lemon zest for an extra pop of flavor and color.

Pro Tips for the Best Lemon Poppy Seed Loaf With Citrus Icing

  • Be careful not to overmix your batter; this is a common mistake that can lead to a dense loaf. Mix just until the dry ingredients are incorporated for a light and fluffy texture.
  • Use room temperature ingredients, especially the butter and eggs. This helps to create a smoother batter and ensures even baking. Take your eggs out of the fridge about 30 minutes before you start.
  • For a more pronounced lemon flavor, consider adding a little lemon extract in addition to the zest and juice. Just a half teaspoon can elevate the citrus notes significantly.
  • When measuring your flour, spoon it into the measuring cup and level it off with a knife instead of scooping directly from the bag. This prevents packing and ensures you don’t end up with a dry loaf.
  • Invest in a good quality loaf pan; it makes a difference in heat distribution, which ensures even baking. If your pan is dark-coated, reduce the oven temperature by 25°F to prevent over-browning.

Variations & Serving Ideas

For a delightful twist, consider adding blueberries or raspberries to the batter for a fruity burst of flavor. You can also experiment with different citrus fruits—try lime or grapefruit zest and juice for a refreshing change. For a healthier option, substitute half of the all-purpose flour with whole wheat flour for added fiber without compromising too much on texture.

This Lemon Poppy Seed Loaf pairs beautifully with a light salad, such as a mixed greens salad with a vinaigrette, or a cup of tea for a cozy afternoon treat. It also complements a creamy cheese platter, as the acidity of the loaf balances rich cheeses perfectly. Lastly, a scoop of vanilla ice cream on the side creates a delightful contrast of temperatures and flavors!

Storage, Make-Ahead & Reheating

This Lemon Poppy Seed Loaf can be stored at room temperature for up to 3 days if wrapped tightly in plastic wrap. If you want to keep it longer, it freezes well for up to 3 months. To freeze, wrap the loaf tightly in plastic wrap and then in aluminum foil to prevent freezer burn.

When you’re ready to enjoy it again, simply thaw it in the fridge overnight. Reheat individual slices in the microwave for 15-20 seconds or in a toaster oven until warmed through. Interestingly, many people find that this loaf tastes even better the next day, as the flavors have time to meld!

Frequently Asked Questions

Can I make Lemon Poppy Seed Loaf With Citrus Icing ahead of time?

Yes — in fact, it tastes even better the next day! You can make the loaf a day in advance, allowing the flavors to develop. Just be sure to store it in an airtight container to maintain its moisture.

Can I substitute the poppy seeds?

Absolutely! If you don’t have poppy seeds on hand or prefer an alternative, you can use sesame seeds for a similar crunch or omit them entirely for a smooth loaf.

What can I use instead of buttermilk?

If you don’t have buttermilk, you can easily create a substitute by mixing ½ cup of milk (dairy or plant-based) with 1 tablespoon of vinegar or lemon juice. Let it sit for 5 minutes before using in the recipe.

How can I make this recipe gluten-free?

To make a gluten-free version of this Lemon Poppy Seed Loaf, substitute the all-purpose flour with a gluten-free all-purpose flour blend. Just ensure that the blend contains a binding agent like xanthan gum for the best results.

What is the best way to store leftover loaf?

Leftover Lemon Poppy Seed Loaf should be stored in an airtight container at room temperature for up to 3 days. For longer storage, wrap it tightly and freeze for up to 3 months. Thaw it before serving for the best texture.

Zesty Lemon Poppy Seed Delight

Final Thoughts

The Lemon Poppy Seed Loaf with Citrus Icing is truly a delightful treat that brings a burst of brightness to any occasion. The zesty lemon flavor combined with the subtle crunch of poppy seeds creates a satisfying balance, while the citrus icing adds a touch of sweetness that perfectly complements the loaf’s tanginess.

This is the kind of recipe I come back to again and again, especially when I want to brighten up a gloomy day or celebrate a small victory. The aroma that fills the kitchen as it bakes is absolutely heavenly! I encourage you to give this recipe a try; you might just find it becoming a beloved staple in your home. Don’t forget to share your results or even add your own unique twist—I can’t wait to see what you create!

Print
clock clock iconcutlery cutlery iconflag flag iconfolder folder iconinstagram instagram iconpinterest pinterest iconfacebook facebook iconprint print iconsquares squares iconheart heart iconheart solid heart solid icon

Lemon Poppy Seed Loaf


  • Author: Lily author
  • Total Time: 13 minute
  • Yield: 1 loaf 1x
Pin Recipe
Print Recipe

Description

This Lemon Poppy Seed Loaf is a delightful treat that combines zesty lemon flavor with crunchy poppy seeds. Topped with a citrus icing, it’s perfect for any occasion.


Ingredients

Scale
  • 1 ½ cups (190g) all-purpose flour
  • 1 teaspoon baking powder
  • ½ teaspoon baking soda
  • ½ teaspoon salt
  • 3 tablespoons poppy seeds
  • ½ cup (115g) unsalted butter, softened to room temperature
  • 1 cup (200g) granulated sugar
  • 2 large eggs
  • 1 teaspoon vanilla extract
  • 1 teaspoon lemon zest (from about 1 medium lemon)
  • ½ cup (120ml) buttermilk
  • 2 tablespoons fresh lemon juice
  • 1 cup (120g) powdered sugar
  • 2 tablespoons fresh lemon juice
  • 1 tablespoon orange juice
  • 1 teaspoon lemon zest (for garnish, optional)

Instructions

  1. Preheat your oven to 350°F (175°C). Grease a 9×5-inch loaf pan or line it with parchment paper for easy removal later.
  2. In a medium mixing bowl, whisk together 1 ½ cups of all-purpose flour, 1 teaspoon of baking powder, ½ teaspoon of baking soda, ½ teaspoon of salt, and 3 tablespoons of poppy seeds. This helps to evenly distribute the baking agents and ensures a uniform rise.
  3. In a large mixing bowl, cream together ½ cup of softened unsalted butter and 1 cup of granulated sugar using an electric mixer on medium speed for about 3-4 minutes, until the mixture is light and fluffy. Make sure to scrape down the sides of the bowl occasionally.
  4. Add 2 large eggs, 1 teaspoon of vanilla extract, and 1 teaspoon of lemon zest to the creamed butter and sugar, mixing until fully combined. You want a smooth consistency, so ensure there are no lumps of butter.
  5. In a small bowl, combine ½ cup of buttermilk and 2 tablespoons of fresh lemon juice. Alternately add the dry ingredients and buttermilk mixture to the butter mixture, starting and ending with the dry ingredients. Mix just until combined; do not overmix, as this can lead to a dense loaf.
  6. Pour the batter into the prepared loaf pan. Smooth the top with a spatula, ensuring it’s even. Bake in the preheated oven for 50-60 minutes, or until a toothpick inserted in the center comes out clean. The edges should be lightly golden brown, and the center should feel just set.
  7. Once baked, remove the loaf from the oven and allow it to cool in the pan for about 10 minutes. Then, transfer it to a wire rack to cool completely. Resist the urge to slice too soon, as it will be crumbly if it’s still warm.
  8. While the loaf is cooling, prepare the citrus icing. In a medium bowl, whisk together 1 cup of powdered sugar, 2 tablespoons of fresh lemon juice, and 1 tablespoon of orange juice until smooth. If the icing is too thick, you can add a little more juice to reach your desired consistency.
  9. Once the loaf is completely cool, drizzle the citrus icing over the top. If you like, sprinkle with an additional teaspoon of lemon zest for an extra pop of flavor and color.
  • Prep Time: 15 mins
  • Cook Time: 50-60 mins
  • Category: Dessert
  • Method: Baking
  • Cuisine: American

Nutrition

  • Serving Size: 1 slice
  • Calories: 200
  • Sugar: 15 g
  • Sodium: 150 mg
  • Fat: 8 g
  • Saturated Fat: 5 g
  • Unsaturated Fat: 3 g
  • Trans Fat: 0 g
  • Carbohydrates: 30 g
  • Fiber: 1 g
  • Protein: 3 g
  • Cholesterol: 40 mg

Keywords: Be careful not to overmix your batter; this is a common mistake that can lead to a dense loaf. Use room temperature ingredients for a smoother batter and even baking.

Did you make this recipe?

Share a photo and tag us — we can't wait to see what you've made!

  • Privacy Policy
  • Terms Of Service
  • Contact
  • About
  • GDPR

Copyright © 2025 Homesmad