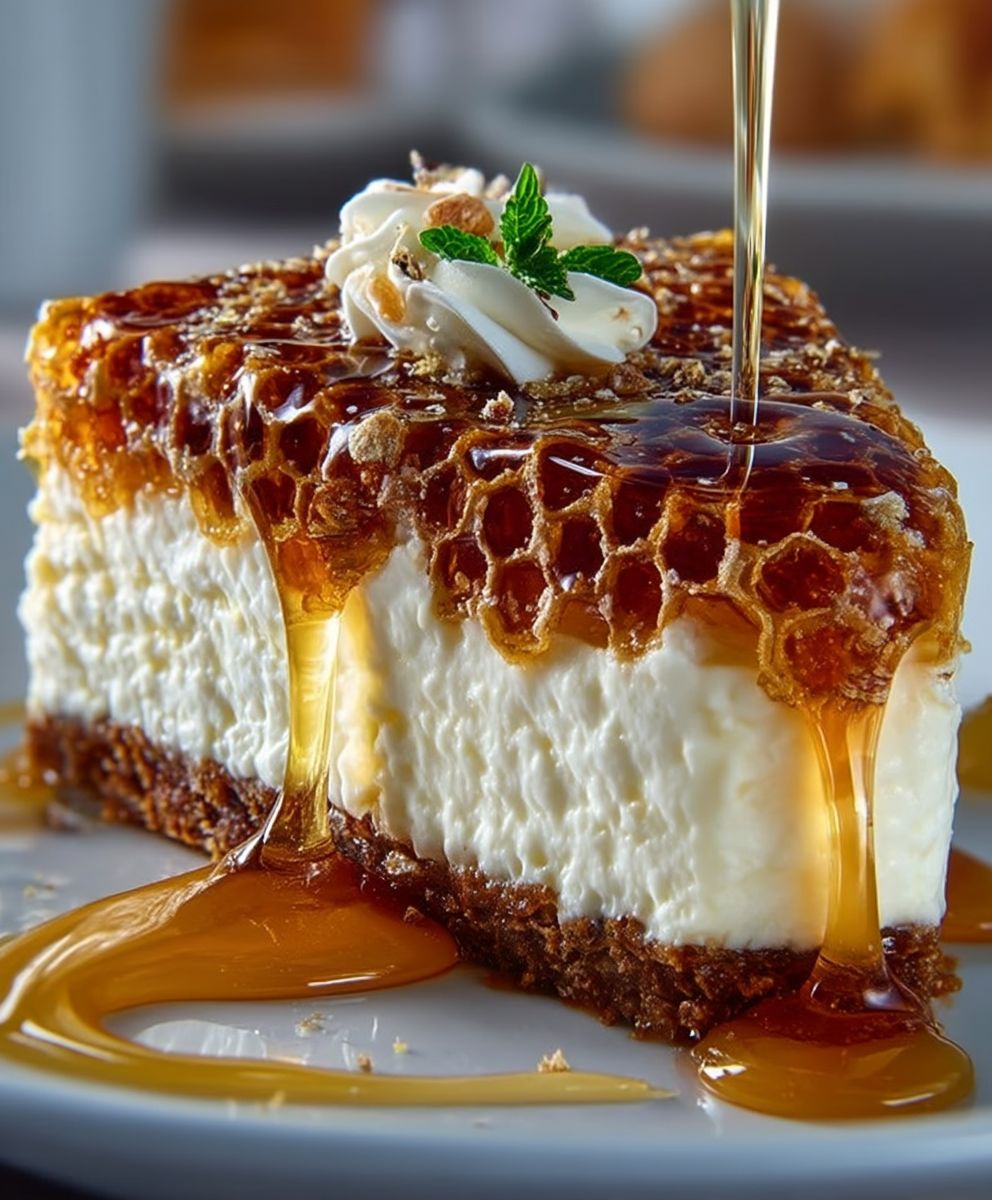
Honeycomb Cheesecake Cake: Prepare to be amazed by a dessert that’s as visually stunning as it is delicious! Imagine the creamy decadence of a classic cheesecake swirled with the golden sweetness of honey and the delightful crunch of homemade honeycomb candy. This isn’t just a cake; it’s an experience.
While the exact origins of combining honeycomb with cheesecake are somewhat modern, the inspiration draws from ancient traditions. Honeycomb, a symbol of nature’s perfect architecture and the sweet reward of the honeybee, has been enjoyed for millennia. Cheesecake, with its roots tracing back to ancient Greece, has evolved into a beloved dessert enjoyed worldwide. Marrying these two elements creates a dessert that feels both timeless and innovative.
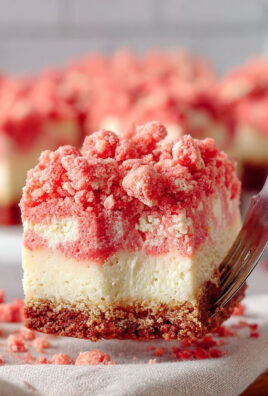
What makes this Honeycomb Cheesecake Cake so irresistible? It’s the symphony of textures and flavors. The smooth, rich cheesecake filling contrasts beautifully with the brittle, caramelized honeycomb. The honey adds a warm, floral note that complements the tangy cream cheese perfectly. Plus, let’s be honest, the visual appeal is undeniable! Each slice is a work of art, making it the perfect centerpiece for any celebration. Whether you’re a seasoned baker or just starting out, this recipe is sure to impress. Get ready to create a show-stopping dessert that will have everyone buzzing!

Ingredients:
- For the Honeycomb Candy:
- 1 cup granulated sugar
- 1/4 cup honey
- 1/4 cup water
- 1 tablespoon baking soda
- For the Cheesecake Layer:
- 32 ounces cream cheese, softened
- 1 1/2 cups granulated sugar
- 4 large eggs
- 1 teaspoon vanilla extract
- 1/4 cup heavy cream
- For the Cake Layers:
- 2 1/2 cups all-purpose flour
- 1 1/2 cups granulated sugar
- 3 1/2 teaspoons baking powder
- 1 teaspoon salt
- 3/4 cup unsalted butter, softened
- 1 1/4 cups milk
- 2 large eggs
- 2 teaspoons vanilla extract
- For the Honey Buttercream Frosting:
- 1 cup (2 sticks) unsalted butter, softened
- 4 cups powdered sugar
- 1/2 cup honey
- 1/4 cup heavy cream
- 1 teaspoon vanilla extract
- Pinch of salt
- For Decoration:
- Extra honeycomb candy, crushed (optional)
- Honey drizzle (optional)
Making the Honeycomb Candy:
- Prepare Your Workspace: Line a baking sheet with parchment paper. This is crucial because the honeycomb sets very quickly. Have your baking soda measured out and ready to go.
- Combine Sugar, Honey, and Water: In a medium saucepan, combine the granulated sugar, honey, and water. Stir to combine.
- Cook the Mixture: Place the saucepan over medium heat. Bring the mixture to a boil, stirring occasionally until the sugar dissolves. Once boiling, stop stirring. Use a candy thermometer to monitor the temperature.
- Reach Hard Crack Stage: Continue to cook the mixture until it reaches 300°F (149°C), the hard crack stage. This will take some time, so be patient. The mixture will turn a light amber color.
- Remove from Heat and Add Baking Soda: Once the mixture reaches 300°F, immediately remove the saucepan from the heat. Quickly add the baking soda and whisk vigorously. The mixture will foam up rapidly.
- Pour and Cool: Immediately pour the foamy mixture onto the prepared parchment-lined baking sheet. Do not spread it out; let it spread on its own.
- Let it Set: Let the honeycomb candy cool completely and harden. This usually takes about 30-60 minutes.
- Break into Pieces: Once cooled and hardened, break the honeycomb candy into pieces. You can use a knife or simply break it with your hands. Be careful, as the edges can be sharp. Store in an airtight container until ready to use.
Making the Cheesecake Layer:
- Preheat Oven and Prepare Pan: Preheat your oven to 325°F (163°C). Wrap the bottom of a 9-inch springform pan tightly with aluminum foil to prevent water from seeping in during the water bath.
- Beat Cream Cheese and Sugar: In a large bowl, beat the softened cream cheese with an electric mixer until smooth and creamy. Gradually add the granulated sugar and continue to beat until well combined and no lumps remain.
- Add Eggs: Add the eggs one at a time, beating well after each addition. Be careful not to overmix, as this can incorporate too much air and cause the cheesecake to crack.
- Add Vanilla and Heavy Cream: Stir in the vanilla extract and heavy cream until just combined. The batter should be smooth and creamy.
- Pour into Pan: Pour the cheesecake batter into the prepared springform pan.
- Prepare Water Bath: Place the springform pan inside a larger roasting pan. Carefully pour hot water into the roasting pan until it reaches about halfway up the sides of the springform pan.
- Bake: Bake in the preheated oven for 55-70 minutes, or until the edges are set but the center still has a slight jiggle.
- Cool: Turn off the oven and crack the oven door slightly. Let the cheesecake cool in the oven for 1 hour. This helps prevent cracking.
- Refrigerate: Remove the cheesecake from the water bath and let it cool completely on a wire rack. Then, cover it with plastic wrap and refrigerate for at least 4 hours, or preferably overnight, to allow it to set completely.
Making the Cake Layers:
- Preheat Oven and Prepare Pans: Preheat your oven to 350°F (175°C). Grease and flour two 9-inch round cake pans. You can also line the bottoms with parchment paper rounds for easy removal.
- Combine Dry Ingredients: In a large bowl, whisk together the all-purpose flour, granulated sugar, baking powder, and salt.
- Cream Butter and Sugar: In a separate bowl, cream together the softened unsalted butter and granulated sugar until light and fluffy.
- Add Eggs: Beat in the eggs one at a time, then stir in the vanilla extract.
- Alternate Adding Dry and Wet Ingredients: Gradually add the dry ingredients to the wet ingredients, alternating with the milk, beginning and ending with the dry ingredients. Mix until just combined. Be careful not to overmix.
- Divide Batter: Divide the cake batter evenly between the two prepared cake pans.
- Bake: Bake in the preheated oven for 25-30 minutes, or until a wooden skewer inserted into the center comes out clean.
- Cool: Let the cakes cool in the pans for 10 minutes before inverting them onto a wire rack to cool completely.
- Level the Cakes: Once the cakes are completely cool, use a serrated knife to level the tops if necessary. This will ensure that your cake is even and stable.
Making the Honey Buttercream Frosting:
- Beat Butter: In a large bowl, beat the softened unsalted butter with an electric mixer until smooth and creamy.
- Add Powdered Sugar: Gradually add the powdered sugar, one cup at a time, beating well after each addition.
- Add Honey, Heavy Cream, Vanilla, and Salt: Add the honey, heavy cream, vanilla extract, and salt. Beat until the frosting is light and fluffy. If the frosting is too thick, add a little more heavy cream. If it’s too thin, add a little more powdered sugar.
- Adjust Consistency: Continue to beat until the frosting reaches your desired consistency.
Assembling the Honeycomb Cheesecake Cake:
- Prepare Cheesecake: Carefully remove the chilled cheesecake from the springform pan.
- Place First Cake Layer: Place one cake layer on a serving plate or cake stand.
- Frost Cake Layer: Spread a generous layer of honey buttercream frosting over the first cake layer.
- Add Cheesecake Layer: Carefully place the cheesecake layer on top of the frosting.
- Frost Cheesecake Layer: Spread another layer of honey buttercream frosting over the cheesecake layer.
- Place Second Cake Layer: Place the second cake layer on top of the frosting.
- Frost Entire Cake: Frost the entire cake with the remaining honey buttercream frosting, creating a smooth and even surface.
- Decorate: Decorate the cake with crushed honeycomb candy and a drizzle of honey, if desired.
- Chill: Chill the assembled cake in the refrigerator for at least 30 minutes to allow the frosting to set before serving. This will make it easier to slice and serve.
- Slice and Serve: Slice the Honeycomb Cheesecake Cake and serve. Enjoy!
Conclusion:
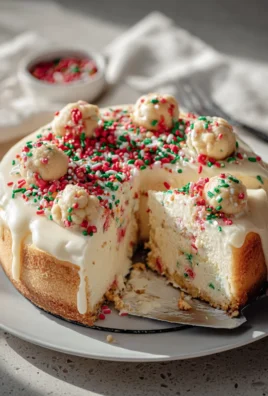
This Honeycomb Cheesecake Cake isn’t just a dessert; it’s an experience. The creamy cheesecake filling, the delightful crunch of the homemade honeycomb candy, and the moist cake layers all come together in a symphony of textures and flavors that will leave you and your guests utterly speechless. I know, I know, it might seem a little ambitious at first glance, but trust me, the end result is *so* worth the effort. It’s the kind of cake that people will be talking about for weeks, asking for the recipe, and begging you to make it again.
Why is this a must-try? Because it’s unique! You won’t find this combination of textures and tastes just anywhere. The honeycomb adds a playful, almost whimsical element, while the cheesecake provides a rich and decadent base. It’s a showstopper, perfect for birthdays, holidays, or any special occasion where you want to impress. Plus, making your own honeycomb is surprisingly fun and rewarding!
But the best part? It’s adaptable! Feel free to experiment with different cake flavors. A lemon cake would add a bright, citrusy note that complements the sweetness of the honey. Or, for a richer, more decadent experience, try a chocolate cake. You could even swirl some caramel into the cheesecake filling for an extra layer of indulgence.
As for serving suggestions, a simple dusting of powdered sugar is all you really need to let the cake shine. However, a dollop of whipped cream or a scoop of vanilla ice cream wouldn’t hurt either! For a truly special presentation, consider drizzling some extra honey over each slice just before serving. And if you’re feeling extra fancy, you could even garnish with a few extra pieces of honeycomb.
Don’t be intimidated by the multiple components. Break it down into manageable steps, and you’ll be surprised at how easy it is to create this masterpiece. I promise, the sense of accomplishment you’ll feel when you pull this Honeycomb Cheesecake Cake out of the oven is unparalleled.
I’m so excited for you to try this recipe! I truly believe it’s one of my best creations, and I can’t wait to hear what you think. Once you’ve given it a go, please, please, please share your experience! Did you make any modifications? What did your friends and family think? Did you manage to resist eating the entire cake yourself? (No judgment if you didn’t!)
Head over to the comments section and let me know how it went. Share your photos, your tips, and your stories. I love hearing from you all, and your feedback helps me make my recipes even better. So go ahead, bake this cake, and let’s create some sweet memories together! I am confident that this recipe will become a family favorite. Happy baking!
Honeycomb Cheesecake Cake: The Ultimate Dessert Recipe
Honeycomb Cheesecake Cake: Layers of moist cake, creamy cheesecake, and honey buttercream, topped with homemade honeycomb candy.
Ingredients
Instructions
Recipe Notes
- The honeycomb candy sets very quickly, so have all ingredients measured and ready before starting.
- Be careful when working with hot sugar, as it can cause severe burns.
- Do not overmix the cheesecake batter or cake batter, as this can result in a tough texture.
- Cooling the cheesecake slowly in the oven helps prevent cracking.
- Chilling the assembled cake before serving makes it easier to slice.