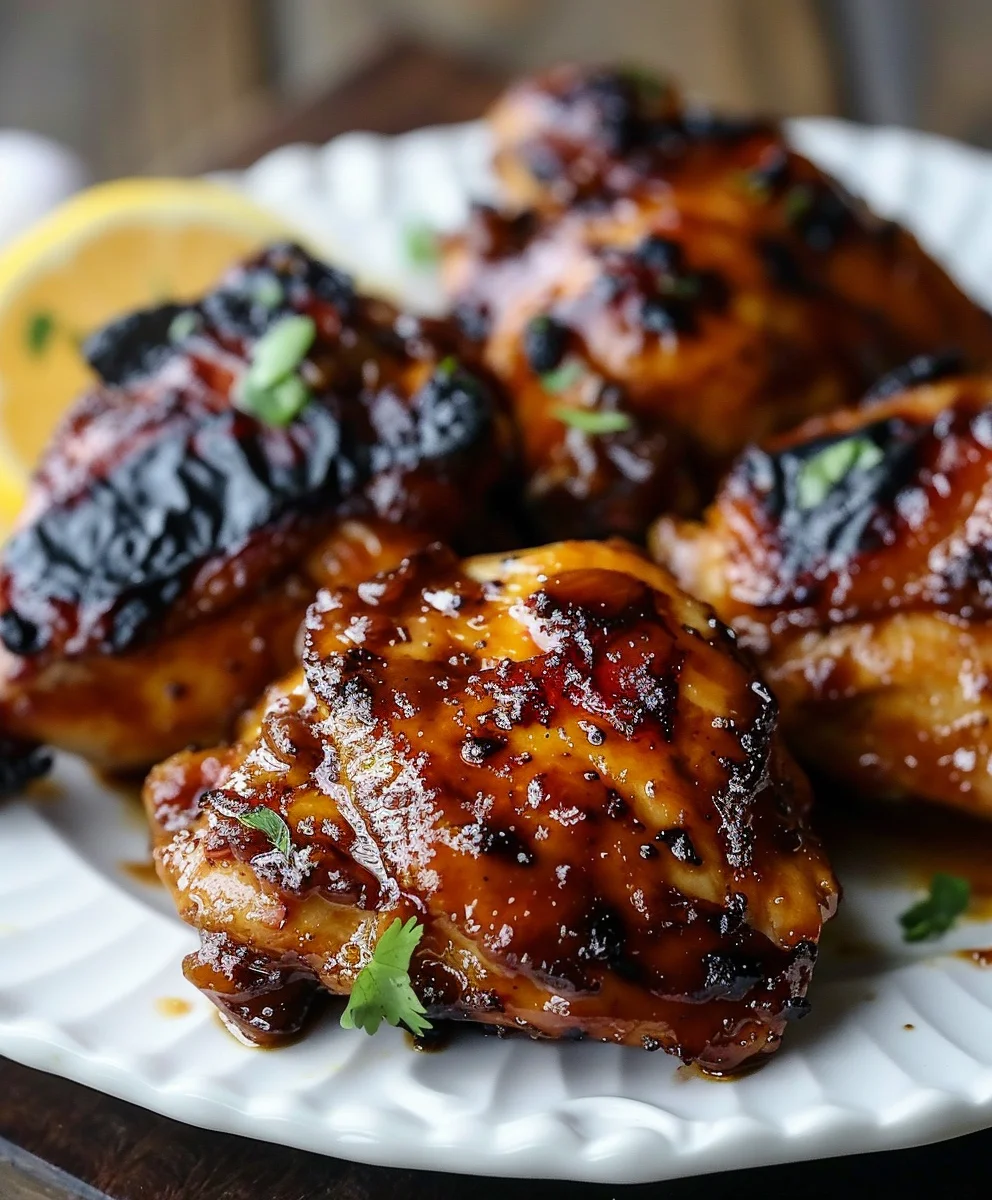
Huli Huli Chicken – prepare to embark on a truly unforgettable culinary journey to the sun-drenched shores of Hawaii with every succulent, flame-kissed bite. If you’re searching for a dish that effortlessly blends sweet, savory, and smoky flavors into a symphony for your palate, you’ve found your next obsession. This iconic Hawaiian barbecue staple, traditionally slow-roasted over kiawe wood and continuously turned on a spit, gets its delightful name from the Hawaiian word ‘huli,’ which quite literally means ‘to turn.’ It’s this dedicated turning and basting in its signature, pineapple-infused soy glaze that creates an undeniably tender, juicy, and caramelized chicken, leaving an indelible impression.
People worldwide adore Huli Huli Chicken not only for its incredible flavor profile that perfectly captures the aloha spirit but also for its surprising simplicity, making it ideal for everything from backyard barbecues to weeknight dinners. The rich history and vibrant taste make Huli Huli Chicken more than just a meal; it’s an experience we can’t wait to share with you.
Ingredients:
- For the Huli Huli Marinade & Glaze:
- 1 cup (240ml) pineapple juice, unsweetened is best for balancing flavors.
- ½ cup (120ml) low-sodium soy sauce; I always opt for low-sodium to control the saltiness myself.
- ½ cup (120ml) packed light brown sugar, which adds a lovely caramel note and helps with that beautiful sticky glaze.
- ¼ cup (60ml) rice vinegar; this provides a crucial tang that cuts through the richness.
- 2 tablespoons (30ml) fresh ginger, finely grated or minced; the fresher, the better for that vibrant aromatic kick.
- 4 cloves garlic, minced; garlic is non-negotiable for depth of flavor.
- 1 tablespoon (15ml) toasted sesame oil; this adds a wonderful nutty aroma that just screams deliciousness.
- 1 teaspoon (5ml) sriracha or other hot sauce, optional, but I find it adds a nice subtle background heat without being overwhelming. Adjust to your preference!
- ½ teaspoon (2.5g) black pepper, freshly ground if possible for superior flavor.
- For the Huli Huli Chicken:
- 3-4 pounds (1.3-1.8kg) bone-in, skin-on chicken pieces. I usually go for a mix of thighs and drumsticks because they stay so juicy and absorb the marinade beautifully. You could also use a whole chicken cut into pieces, or even boneless, skinless cuts, but adjust cooking times accordingly.
- Salt, to taste (optional, as the soy sauce is quite salty already).
- Freshly ground black pepper, to taste.
- For Garnish (Optional):
- Toasted sesame seeds, for a delightful crunch and visual appeal.
- Fresh green onions or scallions, thinly sliced, for a pop of color and freshness.
- Fresh pineapple slices, grilled alongside the chicken, which is a fantastic addition!
Preparing the Huli Huli Marinade:
- Combine the Wet Ingredients: In a medium-sized bowl or a large measuring cup, I like to start by pouring in the pineapple juice, low-sodium soy sauce, and rice vinegar. Give them a quick stir just to get things mingling. These form the liquid base of our incredibly flavorful Huli Huli sauce, and I always make sure to use low-sodium soy sauce so I can control the overall saltiness and prevent it from becoming overpowering.
- Introduce the Sweetness and Aromatics: Next, I add the packed light brown sugar. This is key for that beautiful caramelization and the signature sticky-sweetness of Huli Huli Chicken. Then, I grate in the fresh ginger and mince the garlic directly into the bowl. Trust me, using fresh ginger and garlic makes a world of difference; their pungent, aromatic qualities are truly essential to the depth of this recipe. Don’t skimp on these!
- Add the Finishing Touches: Now, I drizzle in the toasted sesame oil. This ingredient adds such a wonderful, nutty, savory aroma that just elevates the whole marinade. It’s one of those subtle touches that makes you say, “Mmm, what’s that delicious smell?” I also add the optional sriracha at this point if I’m feeling a little adventurous and want that gentle kick of heat in the background – it really just rounds out the flavors without making it overtly spicy. Finally, I season with a bit of freshly ground black pepper.
- Whisk Until Combined: With all the ingredients in the bowl, I grab a whisk and thoroughly combine everything. I whisk diligently until the brown sugar has completely dissolved and all the ingredients are well incorporated. You want a homogenous mixture, not clumps of sugar at the bottom. This ensures every piece of chicken gets coated evenly with all the amazing flavors. Take your time with this step; it’s important for maximum flavor absorption.
- Reserve for Glazing: This is a very important step! Before introducing any raw chicken, I always pour about ½ cup to ¾ cup of this glorious marinade into a separate, clean bowl or jar. This reserved portion will become our basting glaze later on, preventing any cross-contamination. Make sure to set this aside in the refrigerator. We want to keep it fresh and clean for brushing onto the chicken during the cooking process.
Preparing the Chicken for Huli Huli:
-
Pat the Chicken Dry: I start by taking my chicken pieces out of their packaging and placing them on a clean cutting board. Using paper towels, I meticulously pat each piece of chicken thoroughly dry.
Why is this important?
Well, removing excess moisture from the skin is crucial for achieving that wonderfully crispy skin we all crave. Plus, a dry surface allows the marinade to adhere better, ensuring maximum flavor penetration. Don’t skip this step!
- Score the Chicken (Optional but Recommended): For thicker pieces of chicken, especially bone-in thighs or drumsticks, I sometimes make a few shallow diagonal slits (about ¼ to ½ inch deep) into the flesh. This isn’t strictly necessary, but I find it incredibly helpful for two main reasons: firstly, it allows the marinade to really seep deep into the meat, infusing every bite with that irresistible Huli Huli flavor. Secondly, it helps the chicken cook more evenly, preventing the outside from drying out before the inside is done. Just be careful not to cut too deep and detach the meat from the bone.
- Season Lightly (Optional): While the marinade itself is quite flavorful and salty due to the soy sauce, I sometimes like to give the chicken pieces a very light sprinkle of salt and freshly ground black pepper on both sides, especially if I’m using larger cuts or if I prefer a slightly bolder seasoning profile. This is completely optional and depends on your personal taste preferences and the sodium content of your soy sauce. Remember, you can always add more seasoning later, but you can’t take it away!
Marinating the Huli Huli Chicken:
- Submerge the Chicken: Now for the fun part! I place all the prepared chicken pieces into a large, non-reactive bowl or, my preference, a sturdy, resealable plastic bag. Then, I pour the remaining Huli Huli marinade over the chicken, making sure every single piece is thoroughly coated. If using a bag, I press out as much air as possible before sealing it to ensure maximum contact between the chicken and the marinade. If using a bowl, I might stir it gently to ensure even distribution.
-
Refrigerate for Flavor Infusion: Once the chicken is well-coated, I transfer the bowl or bag to the refrigerator.
How long should it marinate?
For the best results and deepest flavor, I recommend marinating the Huli Huli Chicken for a minimum of 4 hours. However, if you have the time, marinating overnight (12-24 hours) will yield an even more incredibly flavorful and tender result. The longer it sits, the more those amazing Huli Huli flavors will penetrate the meat, making each bite absolutely delicious. I sometimes even do this the day before a BBQ just to save time and maximize flavor! Just make sure it’s kept cold and safe.
- Bringing to Temperature (Optional but Recommended): About 30-60 minutes before I plan to grill, I like to take the chicken out of the refrigerator. Allowing it to come closer to room temperature helps it cook more evenly on the grill, preventing the outside from burning before the inside is cooked through. This is a little chef’s trick that I find really makes a difference in the final texture and juiciness of the chicken.
Grilling the Huli Huli Chicken:
-
Prepare Your Grill: This is where the magic truly happens! I always begin by preheating my grill to a medium-high heat, aiming for around 400-450°F (200-230°C). Whether you’re using a charcoal grill, gas grill, or even an indoor grill pan, ensure it’s screaming hot before you put the chicken on. A hot grill creates those beautiful sear marks and prevents sticking. Once preheated, I use a stiff wire brush to thoroughly clean the grates.
Why clean grates are important?
Clean grates prevent sticking and ensure those perfect grill marks. After cleaning, I lightly oil the grates by dipping a folded paper towel in a high-smoke-point oil (like canola or grapeseed) and carefully rubbing it over the hot grates with tongs. This also helps immensely with non-sticking.
- Initial Searing (Direct Heat): Once the grill is hot and clean, I carefully place the marinated Huli Huli Chicken pieces skin-side down over direct heat. I close the lid and let them sear for about 4-5 minutes, or until you see those beautiful, golden-brown grill marks develop. Resist the urge to move them around too much during this initial sear; letting them sit undisturbed is key to achieving that fantastic char. This initial direct heat helps to crisp up the skin and lock in juices.
-
Flip and Move to Indirect Heat: After the initial sear, I use tongs to carefully flip the chicken pieces. At this point, I like to move the chicken over to indirect heat on the grill. If you have a gas grill, this means turning off the burner directly beneath the chicken, leaving adjacent burners on. For a charcoal grill, this means pushing the coals to one side and placing the chicken on the cooler side.
Why indirect heat?
This allows the chicken to cook through gently without burning the exterior, especially crucial for bone-in pieces that take longer. This method ensures your Huli Huli Chicken will be cooked perfectly from the inside out.
- Begin Basting with Huli Huli Glaze: Now, retrieve that reserved ½ to ¾ cup of fresh Huli Huli marinade from the refrigerator. With a basting brush, I start to generously brush the chicken pieces with this wonderful glaze. I typically begin basting after about 10-15 minutes of indirect cooking, once the chicken has started to cook through.
- Continue Grilling, Flipping, and Basting: I continue to grill the chicken over indirect heat, flipping and basting every 5-7 minutes. Each time you flip, brush the newly exposed side with more of that glorious Huli Huli glaze. This repeated basting and flipping is what builds those incredible layers of flavor, creating a beautiful, sticky, caramelized crust on your Huli Huli Chicken. The sugars in the glaze will caramelize beautifully, giving it that signature glossy finish. Keep a close eye on it to prevent burning, as the sugars can char quickly.
-
Monitor Internal Temperature: The total grilling time will vary depending on the size and thickness of your chicken pieces, but typically it takes about 25-40 minutes over indirect heat.
How do you know when it’s done?
The most reliable way to check for doneness is to use an instant-read meat thermometer. Insert the thermometer into the thickest part of the chicken, avoiding the bone. The chicken is perfectly cooked and safe to eat when it reaches an internal temperature of 165°F (74°C). The skin should be deeply caramelized, glossy, and slightly charred in places – that’s exactly what we’re looking for!
- Final Searing (Optional but Recommended): For the last 5 minutes of cooking, I sometimes move the chicken back over direct heat, just for a minute or two per side, to get an extra crispy skin and a final burst of smoky flavor. Be very watchful here, as the caramelized sugars can burn quickly. This step is purely for textural perfection!
Serving Your Delicious Huli Huli Chicken:
-
Rest the Chicken: Once the chicken has reached its target internal temperature, I carefully transfer the glorious Huli Huli Chicken pieces from the grill to a clean cutting board or a platter.
Don’t skip this critical step!
I loosely tent the chicken with aluminum foil and let it rest for at least 5-10 minutes. This resting period allows the juices to redistribute throughout the meat, ensuring every bite is incredibly tender and moist. If you cut into it too soon, those precious juices will run out, leaving you with drier chicken. Patience is a virtue here!
- Garnish and Serve: After resting, it’s time for the final touches! I love to sprinkle my beautiful Huli Huli Chicken with toasted sesame seeds for an added layer of nutty flavor and a delightful textural contrast. A generous scattering of freshly sliced green onions or scallions adds a pop of vibrant color and a fresh, subtle oniony bite that really brightens up the dish. If I’m feeling extra fancy, or if I grilled some pineapple slices alongside, I arrange them around the chicken for a truly tropical presentation.
- Pairing Suggestions: This amazing Huli Huli Chicken pairs wonderfully with a variety of sides. I often serve it with fluffy white rice to soak up all those delicious drippings, a refreshing macaroni salad (a classic Hawaiian side!), or a simple green salad dressed with a bright vinaigrette. Grilled pineapple spears are also a fantastic accompaniment, their sweetness complementing the savory chicken perfectly. Enjoy this taste of the islands right in your own backyard! It’s a dish that always brings smiles to faces.

Conclusion:
So there you have it, friends! We’ve journeyed through the simple yet profound steps to create a dish that is truly more than just a meal; it’s an experience, a little slice of Hawaiian sunshine brought right into your kitchen. If you’ve been searching for a recipe that combines exotic flavors with approachable techniques, something that will genuinely impress your family and friends without demanding hours of intricate work, then this Huli Huli Chicken recipe is absolutely, unequivocally, your next culinary adventure. I truly believe that once you taste that perfect balance of sweet and savory, with those glorious notes of ginger, garlic, and pineapple, you’ll understand why this dish has captured hearts globally. It’s not just food; it’s comfort, it’s vibrant, and it’s incredibly satisfying. The marinade does all the heavy lifting, infusing every fiber of the chicken with an irresistible aroma and taste that is utterly unforgettable. It’s a testament to how simple, good ingredients, when combined with a little love and patience, can create something extraordinary. Imagine the look on your loved ones’ faces when they take that first bite – pure joy, I assure you.
Now, let’s talk about enhancing this already incredible meal. While our Huli Huli Chicken is a star on its own, it plays wonderfully with a variety of companions. For a classic Hawaiian plate lunch feel, I highly recommend serving it alongside a scoop of fluffy jasmine rice or, even better, a fragrant coconut rice that complements the tropical notes beautifully. A simple macaroni salad, often found at traditional luau spreads, also makes for an authentic and delicious pairing, offering a creamy contrast to the chicken’s bold flavors. Don’t forget the greens! A crisp, fresh cucumber salad or a vibrant coleslaw can add a refreshing crunch and balance to your plate. And if you’re feeling adventurous, grilling some fresh pineapple slices right alongside your chicken is an absolute game-changer; the caramelized fruit adds another layer of sweetness and a delightful tang that truly elevates the entire dish.
Creative Variations to Explore
But wait, there’s more! The beauty of this recipe lies in its adaptability. While we’ve focused on grilling, don’t hesitate to experiment with different cooking methods. This Huli Huli Chicken also bakes wonderfully in the oven; simply ensure your internal temperature reaches a safe 165°F (74°C) and you get a nice char under the broiler at the end. For those busy weeknights, you could even adapt the marinade for a slow cooker, letting the chicken simmer until it’s fall-off-the-bone tender, then shredding it for sliders or wraps. Consider trying different cuts of chicken too – boneless, skinless thighs absorb the marinade beautifully and cook quickly, while drumsticks or wings make for fantastic finger food at your next gathering. For a little extra kick, a pinch of red pepper flakes in the marinade can add a subtle heat that awakens the palate. You could also experiment with brushing on some extra marinade as a glaze during the last few minutes of cooking for an even more intense flavor and a gorgeous, glossy finish. The possibilities are truly endless, allowing you to tailor this amazing dish to your personal taste and dietary preferences.
So, my dear readers, I implore you: don’t just read about this culinary delight. Take the plunge! Head to your kitchen, gather those wonderful ingredients, and let the magic of Huli Huli Chicken unfold. This isn’t just a recipe; it’s an invitation to create memories, to share laughter around a table filled with incredible food, and to transport your senses to a sunny, tropical paradise. I guarantee that the effort, minimal as it is, will be profoundly rewarded. And once you’ve tasted the triumph of your own making, please, please come back and tell me all about it! Did you serve it with rice and mac salad? Did you try grilled pineapple? Did your family rave about it? Your experiences, your photos, your tweaks – they inspire not just me, but everyone else who visits this space looking for their next great meal. Share your culinary journey in the comments below, or tag me on social media. I absolutely cannot wait to hear how this fantastic Huli Huli Chicken brightens your day and brings a taste of the islands to your home. Happy cooking, and may your kitchen always be filled with delicious aromas and joyful moments!
Huli Huli Chicken Recipe: Sweet & Savory Grilled Perfection
Huli Huli Chicken – prepare to embark on a truly unforgettable culinary journey to the sun-drenched shores of Hawaii with every succulent, flame-kissed bite. If you’re searching for a dish that effortlessly blends sweet, savory, and smoky flavors into a symphony for your palate, you’ve found your next obsession. This iconic Hawaiian barbecue staple, traditionally slow-roasted over kiawe wood and continuously turned on a spit, gets its delightful name from the Hawaiian word ‘huli,’ which quite literally means ‘to turn.’ It’s this dedicated turning and basting in its signature, pineapple-infused soy glaze that creates an undeniably tender, juicy, and caramelized chicken, leaving an indelible impression.
Ingredients
-
1 cup (240ml) pineapple juice
-
½ cup (120ml) low-sodium soy sauce
-
½ cup (120ml) packed light brown sugar
-
¼ cup (60ml) rice vinegar
-
2 tablespoons (30ml) fresh ginger, grated or minced
-
4 cloves garlic, minced
-
1 tablespoon (15ml) toasted sesame oil
-
1 teaspoon (5ml) sriracha or other hot sauce (optional)
-
½ teaspoon (2.5g) black pepper, freshly ground
-
3-4 pounds (1.3-1.8kg) bone-in, skin-on chicken pieces (mix of thighs and drumsticks recommended)
-
Salt, to taste (optional)
-
Freshly ground black pepper, to taste (optional)
-
Toasted sesame seeds (for garnish, optional)
-
Fresh green onions or scallions, thinly sliced (for garnish, optional)
-
Fresh pineapple slices, grilled (for garnish, optional)
Instructions
-
Step 1
In a medium bowl, combine 1 cup pineapple juice, ½ cup low-sodium soy sauce, ½ cup packed light brown sugar, ¼ cup rice vinegar, 2 tablespoons grated ginger, 4 minced garlic cloves, 1 tablespoon toasted sesame oil, 1 teaspoon sriracha (optional), and ½ teaspoon black pepper. Whisk until the brown sugar has completely dissolved and ingredients are well incorporated. Reserve ½ to ¾ cup of this marinade in a separate, clean bowl or jar for basting during cooking; refrigerate the reserved portion. -
Step 2
Pat chicken pieces thoroughly dry with paper towels. For thicker pieces, make a few shallow diagonal slits (about ¼ to ½ inch deep) into the flesh (optional, helps flavor penetration and even cooking). Lightly season chicken pieces with salt and freshly ground black pepper on both sides (optional). -
Step 3
Place all prepared chicken pieces into a large, non-reactive bowl or a sturdy, resealable plastic bag. Pour the remaining Huli Huli marinade over the chicken, ensuring every piece is thoroughly coated. Press out air from bag if used. Refrigerate for a minimum of 4 hours, or preferably overnight (12-24 hours) for the deepest flavor. About 30-60 minutes before grilling, remove chicken from the refrigerator to come closer to room temperature for more even cooking. -
Step 4
Preheat your grill to a medium-high heat, aiming for around 400-450°F (200-230°C). Clean the grates thoroughly with a stiff wire brush, then lightly oil the grates by carefully rubbing with a paper towel dipped in a high-smoke-point oil (e.g., canola, grapeseed) using tongs. -
Step 5
Carefully place the marinated chicken pieces skin-side down over direct heat. Close the lid and sear for about 4-5 minutes, or until beautiful, golden-brown grill marks develop. Resist moving them during this sear. After searing, use tongs to carefully flip the chicken pieces, then immediately move them over to indirect heat on the grill (turn off burner directly beneath chicken on a gas grill, or push coals to one side on a charcoal grill). -
Step 6
Retrieve the reserved Huli Huli glaze from the refrigerator. After about 10-15 minutes of indirect cooking, begin to generously brush the chicken pieces with the glaze using a basting brush. Continue to grill the chicken over indirect heat, flipping and basting every 5-7 minutes. Each time you flip, brush the newly exposed side with more glaze to build incredible layers of flavor and a sticky, caramelized crust. Keep a close eye on the chicken to prevent the sugars from charring too quickly. -
Step 7
Total grilling time over indirect heat will typically be about 25-40 minutes, depending on chicken size. Use an instant-read meat thermometer inserted into the thickest part of the chicken (avoiding the bone) to check for doneness; it’s perfectly cooked when it reaches an internal temperature of 165°F (74°C). The skin should be deeply caramelized, glossy, and slightly charred. For the last 5 minutes, you may move the chicken back over direct heat for 1-2 minutes per side for an extra crispy skin and smoky flavor, watching carefully to prevent burning. -
Step 8
Once cooked, transfer the Huli Huli Chicken to a clean cutting board or platter. Loosely tent with aluminum foil and let it rest for at least 5-10 minutes to allow juices to redistribute. Garnish with toasted sesame seeds and thinly sliced fresh green onions or scallions. Arrange grilled pineapple slices alongside (optional) for a tropical presentation. Serve with fluffy white rice, macaroni salad, or a simple green salad.
Important Information
Nutrition Facts (Per Serving)
It is important to consider this information as approximate and not to use it as definitive health advice.
Allergy Information
Please check ingredients for potential allergens and consult a health professional if in doubt.