Ice Cream Cake: just the name conjures up images of birthday parties, summer celebrations, and pure, unadulterated joy, doesn’t it? Forget blowing out candles on a regular cake; imagine the delighted gasps when you present a frosty, layered masterpiece that’s as delicious as it is visually stunning. I’m thrilled to share my foolproof recipe for this crowd-pleasing dessert that’s surprisingly simple to make at home.
While the exact origins of Ice Cream Cake are a bit hazy, its popularity exploded in the mid-20th century, coinciding with the rise of home freezers and the increasing accessibility of commercially produced ice cream. It quickly became a staple at family gatherings, offering a refreshing and exciting alternative to traditional baked cakes. Think of it as the ultimate fusion dessert, combining the comforting familiarity of cake with the cool, creamy indulgence of ice cream.
What’s not to love? The contrasting textures – the soft, slightly chewy cake layers against the smooth, melting ice cream – create a symphony in your mouth. Plus, the possibilities for customization are endless! You can use your favorite cake flavors, mix and match ice cream varieties, and add layers of cookies, candies, or sauces to create a truly personalized treat. And let’s be honest, in the heat of summer, who can resist a slice of this frozen delight? So, let’s get started and create an Ice Cream Cake that will be the star of your next celebration!

Ingredients:
- For the Chocolate Cake Layers:
- 2 cups all-purpose flour
- 2 cups granulated sugar
- ¾ cup unsweetened cocoa powder
- 1 ½ teaspoons baking powder
- 1 ½ teaspoons baking soda
- 1 teaspoon salt
- 1 cup buttermilk
- ½ cup vegetable oil
- 2 large eggs
- 2 teaspoons vanilla extract
- 1 cup boiling water
- For the Vanilla Ice Cream Layer:
- 1 ½ quarts vanilla ice cream, softened
- For the Strawberry Ice Cream Layer:
- 1 ½ quarts strawberry ice cream, softened
- For the Chocolate Ganache:
- 1 cup heavy cream
- 12 ounces semi-sweet chocolate chips
- Optional Decorations:
- Whipped cream
- Fresh strawberries
- Chocolate shavings
- Sprinkles
Preparing the Chocolate Cake Layers:
- Preheat and Prep: I always start by preheating my oven to 350°F (175°C). While it’s heating up, grease and flour two 9-inch round cake pans. This is crucial to prevent the cakes from sticking! You can also line the bottoms with parchment paper rounds for extra insurance.
- Combine Dry Ingredients: In a large bowl, whisk together the flour, sugar, cocoa powder, baking powder, baking soda, and salt. Make sure everything is evenly distributed. This ensures a consistent texture and rise.
- Combine Wet Ingredients: In a separate bowl, whisk together the buttermilk, oil, eggs, and vanilla extract. Whisk until well combined.
- Combine Wet and Dry: Gradually add the wet ingredients to the dry ingredients, mixing on low speed until just combined. Be careful not to overmix! Overmixing can lead to a tough cake.
- Add Boiling Water: Slowly pour in the boiling water while mixing on low speed. The batter will be thin, but don’t worry, that’s normal! The hot water helps to bloom the cocoa powder and create a moist cake.
- Divide and Bake: Divide the batter evenly between the prepared cake pans. Bake for 30-35 minutes, or until a wooden skewer inserted into the center comes out clean.
- Cool Completely: Let the cakes cool in the pans for 10 minutes before inverting them onto a wire rack to cool completely. This prevents them from sticking and allows them to cool evenly. Make sure the cakes are completely cool before assembling the ice cream cake!
Softening the Ice Cream:
- Plan Ahead: This is a crucial step! Take the vanilla and strawberry ice cream out of the freezer about 30 minutes to 1 hour before you plan to assemble the cake. The exact time will depend on the temperature of your kitchen.
- Check for Softness: The ice cream should be soft enough to spread easily but not completely melted. You want it to hold its shape. If it’s too hard, it will be difficult to spread evenly. If it’s too soft, it will melt too quickly and make the cake soggy.
- Work Quickly: Once the ice cream is softened, work quickly to assemble the cake before it melts too much.
Assembling the Ice Cream Cake:
- Level the Cake Layers (Optional): If your cake layers are uneven, use a serrated knife to level them. This will create a more even and visually appealing cake.
- First Layer: Place one chocolate cake layer on a cake stand or serving plate. If you have acetate strips, line the inside of a springform pan with them and place the cake layer inside. This will help create clean edges.
- Vanilla Ice Cream Layer: Spread the softened vanilla ice cream evenly over the first cake layer. Make sure to spread it all the way to the edges.
- Freeze: Place the cake in the freezer for at least 1 hour to allow the vanilla ice cream layer to harden. This will prevent the layers from mixing together.
- Second Layer: Remove the cake from the freezer and place the second chocolate cake layer on top of the vanilla ice cream layer.
- Strawberry Ice Cream Layer: Spread the softened strawberry ice cream evenly over the second cake layer. Again, make sure to spread it all the way to the edges.
- Freeze Again: Place the cake back in the freezer for at least 3-4 hours, or preferably overnight, to allow the strawberry ice cream layer to harden completely. This is important for a stable cake.
Making the Chocolate Ganache:
- Heat the Cream: In a saucepan, heat the heavy cream over medium heat until it just begins to simmer. Do not boil!
- Pour Over Chocolate: Remove the saucepan from the heat and pour the hot cream over the chocolate chips in a heatproof bowl.
- Let Sit: Let the mixture sit for 1 minute to allow the heat to melt the chocolate.
- Whisk Until Smooth: Gently whisk the mixture until the chocolate is completely melted and the ganache is smooth and glossy. If there are any stubborn chocolate pieces, you can microwave the mixture in 15-second intervals, stirring in between, until smooth.
- Cool Slightly: Let the ganache cool slightly for about 10-15 minutes before pouring it over the cake. This will help it thicken slightly and prevent it from running off the sides too quickly.
Finishing Touches:
- Remove from Freezer: Remove the ice cream cake from the freezer. If you used a springform pan, carefully remove the sides. If you used acetate strips, peel them away.
- Pour Ganache: Pour the slightly cooled chocolate ganache over the top of the ice cream cake, allowing it to drip down the sides. You can use a spatula to spread it evenly.
- Decorate (Optional): Decorate the cake with whipped cream, fresh strawberries, chocolate shavings, sprinkles, or any other toppings you like. Get creative!
- Freeze Briefly: Place the cake back in the freezer for about 15-20 minutes to allow the ganache to set slightly. This will make it easier to slice.
- Slice and Serve: Remove the cake from the freezer about 10 minutes before serving to allow it to soften slightly. Use a sharp knife to slice and serve. Enjoy!
Tips for Success:
- Don’t Overbake the Cake: Overbaked cake will be dry and crumbly. Check for doneness with a wooden skewer.
- Use High-Quality Ice Cream: The better the ice cream, the better the cake!
- Freeze Between Layers: Freezing the cake between each layer is crucial for preventing the layers from mixing and creating a stable cake.
- Let Ganache Cool Slightly: Letting the ganache cool slightly before pouring it over the cake will help it thicken and prevent it from running off the sides too quickly.
- Use a Warm Knife to Slice: Dip a sharp knife in warm water and dry it before each slice for clean, even cuts.
- Storage: Store leftover ice cream cake in the freezer, tightly wrapped in plastic wrap or in an airtight container. It will keep for up to a week.
Variations:
- Different Cake Flavors: Try using different cake flavors, such as vanilla, red velvet, or even a box mix for convenience.
- Different Ice Cream Flavors: Experiment with different ice cream flavors, such as cookies and cream, mint chocolate chip, or coffee.
- Add a Crunch Layer: Add a layer of crushed Oreos, chopped nuts, or chocolate chips between the ice cream layers for added texture.
- Use Different Toppings: Get creative with your toppings! Try using different types of chocolate, candies, or fruit.
Conclusion:
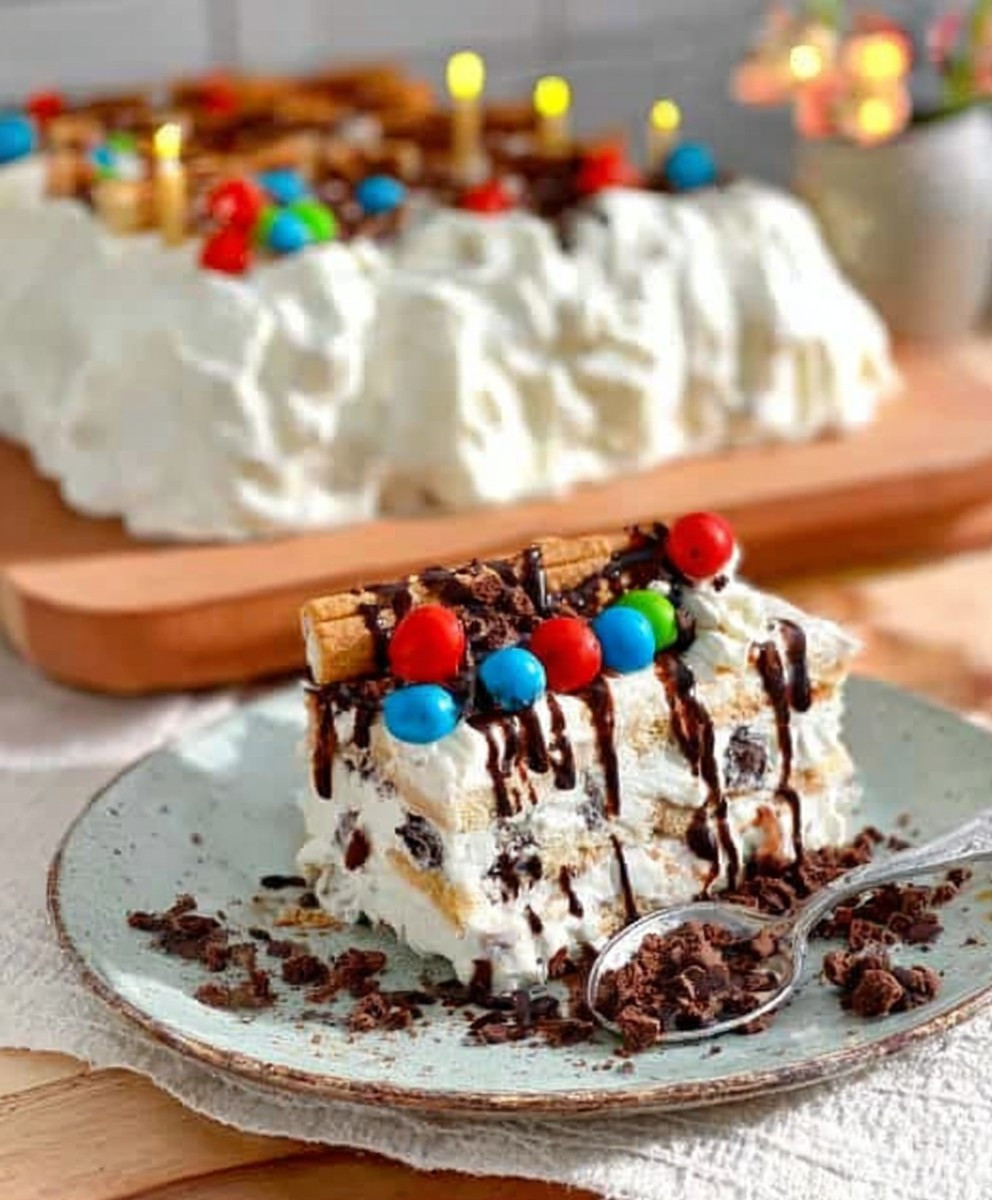
This Ice Cream Cake isn’t just dessert; it’s a celebration waiting to happen! Seriously, if you’re looking for a show-stopping treat that’s surprisingly simple to make, look no further. We’ve combined the creamy coolness of ice cream with the satisfying crunch of cookies and the delightful surprise of fudge, all in one glorious package. What’s not to love?
I know what you might be thinking: “Ice cream cake? Sounds complicated!” But trust me, this recipe is designed for everyone, from seasoned bakers to kitchen newbies. The beauty of it lies in its adaptability. Feel free to swap out the cookies for your favorite kind – Oreos, chocolate chip, even peanut butter cookies would be fantastic. And if fudge isn’t your thing (though I can’t imagine why!), you could drizzle caramel or even a homemade berry sauce between the layers. The possibilities are truly endless!
Think about serving this at your next birthday party. Imagine the look on everyone’s faces when you bring out this towering masterpiece. Or, why wait for a special occasion? This Ice Cream Cake is perfect for a casual summer barbecue, a cozy movie night, or simply a “just because” treat. For an extra touch of elegance, garnish with fresh berries, whipped cream rosettes, or a sprinkle of chocolate shavings. You could even add a layer of chopped nuts for added texture and flavor.
Serving suggestions? I’ve got plenty! Cut into generous slices and serve immediately. For a smoother, easier-to-eat experience, let the cake sit at room temperature for a few minutes before slicing. Pair it with a glass of cold milk, a scoop of extra ice cream (because why not?), or a cup of hot coffee for a delightful contrast. And if you’re feeling adventurous, try adding a splash of liqueur to the ice cream before freezing for an adult-friendly twist.
But the real magic of this recipe is in the sharing. It’s about creating memories and bringing people together over something delicious. So, I urge you to give this Ice Cream Cake a try. I promise you won’t be disappointed. It’s a guaranteed crowd-pleaser that’s sure to become a family favorite.
And now, for the most important part: I want to hear about your experience! Did you make any substitutions? Did you add any special touches? What did your family and friends think? Please, share your photos and stories in the comments below. I can’t wait to see your creations and hear all about your ice cream cake adventures. Let’s spread the joy of homemade desserts, one delicious slice at a time! Happy baking (or should I say, freezing?)! I’m confident that this will become your go-to recipe for a quick, easy, and impressive dessert. Don’t forget to tag me in your social media posts – I’d love to see your creations!
Ice Cream Cake: The Ultimate Guide to Delicious Frozen Desserts
Decadent Chocolate Ice Cream Cake with moist chocolate cake layers, creamy vanilla and strawberry ice cream, and rich chocolate ganache. Perfect for celebrations!
Ingredients
Instructions
Recipe Notes
- Don’t Overbake the Cake: Overbaked cake will be dry and crumbly. Check for doneness with a wooden skewer.
- Use High-Quality Ice Cream: The better the ice cream, the better the cake!
- Freeze Between Layers: Freezing the cake between each layer is crucial for preventing the layers from mixing and creating a stable cake.
- Let Ganache Cool Slightly: Letting the ganache cool slightly before pouring it over the cake will help it thicken and prevent it from running off the sides too quickly.
- Use a Warm Knife to Slice: Dip a sharp knife in warm water and dry it before each slice for clean, even cuts.
- Storage: Store leftover ice cream cake in the freezer, tightly wrapped in plastic wrap or in an airtight container. It will keep for up to a week.