Chocolate Strawberry Swirl Cheesecake is more than just a dessert; it’s a culinary celebration, a stunning centerpiece, and a true testament to the art of baking. Imagine a dessert that’s as breathtaking to behold as it is utterly delightful to devour – a rich tapestry of deep chocolate and vibrant strawberry, elegantly swirled into a creamy, tangy cheesecake base. While the history of cheesecake dates back to ancient Greece, evolving through various forms to the beloved modern New York-style, this particular rendition elevates the classic with a modern twist of flavors and visual appeal.
People adore this dish for countless reasons. The luxurious combination of smooth, decadent chocolate with the refreshing sweetness and slight tartness of strawberries creates an exquisite flavor profile that tantalizes the palate. Its velvety texture, coupled with a perfectly crumbly crust, offers a delightful mouthfeel with every forkful. But perhaps its greatest allure lies in its stunning presentation; the beautiful marbling of colors makes every slice of Chocolate Strawberry Swirl Cheesecake a work of edible art, perfect for impressing guests or simply treating yourself to something truly special. I’m excited to guide you through creating this show-stopping dessert.

Ingredients:
-
For the Graham Cracker Crust:
- 1 ½ cups (about 180g) graham cracker crumbs (roughly 12-14 full graham cracker sheets, finely crushed). I like to crush mine in a food processor for a really fine, even crumb.
- ¼ cup (50g) granulated sugar. This adds a touch of sweetness and helps the crust crisp up.
- 6 tablespoons (85g) unsalted butter, melted. Make sure it’s fully melted but not scorching hot.
-
For the Chocolate Strawberry Swirl Cheesecake Filling:
- 32 ounces (four 8-ounce blocks) full-fat cream cheese, softened to room temperature. This is crucial for a smooth, lump-free cheesecake!
- 1 ½ cups (300g) granulated sugar.
- 2 tablespoons all-purpose flour. This helps prevent cracks and adds a bit of structure.
- 1 teaspoon pure vanilla extract. Use good quality vanilla, it makes a difference.
- ½ teaspoon salt. Balances the sweetness beautifully.
- 1 cup (240g) sour cream, at room temperature. Adds moisture, richness, and that signature tang.
- 4 large eggs, at room temperature. Again, room temperature is key for emulsification.
- 2 large egg yolks, at room temperature. These add extra richness and help with the creamy texture.
-
For the Strawberry Swirl:
- 1 ½ cups fresh or frozen strawberries, hulled and quartered (if fresh).
- ¼ cup (50g) granulated sugar.
- 1 tablespoon fresh lemon juice. Brightens the flavor and enhances the red color.
- 1 tablespoon cornstarch, dissolved in 2 tablespoons cold water (a slurry). This will thicken our swirl.
-
For the Chocolate Swirl:
- 4 ounces good quality semi-sweet or dark chocolate (60-70% cacao), finely chopped. Chocolate chips can work, but finely chopped bar chocolate melts smoother.
- 2 tablespoons heavy cream.
-
Optional Garnish:
- Fresh strawberries, chocolate shavings, or a dollop of whipped cream.
Prepping Your Workspace and Oven:
Before you dive into the delightful process of creating your Chocolate Strawberry Swirl Cheesecake, let’s get everything organized. Trust me, mise en place makes baking so much more enjoyable and less stressful. First, preheat your oven to 325°F (160°C). This gives it plenty of time to come to a stable temperature. Next, you’ll need a 9-inch springform pan. I always recommend lightly greasing the bottom and sides of the pan, and then lining the bottom with a circle of parchment paper. This ensures your beautiful cheesecake releases easily. To prepare for the water bath (which is essential for a crack-free, creamy cheesecake), wrap the outside of your springform pan with two layers of heavy-duty aluminum foil. Make sure the foil extends all the way up the sides, creating a secure barrier against any water seeping in. No one wants a soggy crust! Finally, place a large roasting pan or another oven-safe pan on the middle rack of your preheated oven. This is where your foil-wrapped springform pan will sit, and it will hold the hot water for our water bath.
Why a Water Bath is Crucial for Cheesecake:
I cannot stress enough how important the water bath is for achieving that signature silky, custardy texture in your Chocolate Strawberry Swirl Cheesecake. The steam created by the hot water bath provides a moist environment, preventing the cheesecake from drying out and cracking. It also ensures even, gentle cooking, allowing the center to set slowly and beautifully, much like a perfect custard. Skipping this step often results in a drier, more crumbly cheesecake with noticeable cracks on the surface, which we definitely want to avoid for our show-stopping dessert.
Creating the Graham Cracker Crust:
- Combine Dry Ingredients: In a medium bowl, combine your graham cracker crumbs and granulated sugar. Mix them well with a fork until the sugar is evenly distributed. You want every crumb to have a touch of sweetness.
- Add Melted Butter: Pour the melted butter over the crumb mixture. Using your fork, or even better, your clean hands, mix until all the crumbs are moistened and resemble wet sand. It should hold together when you pinch a bit between your fingers. If it feels too dry, add another teaspoon or two of melted butter, but be careful not to make it greasy.
- Press into Pan: Transfer the moistened crumbs to your prepared 9-inch springform pan. Use the bottom of a flat glass or a measuring cup to firmly and evenly press the mixture over the bottom of the pan. You want a compact, solid crust. Don’t press it up the sides unless you prefer a slightly higher crust, but for this Chocolate Strawberry Swirl Cheesecake, I find a bottom crust works best for showcasing the swirls.
- Pre-bake (Optional but Recommended): For a crisper, more stable crust, I recommend pre-baking it. Place the pan in the preheated 325°F (160°C) oven for 8-10 minutes, or until lightly golden and fragrant. This step helps prevent a soggy crust once the filling is added.
- Cool: Remove the crust from the oven and let it cool completely on a wire rack while you prepare the fillings. A cool crust prevents the cheesecake filling from melting into it too much.
Crafting the Vibrant Strawberry Swirl:
This strawberry swirl is going to add a beautiful tart counterpoint and stunning visual appeal to your Chocolate Strawberry Swirl Cheesecake. It’s simple to make and well worth the effort.
- Simmer Strawberries: In a small saucepan, combine the hulled and quartered strawberries, ¼ cup granulated sugar, and lemon juice. Bring the mixture to a gentle simmer over medium heat, stirring occasionally.
- Cook Down: Continue to simmer for about 5-7 minutes, or until the strawberries have softened significantly and have released their juices, breaking down into a jam-like consistency. You can gently mash them with the back of a spoon if needed to help them break down.
- Thicken: Give your cornstarch slurry a quick stir to re-dissolve the cornstarch, then pour it into the simmering strawberry mixture. Stir continuously for 1-2 minutes until the sauce thickens to a spoon-coating consistency. It should be thick enough to hold its shape somewhat but still pourable.
- Strain (Optional for Ultra-Smooth Swirl): For an incredibly smooth swirl, you can press the strawberry mixture through a fine-mesh sieve to remove seeds. I usually skip this step because I enjoy the tiny texture from the seeds, but it’s totally up to your preference for your Chocolate Strawberry Swirl Cheesecake.
- Cool Completely: Transfer the strawberry swirl to a small bowl and let it cool completely to room temperature. This is important! If it’s warm, it will melt into your cheesecake batter, ruining the distinct swirl effect. You can even pop it into the fridge for 15-20 minutes to speed this up.
Preparing the Decadent Chocolate Swirl:
The rich, dark chocolate swirl is the perfect complement to the creamy cheesecake and bright strawberry, creating the “Chocolate Strawberry Swirl Cheesecake” experience you’re after.
- Melt Chocolate: Place the finely chopped chocolate in a small, microwave-safe bowl. Add the heavy cream.
- Microwave or Double Boiler: Heat in the microwave in 30-second intervals, stirring well after each, until the chocolate is fully melted and smooth. Alternatively, you can create a double boiler by placing the bowl over a saucepan of simmering water (make sure the bottom of the bowl doesn’t touch the water) and stirring until melted and smooth.
- Stir Until Silky: Stir until the mixture is glossy and uniform. It should be a thick, pourable ganache.
- Cool Slightly: Allow the chocolate mixture to cool slightly, but keep it warm enough to be pourable. If it gets too thick, you can gently reheat it for a few seconds. Just like the strawberry, you don’t want it scorching hot, but it needs to be fluid for swirling.
Making the Silky Cheesecake Filling:
This is the heart of your Chocolate Strawberry Swirl Cheesecake, and getting it right ensures a luxuriously smooth texture. Patience and room temperature ingredients are your best friends here!
- Cream Cheese and Sugar: In the bowl of a stand mixer fitted with the paddle attachment, or using a large bowl with a hand mixer, beat the softened cream cheese on medium-low speed for about 2-3 minutes until it’s completely smooth and free of lumps. Then, gradually add the granulated sugar and continue beating on medium-low speed for another 2-3 minutes until the mixture is light and fluffy. Make sure to scrape down the sides of the bowl frequently to ensure everything is incorporated.
- Add Dry Ingredients: Sprinkle in the all-purpose flour and salt. Beat on low speed until just combined. The flour helps stabilize the cheesecake and prevent cracking.
- Introduce Flavorings: Add the vanilla extract and sour cream. Beat on low speed until just combined and smooth. The sour cream adds that lovely tang and extra creaminess. Again, scrape down the bowl.
- Incorporate Eggs and Yolks: In a separate small bowl, lightly whisk the 4 large eggs and 2 egg yolks together. With the mixer on its lowest speed, slowly pour the whisked eggs and yolks into the cream cheese mixture, mixing until just combined. Do not overmix at this stage! Overmixing incorporates too much air, which can cause the cheesecake to puff up too much during baking and then collapse and crack as it cools. We want a dense, creamy texture.
- Final Scrape and Check: Give the bowl one last good scrape with a rubber spatula, making sure there are no unmixed pockets at the bottom. You should have a wonderfully smooth, slightly thick, and uniform cheesecake batter.
Assembling and Swirling Your Chocolate Strawberry Swirl Cheesecake:
This is where the magic happens and your Chocolate Strawberry Swirl Cheesecake truly comes to life with its stunning visual appeal!
- Pour Initial Batter: Pour about two-thirds (roughly 4 cups) of the cheesecake batter over your cooled graham cracker crust in the springform pan. Gently tap the pan on the counter a few times to release any large air bubbles and level the surface.
- Layer Chocolate: Drizzle about half of your cooled chocolate ganache over the batter in a circular pattern. You don’t need to be too neat here, as it will be swirled.
- Layer Strawberry: Drizzle about half of your cooled strawberry swirl over the chocolate, also in a circular pattern.
- Add Remaining Batter: Carefully pour the remaining one-third of the cheesecake batter over the chocolate and strawberry layers. Try to pour it as evenly as possible to cover the swirls.
- Top with Remaining Swirls: Now, drizzle the remaining chocolate ganache and strawberry swirl over the top of the cheesecake batter.
- The Swirl Technique: Take a thin knife or a skewer and gently drag it through the batters and swirls in a figure-eight or circular motion. Don’t go too deep into the crust, just enough to create beautiful, distinct swirls on the surface. You’re aiming for marbling, not fully mixing them in. Be creative with your swirls – each Chocolate Strawberry Swirl Cheesecake will be unique!
Baking the Cheesecake to Perfection:
Baking a cheesecake can seem daunting, but with the right technique, your Chocolate Strawberry Swirl Cheesecake will be perfectly cooked.
- Prepare Water Bath: Carefully place your foil-wrapped springform pan into the large roasting pan that you already have on the oven rack. Pour hot water into the roasting pan until it comes about halfway up the sides of the springform pan. Be very careful not to splash any water into the cheesecake itself.
- Bake Initial Phase: Bake the Chocolate Strawberry Swirl Cheesecake for 1 hour and 15 minutes to 1 hour and 30 minutes, or until the edges are set and lightly golden, but the center still jiggles slightly when you gently nudge the pan. It should resemble a large, soft custard. The internal temperature in the center should register 150-155°F (65-68°C) if you use an instant-read thermometer.
- Cool in Oven: Once baked, turn off the oven but leave the cheesecake inside the water bath with the oven door propped open slightly (a wooden spoon works great for this) for 1 hour. This slow, gradual cooling process is crucial for preventing cracks. It allows the cheesecake to adjust to the temperature change gently.
- Remove from Water Bath: After 1 hour, carefully remove the springform pan from the water bath (remove the roasting pan from the oven first, then lift out the springform). Remove the foil from around the springform pan.
- Cool to Room Temperature: Place the cheesecake on a wire rack and let it cool completely to room temperature, which will take another 2-3 hours. Do not rush this step. The cheesecake will continue to set as it cools.
Chilling for the Ultimate Indulgence:
This is arguably the most important step for achieving that firm, sliceable, and utterly delicious Chocolate Strawberry Swirl Cheesecake texture. Do not skip or shorten this chilling period!
- Refrigerate: Once completely cooled to room temperature, cover the springform pan loosely with plastic wrap. Transfer the Chocolate Strawberry Swirl Cheesecake to the refrigerator and chill for a minimum of 8 hours, but preferably overnight. This long chill allows the cheesecake to fully set, making it easy to slice and enhancing its rich, creamy flavor and texture. Think of it as letting all those beautiful flavors meld together.
Serving Your Masterpiece:
The moment you’ve been waiting for! Presenting your gorgeous homemade Chocolate Strawberry Swirl Cheesecake.
- Unmold: After chilling, run a thin knife around the edge of the cheesecake before releasing the springform ring. This helps prevent the cheesecake from sticking and tearing as you remove the ring.
- Transfer: Carefully slide the cheesecake off the bottom of the springform pan onto a serving plate or cake stand, peeling off the parchment paper. If you find this tricky, you can leave it on the springform base and simply slide a thin spatula or knife under each slice as you serve.
- Slice and Garnish: For clean slices, dip a sharp knife in hot water and wipe it clean between each cut. Garnish your Chocolate Strawberry Swirl Cheesecake with fresh strawberries, chocolate shavings, or a dollop of whipped cream if desired.
- Storage: Store any leftover cheesecake covered in the refrigerator for up to 5 days. Though, I highly doubt it will last that long!
Conclusion:
Well, my friends, we’ve reached the sweet end of our journey, and I genuinely hope you’re feeling as inspired as I am about this incredible dessert. What we’ve just explored isn’t just another recipe; it’s an invitation to create something truly magical, a showstopper that will earn you rave reviews and delighted smiles. This isn’t merely a cheesecake; it’s an experience, a symphony of textures and tastes that come together in perfect harmony. From the creamy, rich tang of the cheesecake base to the vibrant, fruity burst of strawberry, all elegantly intertwined with the decadent depth of chocolate, every single bite is designed to be a moment of pure bliss. It’s a dessert that manages to be both comforting and sophisticated, familiar yet exquisitely special.
I truly believe this recipe for Chocolate Strawberry Swirl Cheesecake is a must-try for anyone who appreciates fine desserts or simply loves to indulge in something extraordinary. It strikes that perfect balance of being impressive enough for a grand celebration, yet comforting enough for a quiet evening treat. The visual appeal alone, with its captivating swirls of color, makes it an instant center-piece, a culinary work of art. But beyond its stunning looks, it’s the unforgettable taste that will truly win hearts. The way the smooth, cool cheesecake melts on your tongue, followed by the refreshing sweetness of strawberry and the comforting bitterness of chocolate, creates a sensory experience that is truly unparalleled. It’s a dessert that speaks of celebration, joy, and the simple pleasure of good food shared with loved ones.
Now, let’s talk about making this masterpiece shine even brighter on your table. For a classic presentation, serve generous slices chilled, perhaps with a delicate dusting of cocoa powder or a few fresh, vibrant strawberry halves arranged artfully on the plate. For an extra touch of indulgence, a dollop of freshly whipped cream, sweetened just slightly, can elevate the experience further, adding an airy counterpoint to the cheesecake’s richness. And if you’re feeling particularly fancy, a drizzle of high-quality dark chocolate sauce or a sprig of fresh mint can add both visual appeal and a refreshing aromatic note. Don’t forget the drink pairings either; a robust cup of coffee, a light herbal tea, or even a glass of sparkling rosé or a sweet dessert wine would complement its complex flavors beautifully, turning a simple dessert into a memorable occasion.
But the beauty of baking, especially with a recipe this versatile, lies in personalizing it. Don’t hesitate to experiment! While the chocolate and strawberry combination is divine, imagine swapping the strawberries for raspberries or cherries for a different fruit profile. Or perhaps play with the chocolate; a white chocolate swirl could create an even more dramatic contrast against a darker base, or a milk chocolate version for a sweeter, milder flavor. You could even consider a different crust – an Oreo cookie crust would be phenomenal for an even deeper chocolate flavor, or a shortbread crust for a buttery, crumbly base. For individual portions, try making mini cheesecakes in muffin tins with paper liners, perfect for parties or portion control. The possibilities are truly endless once you master this core recipe, allowing you to tailor it to any occasion or preference. Every variation offers a new adventure in flavor, and I encourage you to explore them all.
Now, It’s Your Turn!
I genuinely encourage you to roll up your sleeves, gather your ingredients, and give this Chocolate Strawberry Swirl Cheesecake a try. Don’t be intimidated by its elegant appearance; the process is incredibly rewarding, and the steps are designed to guide you to success. There’s a profound satisfaction that comes from creating something so beautiful and delicious from scratch, and I promise you’ll feel immensely proud as you present your finished creation. Baking is often about sharing joy, and this cheesecake is an absolute joy-spreader. I can’t wait to hear about your experience! Please, once you’ve baked and tasted this delightful dessert, come back and share your thoughts in the comments below. Let me know what you loved most, what variations you tried, and who you shared it with. Your feedback and stories inspire not only me but also our entire community of fellow bakers. Happy baking, my friends!
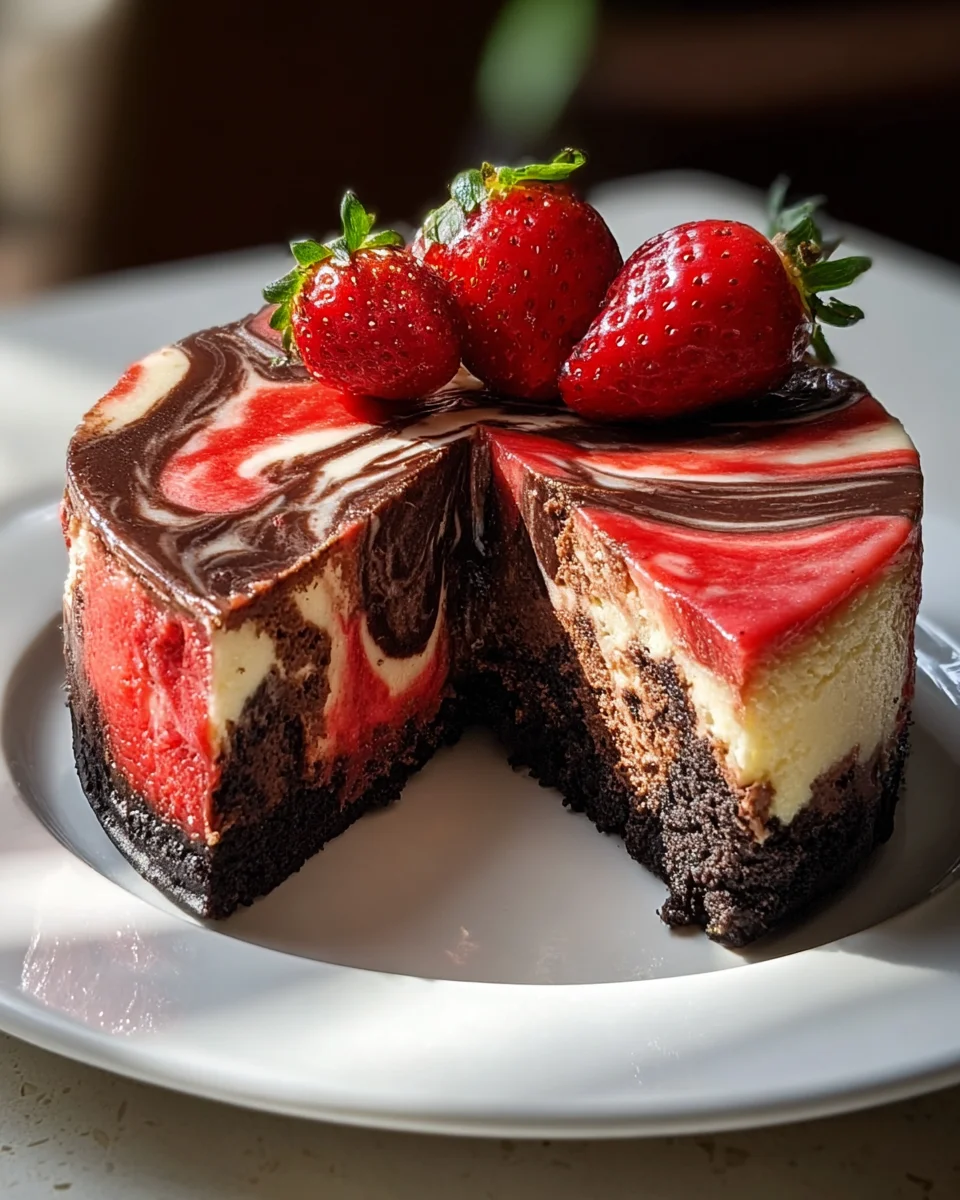
Chocolate Strawberry Swirl Cheesecake
Chocolate Strawberry Swirl Cheesecake is a culinary celebration, a stunning centerpiece, and a true testament to the art of baking. Imagine a dessert that’s as breathtaking to behold as it is utterly delightful to devour – a rich tapestry of deep chocolate and vibrant strawberry, elegantly swirled into a creamy, tangy cheesecake base.
Ingredients
Instructions
Important Information
Nutrition Facts (Per Serving)
It is important to consider this information as approximate and not to use it as definitive health advice.
Allergy Information
Please check ingredients for potential allergens and consult a health professional if in doubt.