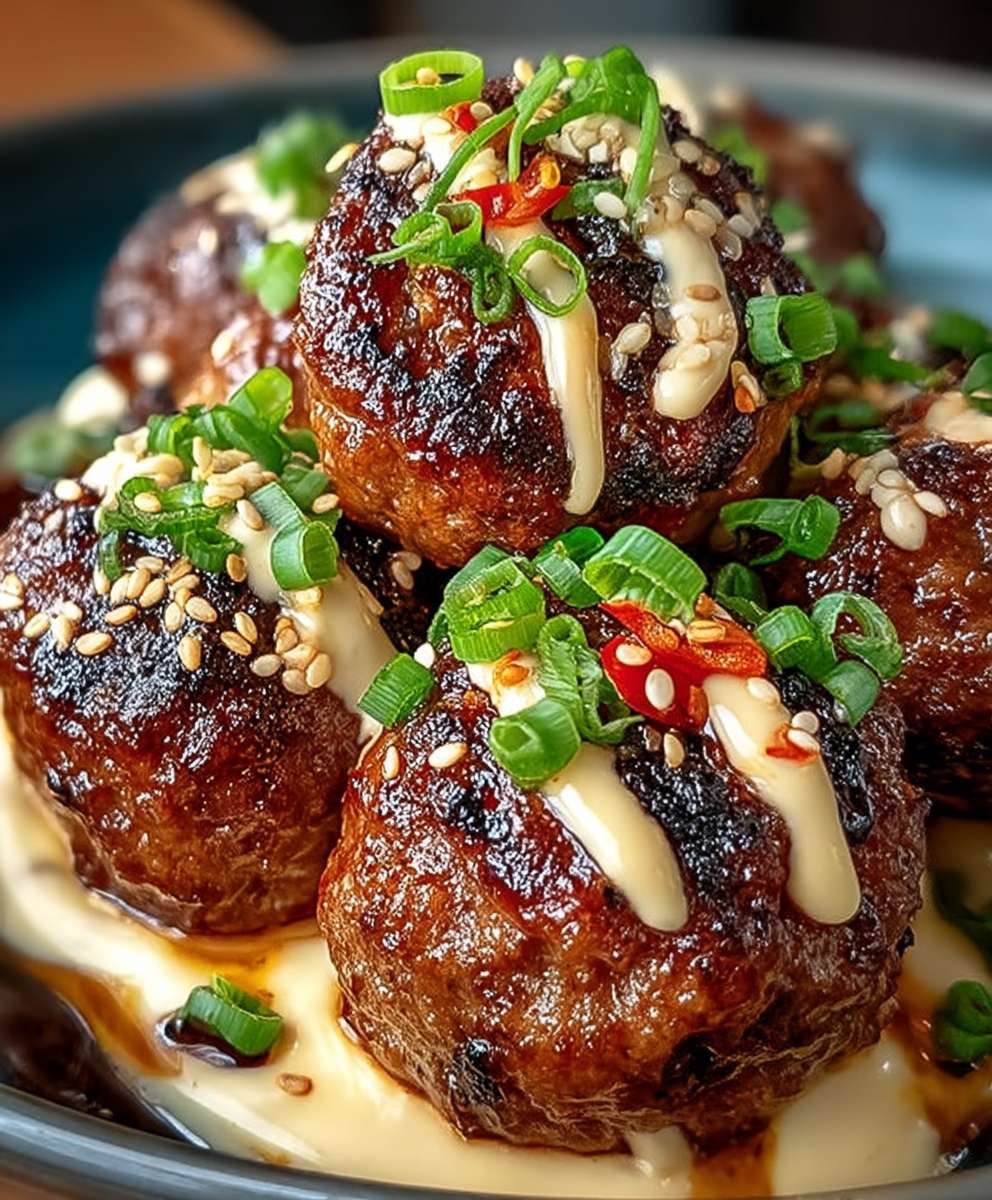
Korean BBQ Meatballs: Get ready to experience a flavor explosion in every bite! These aren’t your average meatballs; we’re talking about a sweet, savory, and slightly spicy sensation that will have your taste buds singing. Imagine tender, juicy meatballs glazed in a rich, umami-packed Korean BBQ sauce – it’s an irresistible combination that’s surprisingly easy to make at home.
Korean BBQ, or gogi-gui, is a beloved culinary tradition deeply rooted in Korean culture. It’s more than just a meal; it’s a social experience, often enjoyed with family and friends around a grill. While traditionally featuring thinly sliced meats cooked at the table, this recipe takes the essence of Korean BBQ – that incredible balance of sweet, savory, and smoky flavors – and transforms it into a convenient and crowd-pleasing meatball form.
What makes these Korean BBQ Meatballs so special? It’s the perfect marriage of textures and tastes. The meatballs themselves are incredibly tender, thanks to a few simple tricks we’ll share. Then there’s the sauce – a symphony of soy sauce, garlic, ginger, sesame oil, and gochujang (Korean chili paste) that creates an addictive glaze. People love this dish because it’s both comforting and exciting, familiar yet exotic. Plus, they’re incredibly versatile! Serve them as an appetizer, a main course over rice, or even in sliders for a fun and flavorful twist. Let’s get cooking!
Ingredients:
- For the Meatballs:
- 1.5 lbs ground beef (80/20 blend is ideal for flavor and moisture)
- 1/2 lb ground pork (adds richness and tenderness)
- 1 cup panko breadcrumbs (Japanese breadcrumbs, lighter and crispier than regular breadcrumbs)
- 1/2 cup finely chopped yellow onion
- 4 cloves garlic, minced
- 2 tablespoons grated fresh ginger
- 1/4 cup soy sauce (low sodium preferred, adjust to taste)
- 2 tablespoons brown sugar, packed
- 1 tablespoon sesame oil
- 1 large egg, lightly beaten
- 1 teaspoon gochujang (Korean chili paste, adjust to taste for spice level)
- 1/2 teaspoon black pepper
- For the Korean BBQ Sauce:
- 1/2 cup soy sauce (low sodium preferred)
- 1/4 cup brown sugar, packed
- 1/4 cup water
- 2 tablespoons rice vinegar
- 2 tablespoons sesame oil
- 2 tablespoons gochujang (Korean chili paste, adjust to taste for spice level)
- 1 tablespoon honey
- 2 cloves garlic, minced
- 1 teaspoon grated fresh ginger
- 1/2 teaspoon red pepper flakes (optional, for extra heat)
- 1 tablespoon cornstarch (for thickening)
- 2 tablespoons cold water (for cornstarch slurry)
- For Garnish (Optional):
- Sesame seeds
- Chopped green onions
- Extra gochujang, for serving
Preparing the Meatball Mixture:
- In a large bowl, gently combine the ground beef and ground pork. Avoid overmixing, as this can lead to tough meatballs.
- Add the panko breadcrumbs, finely chopped yellow onion, minced garlic, and grated fresh ginger to the bowl.
- Pour in the soy sauce, brown sugar, and sesame oil. These ingredients will add the signature Korean BBQ flavor to the meatballs.
- Add the lightly beaten egg and gochujang. The egg will act as a binder, helping the meatballs hold their shape, and the gochujang will provide a spicy kick. Remember you can adjust the amount of gochujang to your preference. If you’re sensitive to spice, start with a smaller amount and taste as you go.
- Season with black pepper.
- Using your hands (or a large spoon), gently mix all the ingredients together until just combined. Again, be careful not to overmix.
Forming and Cooking the Meatballs:
- Preheat your oven to 400°F (200°C). Line a baking sheet with parchment paper for easy cleanup.
- Using a tablespoon or a small ice cream scoop, form the meat mixture into meatballs. Aim for meatballs that are about 1-1.5 inches in diameter. This size will ensure they cook evenly.
- Place the meatballs on the prepared baking sheet, leaving a little space between each one.
- Bake for 20-25 minutes, or until the meatballs are cooked through and lightly browned. The internal temperature should reach 160°F (71°C). You can use a meat thermometer to check for doneness.
- While the meatballs are baking, prepare the Korean BBQ sauce (see instructions below).
Preparing the Korean BBQ Sauce:
- In a medium saucepan, whisk together the soy sauce, brown sugar, water, rice vinegar, and sesame oil.
- Add the gochujang, honey, minced garlic, and grated fresh ginger to the saucepan. If you’re using red pepper flakes, add them now as well.
- Bring the mixture to a simmer over medium heat, stirring occasionally.
- In a small bowl, whisk together the cornstarch and cold water to create a slurry. This will help thicken the sauce.
- Once the sauce is simmering, slowly pour in the cornstarch slurry, whisking constantly to prevent lumps from forming.
- Continue to simmer the sauce for 2-3 minutes, or until it has thickened to your desired consistency. The sauce should be able to coat the back of a spoon.
- Remove the saucepan from the heat and set aside.
Combining Meatballs and Sauce:
- Once the meatballs are cooked through, remove them from the oven.
- Transfer the meatballs to the saucepan with the Korean BBQ sauce.
- Gently toss the meatballs in the sauce until they are evenly coated.
- Return the saucepan to low heat and simmer for another 5-10 minutes, allowing the meatballs to absorb the flavors of the sauce. Stir occasionally to prevent sticking.
Serving Suggestions:
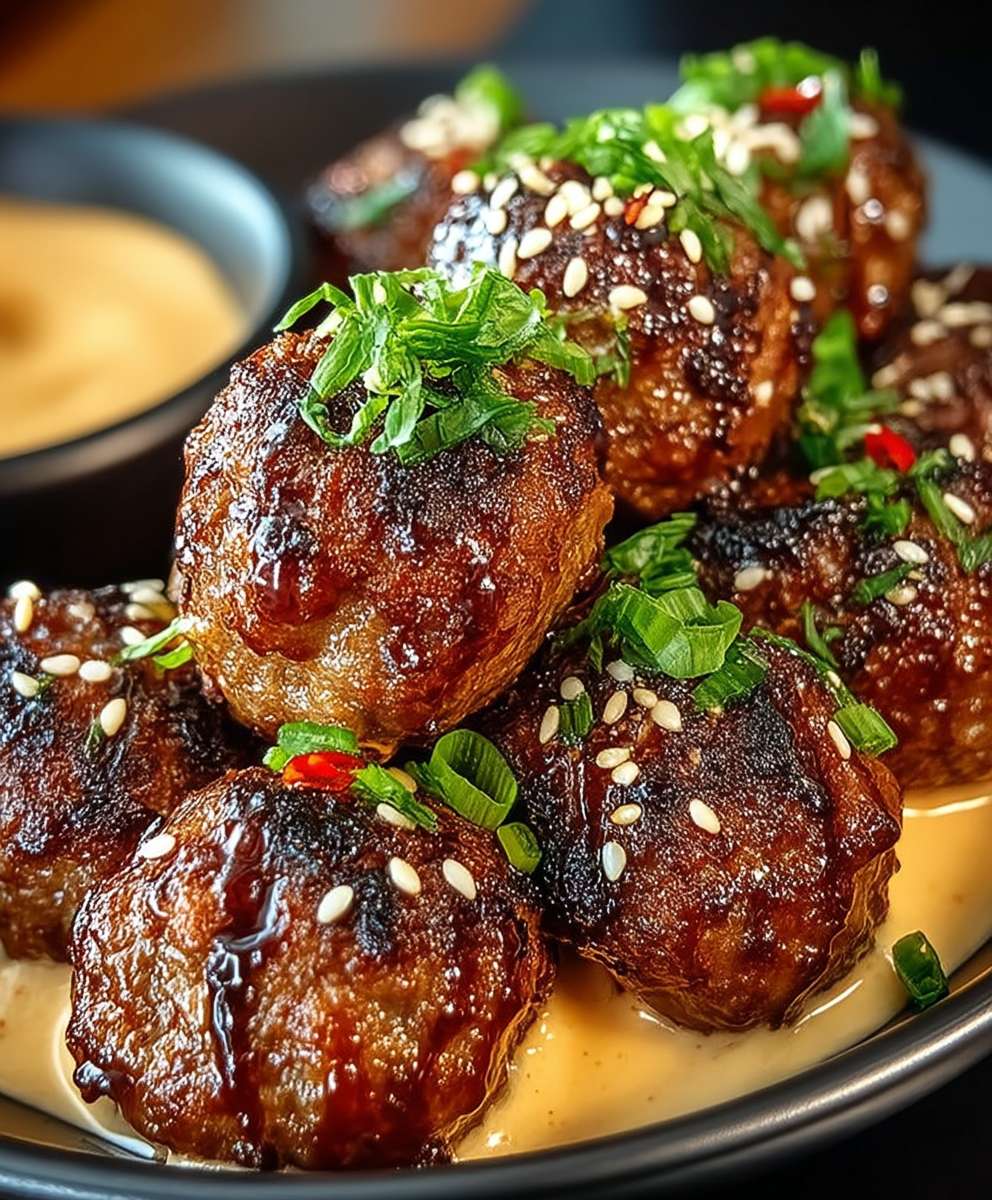
- Serve the Korean BBQ meatballs hot, garnished with sesame seeds and chopped green onions.
- These meatballs are delicious served over rice, noodles, or mashed potatoes.
- They also make a great appetizer or party snack. Serve them with toothpicks for easy grabbing.
- For an extra spicy kick, serve with a side of gochujang.
- Consider serving with kimchi or other Korean side dishes for a complete meal.
- Leftover meatballs can be stored in an airtight container in the refrigerator for up to 3 days. Reheat gently in a saucepan or microwave before serving.
Tips and Variations:
- Spice Level: Adjust the amount of gochujang and red pepper flakes to your preference. If you’re sensitive to spice, start with a smaller amount and taste as you go.
- Meat Options: You can use all ground beef or all ground pork if you prefer. You can also experiment with ground turkey or chicken.
- Breadcrumb Alternatives: If you don’t have panko breadcrumbs, you can use regular breadcrumbs, but the texture of the meatballs may be slightly different.
- Vegetarian Option: For a vegetarian version, substitute the ground meat with a plant-based ground meat alternative.
- Air Fryer Option: You can also cook the meatballs in an air fryer. Preheat your air fryer to 375°F (190°C) and cook for 12-15 minutes, or until cooked through.
- Gluten-Free Option: Use gluten-free panko breadcrumbs and tamari (gluten-free soy sauce) to make this recipe gluten-free.
- Sweetness Adjustment: If you prefer a sweeter sauce, add a little more honey or brown sugar. If you prefer a less sweet sauce, reduce the amount of brown sugar.
- Garlic and Ginger: Freshly minced garlic and grated ginger are essential for the best flavor. Avoid using garlic powder or ginger powder if possible.
- Make Ahead: You can prepare the meatball mixture ahead of time and store it in the refrigerator for up to 24 hours. You can also make the Korean BBQ sauce ahead of time and store it in the refrigerator for up to 3 days.
- Freezing: Cooked meatballs can be frozen for up to 2 months. Allow them to cool completely before transferring them to a freezer-safe bag or container. Thaw overnight in the refrigerator before reheating.
Serving Ideas:
- Korean BBQ Meatball Bowls: Serve the meatballs over a bed of rice with a variety of toppings such as kimchi, pickled vegetables, a fried egg, and a drizzle of sriracha mayo.
- Korean BBQ Meatball Sliders: Use small slider buns and fill them with the Korean BBQ meatballs. Top with coleslaw or kimchi for added flavor and texture.
- Korean BBQ Meatball Lettuce Wraps: For a lighter option, serve the meatballs in lettuce cups. Top with shredded carrots, cucumbers, and a drizzle of sesame dressing.
- Korean BBQ Meatball Skewers: Thread the meatballs onto skewers with vegetables such as bell peppers, onions, and zucchini. Grill or bake until the vegetables are tender and the meatballs are heated through.
- Korean BBQ Meatball Pizza: Use the Korean BBQ meatballs as a topping for pizza. Combine with mozzarella cheese, kimchi, and a drizzle of gochujang for a unique and flavorful pizza.
Nutritional Information (Approximate):
(Note: Nutritional information is an estimate and may vary based on specific ingredients and portion sizes.)
- Calories: 350-400 per serving
- Protein: 25-
Conclusion:
And there you have it! These Korean BBQ Meatballs are truly a game-changer. From the tantalizing aroma that fills your kitchen as they bake to the explosion of sweet, savory, and slightly spicy flavors with every bite, this recipe is guaranteed to become a family favorite. I’ve made these countless times, and they disappear faster than I can say “gochujang”!
But why is this recipe a must-try? It’s simple: it’s incredibly delicious, surprisingly easy to make, and endlessly versatile. Forget boring weeknight dinners – these meatballs bring the excitement of Korean BBQ right to your table, without the fuss of grilling or the expense of takeout. The combination of ground meat, vibrant spices, and that irresistible Korean BBQ sauce creates a symphony of flavors that will leave you craving more. Plus, they’re baked, not fried, making them a healthier option without sacrificing any of the deliciousness.
Serving Suggestions and Variations:
The possibilities are truly endless when it comes to serving these Korean BBQ Meatballs. For a quick and easy weeknight meal, serve them over a bed of fluffy rice, garnished with sesame seeds and chopped green onions. You can also add a side of steamed broccoli or stir-fried vegetables for a complete and balanced meal.
Looking for something a little more adventurous? Try using them as a filling for Korean-inspired sliders! Simply pile them onto mini brioche buns with a dollop of kimchi slaw and a drizzle of sriracha mayo. They’re also fantastic as an appetizer for parties. Skewer them with pineapple chunks and bell peppers for a colorful and flavorful presentation.
For variations, consider experimenting with different types of ground meat. Ground pork or turkey work just as well as ground beef. You can also adjust the level of spice to your liking. If you prefer a milder flavor, reduce the amount of gochujang or omit the red pepper flakes altogether. For those who like it hot, add a pinch of cayenne pepper or a few drops of your favorite hot sauce.
Another fun variation is to add some finely chopped vegetables to the meatball mixture. Diced carrots, zucchini, or mushrooms will add extra flavor and nutrients. You can also experiment with different types of sauces. While the Korean BBQ sauce is the star of the show, you could also try using a teriyaki sauce or a sweet chili sauce for a different flavor profile.
Don’t be afraid to get creative and make this recipe your own! The beauty of cooking is that there are no rules. Experiment with different ingredients and techniques until you find what works best for you.
Now it’s your turn!
I truly believe that these Korean BBQ Meatballs will become a staple in your kitchen. They’re perfect for busy weeknights, casual gatherings, or any time you’re craving a delicious and satisfying meal. So, what are you waiting for? Gather your ingredients, preheat your oven, and get ready to experience the magic of Korean BBQ in meatball form.
I’m so excited for you to try this recipe and I can’t wait to hear about your experience. Did you make any variations? What did you serve them with? What did your family and friends think? Share your photos and stories in the comments below! Your feedback is invaluable and helps me to continue creating recipes that you’ll love. Happy cooking!
Korean BBQ Meatballs: A Delicious & Easy Recipe
Savory, slightly spicy Korean BBQ Meatballs made with ground beef and pork, coated in a flavorful homemade Korean BBQ sauce. Perfect as an appetizer, over rice, or in sliders!
Ingredients
- 1.5 lbs ground beef (80/20 blend)
- 1/2 lb ground pork
- 1 cup panko breadcrumbs
- 1/2 cup finely chopped yellow onion
- 4 cloves garlic, minced
- 2 tablespoons grated fresh ginger
- 1/4 cup soy sauce (low sodium preferred)
- 2 tablespoons brown sugar, packed
- 1 tablespoon sesame oil
- 1 large egg, lightly beaten
- 1 teaspoon gochujang (Korean chili paste, adjust to taste)
- 1/2 teaspoon black pepper
- 1/2 cup soy sauce (low sodium preferred)
- 1/4 cup brown sugar, packed
- 1/4 cup water
- 2 tablespoons rice vinegar
- 2 tablespoons sesame oil
- 2 tablespoons gochujang (Korean chili paste, adjust to taste)
- 1 tablespoon honey
- 2 cloves garlic, minced
- 1 teaspoon grated fresh ginger
- 1/2 teaspoon red pepper flakes (optional, for extra heat)
- 1 tablespoon cornstarch
- 2 tablespoons cold water
- Sesame seeds
- Chopped green onions
- Extra gochujang, for serving
Instructions
- Prepare the Meatball Mixture: In a large bowl, gently combine the ground beef and ground pork. Add the panko breadcrumbs, finely chopped yellow onion, minced garlic, and grated fresh ginger. Pour in the soy sauce, brown sugar, and sesame oil. Add the lightly beaten egg, gochujang, and black pepper. Gently mix all the ingredients together until just combined. Be careful not to overmix.
- Form and Cook the Meatballs: Preheat your oven to 400°F (200°C). Line a baking sheet with parchment paper. Using a tablespoon or small ice cream scoop, form the meat mixture into meatballs (about 1-1.5 inches in diameter). Place the meatballs on the prepared baking sheet, leaving space between each one. Bake for 20-25 minutes, or until the meatballs are cooked through and lightly browned (internal temperature should reach 160°F/71°C).
- Prepare the Korean BBQ Sauce: While the meatballs are baking, in a medium saucepan, whisk together the soy sauce, brown sugar, water, rice vinegar, and sesame oil. Add the gochujang, honey, minced garlic, grated fresh ginger, and red pepper flakes (if using). Bring the mixture to a simmer over medium heat, stirring occasionally. In a small bowl, whisk together the cornstarch and cold water to create a slurry. Once the sauce is simmering, slowly pour in the cornstarch slurry, whisking constantly to prevent lumps. Continue to simmer for 2-3 minutes, or until thickened. Remove from heat.
- Combine Meatballs and Sauce: Once the meatballs are cooked, transfer them to the saucepan with the Korean BBQ sauce. Gently toss to coat evenly. Return the saucepan to low heat and simmer for another 5-10 minutes, allowing the meatballs to absorb the flavors. Stir occasionally.
- Serve: Serve the Korean BBQ meatballs hot, garnished with sesame seeds and chopped green onions. Serve over rice, noodles, or mashed potatoes.
Notes
- Spice Level: Adjust the amount of gochujang and red pepper flakes to your preference.
- Meat Options: You can use all ground beef or all ground pork if you prefer. You can also experiment with ground turkey or chicken.
- Breadcrumb Alternatives: If you don’t have panko breadcrumbs, you can use regular breadcrumbs, but the texture of the meatballs may be slightly different.
- Vegetarian Option: For a vegetarian version, substitute the ground meat with a plant-based ground meat alternative.
- Air Fryer Option: You can also cook the meatballs in an air fryer. Preheat your air fryer to 375°F (190°C) and cook for 12-15 minutes, or until cooked through.
- Gluten-Free Option: Use gluten-free panko breadcrumbs and tamari (gluten-free soy sauce) to make this recipe gluten-free.
- Sweetness Adjustment: If you prefer a sweeter sauce, add a little more honey or brown sugar. If you prefer a less sweet sauce, reduce the amount of brown sugar.
- Garlic and Ginger: Freshly minced garlic and grated ginger are essential for the best flavor. Avoid using garlic powder or ginger powder if possible.
- Make Ahead: You can prepare the meatball mixture ahead of time and store it in the refrigerator for up to 24 hours. You can also make the Korean BBQ sauce ahead of time and store it in the refrigerator for up to 3 days.
- Freezing: Cooked meatballs can be frozen for up to 2 months. Allow them to cool completely before transferring them to a freezer-safe bag or container. Thaw overnight in the refrigerator before reheating.