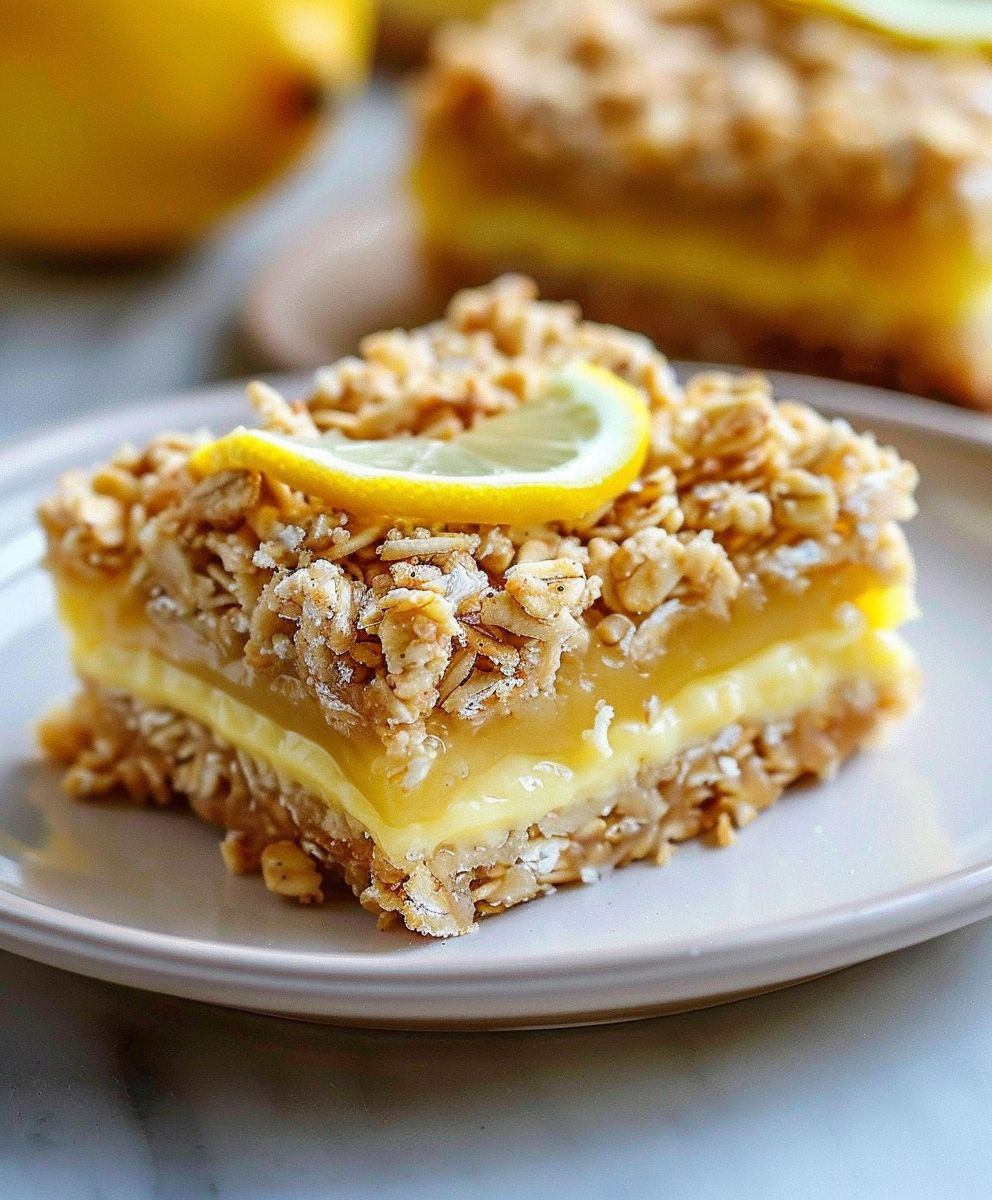
Lemon Oatmeal Crumble Bars: Prepare to be utterly captivated by these sunshine-filled treats! Imagine biting into a buttery, crumbly oat topping that gives way to a tangy, sweet, and perfectly gooey lemon filling. These bars are not just a dessert; they’re an experience, a burst of citrusy joy that will brighten any day.
While the exact origins of crumble bars are somewhat debated, the concept of combining a buttery oat topping with a fruit filling has been a beloved baking tradition for generations. Think of them as a rustic, easier-to-make cousin of the classic fruit pie. The beauty of these bars lies in their simplicity and adaptability; you can easily swap out the lemon for other fruits like berries, apples, or peaches, depending on your preference and the season.
But why are Lemon Oatmeal Crumble Bars so irresistible? It’s the delightful contrast of textures, for starters. The crisp, golden-brown crumble provides a satisfying crunch, while the lemon filling offers a smooth, almost melt-in-your-mouth sensation. Then there’s the flavor – the bright, zesty lemon perfectly complements the nutty, wholesome flavor of the oats. And let’s not forget the convenience! These bars are incredibly easy to make, requiring minimal effort and readily available ingredients. They’re perfect for a quick weeknight dessert, a potluck contribution, or simply a sweet treat to enjoy with your afternoon tea. Trust me, once you try these, they’ll become a staple in your baking repertoire!

Ingredients:
- For the Oatmeal Crust:
- 2 cups rolled oats (not instant)
- 1 cup all-purpose flour
- 1 cup packed light brown sugar
- 1 teaspoon baking soda
- 1/2 teaspoon salt
- 1 cup (2 sticks) cold unsalted butter, cut into cubes
- For the Lemon Filling:
- 1 1/2 cups granulated sugar
- 1/4 cup all-purpose flour
- 1/4 teaspoon salt
- 4 large eggs
- 1/2 cup freshly squeezed lemon juice (from about 3-4 lemons)
- 2 tablespoons lemon zest (from about 3-4 lemons)
- Optional Glaze:
- 1 cup powdered sugar
- 2-3 tablespoons milk or lemon juice
Preparing the Oatmeal Crust
Okay, let’s get started with the base of our delicious Lemon Oatmeal Crumble Bars – the oatmeal crust! This part is super easy and comes together quickly. The key is to use cold butter; it’s what gives the crust that lovely crumble texture.
- Combine Dry Ingredients: In a large bowl, whisk together the rolled oats, all-purpose flour, light brown sugar, baking soda, and salt. Make sure everything is evenly distributed. This ensures that the baking soda works its magic and the flavors are balanced throughout the crust.
- Cut in the Butter: Add the cold, cubed butter to the dry ingredients. Now, you have a few options here. You can use a pastry blender, which is my personal favorite for this task. Just press down and twist until the butter is broken down into pea-sized pieces and evenly distributed throughout the dry ingredients. Alternatively, you can use two forks to cut the butter in, or even pulse it a few times in a food processor (be careful not to over-process!). The goal is to create a mixture that resembles coarse crumbs.
- Press into the Pan: Grease a 9×13 inch baking pan. I like to use baking spray with flour in it to prevent sticking, but you can also grease it with butter and then dust it with flour. Press about two-thirds of the oatmeal mixture firmly into the bottom of the prepared pan. You can use the bottom of a measuring cup or your fingers to get an even layer. This will be the base of our bars, so make sure it’s nice and compact.
- Pre-bake the Crust: Place the pan in a preheated oven at 350°F (175°C) and bake for 10-12 minutes, or until the crust is lightly golden brown. This pre-baking step is important because it helps the crust set up and prevents it from becoming soggy when we add the lemon filling.
Making the Lemon Filling
While the crust is pre-baking, let’s whip up the star of the show – the tangy and sweet lemon filling! This filling is what makes these bars so irresistible. Fresh lemon juice and zest are essential for that bright, vibrant flavor.
- Combine Dry Ingredients: In a separate large bowl, whisk together the granulated sugar, all-purpose flour, and salt. The flour helps to thicken the filling and prevent it from becoming too runny.
- Add Eggs and Lemon Juice: Add the eggs, lemon juice, and lemon zest to the sugar mixture. Whisk everything together until well combined and smooth. Make sure there are no lumps of flour remaining. The mixture should be a beautiful, pale yellow color and smell wonderfully lemony.
Assembling and Baking the Bars
Now comes the fun part – putting everything together and baking our Lemon Oatmeal Crumble Bars! The aroma that will fill your kitchen during baking is simply divine.
- Pour in the Filling: Once the crust is pre-baked, remove it from the oven. Pour the lemon filling evenly over the warm crust.
- Add the Crumble Topping: Sprinkle the remaining oatmeal mixture (the one-third we reserved earlier) evenly over the lemon filling. This will create a lovely crumble topping that adds texture and flavor to the bars.
- Bake: Return the pan to the oven and bake for 25-30 minutes, or until the filling is set and the topping is golden brown. The filling should be slightly jiggly but not liquidy. If the topping starts to brown too quickly, you can loosely tent the pan with aluminum foil.
- Cool Completely: Remove the pan from the oven and let the bars cool completely in the pan on a wire rack. This is crucial! The filling needs time to set up properly. If you try to cut them while they’re still warm, they’ll be a gooey mess (although still delicious!). I usually let them cool for at least 2-3 hours, or even overnight in the refrigerator.
Optional Glaze (But Highly Recommended!)
While the bars are delicious on their own, a simple glaze adds a touch of sweetness and makes them even more visually appealing. This glaze is quick and easy to make, and it really elevates the final product.
- Whisk Together: In a small bowl, whisk together the powdered sugar and milk (or lemon juice) until smooth. Start with 2 tablespoons of liquid and add more, one tablespoon at a time, until you reach your desired consistency. The glaze should be thick enough to drizzle but thin enough to spread easily.
- Drizzle or Spread: Once the bars are completely cooled, drizzle the glaze over the top. You can use a spoon, a fork, or a piping bag for a more decorative look. Alternatively, you can spread the glaze evenly over the entire surface of the bars.
- Let Set: Allow the glaze to set for about 15-20 minutes before cutting the bars. This will prevent the glaze from smearing.
Cutting and Serving
Finally, the moment we’ve all been waiting for – cutting and serving our Lemon Oatmeal Crumble Bars! These bars are perfect for a brunch, a potluck, or just a sweet treat any time of day.
- Cut into Bars: Use a sharp knife to cut the bars into squares or rectangles. I usually cut them into about 24 bars, but you can adjust the size to your preference.
- Serve and Enjoy: Serve the Lemon Oatmeal Crumble Bars and enjoy! They are delicious on their own, but you can also serve them with a scoop of vanilla ice cream or a dollop of whipped cream for an extra special treat.
Tips and Variations
Here are a few extra tips and variations to help you customize these Lemon Oatmeal Crumble Bars to your liking:
- Use Gluten-Free Oats and Flour: To make these bars gluten-free, simply use gluten-free rolled oats and a gluten-free all-purpose flour blend.
- Add Nuts: For extra crunch and flavor, add 1/2 cup of chopped nuts (such as pecans, walnuts, or almonds) to the oatmeal crust mixture.
- Substitute Other Citrus Fruits: While lemon is the star of this recipe, you can also use other citrus fruits, such as oranges or limes, to create different flavor variations.
- Add Berries: Fold 1 cup of fresh or frozen berries (such as blueberries, raspberries, or strawberries) into the lemon filling for a burst of fruity flavor.
- Store Properly: Store the Lemon Oatmeal Crumble Bars in an airtight container at room temperature for up to 3 days, or in the refrigerator for up to 5 days.
Enjoy your baking!
Conclusion:
I truly believe you’ll fall in love with these Lemon Oatmeal Crumble Bars. They’re the perfect balance of sweet and tart, with a satisfyingly chewy base and a delightfully crumbly topping. The bright, zesty lemon flavor is an instant mood booster, making them ideal for a sunny brunch, a comforting afternoon treat, or even a light dessert after dinner. Honestly, what’s not to love?
These bars are more than just a recipe; they’re an experience. The aroma that fills your kitchen as they bake is simply divine, and the first bite is pure bliss. The combination of the buttery crumble, the soft oatmeal base, and the tangy lemon filling is a symphony of textures and flavors that will leave you wanting more. And the best part? They’re surprisingly easy to make!
But don’t just take my word for it. You absolutely *must* try this recipe for yourself! I’ve poured my heart into perfecting it, and I’m confident that you’ll be thrilled with the results.
Serving Suggestions and Variations:
The possibilities are endless when it comes to enjoying these Lemon Oatmeal Crumble Bars. Here are a few ideas to get you started:
* Warm with a scoop of vanilla ice cream: This is a classic pairing that never fails to impress. The warm bars and cold ice cream create a delightful contrast in temperature and texture.
* Drizzled with a lemon glaze: For an extra burst of lemon flavor, whisk together powdered sugar with a little lemon juice and drizzle it over the cooled bars.
* Served with fresh berries: The tartness of the berries complements the sweetness of the bars perfectly. Raspberries, blueberries, or strawberries would all be delicious.
* Cut into smaller squares for a party: These bars are always a hit at gatherings. Cut them into bite-sized pieces for easy snacking.
* Add a layer of cream cheese filling: For an even richer and more decadent treat, spread a layer of cream cheese filling over the oatmeal base before adding the lemon filling. To make the cream cheese filling, simply beat together cream cheese, sugar, and a touch of vanilla extract until smooth.
* Experiment with different citrus fruits: While lemon is the star of the show in this recipe, you could also try using other citrus fruits like oranges, limes, or grapefruits. Each fruit will add its own unique flavor profile to the bars.
* Make it gluten-free: Simply substitute the all-purpose flour in the recipe with a gluten-free all-purpose flour blend. Be sure to use certified gluten-free oats as well.
* Add nuts to the crumble topping: For added crunch and flavor, stir chopped nuts like almonds, pecans, or walnuts into the crumble topping.
I’m so excited for you to try this recipe and discover your own favorite ways to enjoy these delightful bars. Remember, baking is all about experimentation and having fun, so don’t be afraid to get creative and put your own spin on things.
And most importantly, please share your experience with me! I’d love to hear what you think of the recipe, what variations you tried, and how you served them. You can leave a comment below, tag me on social media, or send me an email. Your feedback is invaluable, and it helps me to continue creating recipes that you’ll love. So go ahead, bake a batch of these irresistible Lemon Oatmeal Crumble Bars and let me know what you think! Happy baking!
Lemon Oatmeal Crumble Bars: A Delicious & Easy Recipe
Tangy and sweet Lemon Oatmeal Crumble Bars with a buttery oatmeal crust, bright lemon filling, and optional powdered sugar glaze. Perfect for brunch, potlucks, or a delightful treat!
Ingredients
Instructions
Recipe Notes
- Use cold butter for the oatmeal crust to achieve a crumble texture.
- Pre-baking the crust prevents it from becoming soggy.
- Fresh lemon juice and zest are essential for the best lemon flavor.
- Cool the bars completely before cutting to allow the filling to set.
- For a gluten-free version, use gluten-free rolled oats and all-purpose flour.
- Add nuts to the oatmeal crust for extra crunch.
- Substitute other citrus fruits or add berries to the lemon filling for variations.
- Store in an airtight container at room temperature for up to 3 days, or in the refrigerator for up to 5 days.