Lemon Raspberry Layered Pie: Prepare to be transported to dessert heaven with this stunning and surprisingly simple recipe! Imagine layers of tangy lemon curd dancing with bursts of sweet-tart raspberries, all nestled in a buttery, flaky crust. This isn’t just a pie; it’s an experience.
While the exact origins of layered pies are debated, the combination of citrus and berries has been a beloved flavor pairing for centuries, particularly in European baking traditions. Think of the classic British lemon curd tarts or the raspberry-filled pastries of France. This Lemon Raspberry Layered Pie draws inspiration from these timeless flavors, bringing them together in a show-stopping dessert that’s perfect for any occasion.
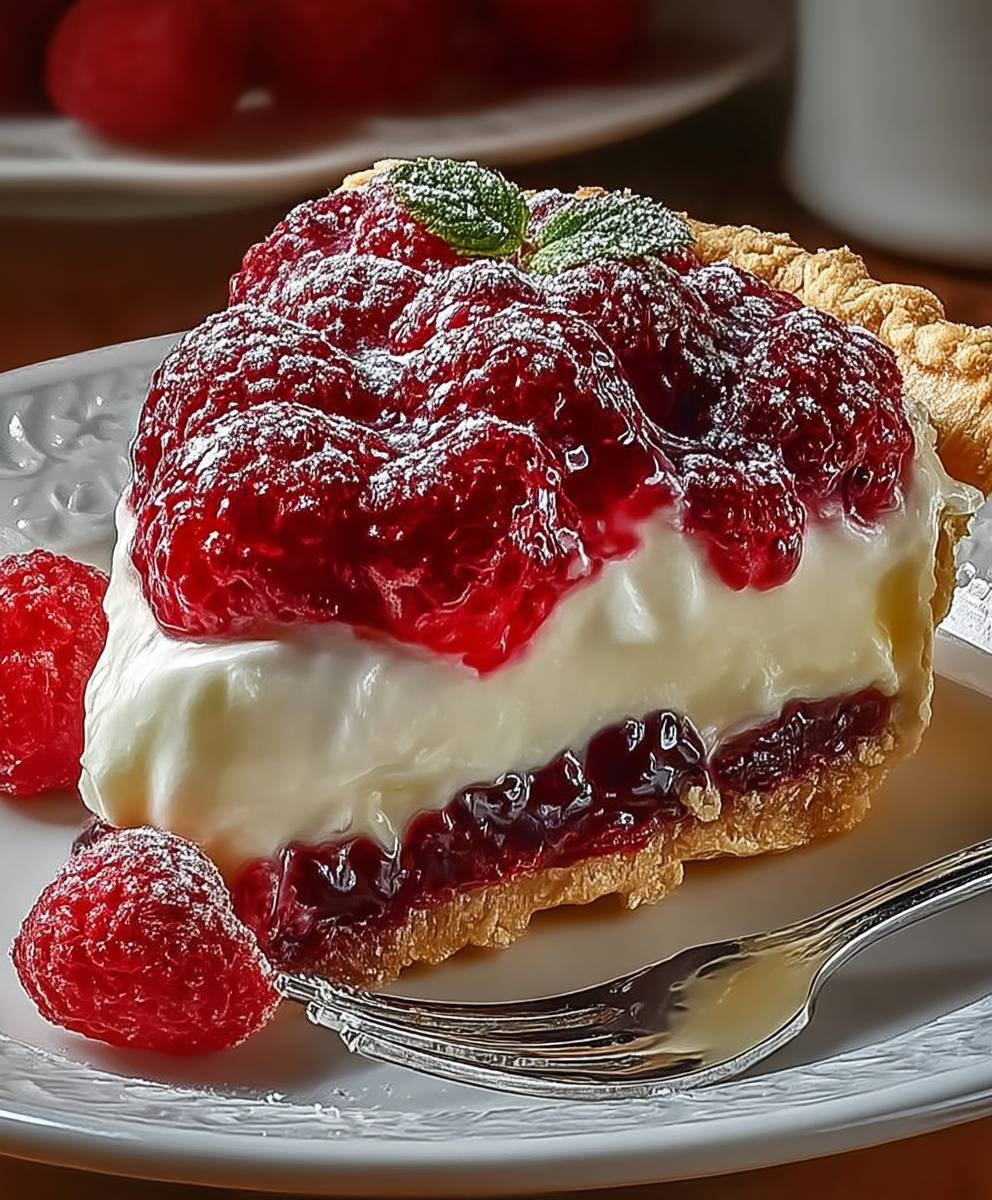
What makes this pie so irresistible? It’s the perfect balance of flavors and textures. The creamy, smooth lemon curd provides a delightful tang that’s beautifully complemented by the juicy, slightly tart raspberries. The flaky crust adds a satisfying crunch, creating a symphony of sensations in every bite. Plus, while it looks impressive, this pie is surprisingly easy to make, making it a winner for both experienced bakers and those just starting out. Get ready to impress your friends and family with this delightful treat!

Ingredients:
- For the Crust:
- 2 ½ cups all-purpose flour
- 1 teaspoon salt
- 1 cup (2 sticks) unsalted butter, cold and cubed
- ½ cup vegetable shortening, cold
- 6-8 tablespoons ice water
- For the Lemon Filling:
- 1 ½ cups granulated sugar
- 6 tablespoons cornstarch
- ¼ teaspoon salt
- 1 ½ cups water
- ½ cup lemon juice, freshly squeezed
- 2 tablespoons lemon zest
- 4 large egg yolks, lightly beaten
- 2 tablespoons unsalted butter
- Yellow food coloring (optional, for a more vibrant color)
- For the Raspberry Filling:
- 4 cups fresh raspberries
- ¾ cup granulated sugar
- 3 tablespoons cornstarch
- ¼ cup water
- 1 tablespoon lemon juice, freshly squeezed
- 1 tablespoon unsalted butter
- For the Topping (Optional):
- 1 cup heavy cream
- 2 tablespoons powdered sugar
- ½ teaspoon vanilla extract
- Fresh raspberries, for garnish
Preparing the Crust:
- Combine Dry Ingredients: In a large bowl, whisk together the flour and salt. This ensures the salt is evenly distributed throughout the crust, which is crucial for flavor.
- Cut in the Fat: Add the cold, cubed butter and vegetable shortening to the flour mixture. Using a pastry blender or your fingertips (work quickly to keep the butter cold!), cut the fat into the flour until the mixture resembles coarse crumbs. You should still see small pieces of butter and shortening – these are what create flaky layers.
- Add Ice Water: Gradually add the ice water, one tablespoon at a time, mixing gently after each addition. Be careful not to overmix! You want just enough water to bring the dough together. The dough should be slightly shaggy but not sticky.
- Form Dough Disks: Divide the dough in half and form each half into a disk. Wrap each disk tightly in plastic wrap.
- Chill the Dough: Refrigerate the dough for at least 2 hours, or preferably overnight. This allows the gluten to relax, which will result in a more tender crust. Chilling also helps the fat solidify, preventing it from melting during baking and creating a flaky texture.
- Roll Out the First Crust: On a lightly floured surface, roll out one of the dough disks into a 12-inch circle. Gently transfer the dough to a 9-inch pie plate. Trim the edges and crimp decoratively. You can use a fork to create a simple crimped edge, or get fancy with your fingers!
- Pre-Bake the Crust (Blind Bake): Preheat your oven to 375°F (190°C). Line the pie crust with parchment paper and fill it with pie weights or dried beans. This prevents the crust from puffing up during baking. Bake for 20 minutes.
- Remove Weights and Bake Further: Remove the parchment paper and pie weights. Return the crust to the oven and bake for another 10-15 minutes, or until lightly golden brown. This ensures the bottom crust is fully cooked and won’t be soggy. Let the crust cool completely before adding the fillings.
Making the Lemon Filling:
- Combine Dry Ingredients: In a medium saucepan, whisk together the sugar, cornstarch, and salt. The cornstarch is essential for thickening the lemon filling, so make sure it’s well combined with the sugar to prevent lumps.
- Add Water and Lemon Juice: Gradually whisk in the water and lemon juice until smooth. Make sure there are no lumps of cornstarch remaining.
- Cook the Mixture: Cook the mixture over medium heat, stirring constantly, until it comes to a boil and thickens. This usually takes about 5-7 minutes. The mixture should be thick enough to coat the back of a spoon.
- Temper the Egg Yolks: In a small bowl, whisk the egg yolks lightly. Slowly drizzle a small amount of the hot lemon mixture into the egg yolks, whisking constantly to temper them. This prevents the eggs from scrambling when added to the hot mixture.
- Combine and Cook Further: Pour the tempered egg yolk mixture back into the saucepan with the remaining lemon mixture. Cook over low heat, stirring constantly, for another 1-2 minutes, or until the filling is very thick and glossy.
- Add Butter and Zest: Remove the saucepan from the heat and stir in the butter and lemon zest. The butter adds richness and shine to the filling, while the lemon zest intensifies the lemon flavor.
- Add Food Coloring (Optional): If desired, add a few drops of yellow food coloring to enhance the color of the lemon filling. Stir until evenly combined.
- Cool Slightly: Let the lemon filling cool slightly before pouring it into the pre-baked pie crust. This prevents the crust from becoming soggy.
Preparing the Raspberry Filling:
- Combine Raspberries, Sugar, and Cornstarch: In a medium saucepan, combine the fresh raspberries, sugar, and cornstarch. Gently stir to coat the raspberries with the sugar and cornstarch mixture.
- Add Water and Lemon Juice: Add the water and lemon juice to the saucepan. The lemon juice helps to brighten the raspberry flavor.
- Cook the Mixture: Cook the mixture over medium heat, stirring occasionally, until the raspberries break down and the filling thickens. This usually takes about 10-15 minutes. The filling should be thick enough to coat the back of a spoon.
- Add Butter: Remove the saucepan from the heat and stir in the butter. The butter adds richness and shine to the filling.
- Cool Slightly: Let the raspberry filling cool slightly before layering it over the lemon filling.
Assembling the Pie:
- Pour in Lemon Filling: Pour the slightly cooled lemon filling into the pre-baked pie crust, spreading it evenly.
- Spoon Raspberry Filling: Carefully spoon the slightly cooled raspberry filling over the lemon filling, spreading it evenly. You can create a marbled effect by gently swirling the two fillings together with a knife or toothpick.
- Roll Out the Top Crust: Roll out the remaining dough disk into a 12-inch circle. Gently place the dough over the raspberry filling. Trim the edges and crimp decoratively to seal the top and bottom crusts together. Cut several slits in the top crust to allow steam to escape during baking.
- Bake the Pie: Preheat your oven to 375°F (190°C). Bake the pie for 30-40 minutes, or until the crust is golden brown and the filling is bubbly. If the crust starts to brown too quickly, you can cover it loosely with aluminum foil.
- Cool Completely: Let the pie cool completely on a wire rack before slicing and serving. This allows the filling to set properly. It’s best to refrigerate the pie for at least 4 hours, or preferably overnight, before serving.
Optional Topping:
- Whip the Cream: In a chilled bowl, combine the heavy cream, powdered sugar, and vanilla extract. Beat with an electric mixer until stiff peaks form. Be careful not to overwhip the cream, or it will turn into butter.
- Garnish and Serve: Spread the whipped cream over the cooled pie or pipe it on decoratively. Garnish with fresh raspberries before serving.
Conclusion:
This Lemon Raspberry Layered Pie isn’t just a dessert; it’s a burst of sunshine and summer berries in every single bite! From the tangy lemon curd to the sweet-tart raspberry filling, all nestled within a buttery, flaky crust, this pie is a symphony of flavors and textures that will leave you wanting more. I truly believe this is a must-try recipe for anyone who loves a good pie, and I’m confident it will become a new family favorite.
Why is it a must-try? Well, beyond the incredible taste, it’s surprisingly approachable. While it looks impressive, the steps are straightforward, and even a novice baker can achieve stunning results. The combination of homemade elements with store-bought shortcuts (like pre-made pie crust, if you’re short on time!) makes it manageable for any skill level. Plus, the vibrant colors of the lemon and raspberry fillings make it a showstopper on any dessert table. It’s the perfect balance of effort and reward, guaranteeing a delicious and visually appealing treat.
But the best part? The versatility! While I’ve presented it as a layered pie, feel free to get creative. You could easily adapt this recipe into individual tarts for a more elegant presentation. Or, if you’re feeling adventurous, try swirling the raspberry filling into the lemon curd for a marbled effect. For a richer flavor, consider adding a touch of almond extract to the crust or a hint of vanilla to the raspberry filling.
Speaking of variations, consider these serving suggestions: A dollop of freshly whipped cream or a scoop of vanilla ice cream complements the pie beautifully. For a more sophisticated touch, try serving it with a drizzle of raspberry coulis or a sprinkle of toasted almonds. And if you want to take it over the top, a light dusting of powdered sugar adds a touch of elegance.
Serving Suggestions:
- With a dollop of freshly whipped cream
- With a scoop of vanilla ice cream
- Drizzled with raspberry coulis
- Sprinkled with toasted almonds
- Lightly dusted with powdered sugar
I’m so excited for you to try this recipe! I poured my heart into perfecting it, and I know you’ll love it as much as I do. Don’t be intimidated by the multiple layers; just take it one step at a time, and you’ll be rewarded with a truly unforgettable dessert.
I urge you to give this Lemon Raspberry Layered Pie a try. I’m confident that it will become a staple in your baking repertoire. And more importantly, I’d love to hear about your experience! Did you make any modifications? Did you serve it at a special occasion? What did your family and friends think?
Please, share your photos and stories in the comments below. I can’t wait to see your creations and hear about your baking adventures. Happy baking, and enjoy every delicious bite of this delightful Lemon Raspberry Layered Pie! Let me know if you have any questions, and I’ll do my best to help. I’m here to support you on your baking journey!
Lemon Raspberry Layered Pie: A Delicious & Easy Recipe
Flaky homemade crust filled with tangy lemon and sweet raspberry layers, topped with optional whipped cream.
Ingredients
Instructions
Recipe Notes
- For the flakiest crust, keep all ingredients cold, especially the butter and shortening.
- Don’t overmix the pie dough. Overmixing develops the gluten, resulting in a tough crust.
- Chilling the dough is crucial for a tender and flaky crust.
- Blind baking the crust prevents a soggy bottom.
- Tempering the egg yolks prevents them from scrambling in the hot lemon filling.
- Cool the pie completely before slicing to allow the filling to set properly.
- Refrigerating the pie overnight enhances the flavor and texture.