Deviled Egg Christmas Trees are about to become your new favorite holiday appetizer! Forget the usual platters; this festive season, I’m thrilled to share a delightful twist on a classic that will truly make your holiday spread sparkle. Imagine the collective gasp of delight when your guests discover beautifully adorned, tree-shaped deviled eggs, complete with edible decorations. While deviled eggs themselves boast a rich history dating back to ancient Rome and have long been a beloved staple at gatherings for their irresistible creamy texture and tangy flavor, this particular iteration elevates them from simple snack to show-stopping centerpiece.
I find that what truly makes this dish special, beyond its nostalgic appeal, is its incredible visual impact combined with the familiar comfort of a perfectly seasoned deviled egg. People adore these because they offer a sophisticated yet approachable take on a party favorite, proving that holiday food can be both whimsical and incredibly delicious. The creamy yolk filling, seasoned just right, provides that satisfying bite everyone craves, all nestled within a charming, edible Christmas tree shape. This ingenious presentation makes Deviled Egg Christmas Trees not just a dish, but an experience, perfect for potlucks, family dinners, or any festive celebration where you want to add a touch of unique charm and culinary creativity. You’ll be amazed at how simple it is to transform ordinary eggs into extraordinary festive treats!

Ingredients:
- 1 dozen large eggs: For the best results, I always recommend using eggs that are a few days old rather than super fresh ones. Older eggs tend to peel much more easily, which is incredibly helpful when you need those beautiful, intact egg white halves for your “Deviled Egg Christmas Trees.”
- 1/2 cup mayonnaise: This is the backbone of our creamy filling. I personally lean towards a good quality, full-fat mayonnaise for maximum richness and a luscious texture. You can, of course, opt for light mayonnaise or even an avocado oil-based mayo if you prefer, but be mindful that the flavor and texture might vary slightly.
- 2 tablespoons Dijon mustard: Dijon adds a fantastic tang and a subtle, sophisticated kick that elevates the deviled egg flavor beyond just basic mustard. It provides a wonderful balance to the richness of the mayonnaise. If you’re not a fan of Dijon, or simply don’t have it on hand, you could use a good quality yellow mustard, but I truly believe Dijon brings out the best in deviled eggs.
- 1 tablespoon white vinegar or pickle juice: This ingredient is a secret weapon for brightening up the flavor profile of the yolk mixture. The acidity cuts through the richness, making each bite feel fresh and exciting. Pickle juice, especially from dill pickles, adds an extra layer of briny, savory depth that I absolutely adore.
- 1/4 teaspoon salt: Seasoning is key! I always start with a quarter teaspoon and then adjust to taste later. Remember, it’s easier to add more salt than to take it away.
- 1/8 teaspoon black pepper: Freshly ground black pepper is always my preference for its vibrant aroma and flavor, but pre-ground will certainly work.
- Green food coloring (gel preferred): To truly transform our deviled eggs into festive “Deviled Egg Christmas Trees,” we need that vibrant green hue! Gel food coloring is superior here because it provides a much more concentrated color with less liquid, meaning it won’t thin out your filling mixture.
- Optional decorations for your “Christmas Trees”: This is where the magic happens and you can really let your creativity shine!
- Pimento strips or small stars: These make wonderful red ornaments. You can buy pre-cut pimento strips or use a tiny star-shaped cookie cutter on a slice of pimento or red bell pepper.
- Finely diced red bell pepper: Adds a beautiful pop of color and a fresh crunch, mimicking tiny red ornaments.
- Finely chopped fresh chives or parsley: These can act as garland or additional green texture, enhancing the “tree” look.
- Small pretzel sticks or carrot sticks: These are perfect for creating the “trunk” of your Christmas trees, adding a delightful visual and textural element.
- Tiny edible glitter: For a truly dazzling effect, a sprinkle of edible gold or silver glitter can make your trees sparkle!
Preparing Your Eggs: The Foundation for Perfect Deviled Egg Christmas Trees
Creating truly spectacular “Deviled Egg Christmas Trees” begins with perfectly hard-boiled eggs. A flawless hard-boiled egg means easy peeling, pristine whites, and a beautifully cooked yolk ready to be transformed.
-
Choosing and Preparing Your Eggs for Optimal Peeling:
As I mentioned in the ingredients, I highly recommend using eggs that are at least a few days old. The fresher an egg, the more the inner membrane adheres to the shell, making peeling a frustrating ordeal. If you only have very fresh eggs, don’t fret too much, but be prepared to be a bit more patient during the peeling process.
Before boiling, I like to gently wash my eggs under cool water to remove any surface impurities. While this isn’t strictly necessary for cooking, it’s a good habit, especially for food that will be handled and presented so beautifully.
-
The Perfect Hard-Boil Method (Stovetop):
This is my go-to method for consistently perfect hard-boiled eggs, ensuring firm yolks and easy-to-peel shells.
- Place Eggs in a Single Layer: Carefully place your eggs in a single layer in a large saucepan. Avoid overcrowding, as this can lead to uneven cooking and cracked shells.
- Cover with Cold Water: Add enough cold water to the saucepan to cover the eggs by about one inch. This ensures even heating and prevents the eggs from rattling excessively and cracking.
- Add a Pinch of Salt (Optional, but Helpful): I often add a generous pinch of salt to the water. Some believe it helps prevent cracking and makes peeling easier by slightly altering the water’s density and temperature. While not scientifically proven to prevent cracking, it certainly doesn’t hurt.
- Bring to a Rolling Boil: Place the saucepan over high heat and bring the water to a full, rolling boil. This means large, vigorous bubbles appearing across the entire surface of the water.
- Turn Off Heat and Cover: As soon as the water reaches a full rolling boil, immediately turn off the heat. Do not continue to boil the eggs vigorously. This gentle cooking method prevents overcooking and those unsightly green rings around the yolks.
- Let Stand for 12-14 Minutes: Cover the saucepan with a lid and let the eggs stand in the hot water for precisely 12-14 minutes. For large eggs, 12 minutes will yield a firm but still slightly creamy yolk, while 14 minutes will result in a fully firm yolk. Since we’re mashing these yolks, either time works wonderfully, but 12 minutes often results in a slightly creamier final product.
-
The Essential Ice Bath: Stopping the Cooking and Aiding Peeling
As soon as the standing time is up, it’s critical to immediately transfer the eggs to a large bowl filled with ice water. This rapid cooling process does two very important things:
- Stops the Cooking: It halts the cooking process, preventing the eggs from becoming overcooked, which can lead to rubbery whites and that unappetizing grayish-green ring around the yolk. This ring, caused by a reaction between sulfur in the egg white and iron in the yolk, doesn’t affect taste but definitely impacts presentation.
- Shrinks the Egg Away from the Shell: The sudden temperature change causes the egg white to contract, pulling it away from the shell membrane. This is a game-changer for easy peeling! Let the eggs sit in the ice bath for at least 5-10 minutes, or until they are completely cool to the touch.
-
The Art of Peeling Hard-Boiled Eggs: Preserving Your Canvas
Now that your eggs are perfectly cooked and chilled, it’s time for the delicate dance of peeling. Since these egg whites will be the base for our “Deviled Egg Christmas Trees,” we want them to be as pristine and intact as possible.
- Crack Gently: Gently tap the wider end of the egg on a hard surface (like your countertop) to crack the shell. Then, gently roll the egg between your palms to create an intricate web of cracks all over the surface.
- Peel Under Running Water (My Favorite Method): I find that peeling under a slow stream of cool running water helps immensely. The water gets under the membrane, lubricating it and making it easier to separate the shell from the egg white without tearing.
- Start from the Wide End: The air pocket is usually at the wider end of the egg, making it easier to get your initial grip under the shell and membrane. Work your way around, patiently removing small pieces of shell.
- Be Patient: Don’t rush! If a piece of shell seems stuck, try getting more water under it or gently trying a different spot. A little patience here will result in beautiful, smooth egg white halves.
- Rinse Clean: After peeling, quickly rinse each egg white to ensure no tiny shell fragments remain.
Crafting the Festive Yolk Filling for Your Deviled Egg Christmas Trees
With our perfectly peeled egg whites ready, it’s time to create the creamy, flavorful, and wonderfully green yolk filling that will form the body of our “Deviled Egg Christmas Trees.” This is where the magic truly begins!
-
Separating Yolks from Whites: Gentle Precision
Carefully slice each peeled hard-boiled egg lengthwise, from top to bottom, using a sharp knife. You want clean cuts to ensure neat halves. Gently scoop out the bright yellow yolks and place them in a medium-sized mixing bowl. Take care to keep the egg white halves intact and place them on a serving platter or a clean plate, cut-side up. These will be our “bases” for the Christmas trees.
A little tip here: If you find the yolks are stubborn to come out, use a small spoon to gently dislodge them without tearing the delicate whites.
-
Mashing the Yolks to Perfection: Achieving a Smooth Base
Using a fork, thoroughly mash the cooked egg yolks in the mixing bowl until they are completely smooth. I mean really smooth! No one wants lumpy deviled eggs, especially when we’re piping them into elegant tree shapes. If you desire an ultra-creamy, absolutely lump-free filling, you could even press the yolks through a fine-mesh sieve, though thorough mashing with a fork is usually sufficient for most home cooks.
-
Blending in the Creamy Goodness: Flavor and Texture
To your mashed yolks, add the mayonnaise, Dijon mustard, and white vinegar (or pickle juice). These ingredients are critical for both the flavor and the creamy, pipeable texture of our deviled egg filling. The mayonnaise provides richness and binds everything together, the Dijon adds a sophisticated tang, and the vinegar or pickle juice brightens the whole mixture, preventing it from tasting heavy or flat. Mix everything together really well until all the ingredients are fully incorporated and the mixture is uniformly smooth and creamy.
-
Seasoning and Adjusting: The Importance of Tasting
Now, add the initial 1/4 teaspoon of salt and 1/8 teaspoon of black pepper to the yolk mixture. Mix well. This is a crucial step: taste the mixture! Everyone’s palate is different, and the exact saltiness of your eggs can vary. Adjust the salt and pepper to your preference. You might even want a touch more mustard or vinegar to hit that perfect balance of creamy, tangy, and savory. Don’t be shy; this is your chance to perfect the flavor!
-
Transforming into a Green Christmas Tree Hue: The Color Magic
Here’s where our “Deviled Egg Christmas Trees” truly come to life! Add a small amount of green food coloring to the yolk mixture. I strongly recommend starting with just a few drops or a tiny dab of gel food coloring, mixing it in thoroughly, and then gradually adding more until you achieve your desired shade of festive green. You want a vibrant, cheerful green that evokes a Christmas tree, but without making it look unnatural or overly dark. Gel food coloring provides the best color saturation without adding excess liquid, which could thin out your filling. Mix, mix, mix until the color is completely uniform throughout the yolk mixture.
Assembling Your Deviled Egg Christmas Trees: The Creative Touch
Now for the fun part – transforming your green deviled egg filling into charming, edible Christmas trees!
-
Preparing Your Piping Bag: Getting Ready for Tree Construction
To create that classic Christmas tree texture, you’ll need a piping bag fitted with a star tip (e.g., Wilton 1M or similar open star tip). If you don’t have a piping bag, a sturdy Ziploc bag with a corner snipped off will work in a pinch, though the tree texture won’t be as defined. Fold the top of the piping bag over your hand to create a wide opening, then use a spatula to carefully scoop all of your green deviled egg filling into the bag. Push the filling down towards the tip, ensuring there are no large air bubbles trapped inside. Twist the top of the bag to seal the filling.
-
Piping the “Christmas Trees” onto the Egg Whites: Building Your Edible Forest
Hold the piping bag vertically over the center of an empty egg white half. Apply steady, even pressure, and pipe a small mound of filling onto the egg white. Then, release the pressure slightly and pipe a second, smaller layer on top of the first, pulling upwards slightly as you finish to create a gentle peak. Continue this process, making each subsequent layer smaller than the one below it, to build a conical “Christmas tree” shape. Aim for 2-3 layers to create a nice, full tree. Practice on a plate first if you’re new to piping – a little trial and error can go a long way in perfecting your technique for these delightful “Deviled Egg Christmas Trees.”
-
Adding the “Trunk” (Optional but Recommended): The Finishing Base
For an extra touch of realism and a bit of fun, gently insert a small pretzel stick or a thin carrot stick into the base of each piped “Christmas tree,” positioning it like a tree trunk. The pretzel sticks add a lovely salty crunch that complements the creamy deviled egg beautifully, while carrot sticks offer a fresh, earthy flavor and vibrant color.
Decorating Your Deviled Egg Christmas Trees: Bringing Them to Life!
This is truly where your “Deviled Egg Christmas Trees” come alive! The decorations are what will make them sparkle and shout “holiday cheer!”
-
Edible Ornaments: Sparkle and Color!
Once your trees are piped and have their trunks, it’s time to deck the branches!
- Pimento Stars or Diced Red Bell Pepper: Using a tiny star-shaped cookie cutter (you can find these in baking sections or craft stores) on pimento strips or thin slices of red bell pepper creates perfect little “stars” to place at the top of your trees or scattered as ornaments. Alternatively, simply finely dice red bell pepper and sprinkle tiny pieces over the trees for brilliant red “ornaments.”
- Finely Chopped Chives or Parsley: Sprinkle a touch of finely chopped fresh chives or parsley over your trees. These act like delicate green garland, adding another layer of texture and a fresh, herbaceous note.
- Tiny Edible Glitter: For a truly show-stopping display, a very light dusting of edible gold or silver glitter can make your “Deviled Egg Christmas Trees” shimmer and shine under the holiday lights. Apply with a small, clean brush or by gently tapping a tiny amount over the trees.
- Tiny Capers: If you enjoy a briny flavor, small capers can be placed strategically to look like little dark ornaments.
Be creative! Think about small, edible, colorful items you have on hand that could mimic festive ornaments. The key is to keep them small so they don’t overpower the delicate egg trees.
-
Dusting of “Snow” (Optional): A Winter Wonderland Touch
For an extra touch of winter magic, you can lightly dust your finished “Deviled Egg Christmas Trees” with a tiny sprinkle of white pepper, a hint of smoked paprika for a rustic look, or even a very light dusting of finely grated Parmesan cheese (if the flavor profile works with your deviled eggs). This gives the illusion of freshly fallen snow on your festive trees. Just be mindful of the flavor impact of any powdered seasoning you choose for this step.
Presentation and Storage: Keeping Your Deviled Egg Christmas Trees Fresh and Festive
You’ve put so much effort into creating these beautiful “Deviled Egg Christmas Trees,” so ensuring they are presented beautifully and stored properly is the final, crucial step!
-
Arranging for Maximum Impact: The Festive Display
Once all your “Deviled Egg Christmas Trees” are piped and decorated, arrange them artfully on your favorite holiday serving platter. I love placing them on a bed of fresh, clean lettuce leaves or a sprinkle of chopped parsley to enhance the green theme. You could also arrange them around a small decorative centerpiece, like a tiny ornament or a sprig of rosemary. The visual appeal is a huge part of the fun with this recipe!
-
Make-Ahead Tips: Ease Your Holiday Stress
If you’re preparing these for a party, you can definitely do some work in advance to save time on the day of the event.
- Boil and Peel Eggs: You can hard-boil and peel your eggs up to 2 days in advance. Store the peeled egg whites (covered in a damp paper towel and sealed in an airtight container) and the yolks (in a separate airtight container) in the refrigerator.
- Prepare the Yolk Mixture (Uncolored): You can even make the yolk filling (minus the green food coloring) a day ahead. Store it in an airtight container in the fridge. On serving day, simply mix in the green food coloring, transfer to a piping bag, and assemble.
- Decorations: Prepare any chopped or cut decorations (like pimento stars or diced bell pepper) a day ahead and store them in small airtight containers.
-
Storage Guidelines: Keeping Them Fresh
Deviled eggs, like most egg-based dishes, are best served fresh, ideally within a few hours of preparation. However, if you have leftovers or need to store them for a short period:
Always Refrigerate: Deviled eggs should be stored in an airtight container in the refrigerator immediately after preparation. Due to the mayonnaise and eggs, they are highly perishable and should not be left at room temperature for more than 2 hours.
Shelf Life: Fully assembled “Deviled Egg Christmas Trees” are generally best consumed within 1-2 days. Beyond that, the texture and freshness can start to degrade, and the vibrant colors might fade slightly. If storing for a short period, you might want to hold off on adding the more delicate decorations like chives or edible glitter until just before serving for the freshest look.
Creative Variations and Tips for Your Deviled Egg Christmas Trees
While the classic “Deviled Egg Christmas Trees” are a showstopper, there are endless ways to customize them to your taste and holiday theme!
-
Flavor Twists: Expanding Your Palate
Don’t be afraid to experiment with the yolk filling’s flavor profile!
- Smoky Christmas Trees: Add a pinch of smoked paprika to the yolk mixture for a warm, smoky depth.
- Spicy Christmas Trees: A dash of your favorite hot sauce or a tiny pinch of cayenne pepper can give your trees a festive kick.
- Herbaceous Christmas Trees: Finely minced fresh dill, tarragon, or chives can be mixed directly into the yolk filling for a more complex herbaceous flavor.
- Curry Christmas Trees: For an unexpected but delicious twist, a touch of curry powder can transform your deviled eggs into something truly unique.
Remember to taste and adjust with any additions! Start small and build up the flavor.
-
Different “Tree” Colors: A Forest of Hues!
While green is quintessential for Christmas trees, you could certainly play with other food colorings for different themed events. Imagine pastel pink trees for Easter, or even blue and silver for a winter wonderland theme that isn’t strictly Christmas. The possibilities are only limited by your imagination!
-
Kid-Friendly Decorating Ideas: Get the Little Ones Involved
Making “Deviled Egg Christmas Trees” is a fantastic activity to do with children! Let them help with the decorating stage. Provide them with small bowls of various tiny edible decorations – sprinkles, tiny pieces of cheese, even mini chocolate chips (if you’re brave and don’t mind a sweet and savory combo!). It’s a fun way to engage them in holiday food preparation and create cherished memories.
-
Serving Suggestions: Completing Your Holiday Spread
These “Deviled Egg Christmas Trees” are perfect as a festive appetizer on their own. They also pair wonderfully with other holiday finger foods, a charcuterie board, or as part of a larger brunch spread. Their vibrant color and unique presentation make them an instant conversation starter and a guaranteed hit at any holiday gathering. I often serve them alongside some fresh crackers or crostini for those who might want to scoop up any stray bits of delicious filling.
I genuinely hope these detailed instructions empower you to create the most beautiful and delicious “Deviled Egg Christmas Trees” for your next holiday celebration. Happy cooking and happy holidays!
Conclusion:
I am absolutely thrilled that you’ve embarked on this culinary journey with me to create something truly magical and utterly delicious. As we wrap up our adventure, I want to reiterate why this particular recipe isn’t just another dish; it’s an experience waiting to happen, a guaranteed showstopper for your next gathering, and honestly, one of the most delightful treats you’ll ever whip up. This isn’t just about making food; it’s about crafting joy, one perfect bite at a time.
The profound beauty of this recipe lies in its elegant simplicity and the sheer impact it delivers. Imagine a platter laid out, filled with these whimsical, vibrant creations – they instantly become the centerpiece, sparking conversation and drawing smiles from everyone. They’re surprisingly easy to make, transforming a classic appetizer into something truly extraordinary with just a few creative steps. You don’t need to be a gourmet chef to achieve stunning results; the instructions are straightforward, designed to guide you effortlessly towards success. Every single time I serve these, I’m met with exclamations of delight, not just for their charming appearance, but most importantly, for their incredibly creamy, savory flavor. The filling is perfectly balanced, a harmonious blend of richness and tang that makes them utterly addictive. They disappear from the plate faster than you can say “holiday cheer!” And let’s be honest, who doesn’t love a dish that looks like a work of art but tastes even better? It’s a testament to how a little creativity can elevate a familiar favorite into something truly unforgettable, making it a must-try for anyone looking to add a touch of whimsy and deliciousness to their table. The texture, the taste, the presentation – it all comes together in a symphony of culinary delight that will undoubtedly leave your guests asking for the recipe, I promise you!
Now, while the basic recipe is phenomenal on its own, I always encourage a little experimentation to truly make it your own and suit your unique palate. For those who love a bit of heat, a pinch of finely ground cayenne pepper or a dash of your favorite hot sauce mixed into the yolk filling can add a fantastic, exciting kick. If you’re a fan of deeper, smokier flavors, try incorporating a touch of smoked paprika instead of sweet paprika for a more robust and intriguing profile. Finely chopped fresh chives or fragrant dill can be delicately mixed in for an herbaceous brightness, enhancing the overall freshness of the eggs and adding a pop of color. For an extra layer of irresistible texture and savory goodness, crispy bacon bits, crumbled finely and folded into the filling, are an absolute game-changer that will have everyone reaching for more. And don’t stop at just the basic design! Think of tiny edible silver or gold pearls delicately placed as “ornaments” for your trees, or a small, perfectly cut star from a pimento or red bell pepper placed at the very top of each one, truly embracing the festive theme. These small additions can elevate the visual appeal even further and add delightful, unexpected flavor notes. You could even create a variety platter, featuring different flavor profiles on the same plate, offering your guests a delightful tasting journey. Consider serving these alongside a vibrant crudité platter with various dips, or as part of a larger holiday spread featuring other complementary finger foods. They pair wonderfully with a crisp white wine, sparkling cider, or even a refreshing mocktail, making them incredibly versatile for any celebratory occasion.
So, what are you waiting for? I wholeheartedly encourage you to roll up your sleeves and give these fantastic Deviled Egg Christmas Trees a try this season. I truly believe you’ll be amazed at how simple and rewarding the process is, and how incredibly delicious and visually stunning the final result turns out to be. Don’t be afraid to get creative with your garnishes and flavor twists; that’s where the real fun begins and your personal culinary touch shines! Once you’ve made them, I would absolutely love to hear about your experience. Did you add a unique ingredient? Did your family or friends rave about them? Please share your photos and stories with me! Your culinary adventures inspire me, and I can’t wait to see the wonderful creations you bring to life. Happy cooking, and may your gatherings be filled with delicious food, cherished memories, and even better company!
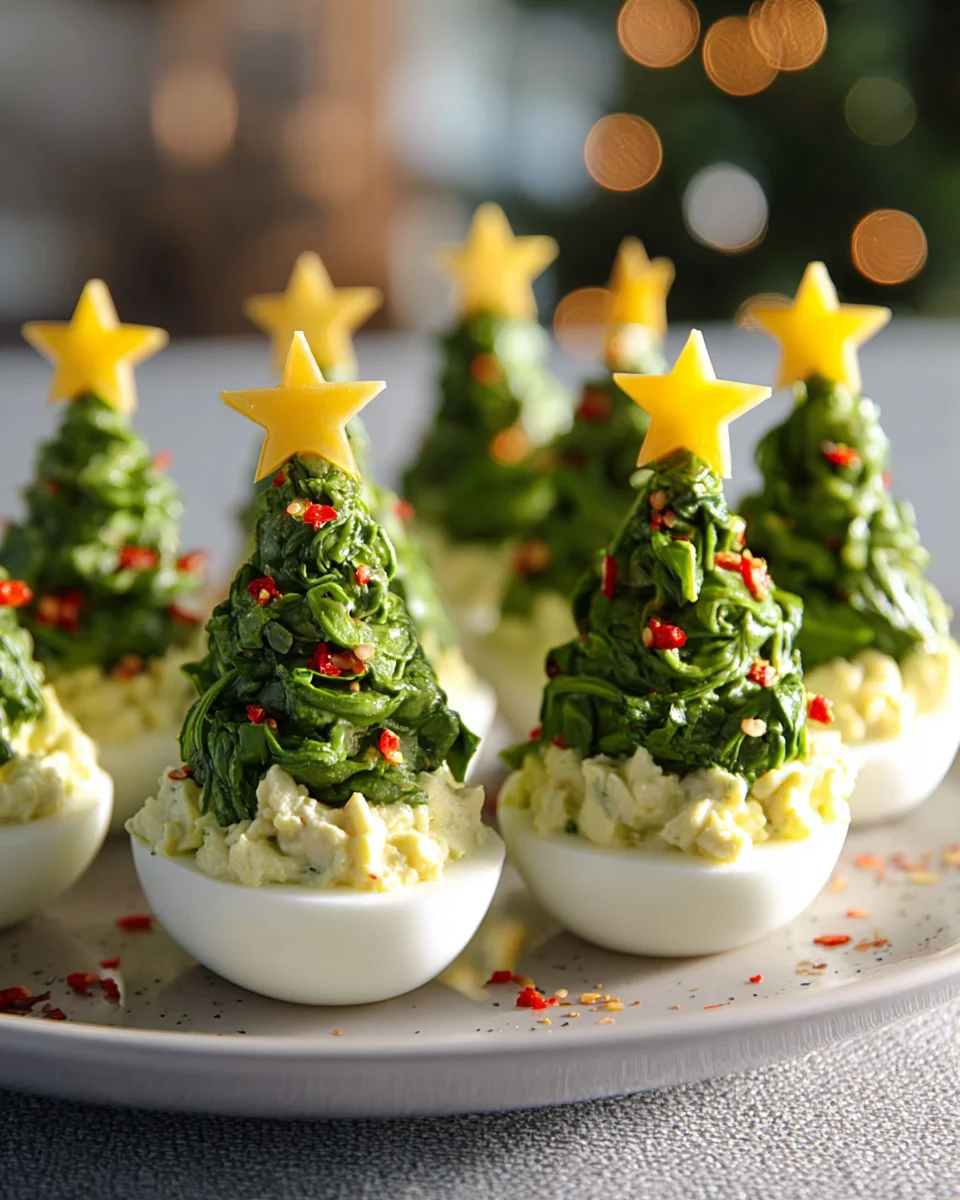
Deviled Egg Christmas Trees
Transform classic deviled eggs into charming, edible Christmas tree shapes. This festive holiday appetizer features a savory spinach and garlic yolk filling, piped into a tree design and adorned with colorful ‘ornaments’ for a delightful visual and flavorful experience.
Ingredients
Instructions
Important Information
Nutrition Facts (Per Serving)
It is important to consider this information as approximate and not to use it as definitive health advice.
Allergy Information
Please check ingredients for potential allergens and consult a health professional if in doubt.