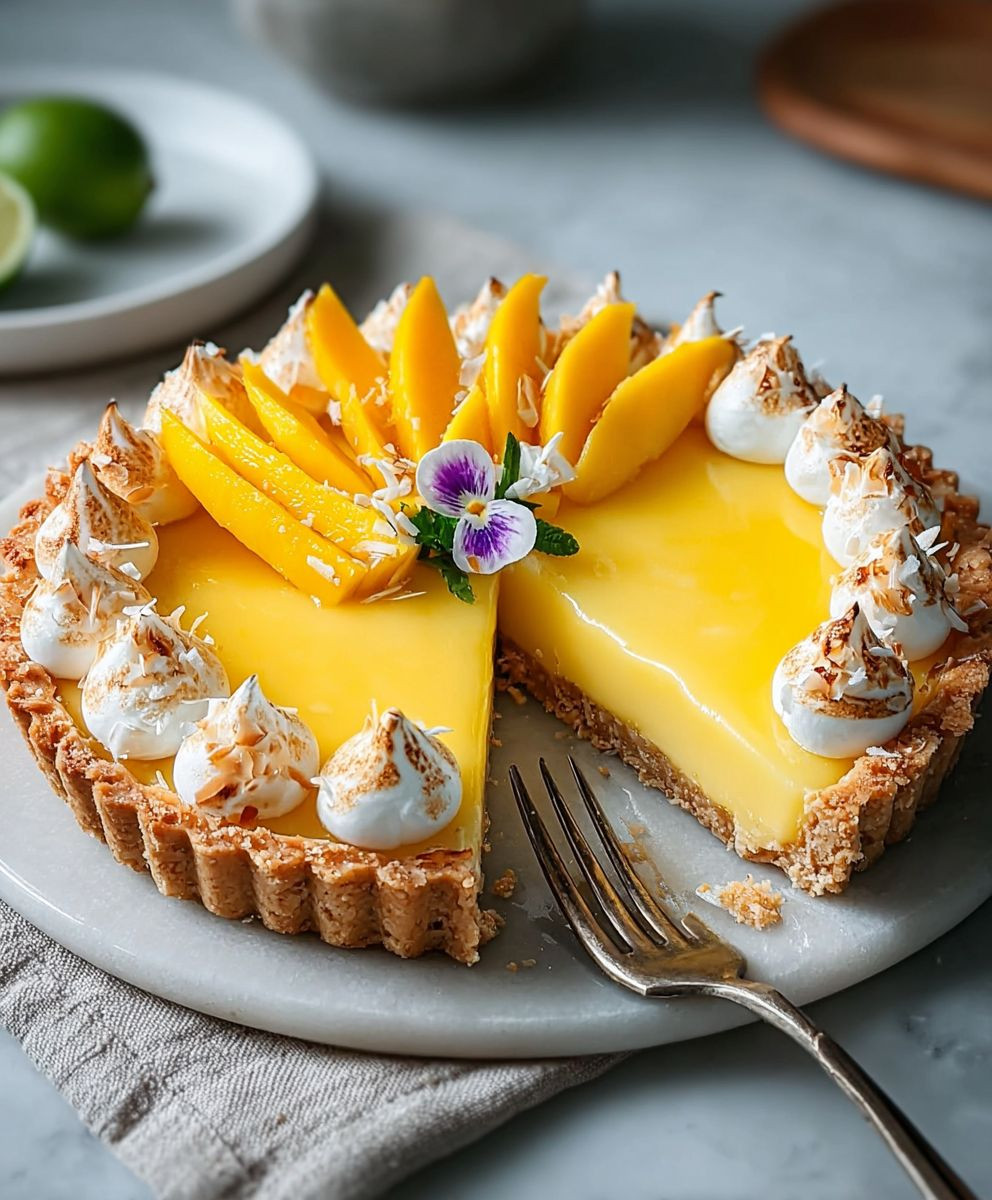
Mango Curd Tart: just the name conjures images of sunshine, tropical breezes, and a burst of vibrant flavor, doesn’t it? Imagine sinking your fork into a buttery, crumbly crust, giving way to a lusciously smooth and tangy mango curd filling. This isn’t just dessert; it’s an experience! I’m thrilled to share my recipe for this delightful treat that’s guaranteed to impress.
While the exact origins of fruit curds are debated, they’ve been a beloved part of British culinary tradition for centuries, often enjoyed with scones or toast. My Mango Curd Tart takes this classic concept and infuses it with the exotic sweetness of ripe mangoes, creating a modern twist on a timeless favorite. Mangoes themselves hold significant cultural importance in many parts of the world, symbolizing prosperity and good fortune. Bringing these two elements together results in a dessert that is both familiar and exciting.
So, why do people adore this tart? It’s the perfect balance of textures and tastes. The crisp, shortbread-like crust provides a satisfying contrast to the creamy, melt-in-your-mouth curd. The tangy sweetness of the mango curd is incredibly refreshing, making it an ideal dessert for warm weather or any time you crave a taste of sunshine. Plus, while it looks impressive, this Mango Curd Tart is surprisingly easy to make, even for beginner bakers. Let’s get started!
Ingredients:
- For the Sweet Pastry Crust:
- 250g (2 cups) all-purpose flour, plus extra for dusting
- 125g (1/2 cup) cold unsalted butter, cubed
- 50g (1/4 cup) powdered sugar
- 1 large egg yolk
- 2-3 tablespoons ice water
- Pinch of salt
- For the Mango Curd Filling:
- 400g (about 2 large) ripe mangoes, peeled and chopped
- 150g (3/4 cup) granulated sugar
- 100g (1/2 cup) unsalted butter, cubed
- 4 large eggs
- 2 large egg yolks
- 2 tablespoons lemon juice
- Pinch of salt
- For the Optional Garnish:
- Fresh mango slices
- Toasted coconut flakes
- Mint leaves
- Powdered sugar, for dusting
Preparing the Sweet Pastry Crust:
- Combine Dry Ingredients: In a large bowl, whisk together the flour, powdered sugar, and salt. This ensures the powdered sugar is evenly distributed, preventing lumps in the dough.
- Incorporate the Butter: Add the cold, cubed butter to the flour mixture. Using a pastry blender or your fingertips, cut the butter into the flour until the mixture resembles coarse crumbs. The key here is to work quickly and keep the butter cold. If the butter melts, the crust will be tough. You should see small pieces of butter still visible in the mixture.
- Add the Egg Yolk: Make a well in the center of the flour mixture and add the egg yolk. Gently mix the egg yolk into the flour and butter mixture. The egg yolk adds richness and helps bind the dough together.
- Add Ice Water: Gradually add the ice water, one tablespoon at a time, mixing until the dough just comes together. Be careful not to overmix. Overmixing develops the gluten in the flour, resulting in a tough crust. The dough should be slightly shaggy but hold together when pressed.
- Form the Dough: Turn the dough out onto a lightly floured surface. Gently form it into a disc, about 1 inch thick. Wrap the disc tightly in plastic wrap.
- Chill the Dough: Refrigerate the dough for at least 1 hour, or preferably 2 hours. This allows the gluten to relax, making the dough easier to roll out and preventing it from shrinking during baking. Chilling also helps the butter solidify, resulting in a flakier crust.
- Roll Out the Dough: On a lightly floured surface, roll out the chilled dough into a circle about 12 inches in diameter and about 1/8 inch thick. Make sure to keep the dough moving and add more flour as needed to prevent it from sticking to the surface.
- Transfer to Tart Pan: Carefully transfer the rolled-out dough to a 9-inch tart pan with a removable bottom. Gently press the dough into the bottom and up the sides of the pan.
- Trim the Edges: Trim any excess dough from the edges of the tart pan. You can use a rolling pin to roll over the edges or a sharp knife to trim them neatly.
- Dock the Crust: Use a fork to prick the bottom of the crust all over. This prevents the crust from puffing up during baking.
- Chill Again: Place the tart pan with the prepared crust in the refrigerator for another 30 minutes. This helps the crust hold its shape during baking.
Blind Baking the Crust:
- Preheat Oven: Preheat your oven to 375°F (190°C).
- Prepare for Blind Baking: Line the chilled tart crust with parchment paper. Fill the parchment paper with pie weights, dried beans, or rice. This will prevent the crust from puffing up and losing its shape.
- Bake the Crust: Bake the crust for 20 minutes.
- Remove Weights: Carefully remove the parchment paper and pie weights.
- Continue Baking: Return the crust to the oven and bake for another 10-15 minutes, or until the crust is lightly golden brown. Keep a close eye on it to prevent burning.
- Cool Completely: Remove the baked crust from the oven and let it cool completely in the tart pan before filling.
Making the Mango Curd Filling:
- Prepare the Mango Puree: In a blender or food processor, puree the chopped mangoes until smooth. You should have about 1 1/2 cups of mango puree.
- Combine Ingredients in a Saucepan: In a medium saucepan, combine the mango puree, granulated sugar, butter, eggs, egg yolks, lemon juice, and salt.
- Cook the Curd: Cook the mixture over medium-low heat, stirring constantly with a whisk, until the curd thickens enough to coat the back of a spoon. This usually takes about 10-15 minutes. Be patient and keep stirring to prevent the eggs from scrambling. The curd is ready when you can run your finger across the back of the spoon and the line remains distinct.
- Strain the Curd (Optional): For an extra smooth curd, strain it through a fine-mesh sieve into a bowl. This will remove any small lumps or cooked egg particles.
- Cool Slightly: Let the mango curd cool slightly for about 10 minutes before pouring it into the baked tart crust. This will prevent the crust from becoming soggy.
Assembling the Mango Curd Tart:
- Pour in the Filling: Pour the slightly cooled mango curd into the cooled, baked tart crust. Spread it evenly to the edges.
- Chill the Tart: Refrigerate the tart for at least 2 hours, or preferably overnight, to allow the curd to set completely. This will make it easier to slice and serve.
Garnishing and Serving:
- Prepare Garnishes: While the tart is chilling, prepare your desired garnishes. Slice fresh mangoes, toast coconut flakes, and wash mint leaves.
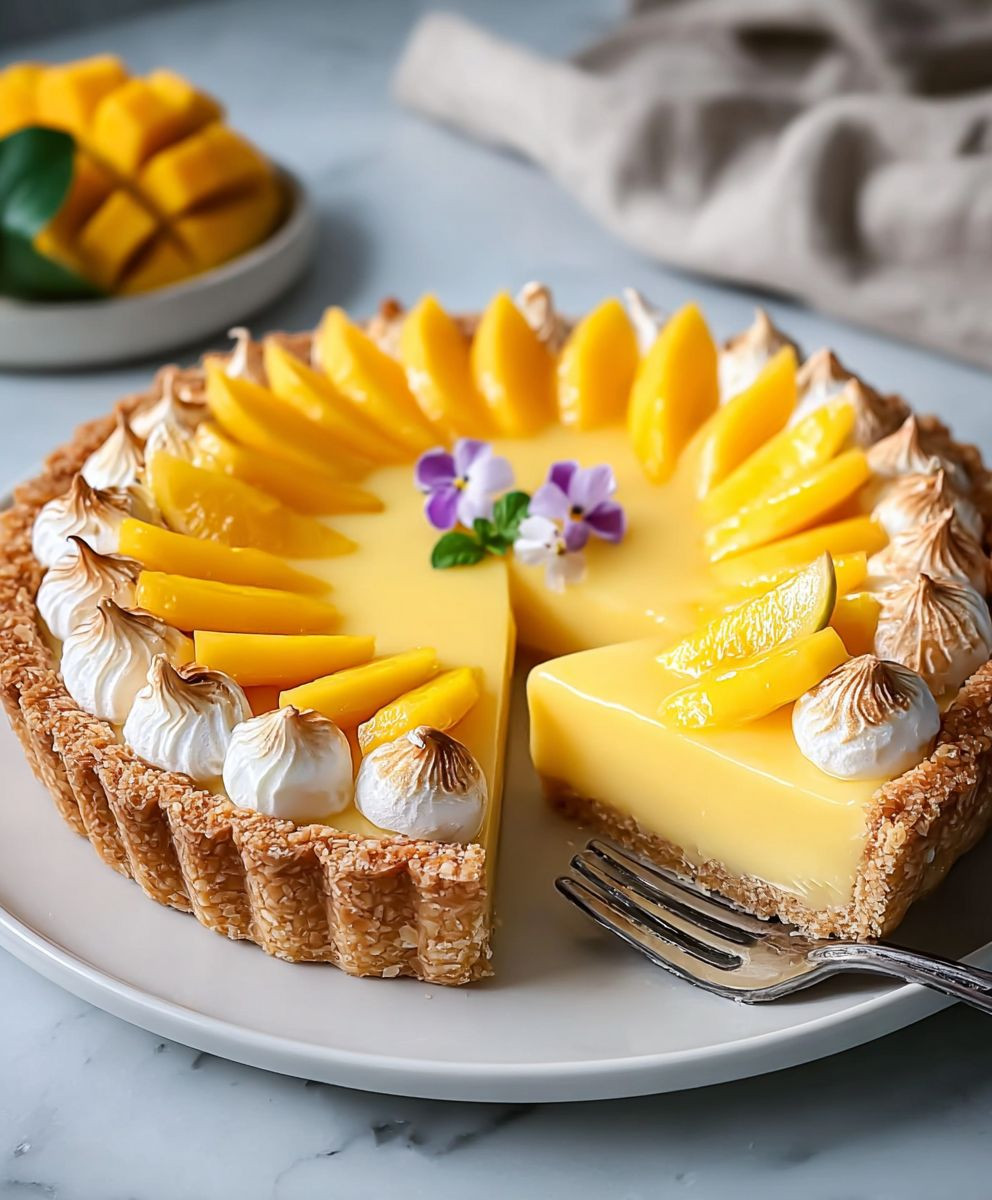
- Garnish the Tart: Just before serving, garnish the tart with fresh mango slices, toasted coconut flakes, and mint leaves. You can arrange the mango slices in a decorative pattern.
- Dust with Powdered Sugar (Optional): Lightly dust the tart with powdered sugar for an extra touch of sweetness and elegance.
- Slice and Serve: Carefully remove the tart from the tart pan by pushing up on the removable bottom. Slice the tart into wedges and serve chilled.
Conclusion:
This Mango Curd Tart is truly a showstopper, and I wholeheartedly believe it deserves a place on your baking bucket list. The vibrant color, the tangy-sweet flavor explosion, and the satisfyingly smooth texture of the curd all combine to create a dessert that’s both impressive and incredibly easy to devour. It’s the kind of treat that will have everyone asking for seconds (and the recipe!).
But beyond its deliciousness, this tart is a must-try because it’s surprisingly adaptable. While the classic recipe is divine as is, there are so many ways to personalize it and make it your own. For a more tropical twist, consider adding a sprinkle of toasted coconut flakes to the crust before baking. The subtle nuttiness complements the mango beautifully. Or, if you’re feeling adventurous, infuse the curd with a hint of ginger or cardamom for an extra layer of warmth and complexity.
Serving suggestions are endless! A simple dollop of whipped cream or a scoop of vanilla ice cream is always a welcome addition. For a more elegant presentation, garnish the tart with fresh mango slices, a sprig of mint, or a dusting of powdered sugar. It’s perfect for afternoon tea, a summer barbecue, or any special occasion that calls for a touch of sunshine.
And don’t feel limited to just a tart! The mango curd itself is incredibly versatile. You can use it as a filling for cupcakes, a topping for pancakes or waffles, or even as a spread for toast. Imagine a warm croissant slathered with this luscious Mango Curd Tart filling – pure bliss! You could even layer it with yogurt and granola for a delightful breakfast parfait. The possibilities are truly endless.
I’ve poured my heart into perfecting this recipe, and I’m so excited for you to try it. I’m confident that you’ll find it as rewarding and delicious as I do. The bright, sunny flavor of the mango curd is guaranteed to brighten even the gloomiest of days. Plus, the process of making it is surprisingly therapeutic. There’s something incredibly satisfying about watching the curd thicken and transform into a smooth, glossy masterpiece.
So, what are you waiting for? Gather your ingredients, preheat your oven, and get ready to embark on a baking adventure. I promise you won’t regret it. And once you’ve created your own masterpiece, I’d absolutely love to hear about your experience! Share your photos and stories with me – I’m always eager to see your creations and learn about any variations you’ve tried. Did you add a secret ingredient? Did you serve it with a unique garnish? Let me know! Your feedback is invaluable, and it helps me continue to improve and refine my recipes. Happy baking! I can’t wait to see your amazing Mango Curd Tart creations!
Mango Curd Tart: A Delicious & Easy Recipe
Bright, flavorful mango curd tart with a sweet pastry crust, perfect for a refreshing dessert.
Ingredients
Instructions
Recipe Notes
- Keeping the butter cold is crucial for a flaky crust.
- Don’t overmix the dough for the crust, or it will become tough.
- Blind baking the crust prevents it from becoming soggy.
- Stir the mango curd constantly to prevent the eggs from scrambling.
- Chilling the tart completely allows the curd to set properly.

