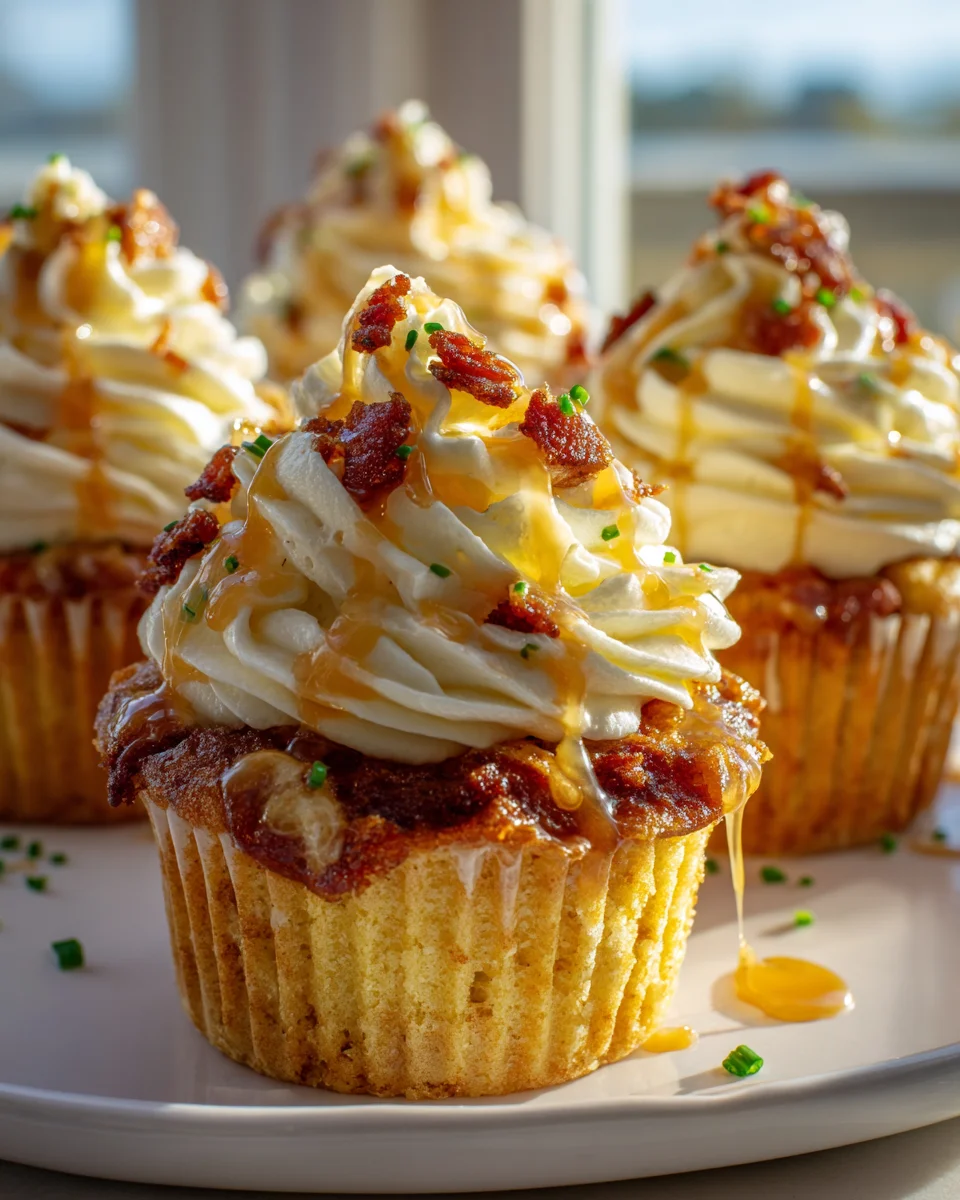
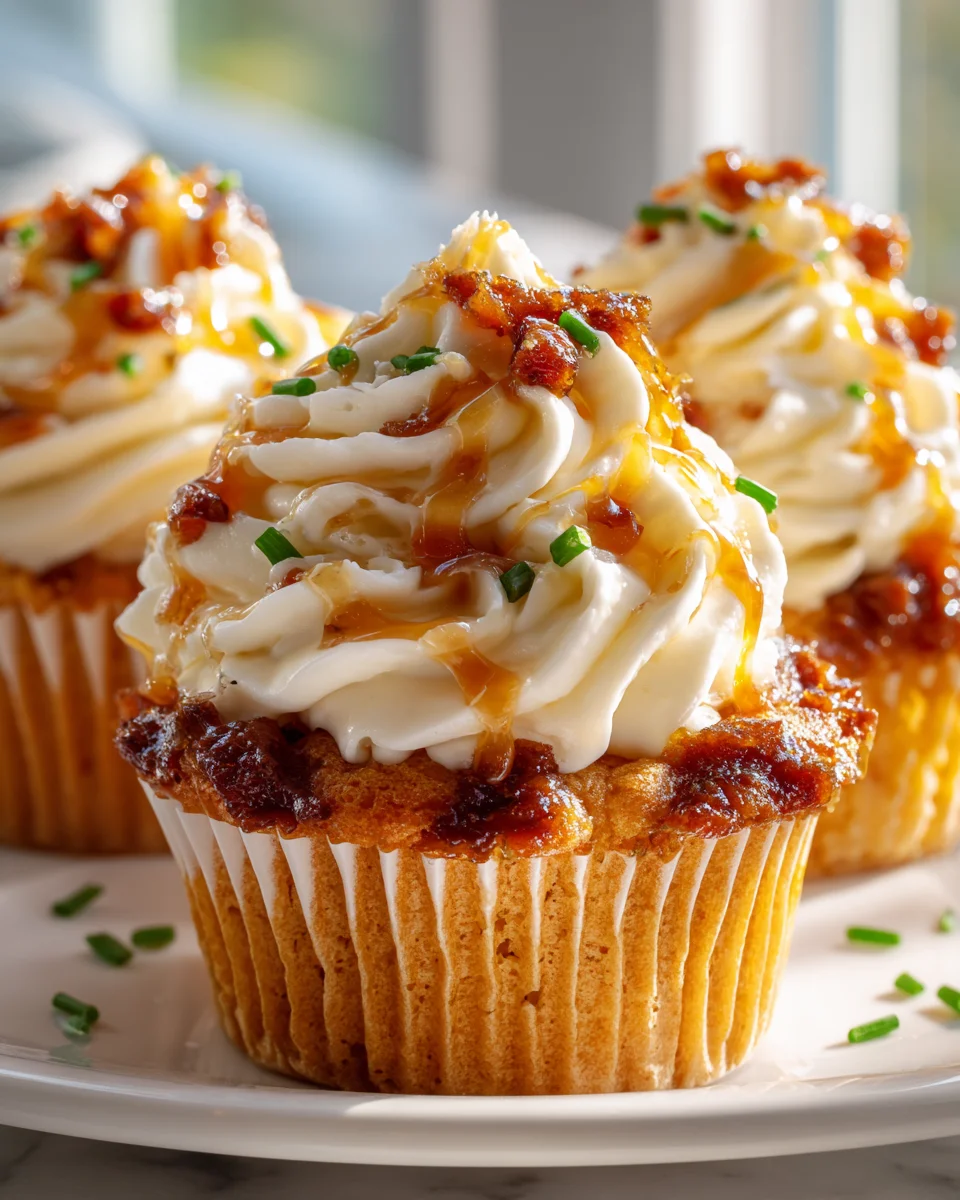
Maple Beef Bacon Breakfast Cupcakes With Whipped Frosting
Maple Beef Bacon Breakfast Cupcakes With Whipped Frosting – just hearing that name probably made your ears perk up, didn’t it? Get ready to redefine what breakfast can be, because I’m absolutely thrilled to share this show-stopping recipe with you. This isn’t just breakfast; it’s a celebration in a cupcake liner!
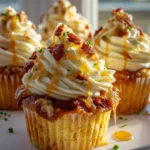
What makes these Maple Beef Bacon Breakfast Cupcakes With Whipped Frosting so incredibly special? It’s the delightful dance between sweet and savory, all packaged in a fun, individual serving that’s perfect for any occasion. Imagine fluffy, maple-infused breakfast cupcakes, bursting with savory beef bacon and tender scrambled eggs, perfectly baked until golden. But wait, there’s more! We crown each one with a swirl of light, airy whipped frosting – a surprisingly complementary, slightly savory touch that elevates these from simple breakfast bites to an unforgettable culinary experience. It’s unexpected, it’s decadent, and it’s utterly genius!
You’re going to love these because they’re not just a meal; they’re an event! They’re perfect for impressing guests at a brunch, treating yourself to a special weekend indulgence, or even a unique grab-and-go option that feels utterly luxurious. They look impressive, taste incredible, and offer a playful, sophisticated twist on classic breakfast flavors. Trust me, once you try these, your breakfast routine will never be the same again!
Ingredient Notes
Creating these Maple Beef Bacon Breakfast Cupcakes is such a joy, and the key to their incredible flavor truly lies in selecting the right ingredients. I want to walk you through some of the stars of this recipe and offer a few helpful substitution tips, just in case!
For the Cupcakes:
- Beef Bacon: This is non-negotiable for our specific recipe name, and it brings such a wonderfully savory, salty counterpoint to the sweet maple. I recommend using a good quality, thicker-cut beef bacon if you can find it. The thicker slices crisp up beautifully and provide more texture. If you absolutely can’t source beef bacon, a turkey bacon can be a lighter alternative, but do note the flavor profile will shift significantly. The rendered fat from the beef bacon is also incredibly flavorful; sometimes I save a tablespoon or two to add to the batter for an extra savory kick, but it’s totally optional.
- Pure Maple Syrup: Forget the imitation stuff here; pure maple syrup is where all that authentic, warm, breakfast-y sweetness comes from. It’s truly worth the investment for the depth of flavor it provides. If you’re in a pinch and don’t have pure maple syrup, you could use a good quality pancake syrup, but be aware it won’t have the same nuanced flavor. For a more intense maple hit without adding too much liquid, a few drops of maple extract can be a fantastic addition alongside a regular sweetener.
- All-Purpose Flour: My go-to for most baking! It gives the cupcakes a lovely, tender crumb. If you need a gluten-free option, a good quality 1:1 gluten-free baking blend that contains xanthan gum should work beautifully. Just make sure to measure by weight if possible, as gluten-free flours can vary in density.
- Baking Powder and Baking Soda: These are our leavening agents, giving our cupcakes their lovely rise and fluffy texture. Always check the expiration dates to ensure they’re fresh and active.
- Milk: I typically use whole milk for richness in my baking, but any dairy milk (2%, skim) will work just fine. For a dairy-free alternative, unsweetened almond milk or oat milk are excellent choices and won’t significantly alter the flavor profile.
- Eggs: Large eggs are standard in baking for binding and moisture. Make sure they’re at room temperature, as this helps them emulsify better with other ingredients, leading to a smoother batter and a better rise.
- Neutral Oil or Melted Butter: I often use a neutral-flavored oil like vegetable or canola oil because it keeps the cupcakes incredibly moist. Melted unsalted butter can also be used and adds a lovely richness, but be sure to let it cool slightly before adding to your wet ingredients.
- Brown Sugar: I prefer light brown sugar here for its molasses notes, which complement the maple and bacon so well. It also contributes to a wonderfully moist cupcake. Granulated sugar can be substituted, but you might lose a little of that depth.
For the Whipped Frosting:
- Cream Cheese: Full-fat cream cheese, softened to room temperature, is essential for a smooth, lump-free frosting with that signature tangy richness. Don’t try to rush this step by microwaving it; patience is key! For a dairy-free option, there are some great dairy-free cream cheese alternatives available now that work well in frostings.
- Heavy Cream (or Heavy Whipping Cream): This is what gives our frosting its light, airy, whipped texture. It needs to be very cold to whip up properly, so keep it in the fridge until you’re ready to use it.
- Powdered Sugar (Confectioners’ Sugar): This provides sweetness and helps stabilize the frosting without adding a grainy texture. Sift it if it’s lumpy to ensure a silky-smooth finish.
- Pure Maple Syrup (again!): A touch more for that unmistakable maple flavor in our frosting.
Step-by-Step Instructions
Alright, let’s get baking! Here’s how I bring these delicious Maple Beef Bacon Breakfast Cupcakes to life in my kitchen. Follow these steps, and you’ll have a batch of incredibly tempting treats in no time.
- Prep Your Beef Bacon: First things first, cook your beef bacon until it’s wonderfully crispy. I like to do this in a skillet over medium heat, or you can bake it in the oven. Once cooked, transfer it to a paper towel-lined plate to drain off any excess fat. Once cool enough to handle, crumble about two-thirds of the bacon into small pieces. Reserve the remaining one-third for garnish later.
- Get Ready to Bake: Preheat your oven to 375°F (190°C). Line a 12-cup muffin tin with paper cupcake liners. This recipe makes about 12 standard cupcakes.
- Combine Dry Ingredients: In a large mixing bowl, whisk together your all-purpose flour, light brown sugar, baking powder, baking soda, and a pinch of salt. Make sure there are no lumps and everything is well combined.
- Mix Wet Ingredients: In a separate medium bowl, whisk together your eggs, milk, pure maple syrup, and neutral oil (or melted butter). Whisk until everything is fully incorporated and smooth.
- Combine Wet and Dry: Pour the wet ingredients into the dry ingredients. Stir gently with a spatula or wooden spoon until just combined. Be careful not to overmix! A few small lumps are perfectly fine; overmixing can lead to tough cupcakes.
- Fold in the Bacon: Gently fold in the crumbled beef bacon (the two-thirds you prepared earlier) into the cupcake batter. Distribute it evenly throughout the batter.
- Fill the Liners: Divide the batter evenly among the 12 prepared cupcake liners, filling each about two-thirds full.
- Bake to Perfection: Transfer the muffin tin to your preheated oven and bake for 18-22 minutes, or until a wooden skewer or toothpick inserted into the center of a cupcake comes out clean.
- Cool Completely: Once baked, remove the cupcakes from the oven and let them cool in the muffin tin for a few minutes before transferring them to a wire rack to cool completely. This is a crucial step – don’t try to frost warm cupcakes!
- Prepare the Whipped Frosting: While the cupcakes are cooling, beat your softened cream cheese in a large mixing bowl with an electric mixer until smooth and creamy, about 1-2 minutes. Scrape down the sides of the bowl.
- Add Sweetness and Maple: Gradually add the sifted powdered sugar and a tablespoon or two of pure maple syrup to the cream cheese, beating until well combined and fluffy.
- Whip the Cream: In a separate, very cold bowl, pour your cold heavy cream. Whip with clean beaters on medium-high speed until stiff peaks form. Be careful not to over-whip, or it can become grainy.
- Combine for Frosting: Gently fold the whipped cream into the cream cheese mixture until just combined and light and airy. Try not to deflate the whipped cream.
- Frost and Garnish: Once the cupcakes are completely cool, transfer the whipped frosting to a piping bag fitted with your favorite tip, or simply use an offset spatula to spread it on. Frost each cupcake generously. Finally, sprinkle the reserved crispy beef bacon crumbles over the top of each frosted cupcake. A tiny drizzle of extra maple syrup can also be a lovely touch!
Tips & Suggestions
I’ve made these Maple Beef Bacon Breakfast Cupcakes quite a few times, and I’ve picked up a few tricks along the way that I think will really elevate your baking experience and the final delicious result. Here are my top tips and suggestions!
- Don’t Overmix the Batter: This is a golden rule for tender cupcakes. Once you combine the wet and dry ingredients, mix just until no streaks of dry flour remain. Overmixing develops the gluten, leading to a tougher, chewier cupcake, and we want a light, fluffy crumb here!
- Crispy Beef Bacon is Key: For the best texture contrast, make sure your beef bacon is cooked until truly crispy. Those crunchy, savory bits against the soft, sweet cupcake are what make this recipe sing. If your bacon isn’t crispy enough, it might become a bit chewy in the batter.
- Room Temperature Ingredients for Frosting: Just like with baking, having your cream cheese at room temperature for the frosting is vital. It blends much smoother, preventing any lumps and ensuring that wonderfully creamy texture we’re aiming for.
- Chill Your Whipping Bowl and Beaters: For the stiffest, most stable whipped cream, I always pop my mixing bowl and whisk attachment (or beater) into the freezer for 10-15 minutes before whipping. Cold cream whips up faster and holds its shape better.
- Embrace the Maple Flavor: If you’re a true maple lover, consider adding a tiny splash (1/4 to 1/2 teaspoon) of maple extract to the cupcake batter along with the pure maple syrup. This will deepen that maple essence even further.
- Serving Suggestions: These cupcakes are absolutely perfect for a weekend brunch spread! Serve them alongside a hot cup of coffee or tea, a tall glass of freshly squeezed orange juice, and maybe some fresh fruit for a complete breakfast experience. They also make a fantastic unexpected treat for a morning meeting or special occasion.
- Presentation Matters: A simple swirl of frosting with a piping bag makes these cupcakes look professional and inviting. Don’t be shy with the bacon garnish; it’s both decorative and delicious! You can even add a tiny, thin slice of candied beef bacon on top for an extra gourmet touch.
- Customize Your Crunch: If you love even more texture, a sprinkle of toasted pecans or walnuts can be a wonderful addition to the batter or sprinkled over the frosting, enhancing the breakfast feel.
Storage
Once you’ve made these delicious Maple Beef Bacon Breakfast Cupcakes, you’ll want to make sure you store them properly to keep them fresh and tasty for as long as possible. Here’s what I recommend:
- Frosted Cupcakes: Because our whipped frosting contains cream cheese and heavy cream, these cupcakes need to be refrigerated. Store them in an airtight container in the refrigerator for up to 3-4 days. I find that placing a piece of parchment paper directly on top of the frosting before closing the lid can help prevent any moisture from gathering on the frosting.
- Serving Chilled or Room Temperature: While they need to be stored in the fridge, I personally love these cupcakes best when they’ve been allowed to come to room temperature for about 15-20 minutes before serving. This softens the frosting slightly and allows the flavors to truly shine.
- Unfrosted Cupcakes: If you want to bake ahead, you can store the unfrosted cupcakes at room temperature in an airtight container for up to 2 days. Make sure they are completely cooled before storing to prevent condensation.
- Freezing Unfrosted Cupcakes: These cupcakes freeze beautifully without the frosting! Once completely cooled, wrap each unfrosted cupcake individually in plastic wrap, then place them in a freezer-safe airtight container or heavy-duty freezer bag. They can be frozen for up to 2-3 months.
- Thawing Frozen Cupcakes: When you’re ready to enjoy them, simply remove the desired number of cupcakes from the freezer and let them thaw at room temperature for a few hours, or overnight in the refrigerator. Once thawed, you can whip up a fresh batch of frosting and decorate them as desired.
- Freezing Frosting: The cream cheese whipped frosting isn’t ideal for freezing once prepared as it can lose its light, airy texture when thawed. It’s best made fresh on the day you plan to frost your cupcakes.
Final Thoughts
And there you have it, my friends! We’ve reached the delightful conclusion of our culinary adventure. I truly believe that once you experience the magic of these unique treats, you’ll understand why I’m so enthusiastic about them. The incredible dance between the sweet maple and the savory beef bacon, all baked into a perfectly portioned cupcake and crowned with that luscious whipped frosting, creates an absolutely unforgettable breakfast experience.
This isn’t just another breakfast item; it’s a statement. It’s fun, it’s innovative, and it brings a smile to every face at the table. Seriously, I urge you to make these Maple Beef Bacon Breakfast Cupcakes With Whipped Frosting. They are a true game-changer for brunch, a fantastic way to make any morning feel special, or simply a brilliant indulgence that offers a perfect balance of flavors and textures. Trust me, preparing and enjoying your very own Maple Beef Bacon Breakfast Cupcakes With Whipped Frosting will be a delightful decision you won’t regret. Get ready to impress and savor every single bite!
Maple Beef Bacon Breakfast Cupcakes – Sweet & Savory!
- Total Time: 52 minutes
- Yield: 12 servings
Description
These Maple Beef Bacon Breakfast Cupcakes redefine breakfast with a delightful blend of sweet and savory flavors. Topped with a light whipped frosting, they are perfect for any occasion!
Ingredients
- Beef Bacon
- Pure Maple Syrup
- All-Purpose Flour
- Baking Powder
- Baking Soda
- Milk
- Eggs
- Neutral Oil or Melted Butter
- Brown Sugar
- Cream Cheese
- Heavy Cream (or Heavy Whipping Cream)
- Powdered Sugar (Confectioners' Sugar)
- Pure Maple Syrup (again!)
Instructions
- Prep Your Beef Bacon: Cook your beef bacon until it's wonderfully crispy. Transfer it to a paper towel-lined plate to drain off any excess fat. Once cool enough to handle, crumble about two-thirds of the bacon into small pieces. Reserve the remaining one-third for garnish later.
- Get Ready to Bake: Preheat your oven to 375°F (190°C). Line a 12-cup muffin tin with paper cupcake liners.
- Combine Dry Ingredients: In a large mixing bowl, whisk together your all-purpose flour, light brown sugar, baking powder, baking soda, and a pinch of salt.
- Mix Wet Ingredients: In a separate medium bowl, whisk together your eggs, milk, pure maple syrup, and neutral oil (or melted butter).
- Combine Wet and Dry: Pour the wet ingredients into the dry ingredients. Stir gently until just combined.
- Fold in the Bacon: Gently fold in the crumbled beef bacon into the cupcake batter.
- Fill the Liners: Divide the batter evenly among the 12 prepared cupcake liners, filling each about two-thirds full.
- Bake to Perfection: Bake for 18-22 minutes, or until a wooden skewer or toothpick inserted into the center comes out clean.
- Cool Completely: Let the cupcakes cool in the muffin tin for a few minutes before transferring them to a wire rack to cool completely.
- Prepare the Whipped Frosting: Beat your softened cream cheese in a large mixing bowl until smooth and creamy.
- Add Sweetness and Maple: Gradually add the sifted powdered sugar and a tablespoon or two of pure maple syrup to the cream cheese, beating until well combined.
- Whip the Cream: In a separate, very cold bowl, whip your cold heavy cream until stiff peaks form.
- Combine for Frosting: Gently fold the whipped cream into the cream cheese mixture until just combined.
- Frost and Garnish: Frost each cupcake generously with the whipped frosting and sprinkle the reserved crispy beef bacon crumbles over the top.
- Prep Time: 30 mins
- Cook Time: 22 mins
- Category: Breakfast
- Method: Baking
- Cuisine: American
Nutrition
- Serving Size: 1 cupcake
- Calories: 250
- Sugar: 15 g
- Sodium: 300 mg
- Fat: 12 g
- Saturated Fat: 5 g
- Unsaturated Fat: 6 g
- Trans Fat: 0 g
- Carbohydrates: 30 g
- Fiber: 1 g
- Protein: 6 g
- Cholesterol: 50 mg
Keywords: Don't overmix the batter for tender cupcakes. Ensure your beef bacon is crispy for the best texture contrast. Use room temperature cream cheese for a smoother frosting.