Margarita dessert bars are about to become your new favorite way to enjoy the flavors of summer! Imagine this: the tangy zest of lime, the subtle sweetness of agave, and that unmistakable tequila kick, all transformed into a creamy, dreamy dessert bar. Forget the blender and the salt-rimmed glasses; we’re taking the iconic margarita and giving it a delicious, no-fuss makeover.
While the exact origins of the margarita cocktail are debated, its popularity is undeniable, especially in Mexican-American culture and beyond. It’s a symbol of celebration, relaxation, and good times. These margarita dessert bars capture that same spirit in a portable, shareable form. They’re perfect for potlucks, barbecues, or simply a sweet treat on a warm evening.
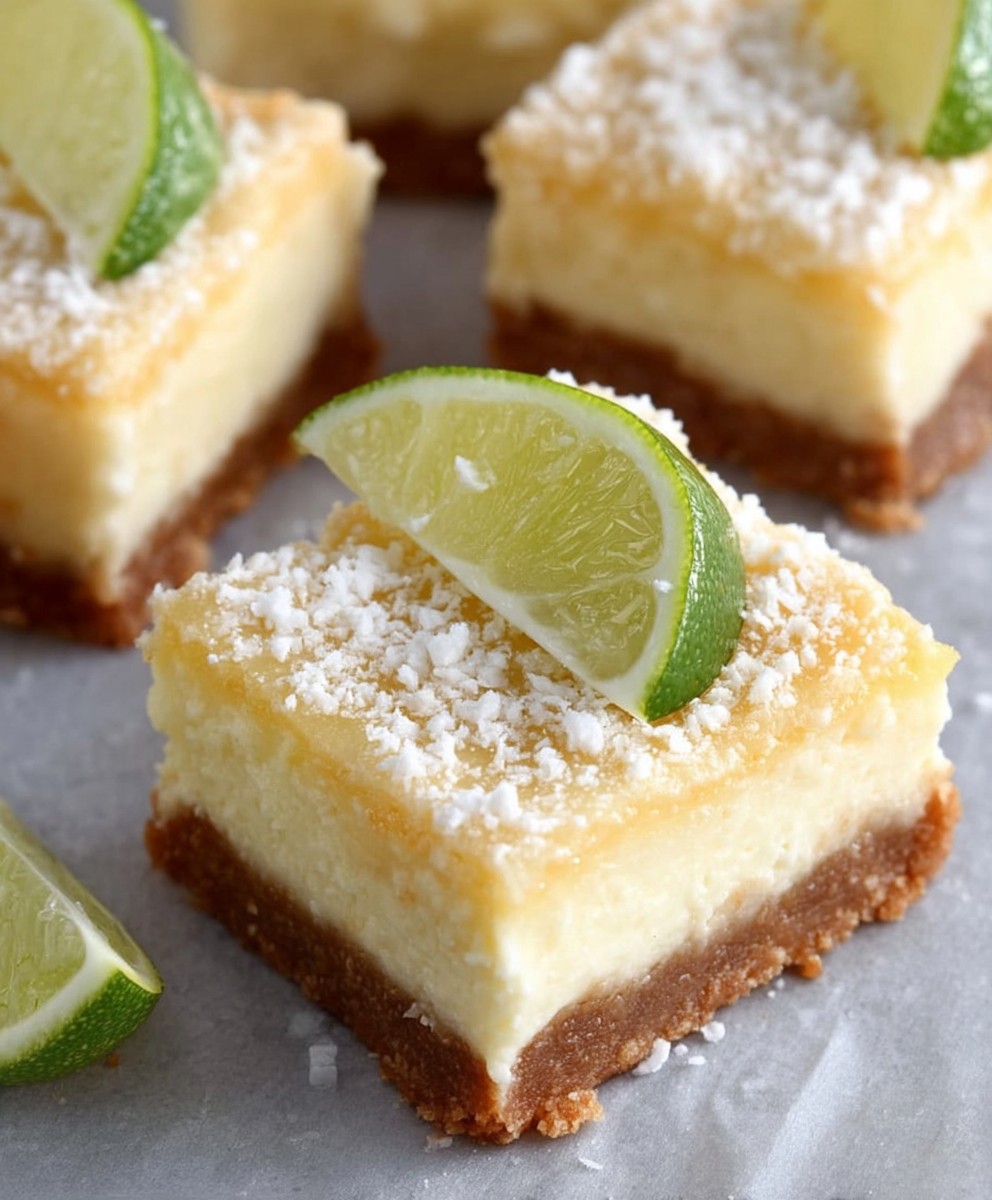
What makes these bars so irresistible? It’s the perfect balance of flavors and textures. The creamy filling melts in your mouth, while the graham cracker crust provides a satisfying crunch. Plus, the bright, citrusy flavor is incredibly refreshing. And let’s be honest, who can resist a dessert that tastes like a vacation? Get ready to experience the margarita in a whole new, incredibly delicious way!

Ingredients:
- For the Crust:
- 1 ½ cups graham cracker crumbs
- ⅓ cup granulated sugar
- 6 tablespoons (3 ounces) unsalted butter, melted
- For the Margarita Filling:
- 2 (8 ounce) packages cream cheese, softened
- 1 ½ cups granulated sugar
- ½ cup sour cream
- ¼ cup lime juice, freshly squeezed (from about 2-3 limes)
- 2 tablespoons tequila (silver or blanco recommended)
- 1 tablespoon lime zest (from about 2 limes)
- ½ teaspoon orange extract
- Pinch of salt
- Green food coloring (optional, for a more vibrant color)
- For the Salted Rim Topping:
- ½ cup heavy cream
- 2 tablespoons powdered sugar
- ¼ teaspoon lime zest
- Coarse sea salt, for sprinkling
- Lime wedges, for garnish (optional)
Preparing the Graham Cracker Crust
Okay, let’s start with the foundation of our delicious Margarita Dessert Bars – the graham cracker crust! This is super easy and sets the stage for all the amazing flavors to come.
- Preheat the Oven: First things first, preheat your oven to 350°F (175°C). This ensures the crust bakes evenly and gets that perfect golden-brown color.
- Combine the Dry Ingredients: In a medium-sized bowl, whisk together the graham cracker crumbs and granulated sugar. Make sure they’re well combined so the sweetness is evenly distributed throughout the crust.
- Add the Melted Butter: Pour the melted butter into the bowl with the graham cracker mixture. Use a fork or your fingers to mix everything together until the crumbs are evenly moistened. The mixture should resemble wet sand.
- Press into the Pan: Press the graham cracker mixture firmly into the bottom of a 9×13 inch baking pan. I like to use the bottom of a measuring cup or a flat-bottomed glass to really pack it down and create a solid, even crust. This is important so the crust doesn’t crumble when you cut the bars later.
- Bake the Crust: Bake the crust in the preheated oven for 8-10 minutes, or until it’s lightly golden brown and fragrant. Keep a close eye on it, as it can burn easily.
- Cool Completely: Once the crust is baked, remove it from the oven and let it cool completely on a wire rack. This is crucial! You don’t want to add the filling to a hot crust, as it could melt the cream cheese and create a soggy mess. Patience is key here!
Making the Margarita Filling
Now for the star of the show – the Margarita Filling! This is where all the tangy, sweet, and boozy goodness comes together. Make sure your cream cheese is nice and soft for a smooth and creamy filling.
- Beat the Cream Cheese: In a large bowl, beat the softened cream cheese with an electric mixer until it’s smooth and creamy. This usually takes about 2-3 minutes. You want to make sure there are no lumps, so the filling is perfectly smooth.
- Add the Sugar: Gradually add the granulated sugar to the cream cheese, beating until well combined. Scrape down the sides of the bowl as needed to ensure everything is incorporated.
- Incorporate the Sour Cream: Add the sour cream to the mixture and beat until smooth. The sour cream adds a lovely tanginess and helps to create a lighter texture.
- Add the Lime Juice, Tequila, Lime Zest, and Orange Extract: Pour in the lime juice, tequila, lime zest, and orange extract. Beat until everything is well combined. These ingredients are what give the filling that signature margarita flavor! Don’t be shy with the lime zest – it adds a wonderful aroma and flavor.
- Add Salt and Food Coloring (Optional): Add a pinch of salt to enhance the flavors. If you want a more vibrant green color, add a few drops of green food coloring. I usually add just a couple of drops to get a nice, subtle green hue.
- Mix Until Smooth: Beat the filling until it’s smooth and creamy. Make sure all the ingredients are well incorporated and there are no lumps.
Assembling and Chilling the Dessert Bars
Almost there! Now it’s time to put everything together and let the magic happen in the refrigerator. Chilling is essential for these bars to set properly and develop their full flavor.
- Pour the Filling onto the Crust: Pour the margarita filling evenly over the cooled graham cracker crust. Use a spatula to spread it out and make sure it reaches all the edges of the pan.
- Chill in the Refrigerator: Cover the pan with plastic wrap and chill in the refrigerator for at least 4 hours, or preferably overnight. This allows the filling to set completely and the flavors to meld together. Trust me, the longer you chill them, the better they’ll taste!
Preparing the Salted Rim Topping
This topping is what really elevates these bars and gives them that authentic margarita vibe. The salty-sweet combination is absolutely irresistible!
- Whip the Heavy Cream: In a chilled bowl, whip the heavy cream with an electric mixer until soft peaks form. This usually takes about 2-3 minutes. Make sure your bowl and beaters are cold for the best results.
- Add the Powdered Sugar and Lime Zest: Add the powdered sugar and lime zest to the whipped cream and beat until stiff peaks form. Be careful not to over-whip, or the cream will turn grainy.
Finishing Touches and Serving
The final step! Now we get to add the finishing touches and enjoy our delicious Margarita Dessert Bars.
- Spread the Whipped Cream: Once the bars are chilled and set, spread the whipped cream evenly over the top.
- Sprinkle with Sea Salt: Sprinkle the top of the whipped cream with coarse sea salt. Don’t be afraid to be generous – the salt is what makes this topping so special!
- Cut into Bars: Cut the bars into squares or rectangles using a sharp knife. I like to run the knife under hot water and wipe it clean between each cut for clean, even slices.
- Garnish (Optional): Garnish each bar with a lime wedge, if desired. This adds a pop of color and a little extra lime flavor.
- Serve and Enjoy!: Serve the Margarita Dessert Bars immediately and enjoy! Store any leftovers in the refrigerator. They’re best enjoyed within 2-3 days.
Tips for Success:
- Use Full-Fat Cream Cheese: For the creamiest filling, use full-fat cream cheese. Reduced-fat cream cheese can result in a slightly less rich and creamy texture.
- Don’t Overbake the Crust: Keep a close eye on the crust while it’s baking to prevent it from burning. A slightly underbaked crust is better than an overbaked one.
- Chill Thoroughly: Chilling the bars for at least 4 hours, or preferably overnight, is crucial for them to set properly and develop their full flavor.
- Adjust the Sweetness: If you prefer a less sweet dessert, you can reduce the amount of sugar in the filling.
- Experiment with Flavors: Feel free to experiment with different flavors! You could add a splash of orange liqueur to the filling for a more complex flavor, or use different types of citrus zest.
Variations:
- Strawberry Margarita Bars: Add pureed strawberries to the filling for a fruity twist.
- Mango Margarita Bars: Add pureed mango to the filling for a tropical flavor.
- Spicy Margarita Bars: Add a pinch of cayenne pepper to the filling for a little kick.
Conclusion:
So, there you have it! These Margarita Dessert Bars are truly a slice of sunshine, even on a cloudy day. I genuinely believe this recipe is a must-try for anyone who loves the bright, zesty flavors of a classic margarita, but prefers a dessert that’s easy to share and even easier to devour. The combination of the buttery, crumbly crust, the tangy lime filling, and that hint of tequila (or not, if you prefer!) creates a symphony of flavors that will have everyone begging for seconds.
Why are these bars a must-try? Well, beyond the incredible taste, they’re surprisingly simple to make. No complicated techniques or fancy equipment required! Plus, they’re perfect for any occasion – from summer barbecues and potlucks to a casual weeknight treat. They’re a guaranteed crowd-pleaser, and I can almost guarantee you won’t have any leftovers.
But the fun doesn’t stop there! Feel free to get creative with your serving suggestions and variations. For a truly decadent experience, try topping each bar with a dollop of whipped cream and a sprinkle of lime zest. Or, if you’re feeling adventurous, you could even add a swirl of mango puree to the filling for a tropical twist. Another fun idea is to rim the serving plate with coarse salt, just like you would a margarita glass, for an extra touch of authenticity.
For a non-alcoholic version, simply omit the tequila and add a splash of lime juice or a teaspoon of lime extract to compensate. You can also experiment with different types of citrus fruits. Grapefruit or orange juice can add a unique and delicious flavor profile. Consider adding a thin layer of melted white chocolate on top for an extra layer of sweetness and visual appeal. You could even sprinkle some toasted coconut flakes on top of the white chocolate while it’s still wet.
These Margarita Dessert Bars are also incredibly versatile when it comes to presentation. You can cut them into squares, rectangles, or even triangles for a more elegant look. Arrange them on a platter with fresh berries and a sprig of mint for a truly stunning dessert display.
I’m so excited for you to try this recipe and experience the magic of these Margarita Dessert Bars for yourself! I truly believe you’ll love them as much as I do.
And now, for the most important part: I want to hear about your experience! Did you make any variations? What did your friends and family think? Did you add any secret ingredients? Please, share your photos and stories in the comments below. I can’t wait to see your creations and hear all about your Margarita Dessert Bar adventures. Happy baking! Don’t forget to tag me in your social media posts so I can see your delicious creations! I’m always looking for new and exciting ways to enjoy this classic flavor combination, and I’m sure your feedback will inspire others to give this recipe a try. Let’s spread the Margarita Dessert Bar love!
Margarita Dessert Bars: The Ultimate Guide to a Refreshing Treat
Tangy Margarita Dessert Bars with graham cracker crust, creamy lime and tequila filling, and salted whipped cream. A perfect no-bake treat!
Ingredients
Instructions
Recipe Notes
- Use full-fat cream cheese for the creamiest filling.
- Don’t overbake the crust.
- Chill thoroughly for at least 4 hours, or preferably overnight.
- Adjust the sweetness to your preference.
- Experiment with different flavors like orange liqueur or different citrus zests.