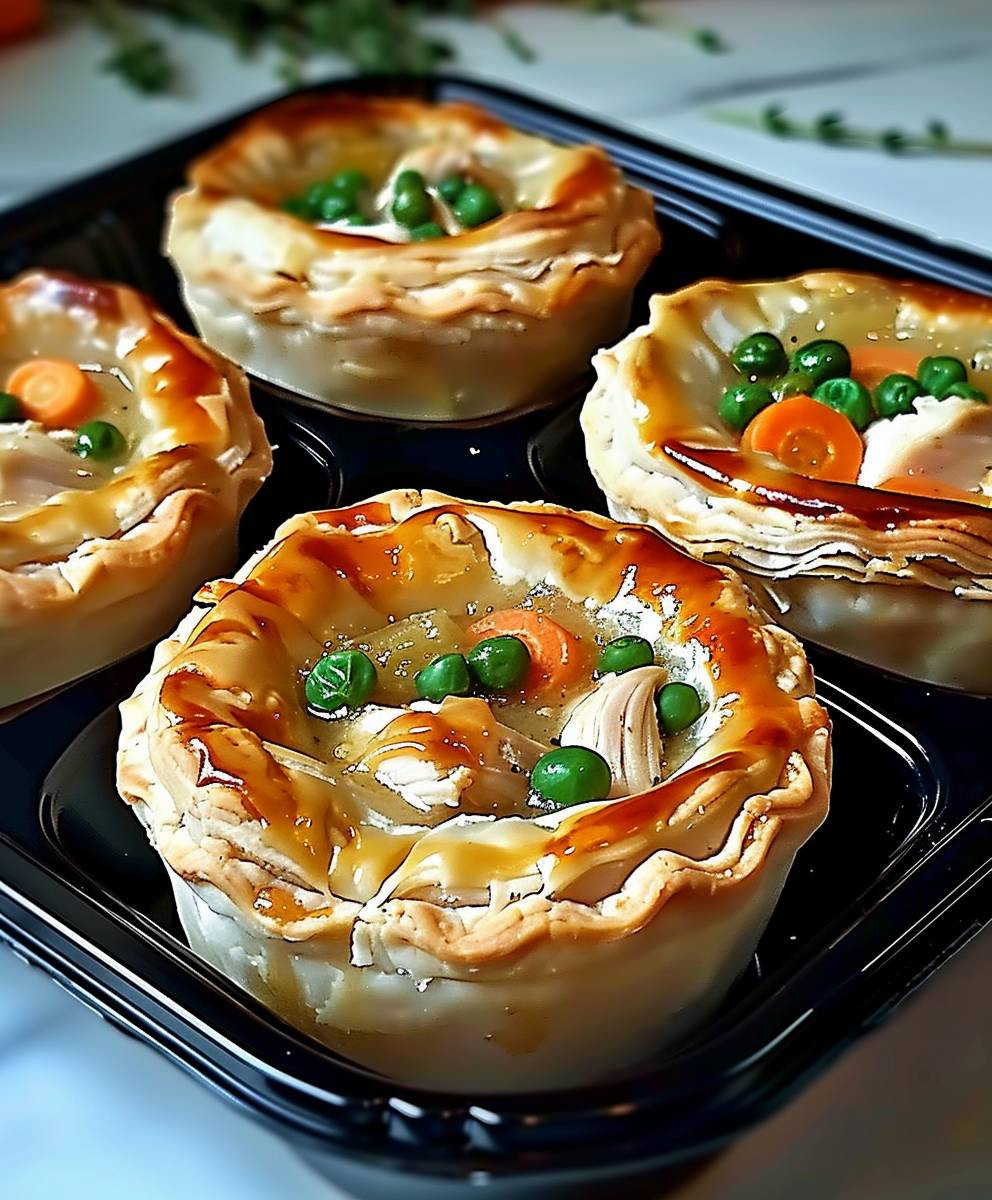
Mini Chicken Pot Pies: Prepare to be transported to a world of flaky, buttery crusts and savory, comforting fillings! Is there anything quite as satisfying as a warm, handheld pie bursting with tender chicken and perfectly cooked vegetables? I think not! These aren’t just any pot pies; they’re perfectly portioned, utterly adorable, and guaranteed to be a crowd-pleaser.
The concept of a pot pie, a savory filling encased in pastry, has roots stretching back to ancient Greece. However, the chicken pot pie, as we know and love it, truly blossomed in America, becoming a symbol of home-cooked goodness and family gatherings. It represents resourcefulness and comfort, transforming humble ingredients into a truly special meal.
What makes mini chicken pot pies so irresistible? It’s the delightful combination of textures – the crisp, golden crust giving way to a creamy, flavorful interior. The savory chicken, the sweet vegetables, and the rich gravy create a symphony of flavors that dance on your palate. Plus, their individual size makes them incredibly convenient for parties, potlucks, or even a quick and satisfying weeknight dinner. They are easy to eat, easy to serve, and undeniably delicious. Get ready to experience the ultimate comfort food in miniature form!

Ingredients:
- For the Chicken Filling:
- 2 tablespoons olive oil
- 1 pound boneless, skinless chicken breasts, cut into 1/2-inch cubes
- 1 medium yellow onion, chopped
- 2 carrots, peeled and diced
- 2 celery stalks, diced
- 1 teaspoon dried thyme
- 1/2 teaspoon dried rosemary
- 1/4 teaspoon salt
- 1/4 teaspoon black pepper
- 1/4 cup all-purpose flour
- 3 cups chicken broth
- 1 cup frozen peas
- 1 cup frozen corn
- 1/2 cup heavy cream
- For the Crust:
- 2 1/2 cups all-purpose flour
- 1 teaspoon salt
- 1 cup (2 sticks) cold unsalted butter, cut into cubes
- 1/2 cup ice water
- For Egg Wash:
- 1 large egg
- 1 tablespoon milk
Preparing the Crust:
Okay, let’s start with the crust. This is the foundation of our mini pot pies, and a good crust makes all the difference. Don’t be intimidated; I’ll walk you through it!
- Combine Dry Ingredients: In a large bowl, whisk together the 2 1/2 cups of all-purpose flour and 1 teaspoon of salt. Make sure they’re well combined. This ensures the salt is evenly distributed, which is important for flavor.
- Cut in the Butter: This is where the magic happens! Add the 1 cup (2 sticks) of cold, cubed unsalted butter to the flour mixture. Using a pastry blender or your fingertips (work quickly to keep the butter cold!), cut the butter into the flour until the mixture resembles coarse crumbs. You should still see some small pieces of butter – that’s what creates those flaky layers we all love. The key here is to keep everything cold. Warm butter will result in a tough crust.
- Add Ice Water: Gradually add the 1/2 cup of ice water, one tablespoon at a time, mixing gently after each addition. Mix until the dough just comes together. Be careful not to overmix! Overmixing develops the gluten in the flour, which will make the crust tough. You want a shaggy dough that holds together when you press it.
- Form Dough Disks: Divide the dough in half and form each half into a disk. Wrap each disk tightly in plastic wrap.
- Chill the Dough: Refrigerate the dough for at least 30 minutes, or up to 2 hours. This allows the gluten to relax and the butter to firm up, which will make the dough easier to roll out and prevent it from shrinking during baking. I usually chill it for at least an hour if I have the time.
Making the Chicken Filling:
While the crust is chilling, let’s get started on the delicious chicken filling. This is where all the flavor comes from!
- Sauté the Chicken: Heat 2 tablespoons of olive oil in a large skillet or Dutch oven over medium-high heat. Add the 1 pound of cubed chicken breasts and cook until browned on all sides and cooked through. Don’t overcrowd the pan; you may need to do this in batches to ensure the chicken browns properly. Remove the chicken from the skillet and set aside.
- Sauté the Vegetables: Add the chopped onion, diced carrots, and diced celery to the same skillet. Cook over medium heat until the vegetables are softened, about 5-7 minutes. Stir occasionally to prevent them from burning.
- Add Herbs and Seasonings: Stir in the dried thyme, dried rosemary, salt, and pepper. Cook for another minute, until fragrant. This helps to bloom the herbs and release their flavors.
- Make a Roux: Sprinkle the 1/4 cup of all-purpose flour over the vegetables and cook for 1-2 minutes, stirring constantly. This creates a roux, which will help to thicken the sauce.
- Add Chicken Broth: Gradually whisk in the 3 cups of chicken broth, making sure to scrape up any browned bits from the bottom of the skillet. Bring the mixture to a simmer.
- Simmer and Thicken: Reduce the heat to low and simmer for 10-15 minutes, or until the sauce has thickened slightly. Stir occasionally to prevent sticking.
- Add Chicken and Vegetables: Return the cooked chicken to the skillet. Stir in the frozen peas and frozen corn. Cook for another 5 minutes, or until the vegetables are heated through.
- Stir in Cream: Stir in the 1/2 cup of heavy cream. Cook for another minute, until heated through. Taste and adjust seasonings as needed. You might want to add a little more salt and pepper to your liking.
- Cool the Filling: Remove the skillet from the heat and let the filling cool slightly while you prepare the crust. This will prevent the crust from becoming soggy.
Assembling and Baking the Mini Pot Pies:
Now for the fun part – putting everything together! This is where your mini pot pies really start to take shape.
- Preheat Oven: Preheat your oven to 400°F (200°C).
- Roll Out the Dough: On a lightly floured surface, roll out one disk of dough to about 1/8-inch thickness. Use a 4-inch round cookie cutter or a knife to cut out circles of dough. You should get about 6-8 circles from each disk.
- Line Muffin Tins: Gently press each circle of dough into a muffin tin. Make sure the dough comes up the sides of the muffin tin.
- Fill the Crusts: Spoon the chicken filling into each crust-lined muffin tin, filling them almost to the top.
- Create Top Crusts: Roll out the second disk of dough and cut out circles of dough, just like you did for the bottom crusts.
- Top with Crusts: Place a circle of dough on top of each filled muffin tin.
- Crimp the Edges: Crimp the edges of the top and bottom crusts together to seal. You can use a fork to do this, or simply pinch them together with your fingers.
- Cut Slits: Cut a few slits in the top of each crust to allow steam to escape. This will prevent the crust from puffing up too much and potentially bursting.
- Prepare Egg Wash: In a small bowl, whisk together the egg and milk.
- Brush with Egg Wash: Brush the top of each crust with the egg wash. This will give the crust a beautiful golden-brown color.
- Bake: Bake for 20-25 minutes, or until the crusts are golden brown and the filling is bubbly.
- Cool Slightly: Let the mini pot pies cool in the muffin tin for a few minutes before carefully removing them.
And there you have it – delicious, homemade mini chicken pot pies! Enjoy!
Conclusion:
And there you have it! These Mini Chicken Pot Pies are truly a must-try recipe, and I’m confident they’ll become a family favorite in your home, just as they have in mine. The flaky, buttery crust combined with the savory, creamy chicken filling is an irresistible combination that’s both comforting and satisfying. Forget those store-bought versions – these homemade pot pies are bursting with fresh flavor and made with love, which makes all the difference.
What makes these mini pot pies so special? It’s the perfect balance of textures and tastes. The golden-brown crust offers a delightful crunch, giving way to a tender, flavorful filling packed with juicy chicken, tender vegetables, and a rich, creamy sauce. Plus, the individual portions make them incredibly convenient for weeknight dinners, lunchboxes, or even elegant appetizers for your next gathering. They’re also a fantastic way to use up leftover cooked chicken or vegetables, minimizing food waste and maximizing deliciousness!
But the best part? They’re surprisingly easy to make! Don’t let the “pot pie” name intimidate you. With a few simple ingredients and straightforward steps, you can whip up a batch of these delightful treats in no time. I’ve provided detailed instructions and helpful tips to guide you through the process, ensuring success even for novice bakers.
Looking for serving suggestions or variations? These Mini Chicken Pot Pies are incredibly versatile! Serve them as a complete meal with a side salad for a light and refreshing contrast. Or, for a heartier meal, pair them with roasted vegetables like Brussels sprouts or carrots. For a fun twist, try using different types of vegetables in the filling, such as mushrooms, peas, or corn. You can also experiment with different herbs and spices to customize the flavor to your liking. A pinch of thyme, rosemary, or even a dash of smoked paprika can add a unique and delicious dimension.
Serving Suggestions:
- Serve warm with a side of green salad.
- Pair with roasted vegetables like Brussels sprouts or carrots.
- Top with a sprinkle of fresh parsley or chives.
Variations:
- Use different vegetables like mushrooms, peas, or corn.
- Add a pinch of thyme, rosemary, or smoked paprika for extra flavor.
- Substitute the chicken with turkey or leftover roast beef.
- For a vegetarian option, use a mix of hearty vegetables like potatoes, carrots, and parsnips.
I truly believe that everyone should experience the joy of biting into a warm, homemade mini chicken pot pie. The aroma alone is enough to make your mouth water, and the taste is simply divine. So, I wholeheartedly encourage you to give this recipe a try. Gather your ingredients, preheat your oven, and get ready to create some culinary magic!
Once you’ve made these Mini Chicken Pot Pies, I’d absolutely love to hear about your experience! Did you make any variations? What did your family think? Share your photos and comments on social media using [Your Hashtag] or tag me [Your Social Media Handle]. I can’t wait to see your creations and hear your feedback. Happy baking! Let me know if you have any questions, and I’ll be happy to help. Enjoy!
Mini Chicken Pot Pies: The Ultimate Comfort Food Recipe
Individual mini chicken pot pies with a flaky homemade crust and a creamy, savory chicken and vegetable filling.
Ingredients
Instructions
Recipe Notes
- Keeping the butter cold is crucial for a flaky crust.
- Don’t overmix the dough, or the crust will be tough.
- Cooling the filling slightly prevents the crust from becoming soggy.
- You can use store-bought pie crust to save time.
- Adjust seasonings in the filling to your liking.