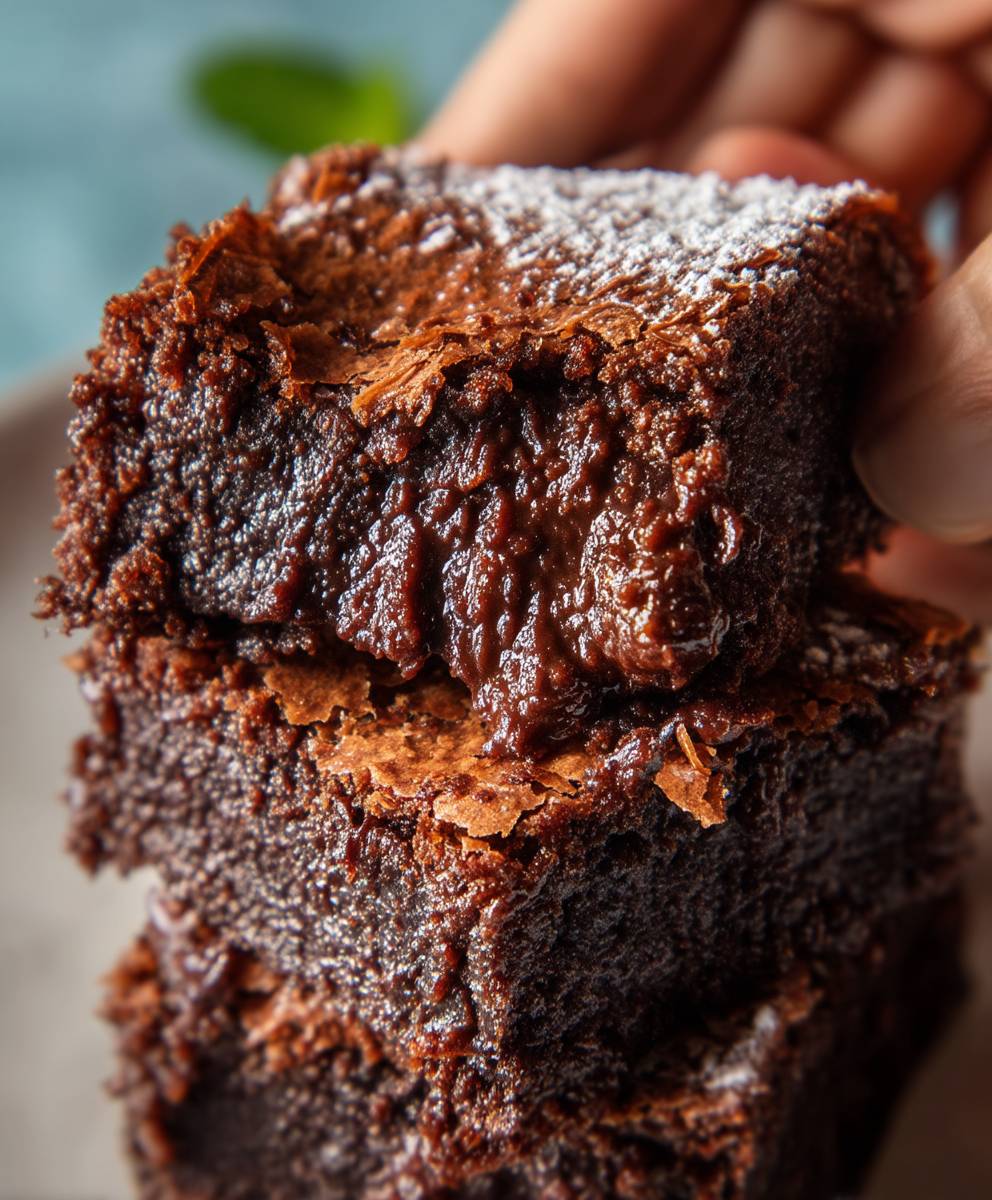
Mochi Brownies: Prepare to experience a dessert revelation! Imagine the fudgy, chocolatey goodness of a classic brownie, but with a delightful chewy, slightly bouncy texture that will keep you coming back for more. This isn’t just another brownie recipe; it’s a fusion of cultures and flavors that will tantalize your taste buds.
The marriage of mochi and brownies might seem unconventional, but it’s a match made in dessert heaven. Mochi, a Japanese rice cake made from glutinous rice flour, has been enjoyed for centuries in various sweet and savory dishes. Its unique texture is what makes it so beloved. By incorporating mochi flour (glutinous rice flour) into a traditional brownie recipe, we create a hybrid treat that offers the best of both worlds.
What makes these Mochi Brownies so irresistible? It’s the delightful contrast between the rich, decadent chocolate and the subtly sweet, chewy mochi. The texture is incredibly satisfying – a soft, fudgy center with a slightly crisp edge and that signature mochi bounce. Plus, this recipe is surprisingly easy to make, requiring only a handful of ingredients and minimal effort. Whether you’re a seasoned baker or a novice in the kitchen, you can whip up a batch of these delightful treats in no time. Get ready to impress your friends and family with this unique and unforgettable dessert!

Ingredients:
- For the Brownie Layer:
- 1 cup (2 sticks) unsalted butter, melted
- 2 cups granulated sugar
- 1 cup unsweetened cocoa powder
- 1 teaspoon salt
- 1 teaspoon baking powder
- 1 tablespoon vanilla extract
- 4 large eggs
- 1 cup all-purpose flour
- 1 cup chocolate chips (optional)
- For the Mochi Layer:
- 1 cup glutinous rice flour (mochiko)
- 1 cup granulated sugar
- 1 teaspoon baking powder
- 1 cup milk (or water)
- 2 tablespoons unsalted butter, melted
- 1 teaspoon vanilla extract
- Optional: Food coloring (for a fun twist!)
Preparing the Brownie Layer:
- Melt the Butter: First, melt the butter in a large, microwave-safe bowl. You can do this in 30-second intervals, stirring in between, until fully melted. Be careful not to overheat it!
- Combine Wet Ingredients: Add the granulated sugar to the melted butter and whisk until well combined. The mixture should be smooth and glossy.
- Add Cocoa Powder and Dry Ingredients: Sift in the unsweetened cocoa powder, salt, and baking powder. Sifting helps prevent lumps and ensures everything is evenly distributed. Whisk until just combined. Be careful not to overmix at this stage.
- Incorporate Vanilla and Eggs: Stir in the vanilla extract. Then, add the eggs one at a time, whisking well after each addition. This is important for creating a rich and fudgy texture.
- Add Flour: Gradually add the all-purpose flour, mixing until just combined. Again, avoid overmixing, as this can lead to tough brownies.
- Add Chocolate Chips (Optional): If you’re using chocolate chips, fold them into the batter now.
Preparing the Mochi Layer:
- Combine Dry Ingredients: In a separate bowl, whisk together the glutinous rice flour (mochiko), granulated sugar, and baking powder. Make sure there are no lumps.
- Combine Wet Ingredients: In a separate measuring cup or bowl, whisk together the milk (or water), melted butter, and vanilla extract.
- Combine Wet and Dry: Gradually add the wet ingredients to the dry ingredients, whisking until smooth. The batter will be quite thick, but that’s perfectly normal.
- Add Food Coloring (Optional): If you want to add food coloring, now’s the time! Add a few drops and stir until you achieve your desired color.
Assembling and Baking:
- Prepare the Baking Pan: Preheat your oven to 350°F (175°C). Grease and flour a 9×13 inch baking pan. You can also line it with parchment paper, leaving an overhang on the sides, for easy removal.
- Pour Brownie Batter: Pour the brownie batter into the prepared baking pan and spread it evenly.
- Pour Mochi Batter: Gently pour the mochi batter over the brownie batter. Try to spread it as evenly as possible. It might not completely cover the brownie batter, and that’s okay. It will spread during baking.
- Bake: Bake for 30-40 minutes, or until a toothpick inserted into the center comes out with moist crumbs. The mochi layer should be slightly golden brown and set.
- Cool Completely: Let the brownies cool completely in the pan before cutting. This is crucial for getting clean slices and preventing the mochi layer from being too sticky. I know it’s hard to resist, but trust me, it’s worth the wait!
- Cut and Serve: Once cooled, cut the mochi brownies into squares and serve. They’re delicious on their own, but you can also add a scoop of ice cream or a dusting of powdered sugar for an extra treat.
Tips and Variations:
- Mochi Texture: The mochi layer can be a bit sticky, especially when warm. Cooling it completely helps it set. If you prefer a chewier mochi, you can slightly underbake the brownies.
- Chocolate Intensity: Adjust the amount of cocoa powder to your liking. For a richer, darker brownie, use Dutch-processed cocoa powder.
- Nutty Addition: Add chopped nuts, such as walnuts or pecans, to the brownie batter for extra flavor and texture.
- Flavor Extracts: Experiment with different flavor extracts in the mochi layer, such as almond extract or coconut extract.
- Gluten-Free Option: While this recipe already uses glutinous rice flour for the mochi, ensure your all-purpose flour is replaced with a gluten-free blend for the brownie layer to make the entire recipe gluten-free.
- Storage: Store the mochi brownies in an airtight container at room temperature for up to 3 days, or in the refrigerator for up to a week. They can also be frozen for longer storage.
- Serving Suggestions: These brownies are fantastic on their own, but they also pair well with a scoop of vanilla ice cream, a drizzle of chocolate sauce, or a dusting of powdered sugar. You can also serve them with fresh berries for a pop of color and flavor.
- Baking Time Adjustments: Ovens vary, so keep an eye on your brownies while they’re baking. If the top is browning too quickly, you can tent the pan with foil. If they’re not baking evenly, rotate the pan halfway through.
- Mochi Layer Thickness: If you prefer a thicker mochi layer, you can double the mochi layer ingredients. Just be sure to adjust the baking time accordingly.
- Brownie Layer Fudginess: For extra fudgy brownies, use a higher ratio of butter to flour. You can also add a tablespoon of cornstarch to the brownie batter.
- Preventing a Soggy Bottom: To prevent the brownie layer from becoming soggy, make sure the mochi layer is evenly distributed and not too thick. Also, avoid overbaking the brownies.
- Using Different Types of Milk: You can use different types of milk in the mochi layer, such as almond milk, soy milk, or oat milk. Just be aware that this may slightly alter the flavor and texture.
- Adding a Swirl: Before baking, you can create a swirl effect by dragging a knife or toothpick through the mochi and brownie layers.
- Using a Stand Mixer: While you can mix the brownie batter by hand, using a stand mixer can make the process easier and more efficient. Just be careful not to overmix the batter.
- Making Mini Mochi Brownies: You can also make mini mochi brownies by using a muffin tin. Just adjust the baking time accordingly.
Troubleshooting:
- Brownies are too dry: You may have overbaked them. Reduce the baking time next time. Also, ensure you’re using enough butter and eggs.
- Mochi layer is too sticky: Make sure you cool the brownies completely before cutting. You can also try adding a bit more glutinous rice flour to the mochi batter next time.
- Brownie layer is too cakey: You may have overmixed the batter. Be careful not to overmix next time. Also, ensure you’re using the correct amount of flour.
- Mochi layer is sinking into the brownie layer: This can happen if the brownie batter is too thin. Try using a slightly thicker brownie batter next time.
- Brownies are not baking evenly: Rotate the pan halfway through baking. Also, ensure your oven is properly calibrated.
Enjoy your delicious homemade Mochi Brownies!
Conclusion:
So, there you have it! These Mochi Brownies are truly a game-changer, and I genuinely believe they’re a must-try for any brownie lover, especially those seeking a delightful textural twist. The fudgy, chocolatey goodness combined with that irresistible chewy mochi center creates a symphony of flavors and textures that will leave you wanting more. It’s the perfect balance of comforting familiarity and exciting innovation.
Why are these brownies a must-try? Well, beyond the incredible taste and texture, they’re surprisingly easy to make. The recipe is straightforward, and the ingredients are readily available. You don’t need to be a professional baker to achieve brownie perfection with this recipe. Plus, they’re a guaranteed crowd-pleaser! Whether you’re baking for a special occasion, a casual get-together, or simply treating yourself, these brownies are sure to impress.
But the best part? The versatility! While the recipe as written is absolutely divine, there’s plenty of room for experimentation and personalization.
Serving Suggestions and Variations:
* A la Mode: Serve warm with a scoop of vanilla ice cream for a classic and comforting dessert. The contrast between the warm brownie and the cold ice cream is simply heavenly.
* Chocolate Drizzle: Drizzle melted dark, milk, or white chocolate over the cooled brownies for an extra touch of decadence. You can even create a marbled effect by swirling different types of chocolate together.
* Nutty Goodness: Add chopped walnuts, pecans, or almonds to the batter for a delightful crunch. Toasted nuts will enhance the flavor even further.
* Espresso Boost: Incorporate a teaspoon or two of instant espresso powder into the batter to intensify the chocolate flavor and add a subtle coffee kick.
* Peanut Butter Swirl: Swirl a spoonful of peanut butter into the batter before baking for a rich and nutty twist.
* Mochi Madness: Experiment with different flavors of mochi! Strawberry, matcha, or even black sesame mochi would add a unique and exciting twist to these brownies.
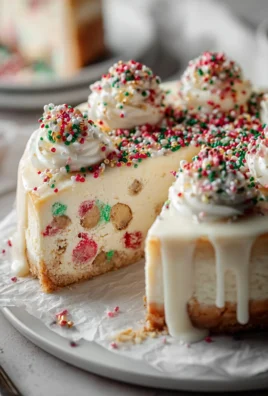
* Sprinkle Some Joy: Add sprinkles to the batter or on top of the brownies before baking for a festive and colorful treat.
* Salted Caramel: Drizzle salted caramel sauce over the baked and cooled brownies for a sweet and salty indulgence.
I’m so excited for you to try this recipe and experience the magic of Mochi Brownies for yourself. I truly believe you’ll fall in love with the unique texture and the rich, chocolatey flavor. Don’t be intimidated by the mochi; it’s easier to work with than you might think! Just follow the instructions carefully, and you’ll be rewarded with a batch of incredibly delicious and satisfying brownies.
Now, it’s your turn! Head to the kitchen, gather your ingredients, and get baking! I can’t wait to hear about your experience. Did you try any of the variations I suggested? Did you come up with your own creative twist? Please, share your photos and stories in the comments below. I’m eager to see your creations and learn from your experiences. Happy baking, and enjoy every chewy, fudgy bite! Let me know what you think!
Mochi Brownies: The Ultimate Guide to Making Chewy, Delicious Brownies
Fudgy brownies meet chewy mochi in this delightful dessert! These Mochi Brownies combine a rich chocolate brownie base with a sweet and slightly sticky mochi layer for a unique and satisfying treat.
Ingredients
- 1 cup (2 sticks) unsalted butter, melted
- 2 cups granulated sugar
- 1 cup unsweetened cocoa powder
- 1 teaspoon salt
- 1 teaspoon baking powder
- 1 tablespoon vanilla extract
- 4 large eggs
- 1 cup all-purpose flour
- 1 cup chocolate chips (optional)
- 1 cup glutinous rice flour (mochiko)
- 1 cup granulated sugar
- 1 teaspoon baking powder
- 1 cup milk (or water)
- 2 tablespoons unsalted butter, melted
- 1 teaspoon vanilla extract
- Optional: Food coloring (for a fun twist!)
Instructions
- Melt the Butter: Melt the butter in a large, microwave-safe bowl in 30-second intervals, stirring in between, until fully melted.
- Combine Wet Ingredients: Add the granulated sugar to the melted butter and whisk until well combined.
- Add Cocoa Powder and Dry Ingredients: Sift in the unsweetened cocoa powder, salt, and baking powder. Whisk until just combined.
- Incorporate Vanilla and Eggs: Stir in the vanilla extract. Then, add the eggs one at a time, whisking well after each addition.
- Add Flour: Gradually add the all-purpose flour, mixing until just combined. Avoid overmixing.
- Add Chocolate Chips (Optional): Fold in chocolate chips, if using.
- Combine Dry Ingredients: In a separate bowl, whisk together the glutinous rice flour (mochiko), granulated sugar, and baking powder.
- Combine Wet Ingredients: In a separate measuring cup or bowl, whisk together the milk (or water), melted butter, and vanilla extract.
- Combine Wet and Dry: Gradually add the wet ingredients to the dry ingredients, whisking until smooth.
- Add Food Coloring (Optional): Add a few drops of food coloring, if desired, and stir until you achieve your desired color.
- Prepare the Baking Pan: Preheat your oven to 350°F (175°C). Grease and flour a 9×13 inch baking pan (or line with parchment paper).
- Pour Brownie Batter: Pour the brownie batter into the prepared baking pan and spread it evenly.
- Pour Mochi Batter: Gently pour the mochi batter over the brownie batter. Try to spread it as evenly as possible.
- Bake: Bake for 30-40 minutes, or until a toothpick inserted into the center comes out with moist crumbs. The mochi layer should be slightly golden brown and set.
- Cool Completely: Let the brownies cool completely in the pan before cutting.
- Cut and Serve: Once cooled, cut the mochi brownies into squares and serve.
Notes
- The mochi layer can be a bit sticky, especially when warm. Cooling it completely helps it set. If you prefer a chewier mochi, you can slightly underbake the brownies.
- Adjust the amount of cocoa powder to your liking. For a richer, darker brownie, use Dutch-processed cocoa powder.
- Add chopped nuts, such as walnuts or pecans, to the brownie batter for extra flavor and texture.
- Experiment with different flavor extracts in the mochi layer, such as almond extract or coconut extract.
- While this recipe already uses glutinous rice flour for the mochi, ensure your all-purpose flour is replaced with a gluten-free blend for the brownie layer to make the entire recipe gluten-free.
- Store the mochi brownies in an airtight container at room temperature for up to 3 days, or in the refrigerator for up to a week. They can also be frozen for longer storage.
- These brownies are fantastic on their own, but they also pair well with a scoop of vanilla ice cream, a drizzle of chocolate sauce, or a dusting of powdered sugar. You can also serve them with fresh berries for a pop of color and flavor.
- Ovens vary, so keep an eye on your brownies while they’re baking. If the top is browning too quickly, you can tent the pan with foil. If they’re not baking evenly, rotate the pan halfway through.
- If you prefer a thicker mochi layer, you can double the mochi layer ingredients. Just be sure to adjust the baking time accordingly.
- For extra fudgy brownies, use a higher ratio of butter to flour. You can also add a tablespoon of cornstarch to the brownie batter.
- To prevent the brownie layer from becoming soggy, make sure the mochi layer is evenly distributed and not too thick. Also, avoid overbaking the brownies.
- You can use different types of milk in the mochi layer, such as almond milk, soy milk, or oat milk. Just be aware that this may slightly alter the flavor and texture.
- Before baking, you can create a swirl effect by dragging a knife or toothpick through the mochi and brownie layers.
- While you can mix the brownie batter by hand, using a stand mixer can make the process easier and more efficient. Just be careful not to overmix the batter.
- You can also make mini mochi brownies by using a muffin tin. Just adjust the baking time accordingly.