Mouthwatering Red Velvet Cream Cheese Thumbprint Cookies
Oh, my goodness, if there’s one recipe I’m absolutely giddy to share with you, it’s these Mouthwatering Red Velvet Cream Cheese Thumbprint Cookies! Forget choosing between a classic red velvet cake and a delightful cookie; this recipe brings the best of both worlds right to your fingertips. I promise you, these aren’t just any cookies – they’re a little bite of pure joy, designed to make your taste buds sing and your heart happy.
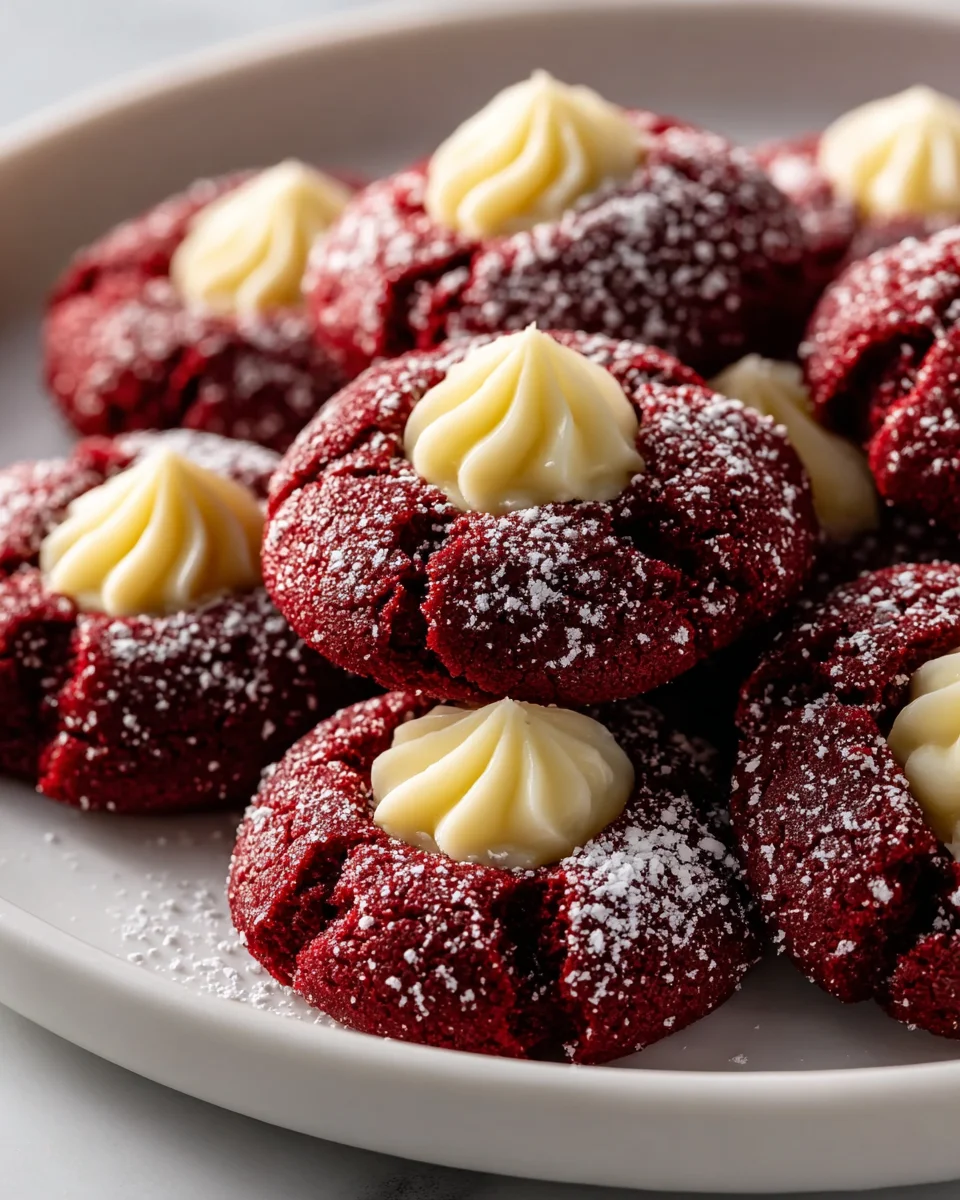
What makes them so incredibly special, you ask? Well, imagine a soft, tender, and beautifully vibrant red cookie, infused with that signature hint of cocoa and subtle tang that we all adore in red velvet. But wait, there’s more! Each cookie boasts a sweet little indentation, just waiting to be filled with the most luscious, rich, and perfectly tangy cream cheese frosting. It’s like a miniature red velvet cupcake, transformed into an adorable, easy-to-eat cookie form! I absolutely adore how the bright red cookie contrasts with the creamy white filling, making them a feast for the eyes as well as the palate.
You are going to fall head over heels for these because they are incredibly satisfying to make and even more delightful to devour. They strike that perfect balance between comforting familiarity and impressive elegance, making them ideal for holiday gatherings, a cozy afternoon treat, or simply when you want to make someone (or yourself!) feel extra special. Get ready to bake up a batch of these beauties, because once you taste that glorious combination of moist red velvet and creamy cheesecake goodness in every single bite, you’ll understand exactly why I call them mouthwatering!

Ingredient Notes
Oh, you are in for such a treat with these Mouthwatering Red Velvet Cream Cheese Thumbprint Cookies! They’re a symphony of tender, slightly fudgy red velvet cookie and a creamy, tangy cream cheese filling. Getting the right ingredients is key to that perfect balance, so let me share some insights on what I use and why, along with some helpful substitutions.
- Unsalted Butter: I always opt for unsalted butter for both the cookie dough and a touch in the cream cheese filling. Why? It gives me full control over the saltiness. Make sure it’s at room temperature for both components – it creams beautifully with sugar for the cookie dough and blends smoothly into the filling. If you only have salted butter, you can use it, but omit the added salt in the cookie dough.
- Granulated Sugar & Powdered Sugar: We’ll use granulated sugar for the cookie dough, giving it that classic sweetness and texture. For the cream cheese filling, powdered sugar (confectioners’ sugar) is essential. It dissolves quickly, ensuring a silky-smooth, lump-free filling that’s just divine.
- Large Egg: One large egg binds our cookie dough together, adding richness and moisture. I prefer to use it at room temperature, as it emulsifies better with the butter and sugar, creating a smoother batter.
- Vanilla Extract: A good quality pure vanilla extract is non-negotiable for both the red velvet dough and the cream cheese filling. It enhances all the other flavors beautifully. Don’t skimp on this!
- Red Food Coloring: This is where the “red” in red velvet comes in! For a truly vibrant, deep red hue, I highly recommend using a gel food coloring. It’s far more concentrated than liquid food coloring, so you’ll need less of it, and it won’t thin out your dough. Start with a smaller amount and add more until you achieve your desired shade.
- All-Purpose Flour: The backbone of our cookie. Make sure to measure it correctly by spooning it into your measuring cup and then leveling it off with a straight edge. Too much flour can make your cookies dry and crumbly.
- Unsweetened Cocoa Powder: For that classic subtle chocolate flavor in red velvet. I use natural unsweetened cocoa powder, which has a higher acidity that reacts wonderfully with the baking soda and buttermilk, contributing to the tender crumb. Dutch-processed cocoa powder is fine in a pinch, but it might give you a slightly darker, less vibrant red and a different flavor profile.
- Baking Soda & Salt: Baking soda works with the buttermilk and cocoa powder to give our cookies their signature soft and chewy texture. Salt, as always, balances the sweetness and enhances all the delicious flavors.
- Buttermilk: This is a crucial ingredient for traditional red velvet, lending a slight tang and contributing to the tender, moist crumb. If you don’t have buttermilk on hand, don’t fret! You can easily make your own by adding 1 tablespoon of lemon juice or white vinegar to a liquid measuring cup, then filling it up to the 1/2 cup line with regular milk. Let it sit for 5-10 minutes until it slightly curdles – and voilà, homemade buttermilk!
- Cream Cheese: For the filling, always go for full-fat block cream cheese. It yields the best flavor, texture, and stability. Make sure it’s softened to room temperature, which is essential for a smooth, lump-free filling that pipes beautifully and tastes heavenly. Low-fat or whipped cream cheese just won’t give you the same fantastic results.
Step-by-Step Instructions
Let’s get baking! Making these Mouthwatering Red Velvet Cream Cheese Thumbprint Cookies is a delightful process, and I’ll walk you through each step to ensure perfect results.
- Prepare the Cream Cheese Filling (and Chill!):
- In a medium bowl, combine 8 ounces of softened full-fat cream cheese, 1/2 cup of powdered sugar, 1 tablespoon of softened unsalted butter, and 1/2 teaspoon of pure vanilla extract.
- Beat with an electric mixer on medium speed until the mixture is completely smooth, creamy, and free of any lumps. Scrape down the sides of the bowl as needed.
- Cover the bowl and refrigerate the cream cheese filling for at least 30 minutes, or until firm enough to pipe. This chilling step is crucial for stability during baking.
- Preheat Oven & Prep Baking Sheets:
- Preheat your oven to 375°F (190°C).
- Line two large baking sheets with parchment paper or silicone baking mats. This prevents sticking and helps with even baking.
- Cream Butter and Sugars:
- In a large bowl, using an electric mixer on medium speed, cream together 1/2 cup (1 stick) of softened unsalted butter and 3/4 cup of granulated sugar until light and fluffy, about 2-3 minutes. This incorporates air, making the cookies tender.
- Add Wet Ingredients:
- Beat in 1 large egg until well combined.
- Stir in 1 teaspoon of pure vanilla extract and 1.5-2 teaspoons of red gel food coloring. Continue mixing until the color is evenly distributed and vibrantly red. Don’t be shy – if you want a deeper red, add a tiny bit more coloring!
- Combine Dry Ingredients:
- In a separate medium bowl, whisk together 1.5 cups of all-purpose flour, 2 tablespoons of unsweetened cocoa powder, 1/2 teaspoon of baking soda, and 1/4 teaspoon of salt. Make sure these are thoroughly combined.
- Alternate Wet and Dry:
- With the mixer on low speed, gradually add the dry ingredient mixture to the wet ingredients, alternating with 1/2 cup of buttermilk, beginning and ending with the dry ingredients. Mix until just combined; be careful not to overmix, as this can lead to tough cookies.
- Chill the Cookie Dough:
- Cover the dough with plastic wrap and refrigerate for at least 30 minutes. This chilling period is essential to prevent the cookies from spreading too much and makes them easier to handle.
- Form the Cookies & Make Thumbprints:
- Scoop the chilled dough by rounded tablespoons (or use a small cookie scoop) and roll each into a smooth ball.
- Place the dough balls about 2 inches apart on the prepared baking sheets.
- Using your thumb, the back of a rounded measuring spoon, or a small dowel, gently press an indentation into the center of each cookie ball. Make sure it’s deep enough to hold a good amount of filling, but don’t go all the way through to the bottom.
- First Bake:
- Bake in the preheated oven for 8-10 minutes, or until the edges are lightly set but the centers are still soft.
- Remove from the oven. If the indentations have puffed up, gently re-press them with your thumb or spoon.
- Fill and Finish Baking:
- Spoon or pipe the chilled cream cheese filling into each indentation. I find using a small spoon or a piping bag with a round tip makes this step neat and easy.
- Return the cookies to the oven and bake for another 3-5 minutes, or until the cream cheese filling is just set and slightly puffed, and the cookies are fully baked but still soft.
- Cool & Enjoy:
- Let the cookies cool on the baking sheets for 5 minutes before transferring them to a wire rack to cool completely. The filling will set further as they cool.
- Once cooled, you can dust them with a little extra powdered sugar if you like for a pretty finish!
Tips & Suggestions
To truly master these Mouthwatering Red Velvet Cream Cheese Thumbprint Cookies and make them absolutely irresistible, I’ve gathered some of my favorite tips and suggestions for you:
- Don’t Skimp on Chilling: I cannot stress this enough! Chilling both the cookie dough and the cream cheese filling is paramount. Chilled dough spreads less in the oven, ensuring your thumbprints hold their shape beautifully. Chilled filling is easier to work with, pipes more cleanly, and maintains its texture during that final bake. If your kitchen is warm, you might even need to chill the dough for longer.
- Gel Food Coloring is Your Best Friend: For that iconic, rich red velvet hue, always reach for gel food coloring. Liquid food coloring can thin out your dough and often requires a lot more product to achieve a vibrant color. With gel, a little goes a long way! Start with a teaspoon and add more until you reach your desired shade of red.
- Room Temperature Ingredients for the Win: Ensure your butter, cream cheese, and egg are all at room temperature before you start. This allows them to cream together seamlessly with the sugar, creating a smooth, emulsified mixture for both the cookie dough and the filling. Cold ingredients will result in a lumpy, less cohesive product.
- Perfecting the Thumbprint: After the initial bake, the indentations might puff up a bit. That’s totally normal! Simply use the back of a rounded measuring spoon (like a 1/2 teaspoon or 1 teaspoon) or even your thumb to gently re-press the centers before filling. This ensures a nice, deep well for that glorious cream cheese filling.
- Don’t Overbake: Red velvet cookies are meant to be soft and tender. Keep an eye on them! Overbaking will result in dry, crumbly cookies. They should look just set around the edges but still soft in the center when you pull them out after the first bake, and the filling should be just set after the second bake.
- Flavor Boosters: For an extra layer of deliciousness, consider adding a tiny pinch of espresso powder (about 1/4 teaspoon) to your cocoa mixture. It won’t make the cookies taste like coffee, but it will enhance the chocolate flavor beautifully. A hint of almond extract (1/4 teaspoon) in the cookie dough can also add a lovely depth of flavor.
- Creative Garnishes: While these cookies are perfect as is, a dusting of powdered sugar after they’ve cooled adds an elegant touch. You could also drizzle them with melted white chocolate or sprinkle with mini chocolate chips for a bit of extra flair.
- Measuring Flour Accurately: Remember the “spoon and level” method for flour. Spoon flour into your measuring cup, then level it off with a straight edge. Scooping directly from the bag compacts the flour, leading to too much in your recipe and potentially dry cookies.
Storage
Because these Mouthwatering Red Velvet Cream Cheese Thumbprint Cookies feature a delectable cream cheese filling, proper storage is super important to keep them fresh, safe, and tasting their best. Here’s what I recommend:
- Refrigeration is Key: Due to the cream cheese filling, these cookies must be stored in the refrigerator. After they have completely cooled to room temperature, place them in an airtight container. Layer them with parchment paper if you need to stack them to prevent sticking. They will stay fresh and delicious in the fridge for up to 5 days. I love to let them come closer to room temperature for about 15-20 minutes before serving, as it allows the filling to soften slightly and the flavors to truly shine.
- Freezing Baked Cookies: Yes, you can freeze these beauties! Once the cookies are completely cool and the filling is set, arrange them in a single layer on a baking sheet and freeze for about an hour until firm. This flash-freezing prevents them from sticking together. Then, transfer the frozen cookies to an airtight freezer-safe container or a heavy-duty freezer bag, again using parchment paper between layers if stacking. They can be frozen for up to 1 month.
- Thawing Frozen Cookies: When you’re ready to enjoy them, simply transfer the desired number of frozen cookies from the freezer to the refrigerator and let them thaw overnight. For a quicker thaw, you can leave them at room temperature for an hour or two. As with refrigerated cookies, I often let them sit out for a bit before serving for optimal texture and flavor.
- Freezing Unbaked Dough Balls: If you want to get ahead, you can prepare the cookie dough (up to step 7 in the instructions), roll it into balls, and place them on a parchment-lined baking sheet. Flash-freeze the dough balls until solid, then transfer them to an airtight freezer-safe bag or container. You can store them for up to 2-3 months. When ready to bake, place the frozen dough balls on a prepared baking sheet, let them sit at room temperature for about 15-20 minutes (they won’t get super soft), then make your thumbprint indentations and proceed with the baking instructions, adding a few extra minutes to the initial bake time. Prepare the cream cheese filling fresh on baking day.
Final Thoughts
And there you have it! I truly hope you’ve enjoyed the journey to creating these incredible treats. For me, making these Mouthwatering Red Velvet Cream Cheese Thumbprint Cookies is an experience in itself, filling my kitchen with anticipation and a delightful aroma. But the real magic happens with that very first bite.
What makes these Mouthwatering Red Velvet Cream Cheese Thumbprint Cookies an absolute must-try, you ask? It’s the perfect harmony of textures and flavors. You get the soft, tender red velvet cookie, kissed with just the right amount of cocoa, providing a beautiful canvas for that luscious, tangy cream cheese filling. That iconic crimson color, coupled with the creamy white center, makes them a visual delight as much as a culinary one.
Whether you’re baking for a special occasion, looking for a thoughtful homemade gift, or simply want to treat yourself to something extraordinary, these Mouthwatering Red Velvet Cream Cheese Thumbprint Cookies are guaranteed to impress and satisfy. They’re simply irresistible! I encourage you to whip up a batch soon – your taste buds will thank you.

Mouthwatering Red Velvet Cream Cheese Thumbprint Cookies
- Total Time: 45 minutes
- Yield: 24 cookies 1x
Description
These Mouthwatering Red Velvet Cream Cheese Thumbprint Cookies combine the rich flavors of red velvet cake with a creamy, tangy filling, creating a delightful treat. Perfect for any occasion, they are sure to impress with their vibrant color and delicious taste.
Ingredients
- 8 ounces of softened full-fat cream cheese
- 1/2 cup of powdered sugar
- 1 tablespoon of softened unsalted butter
- 1/2 teaspoon of pure vanilla extract
- 1/2 cup (1 stick) of softened unsalted butter
- 3/4 cup of granulated sugar
- 1 large egg
- 1 teaspoon of pure vanilla extract
- 1.5–2 teaspoons of red gel food coloring
- 1.5 cups of all-purpose flour
- 2 tablespoons of unsweetened cocoa powder
- 1/2 teaspoon of baking soda
- 1/4 teaspoon of salt
- 1/2 cup of buttermilk
Instructions
- In a medium bowl, combine 8 ounces of softened full-fat cream cheese, 1/2 cup of powdered sugar, 1 tablespoon of softened unsalted butter, and 1/2 teaspoon of pure vanilla extract. Beat with an electric mixer on medium speed until the mixture is completely smooth, creamy, and free of any lumps. Cover the bowl and refrigerate the cream cheese filling for at least 30 minutes, or until firm enough to pipe.
- Preheat your oven to 375°F (190°C). Line two large baking sheets with parchment paper or silicone baking mats.
- In a large bowl, using an electric mixer on medium speed, cream together 1/2 cup (1 stick) of softened unsalted butter and 3/4 cup of granulated sugar until light and fluffy, about 2-3 minutes.
- Beat in 1 large egg until well combined. Stir in 1 teaspoon of pure vanilla extract and 1.5-2 teaspoons of red gel food coloring. Continue mixing until the color is evenly distributed and vibrantly red.
- In a separate medium bowl, whisk together 1.5 cups of all-purpose flour, 2 tablespoons of unsweetened cocoa powder, 1/2 teaspoon of baking soda, and 1/4 teaspoon of salt.
- With the mixer on low speed, gradually add the dry ingredient mixture to the wet ingredients, alternating with 1/2 cup of buttermilk, beginning and ending with the dry ingredients. Mix until just combined.
- Cover the dough with plastic wrap and refrigerate for at least 30 minutes.
- Scoop the chilled dough by rounded tablespoons and roll each into a smooth ball. Place the dough balls about 2 inches apart on the prepared baking sheets. Using your thumb, the back of a rounded measuring spoon, or a small dowel, gently press an indentation into the center of each cookie ball.
- Bake in the preheated oven for 8-10 minutes, or until the edges are lightly set but the centers are still soft. Remove from the oven and re-press the indentations if needed.
- Spoon or pipe the chilled cream cheese filling into each indentation. Return the cookies to the oven and bake for another 3-5 minutes, or until the cream cheese filling is just set and slightly puffed.
- Let the cookies cool on the baking sheets for 5 minutes before transferring them to a wire rack to cool completely.
- Prep Time: 30 mins
- Cook Time: 15 mins
- Category: Dessert
- Method: Baking
- Cuisine: American
Nutrition
- Serving Size: 1 cookie
- Calories: 150
- Sugar: 10 g
- Sodium: 100 mg
- Fat: 7 g
- Saturated Fat: 4 g
- Unsaturated Fat: 2 g
- Trans Fat: 0 g
- Carbohydrates: 20 g
- Fiber: 1 g
- Protein: 2 g
- Cholesterol: 30 mg
Keywords: Chilling both the cookie dough and the cream cheese filling is crucial for the best results. Use gel food coloring for a vibrant red hue, and ensure all ingredients are at room temperature for optimal mixing.