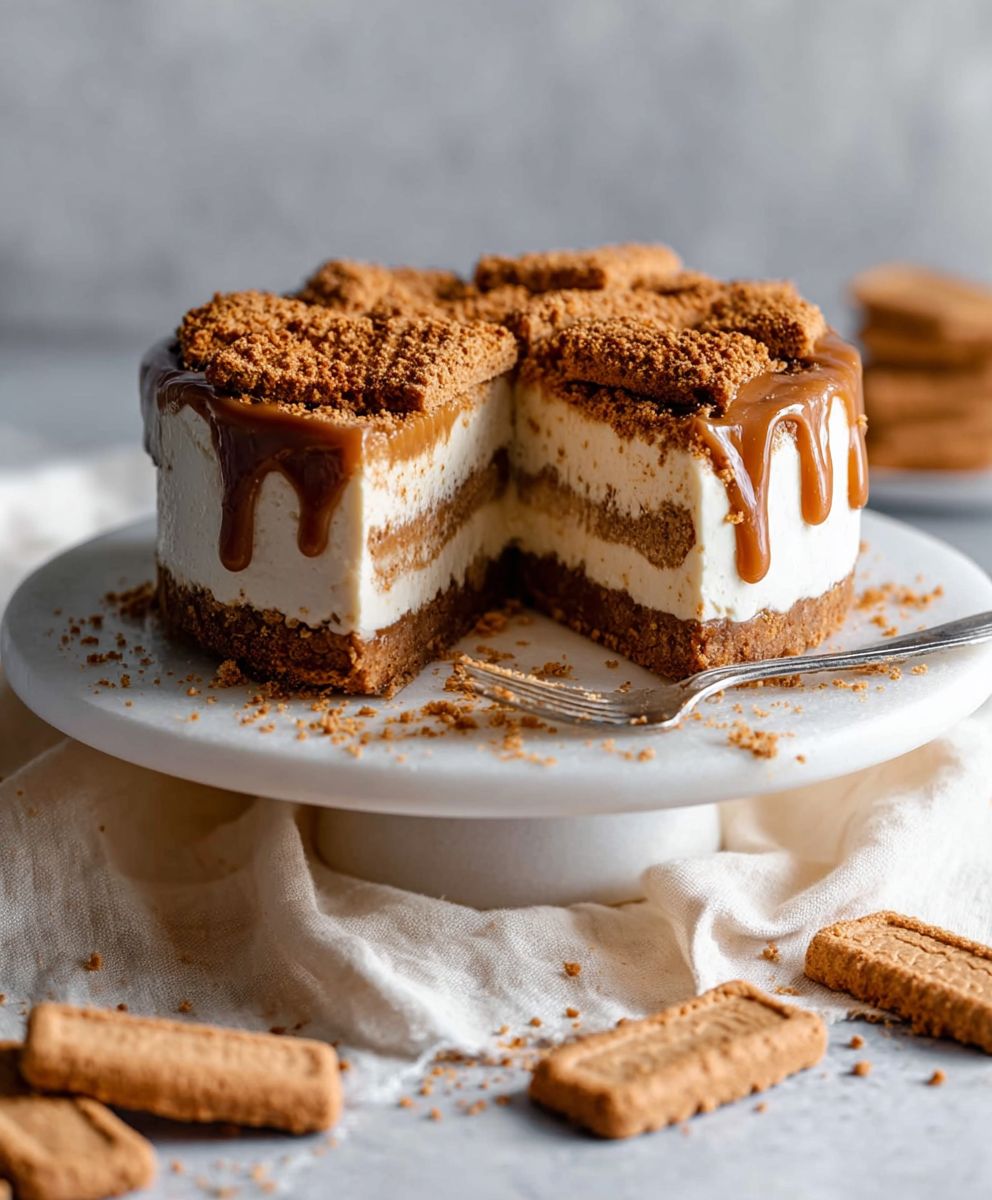
No Bake Biscoff Cheesecake: Prepare to be utterly captivated by this decadent dessert that requires absolutely no oven time! Imagine a creamy, dreamy cheesecake infused with the irresistible caramelised biscuit flavour of Biscoff, all resting on a crunchy Biscoff cookie crust. It’s a symphony of textures and tastes that will leave you craving more.
Cheesecake itself has a rich history, dating back to ancient Greece, where it was even served to athletes during the Olympic Games! Over the centuries, it has evolved into countless variations, each reflecting the unique culinary traditions of different cultures. This No Bake Biscoff Cheesecake is a modern twist on a classic, incorporating the globally beloved Biscoff spread, which originated in Belgium and has taken the world by storm with its distinctive spiced flavour.
What makes this dessert so incredibly popular? Well, besides the obvious deliciousness, it’s the sheer convenience. No baking means no worrying about cracks or uneven cooking. It’s the perfect make-ahead dessert for parties, potlucks, or simply a delightful treat for yourself. The creamy, smooth texture of the cheesecake filling, combined with the crunchy Biscoff crust and the intense flavour of the Biscoff spread, creates a truly unforgettable experience. It’s a guaranteed crowd-pleaser that’s surprisingly easy to make. So, let’s dive in and create this magical No Bake Biscoff Cheesecake together!

Ingredients:
- For the Biscoff Crust:
- 250g Biscoff biscuits
- 100g unsalted butter, melted
- For the Cheesecake Filling:
- 500g full-fat cream cheese, softened
- 150g icing sugar, sifted
- 300ml double cream
- 200g Biscoff spread, melted and cooled slightly
- 1 tsp vanilla extract
- Pinch of salt
- For the Biscoff Topping:
- 100g Biscoff spread, melted
- Biscoff biscuits, for decoration (optional)
Preparing the Biscoff Crust
Okay, let’s get started with the base of our delicious no-bake Biscoff cheesecake – the crust! This is super easy and sets the stage for all the Biscoff goodness to come.
- Crush the Biscoff Biscuits: The first thing we need to do is crush those Biscoff biscuits into fine crumbs. You have a couple of options here. You can use a food processor, which is the quickest and easiest way to get a consistent crumb. Just pulse the biscuits until they’re finely ground. If you don’t have a food processor, don’t worry! You can put the biscuits in a large ziplock bag and use a rolling pin to crush them. Just make sure the bag is sealed tightly to avoid any crumbs escaping.
- Melt the Butter: Next, melt the unsalted butter. You can do this in the microwave in 30-second intervals, stirring in between, or in a saucepan over low heat. Make sure the butter is completely melted but not boiling.
- Combine the Crumbs and Butter: Now, in a medium-sized bowl, combine the crushed Biscoff biscuit crumbs and the melted butter. Mix them together really well until all the crumbs are evenly coated with butter. The mixture should resemble wet sand. This is what will hold our crust together.
- Press the Crust into the Pan: Take an 8-inch or 9-inch springform pan. This is important because it allows you to easily remove the cheesecake later. Pour the Biscoff crumb mixture into the pan. Use the bottom of a measuring cup or your fingers to firmly press the crumbs evenly across the bottom of the pan and slightly up the sides. The firmer you press, the more stable your crust will be.
- Chill the Crust: Once the crust is pressed in, cover the pan with plastic wrap and place it in the refrigerator to chill for at least 30 minutes. This will allow the butter to solidify and the crust to set properly. You can even chill it for longer, up to an hour or two, if you have the time. A well-chilled crust is key to a no-bake cheesecake that holds its shape.
Making the Cheesecake Filling
Alright, with the crust chilling in the fridge, it’s time to move on to the star of the show – the Biscoff cheesecake filling! This is where all the creamy, dreamy Biscoff flavor comes to life.
- Soften the Cream Cheese: This is crucial! Make sure your cream cheese is softened to room temperature before you start. This will ensure that your filling is smooth and lump-free. If you forget to take it out of the fridge in advance, you can microwave it in 15-second intervals, but be careful not to melt it.
- Beat the Cream Cheese and Icing Sugar: In a large bowl, using an electric mixer (either a stand mixer or a hand mixer), beat the softened cream cheese and sifted icing sugar together until smooth and creamy. Sifting the icing sugar is important to prevent any lumps in your filling. Beat on medium speed for about 2-3 minutes, scraping down the sides of the bowl as needed to ensure everything is well combined.
- Whip the Double Cream: In a separate clean bowl, whip the double cream until stiff peaks form. This is what will give your cheesecake filling its light and airy texture. Be careful not to overwhip the cream, or it will turn into butter. You want it to be thick and hold its shape when you lift the beaters.
- Melt and Cool the Biscoff Spread: Gently melt the Biscoff spread in the microwave in 30-second intervals, stirring in between, or in a saucepan over low heat. Let it cool slightly before adding it to the cream cheese mixture. This prevents the hot Biscoff spread from melting the cream cheese or affecting the texture of the filling.
- Combine the Ingredients: Add the melted and cooled Biscoff spread, vanilla extract, and a pinch of salt to the cream cheese mixture. Beat on low speed until just combined. Be careful not to overmix at this stage, as it can deflate the filling.
- Fold in the Whipped Cream: Gently fold the whipped cream into the Biscoff cream cheese mixture. Use a spatula and fold it in gently in a figure-eight motion, being careful not to deflate the cream. This will keep the filling light and airy.
Assembling and Chilling the Cheesecake
We’re almost there! Now it’s time to put everything together and let the cheesecake chill to perfection.
- Pour the Filling into the Crust: Remove the chilled Biscoff crust from the refrigerator. Pour the cheesecake filling evenly over the crust. Use a spatula to smooth the top of the filling.
- Chill the Cheesecake: Cover the cheesecake with plastic wrap and place it in the refrigerator to chill for at least 6 hours, or preferably overnight. This is essential for the cheesecake to set properly. The longer it chills, the firmer and more stable it will be.
Adding the Biscoff Topping and Decoration
The final touch! This is where we add that extra layer of Biscoff goodness and make our cheesecake look absolutely irresistible.
- Melt the Biscoff Spread: Gently melt the remaining Biscoff spread in the microwave in 30-second intervals, stirring in between, or in a saucepan over low heat.
- Pour the Melted Biscoff Spread over the Cheesecake: Once the cheesecake has chilled completely, remove it from the refrigerator. Carefully pour the melted Biscoff spread over the top of the cheesecake, spreading it evenly with a spatula.
- Decorate (Optional): If you want to add some extra flair, you can decorate the cheesecake with Biscoff biscuits. You can arrange them whole around the edge of the cheesecake, or you can crush some biscuits and sprinkle them over the top. Get creative and have fun with it!
- Chill Again (Optional): If you’ve added the Biscoff topping, you can chill the cheesecake for another 30 minutes to allow the topping to set slightly. This will make it easier to slice and serve.
- Remove from the Springform Pan: To remove the cheesecake from the springform pan, carefully run a thin knife or spatula around the edge of the cheesecake to loosen it from the sides of the pan. Then, release the springform latch and gently lift the cheesecake off the base of the pan.
- Slice and Serve: Finally, slice the cheesecake with a sharp knife and serve. You can serve it plain, or you can add a dollop of whipped cream or a scoop of vanilla ice cream. Enjoy!
Conclusion:
This No Bake Biscoff Cheesecake is truly a dessert game-changer, and I genuinely believe you need to experience it. The creamy, dreamy texture combined with the irresistible Biscoff flavor creates a symphony of deliciousness that’s hard to beat. Forget slaving over a hot oven; this recipe is all about ease and maximum flavor payoff. It’s the perfect dessert for those moments when you crave something decadent but don’t want to spend hours in the kitchen.
Think about it: a rich, velvety cheesecake filling infused with the warm, spiced notes of Biscoff, all nestled on a buttery, crunchy Biscoff cookie crust. It’s a textural and flavor masterpiece that will have everyone begging for seconds. Plus, the no-bake aspect makes it incredibly convenient for potlucks, parties, or even just a spontaneous treat for yourself.
But the best part? It’s incredibly versatile! While the recipe as written is pure Biscoff bliss, feel free to get creative with your serving suggestions and variations. For an extra touch of elegance, try topping each slice with a dollop of whipped cream and a sprinkle of crushed Biscoff cookies. Or, if you’re feeling adventurous, drizzle some melted white chocolate over the top for an even more indulgent experience.
For a fun twist, consider adding a layer of Biscoff spread between the crust and the filling. This will amplify the Biscoff flavor and create a gooey, irresistible center. You could also experiment with different types of cookies for the crust. While Biscoff cookies are the star of the show, graham crackers or even chocolate cookies would work beautifully.
If you’re looking to make individual cheesecakes, simply divide the filling into small ramekins or mason jars. This is a great way to control portion sizes and create a stunning presentation. Top each individual cheesecake with your favorite toppings and chill until ready to serve.
And don’t forget about seasonal variations! In the fall, you could add a touch of pumpkin spice to the filling for a cozy, autumnal treat. In the summer, you could top the cheesecake with fresh berries for a refreshing and vibrant dessert. The possibilities are endless!
I’m so confident that you’ll love this No Bake Biscoff Cheesecake that I urge you to give it a try. It’s a guaranteed crowd-pleaser that’s sure to impress your friends and family. And the best part is, it’s so easy to make that even beginner bakers can achieve perfect results.
Once you’ve made it, I’d absolutely love to hear about your experience! Did you stick to the original recipe, or did you try any fun variations? What were your favorite toppings? Share your photos and stories in the comments below – I can’t wait to see your creations! Happy baking (or rather, no-baking!), and enjoy every delicious bite of this incredible cheesecake. I know you’ll find this recipe becomes a new favorite in your dessert repertoire. Don’t be shy, get in the kitchen and whip up this amazing treat! You deserve it!
No Bake Biscoff Cheesecake: The Ultimate Easy Dessert Recipe
Decadent no-bake Biscoff cheesecake with a buttery Biscoff crust, a creamy Biscoff-infused filling, and a smooth Biscoff topping.
Ingredients
Instructions
Recipe Notes
- Ensure the cream cheese is fully softened for a smooth filling.
- Sift the icing sugar to prevent lumps.
- Be careful not to overwhip the double cream.
- Let the melted Biscoff spread cool slightly before adding it to the cream cheese mixture.
- Chill the cheesecake for at least 6 hours for best results.
- For easier slicing, run a knife under hot water and wipe clean between slices.