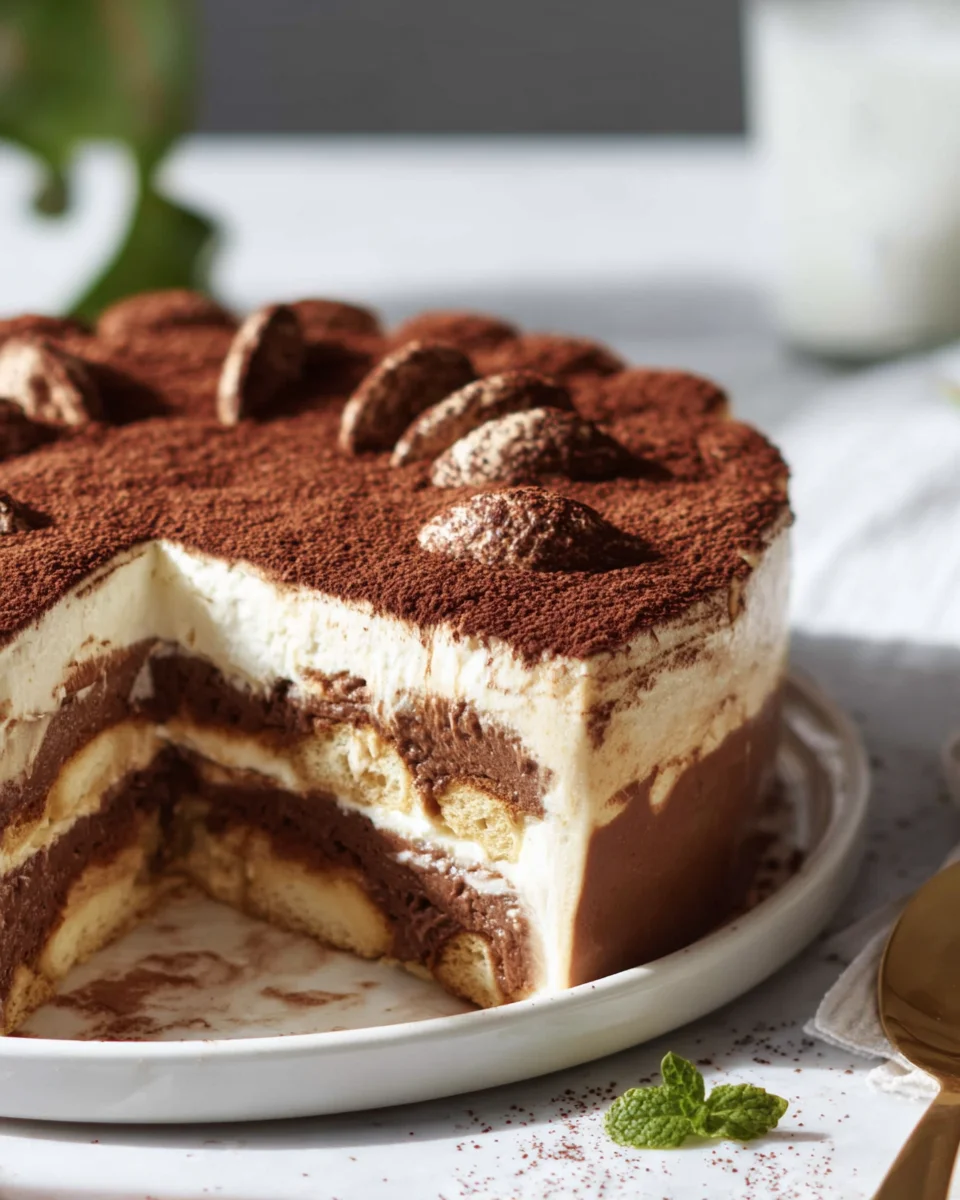
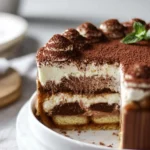
Czekoladowy Sernik Tiramisu Bez Pieczenia
Welcome to a delightful journey of flavors with my favorite dessert: Czekoladowy Sernik Tiramisu Bez Pieczenia. This no-bake chocolate cheesecake tiramisu is the perfect treat for chocolate lovers and dessert enthusiasts alike. What makes this recipe truly special is its luscious layers of creamy chocolate goodness combined with the rich, coffee-infused essence of traditional tiramisu. It’s an indulgent dessert that not only satisfies your sweet tooth but also brings a bit of Italian flair to your table.
Imagine sinking your spoon into a velvety slice that melts in your mouth, leaving behind a delightful hint of coffee and chocolate. Trust me, your taste buds will thank you! Plus, the best part? There’s no baking involved, making it a stress-free option for gatherings or a cozy night in. Whether you’re entertaining guests or simply treating yourself, this Czekoladowy Sernik Tiramisu Bez Pieczenia is sure to impress and become a beloved favorite in your dessert repertoire. Let’s dive into the recipe and create a masterpiece that’s as easy as it is delicious!

Ingredient Notes
For my delicious Czekoladowy Sernik Tiramisu Bez Pieczenia, I typically use a few key ingredients that create the perfect balance of flavors and textures. Here’s a breakdown of the main components and some handy substitutions.
- Mascarpone cheese: This is essential for the creamy texture. If you can’t find mascarpone, you can substitute it with a mixture of cream cheese and heavy cream, whipped together until smooth.
- Cream: Heavy whipping cream is the best choice for achieving that light and airy texture. If you’re looking for a lower-fat option, you can use whipped coconut cream.
- Cocoa powder: Unsweetened cocoa powder is ideal for that rich chocolate flavor. You can also use Dutch-processed cocoa for a smoother taste.
- Ladyfinger cookies: Traditionally, I use Italian ladyfingers for that classic tiramisu feel. If they’re not available, you can easily use sponge cake cut into fingers or even chocolate biscuits for an extra chocolatey twist.
- Non-alcoholic coffee or espresso: I love using strong brewed coffee or espresso to soak the ladyfingers. For a fun twist, you can substitute coffee with a non-caffeinated herbal tea or even a chocolate milk alternative.
- Sugar: Granulated sugar or powdered sugar works well here. If you want to reduce sugar intake, feel free to use a sugar substitute like stevia or erythritol.
Step-by-Step Instructions
Making Czekoladowy Sernik Tiramisu Bez Pieczenia is a breeze! Here’s a simple step-by-step guide to help you create this delightful dessert.
- Prepare the base: Start by mixing the brewed coffee (or your non-alcoholic alternative) with a tablespoon of sugar in a shallow dish. Set it aside to cool.
- Whip the cream: In a mixing bowl, whip 1 cup of heavy cream until soft peaks form. Be careful not to overwhip, as you want it to remain fluffy.
- Mix the mascarpone: In another bowl, combine 250g of mascarpone cheese with 1/3 cup of powdered sugar and 2 tablespoons of cocoa powder. Mix until smooth and creamy.
- Combine the mixtures: Gently fold the whipped cream into the mascarpone mixture in batches, ensuring you maintain the airy consistency.
- Soak the ladyfingers: Quickly dip each ladyfinger into the coffee mixture, making sure they are soaked but not soggy. Lay them in a single layer at the bottom of your serving dish.
- Layering: Spread half of the mascarpone mixture over the soaked ladyfingers, smoothing it out evenly. Then, repeat the process with another layer of dipped ladyfingers and the remaining mascarpone mixture.
- Chill: Cover the dish with plastic wrap and refrigerate for at least 4 hours, or overnight if possible. This allows the flavors to meld beautifully.
- Serve: Before serving, dust the top generously with cocoa powder. You can also garnish with chocolate shavings or fresh berries if you like.
Tips & Suggestions
Here are some tips to ensure your Czekoladowy Sernik Tiramisu Bez Pieczenia turns out perfectly:
- Quality Ingredients: Use high-quality mascarpone and chocolate for the best flavor. It makes a noticeable difference!
- Chilling Time: Don’t rush the chilling process. The longer it sits, the better the flavors will develop. Overnight chilling is ideal.
- Customize Flavors: Feel free to experiment with flavors! You can add a layer of fruit puree like raspberry or strawberry between the layers for a fruity twist.
- Presentation: When serving, consider using individual ramekins for a beautiful presentation. It’s also easier for guests to enjoy!
Storage
To keep your Czekoladowy Sernik Tiramisu Bez Pieczenia fresh, store it in the refrigerator, covered with plastic wrap or in an airtight container. It’s best consumed within 3 to 5 days for optimal flavor and texture. If you’ve made a larger batch, you can also freeze it, but keep in mind that the texture may change slightly upon thawing. To freeze, cut into portions, wrap individually, and store in an airtight container. Let it thaw in the refrigerator before serving.
I hope you enjoy making and indulging in this delightful no-bake chocolate cheesecake tiramisu! It’s a crowd-pleaser that’s sure to impress!
Final Thoughts
If you’re looking for a dessert that combines the rich, indulgent flavors of chocolate with the classic charm of tiramisu, then the Czekoladowy Sernik Tiramisu Bez Pieczenia is an absolute must-try! This no-bake cheesecake is not only simple to prepare, but it also offers a delightful combination of creamy texture and robust taste that will impress your family and friends. Plus, the absence of baking means you can whip it up in no time, making it the perfect treat for any occasion. So gather your ingredients, unleash your creativity, and enjoy every delicious bite of this heavenly dessert. Trust me, once you try Czekoladowy Sernik Tiramisu Bez Pieczenia, it will become a favorite in your dessert repertoire!
No-Bake Chocolate Tiramisu Cheesecake Recipe Delight
- Total Time: 15 minutes
- Yield: 8 servings 1x
Description
Indulge in the rich flavors of this no-bake chocolate cheesecake tiramisu, perfect for chocolate lovers. With creamy layers and a hint of coffee, this dessert is a delightful treat that requires no baking!
Ingredients
- 250g mascarpone cheese
- 1 cup heavy cream
- 1/3 cup powdered sugar
- 2 tablespoons cocoa powder
- Ladyfinger cookies
- Non-alcoholic coffee or espresso
- 1 tablespoon sugar
- Granulated sugar or powdered sugar
Instructions
- Prepare the base: Start by mixing the brewed coffee (or your non-alcoholic alternative) with a tablespoon of sugar in a shallow dish. Set it aside to cool.
- Whip the cream: In a mixing bowl, whip 1 cup of heavy cream until soft peaks form. Be careful not to overwhip, as you want it to remain fluffy.
- Mix the mascarpone: In another bowl, combine 250g of mascarpone cheese with 1/3 cup of powdered sugar and 2 tablespoons of cocoa powder. Mix until smooth and creamy.
- Combine the mixtures: Gently fold the whipped cream into the mascarpone mixture in batches, ensuring you maintain the airy consistency.
- Soak the ladyfingers: Quickly dip each ladyfinger into the coffee mixture, making sure they are soaked but not soggy. Lay them in a single layer at the bottom of your serving dish.
- Layering: Spread half of the mascarpone mixture over the soaked ladyfingers, smoothing it out evenly. Then, repeat the process with another layer of dipped ladyfingers and the remaining mascarpone mixture.
- Chill: Cover the dish with plastic wrap and refrigerate for at least 4 hours, or overnight if possible. This allows the flavors to meld beautifully.
- Serve: Before serving, dust the top generously with cocoa powder. You can also garnish with chocolate shavings or fresh berries if you like.
- Prep Time: 15 mins
- Cook Time: 0 mins
- Category: Dessert
- Method: No-Bake
- Cuisine: Italian
Nutrition
- Serving Size: 1 slice
- Calories: 350
- Sugar: 25 g
- Sodium: 50 mg
- Fat: 24 g
- Saturated Fat: 15 g
- Unsaturated Fat: 5 g
- Trans Fat: 0 g
- Carbohydrates: 30 g
- Fiber: 2 g
- Protein: 5 g
- Cholesterol: 70 mg
Keywords: Use high-quality mascarpone and chocolate for the best flavor. Don't rush the chilling process; overnight chilling is ideal. Feel free to experiment with flavors by adding a layer of fruit puree between the layers.