• Skip to primary navigation
  • Skip to main content
  • Skip to primary sidebar
Homesmad

Homesmad

  • Home
  • Breakfast & Brunch
  • Appetizers & Snacks
  • Dinner
  • Dessert
  • About
  • Privacy Policy
  • Contact
Homesmad
  • Home
  • Breakfast & Brunch
  • Appetizers & Snacks
  • Dinner
  • Dessert
  • About
  • Privacy Policy
  • Contact

One Pot Lasagna Soup: Comforting, Easy Weeknight Family Dinner

November 5, 2025 by Lily author

One Pot Lasagna Soup is truly a game-changer in the kitchen, offering all the beloved flavors of classic lasagna without the usual fuss and multiple baking dishes. I remember the joy of a traditional lasagna, a dish with roots tracing back to ancient Rome and perfected through generations of Italian cooking, renowned for its layers of rich ragu, creamy béchamel, and tender pasta. While making a full lasagna can be a labor of love, requiring time and effort, this brilliant soup brings that same comforting experience to your weeknight table in a fraction of the time.

What makes this recipe so incredibly popular? It’s the incredible convenience paired with an explosion of familiar, delicious taste.

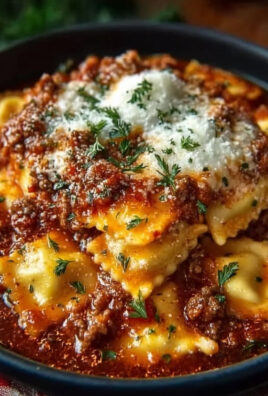
Imagine rich tomato sauce, savory ground meat, perfectly cooked pasta, and gooey melted cheese, all coming together in a single pot. People adore this One Pot Lasagna Soup because it delivers on robust flavor, offers a wonderfully heartwarming texture, and most importantly, dramatically cuts down on cleanup. It’s the ultimate comfort food for a busy schedule, ensuring a satisfying meal everyone will love.

One Pot Lasagna Soup: Comforting, Easy Weeknight Family Dinner this RECIPE

Ingredients:

  • For the Meat and Aromatics:
    • 1 tablespoon olive oil
    • 1 pound lean ground beef or Italian sausage (mild or hot, your preference!)
    • 1 large yellow onion, finely diced
    • 3 cloves garlic, minced
    • 1 teaspoon dried oregano
    • 1/2 teaspoon dried basil
    • 1/4 teaspoon red pepper flakes (optional, for a little kick!)
    • Salt and freshly ground black pepper to taste
  • For the Tomato Base:
    • 1 (28 ounce) can crushed tomatoes
    • 1 (15 ounce) can tomato sauce
    • 1 (14.5 ounce) can diced tomatoes, undrained
    • 6 cups (about 1.5 liters) good quality chicken broth or vegetable broth
    • 1 tablespoon granulated sugar (optional, to balance acidity)
    • 1 bay leaf
  • For the Pasta:
    • 8 ounces lasagna noodles, broken into 2-inch pieces (about 10-12 noodles)
  • For the Creamy Swirl and Garnish:
    • 1/2 cup ricotta cheese
    • 1/4 cup grated Parmesan cheese, plus more for serving
    • 4 ounces fresh mozzarella cheese, shredded or diced into small pieces
    • 1/4 cup fresh parsley or basil, chopped, for garnish

Prepping Your Ingredients

  1. Before we dive into the delicious cooking of our One Pot Lasagna Soup, let’s take a moment to ensure all our ingredients are ready to go. Trust me, a little prep work makes the entire process smooth and enjoyable, allowing you to focus on building those incredible layers of flavor. First, gather all your ingredients and place them on your counter. This mise en place technique is a chef’s secret for success and helps prevent any last-minute scrambling.
  2. Start by finely dicing your large yellow onion. We want small, even pieces here, as they’ll soften and melt into the soup, contributing a sweet, foundational flavor without being too prominent in texture. Next, mince your three cloves of garlic. If you’re using a garlic press, even better! Otherwise, a sharp knife will do the trick. The finer the chop, the more intensely the garlic flavor will infuse our soup.
  3. If you’re using ground beef, ensure it’s fresh and ready. If you opt for Italian sausage, whether mild or hot, you might want to remove it from its casings if you bought links, as we’ll be crumbling it in the pot. For the lasagna noodles, this is an important step for our One Pot Lasagna Soup! Take about 8 ounces of dry lasagna noodles and break them into manageable 2-inch pieces. I usually find it easiest to break them by hand over a clean towel or directly into a bowl. Don’t worry if the pieces aren’t perfectly uniform; a little variation adds to the rustic charm of the soup.
  4. Finally, prepare your cheeses. Measure out your ricotta and Parmesan. If you’re using a block of fresh mozzarella, go ahead and shred or dice it into small, meltable pieces. Chop your fresh parsley or basil for the final garnish. Having these ready will make the finishing touches a breeze and ensure your soup is served beautifully. Good preparation is the cornerstone of any great recipe, especially when creating something as comforting as this One Pot Lasagna Soup.

Building the Flavor Base

  1. Now that our ingredients are prepped, it’s time to fire up the stove and start building the incredible flavor foundation for our One Pot Lasagna Soup. Grab your largest, heaviest pot or Dutch oven – the “one pot” in “One Pot Lasagna Soup” is truly key here! Place it over medium-high heat and add 1 tablespoon of olive oil. Let the oil shimmer slightly, indicating it’s ready for action.
  2. Once the oil is hot, carefully add your ground beef or Italian sausage to the pot. Using a wooden spoon or spatula, break up the meat into small pieces as it cooks. We want to brown the meat thoroughly, creating a rich, savory base. This process usually takes about 5-7 minutes. You’ll notice the meat changing color from pink to a lovely golden brown, and the aroma will already start filling your kitchen!
  3. When the meat is fully browned, if you’ve used a fattier ground beef or sausage, you might see a good amount of rendered fat in the pot. I usually prefer to carefully drain off any excess fat at this point. This step helps to ensure our One Pot Lasagna Soup isn’t overly greasy and keeps the flavors clean and bright. Simply tilt the pot and spoon out the fat, or carefully drain it into a heat-safe container.
  4. With the meat browned and excess fat removed, it’s time to introduce our aromatic vegetables. Add your finely diced yellow onion to the pot with the meat. Reduce the heat slightly to medium and cook the onion, stirring occasionally, until it becomes soft and translucent, which typically takes another 5-8 minutes. The onion will release its natural sugars and add a wonderful sweetness to the savory meat.
  5. Once the onion is tender, add your minced garlic to the pot, along with 1 teaspoon of dried oregano, 1/2 teaspoon of dried basil, and the optional 1/4 teaspoon of red pepper flakes. Stir these ingredients frequently for about 1 minute. You’ll notice the garlic becoming incredibly fragrant – this is your cue that the flavors are truly developing! Be careful not to let the garlic burn, as burnt garlic can taste bitter. This blend of herbs and spices is what gives our One Pot Lasagna Soup that classic Italian flair. Season the mixture with a generous pinch of salt and freshly ground black pepper to taste.

Simmering the Soup

  1. Now that we’ve built a robust flavor base, it’s time to transform our seasoned meat and aromatics into a hearty soup. To the pot, add your 28-ounce can of crushed tomatoes, 15-ounce can of tomato sauce, and the 14.5-ounce can of diced tomatoes (undrained). Stir everything together thoroughly, making sure to scrape up any browned bits from the bottom of the pot. Those browned bits, called “fond,” are packed with flavor and will dissolve into the liquid, enriching our soup.
  2. Next, pour in 6 cups of chicken or vegetable broth. This is where our One Pot Lasagna Soup truly begins to take its liquid form. If you choose, add 1 tablespoon of granulated sugar at this point. The sugar is entirely optional, but I find it helps to balance the acidity of the tomatoes, resulting in a more rounded and mellow flavor profile. Give everything a good stir to combine.
  3. Don’t forget the bay leaf! Drop one bay leaf into the pot. This seemingly small addition makes a big difference, imparting a subtle, almost woodsy aroma that deepens the overall complexity of the soup. Bring the mixture to a gentle boil over medium-high heat.
  4. Once it reaches a boil, immediately reduce the heat to low, cover the pot, and let our One Pot Lasagna Soup simmer for at least 20-25 minutes. Simmering is a crucial step that allows all the flavors to meld together beautifully. During this time, the herbs will fully hydrate, the tomatoes will break down further, and the entire soup will develop a richness that tastes like it’s been cooking for hours. Stir occasionally to prevent anything from sticking to the bottom. Patience truly pays off in this stage, leading to a more flavorful One Pot Lasagna Soup.

Adding the Pasta and Finishing Touches

  1. After our soup has simmered and developed its deep, rich flavors, it’s time to add the star of the show: the lasagna noodles! Increase the heat slightly back to medium-low, or just enough to maintain a gentle simmer. Carefully add your broken lasagna noodle pieces directly into the simmering soup. Make sure to stir them well, submerging them fully in the liquid. We want to ensure every piece gets hydrated and cooks evenly.
  2. Continue to cook the noodles for about 10-12 minutes, or according to the package directions for al dente pasta. This is where the “one pot” magic truly shines. The noodles will cook directly in the flavorful broth, absorbing all those wonderful tastes. Stir frequently to prevent the noodles from sticking to each other or to the bottom of the pot. You’ll notice the soup will thicken considerably as the pasta releases its starches.
  3. While the pasta is cooking, this is the perfect moment to remove the bay leaf. It has done its job infusing flavor and should be discarded before serving. Once the noodles are tender but still have a slight bite (that’s al dente!), turn off the heat.
  4. Now for the creamy, cheesy goodness that makes this One Pot Lasagna Soup so irresistible. In a small bowl, combine your 1/2 cup of ricotta cheese with 1/4 cup of grated Parmesan cheese. This mixture will be swirled into individual servings, adding that signature lasagna creaminess.
  5. Before serving, add your 4 ounces of shredded or diced fresh mozzarella cheese directly into the hot soup. Stir gently until the mozzarella begins to melt and create luscious, stretchy ribbons throughout the soup. This instant melt adds another layer of cheesy comfort that you’d expect from a traditional lasagna, but in a convenient soup form. Taste the soup and adjust the seasonings if needed. You might want a little more salt, pepper, or even a tiny pinch more oregano.

Serving Your One Pot Lasagna Soup

  1. The moment we’ve been waiting for! Your One Pot Lasagna Soup is ready to be served and enjoyed. Ladle generous portions of the hot, steamy soup into individual bowls. Make sure each serving gets a good mix of the beef, noodles, and rich tomato broth. The aroma alone will be enough to make your mouth water.
  2. For that ultimate lasagna experience, take a dollop of your prepared ricotta-Parmesan mixture and gently place it on top of each bowl of soup. You can swirl it in slightly with a spoon, or just let it sit beautifully as a creamy contrast to the robust tomato base. This addition truly elevates the dish, mimicking the cheesy layers of baked lasagna.
  3. Finish each bowl with an extra sprinkle of grated Parmesan cheese and a garnish of fresh chopped parsley or basil. The fresh herbs not only add a pop of color but also a bright, fresh flavor that complements the rich soup perfectly.
  4. Serve your One Pot Lasagna Soup immediately, perhaps with a side of crusty garlic bread for dipping. This soup is incredibly comforting and satisfying, perfect for a cozy weeknight meal or feeding a crowd. It captures all the beloved flavors of classic lasagna in a much easier-to-make, single-pot format. Enjoy every delicious spoonful of this amazing dish!

One Pot Lasagna Soup: Comforting, Easy Weeknight Family Dinner

Conclusion:

And there you have it, friends! We’ve reached the end of our culinary journey for this incredible dish, and I genuinely hope you’re feeling as inspired as I am to whip up a batch. This recipe truly is a game-changer in the kitchen, offering all the beloved, rich flavors of a traditional lasagna without the usual fuss, layering, and multiple pots to clean. It’s the kind of meal that brings instant warmth and comfort to your table, making even the busiest weeknights feel special. The simplicity of its preparation belies the depth of flavor you’ll achieve – a hearty, savory broth brimming with tender pasta, succulent meat, and a melty trio of cheeses that will have everyone clamoring for seconds. It’s a testament to how creative cooking can transform a complex classic into an effortlessly elegant and deeply satisfying experience for anyone, regardless of their cooking prowess.

What makes this dish an absolute must-try, in my humble opinion, is its unparalleled convenience paired with its undeniable deliciousness. Imagine savoring that rich, tomato-based sauce infused with herbs, the perfectly cooked noodles, and the creamy pockets of ricotta, all without a stack of baking dishes and pans staring back at you from the sink. This is where the magic truly happens! The genius behind the One Pot Lasagna Soup means fewer dishes, less time tied to the stove, and more precious moments spent enjoying your meal with loved ones. It’s robust enough to satisfy the heartiest appetites yet comforting enough to soothe the soul, making it a perfect contender for family dinners, cozy nights in, or even a delightful dish to share with friends. Trust me, once you try this streamlined approach to a classic, you’ll wonder how you ever lived without it.

When it comes to serving, while this soup is undoubtedly a star on its own, a few thoughtful additions can elevate the experience even further. I love serving it with a generous side of warm, crusty garlic bread or a simple, crisp green salad tossed with a light vinaigrette. The bread is perfect for soaking up every last drop of that amazing broth, and the salad adds a refreshing contrast to the richness of the soup. Don’t forget those delightful garnishes! A sprinkle of fresh basil, a final grating of Parmesan cheese, a dollop of cool, creamy ricotta, or even a pinch of red pepper flakes for a little kick can truly enhance each bowl. These small touches not only add visual appeal but also introduce layers of texture and flavor that make every spoonful an absolute delight.

But don’t stop there – this recipe is wonderfully versatile and encourages experimentation! If you’re looking to add more vegetables, consider stirring in some sautéed mushrooms, baby spinach, or finely diced zucchini during the last few minutes of cooking. For a vegetarian twist, you could easily omit the ground meat and instead use a medley of finely chopped bell peppers, onions, carrots, and perhaps some lentils or cannellini beans for added protein and heartiness. If ground beef isn’t your preference, ground Italian sausage (mild or hot, depending on your taste) or even ground turkey would work beautifully. Feel free to play with the cheese combination too; a blend of provolone and mozzarella alongside the ricotta can add another dimension of flavor and stretch. Don’t be afraid to make this recipe your own by adjusting the seasonings to suit your palate – perhaps a little extra oregano, a dash of smoked paprika, or a splash of red wine for a deeper, more complex sauce. The beauty of a “one pot” dish is its inherent flexibility!

So, what are you waiting for? I sincerely encourage you to roll up your sleeves, gather your ingredients, and give this magnificent recipe a try. It’s more than just a meal; it’s an experience that promises to simplify your cooking while delivering unparalleled flavor. I am absolutely confident that you’ll be thrilled with the results and that this dish will quickly become a cherished staple in your culinary repertoire. And when you do make it, please, please, please come back and share your experience with me! I’d love to hear how it turned out, what variations you tried, and see any photos of your delicious creations. Your feedback and stories are what truly make this cooking community so vibrant and inspiring. Happy cooking, and get ready to enjoy a bowlful of pure, unadulterated comfort!


One Pot Lasagna Soup: Comforting, Easy Weeknight Family Dinner

One Pot Lasagna Soup: Comforting, Easy Weeknight Family Dinner

Enjoy all the beloved flavors of classic lasagna without the fuss with this easy one-pot soup. Rich tomato sauce, savory ground beef, tender pasta, and gooey melted cheese come together for the ultimate comfort food for a busy weeknight.

Prep Time
20 Minutes

Cook Time
55 Minutes

Total Time
75 Minutes

Servings
8 servings

Ingredients

  • 1 tablespoon olive oil
  • 1 large onion, diced
  • 3 cloves garlic, minced
  • 1 pound ground beef or beef Italian sausage
  • 28 ounces crushed tomatoes
  • 4 cups vegetable or chicken broth
  • 2 teaspoons dried basil
  • 1 teaspoon dried oregano
  • 1/2 teaspoon red pepper flakes (optional)
  • 8 ounces lasagna noodles, broken into pieces
  • 1 cup ricotta cheese
  • 1 cup shredded mozzarella cheese
  • 1/2 cup grated Parmesan cheese
  • Salt to taste
  • Pepper to taste

Instructions

  1. Step 1
    Dice onion, mince garlic, break lasagna noodles into 2-inch pieces, and prepare cheeses (shred mozzarella, combine ricotta and Parmesan).
  2. Step 2
    Heat olive oil in a large pot or Dutch oven over medium-high heat. Add ground beef or beef Italian sausage and brown, breaking it apart. Drain excess fat. Add diced onion and cook until softened (5-8 minutes). Stir in minced garlic, oregano, basil, and red pepper flakes (if using) for 1 minute until fragrant. Season with salt and pepper.
  3. Step 3
    Stir in crushed tomatoes, broth, and 1 bay leaf. Bring to a gentle boil, then reduce heat to low, cover, and simmer for 20-25 minutes, stirring occasionally, to allow flavors to meld. (Note: Original recipe text refers to sugar and diced tomatoes, but these are not in the provided ingredient list.)
  4. Step 4
    Increase heat to maintain a gentle simmer. Add broken lasagna noodles to the soup, stirring to submerge. Cook for 10-12 minutes, or until al dente, stirring frequently to prevent sticking. Remove and discard the bay leaf. The soup will thicken as pasta cooks.
  5. Step 5
    Turn off heat. Stir 1 cup shredded mozzarella into the hot soup until melted and creamy. Taste and adjust seasonings. Ladle soup into bowls, dollop with the ricotta-Parmesan mixture, and garnish with extra grated Parmesan and fresh herbs.

Important Information

Nutrition Facts (Per Serving)

It is important to consider this information as approximate and not to use it as definitive health advice.

Allergy Information

Please check ingredients for potential allergens and consult a health professional if in doubt.

« Previous Post
Hearty One Pot Lasagna Soup – Your New Favorite Family Dinner
Next Post »
Delicious Turkey Sage Stuffed Pumpkins for Fall Feasts

If you enjoyed this…

Philly Cheesesteak Breadsticks: A Delicious Twist on a Classic Favorite

Air Fryer Sweet Chili Chicken: A Deliciously Crispy Recipe You’ll Love

Cilantro Lime Steak Bowls: A Flavorful Recipe for a Quick Dinner

Primary Sidebar

Browse by Diet

BreakfastDinnerLunchDessertAppetizer

Sweet Peach Yogurt Parfait Delight

One of my fondest memories is from a lazy summer afternoon spent at my grandmother’s house. The sun filtered through the kitchen window, casting a warm glow over the table where she would create her culinary magic. It was during one of those blissful moments that I first tasted her Peach Yogurt Parfait with Honey and Granola. The sweet aroma of ripe peaches mingling with creamy yogurt and the crunch of granola was nothing short of heavenly. It felt like summer captured in a bowl, and I still remember the joy of diving in with a spoon, each layer revealing a new burst of flavor.

When I think about that parfait, I can almost hear the gentle hum of the bees outside, reminding me of the floral notes that honey brings to every bite. The vibrant yellows and soft oranges of the peaches contrast beautifully with the creamy white yogurt and the golden crunch of granola. It’s a dish that not only looks delightful but also tastes like a celebration of fresh, wholesome ingredients.

What makes my version of this Peach Yogurt Parfait special is the careful balance of flavors and textures. I use ripe, juicy peaches, drizzled with locally sourced honey, and a homemade granola that’s bursting with nuts and seeds for an extra crunch. It’s a simple dish, but every layer is crafted with love and attention.

Let me show you exactly how to make this delightful parfait, so you can bring a bit of that summer magic into your kitchen!

Sweet Peach Yogurt Parfait Delight

Why You’ll Love This Recipe

  • Delightfully creamy texture from the Greek yogurt, paired with the juicy sweetness of fresh peaches.
  • Ready in under 20 minutes, making it a quick and satisfying breakfast or snack option.
  • Budget-friendly, using common ingredients that you may already have in your pantry.
  • Customizable with your favorite granola and nuts, allowing you to tailor each parfait to your taste.
  • Perfectly balanced flavors with the bright acidity of lemon juice and the sweetness of honey enhancing the peaches.

Ingredients

  • For the Parfait:
  • 2 cups plain Greek yogurt (or vanilla yogurt for a sweeter option)
  • 2 large ripe peaches, diced (about 2 cups)
  • 1 tablespoon fresh lemon juice (to prevent browning of peaches)
  • 2 tablespoons honey (plus more for drizzling)
  • 1 teaspoon vanilla extract (optional for extra flavor)
  • For the Granola:
  • 1 cup granola (store-bought or homemade; see notes for a simple granola recipe)
  • 1/4 cup sliced almonds (optional for added crunch)
  • 1/4 cup shredded coconut (optional for added flavor)

Let’s dive into some key ingredients that make this Peach Yogurt Parfait so delightful! First, the Greek yogurt is not only creamy but also packed with protein, making it a satisfying option for breakfast or a snack. If you’re looking for a sweeter option, you can easily substitute it with vanilla yogurt, though it may alter the overall flavor balance. Next, the ripe peaches are the star of the show; their natural sweetness shines through, so I recommend choosing peaches that yield slightly to pressure, indicating they’re perfectly ripe. If peaches aren’t in season, feel free to use nectarines or even frozen peaches—just thaw them before use. Finally, honey adds a lovely floral sweetness that ties everything together. If you prefer, maple syrup can serve as a delicious substitute.

Step-by-Step Instructions

  1. Start by preparing the peaches. Wash them thoroughly, then slice and dice them into bite-sized pieces. In a medium bowl, toss the diced peaches with 1 tablespoon of fresh lemon juice to prevent browning. Set aside for about 5 minutes while the lemon juice works its magic.
  2. In a separate bowl, combine the Greek yogurt, 2 tablespoons of honey, and 1 teaspoon of vanilla extract if using. Stir the mixture until smooth and thoroughly blended. This should take about a minute. Avoid overmixing to maintain the creaminess of the yogurt.
  3. Now it’s time to layer your parfait. Grab a clear glass or bowl to showcase your beautiful creation. Start with a generous spoonful of the yogurt mixture at the bottom—about 1/4 cup will do. Use a spoon to spread it evenly.
  4. Add a layer of the diced peaches over the yogurt, ensuring they cover the yogurt completely. You might want to use about half of what you have prepared—roughly 1 cup. This layer should be visually appealing, so arrange the peaches neatly.
  5. Sprinkle 1/4 cup of granola over the peaches. This adds a delightful crunch. Make sure to distribute it evenly to ensure every bite has that satisfying texture. Avoid packing it down too tightly, as you want it to maintain its crunch.
  6. Repeat the layers: spoon in another 1/4 cup of yogurt, followed by another cup of peaches, and another sprinkle of granola. You should have at least two layers, but feel free to add more depending on your glass size.
  7. Finish off your parfait with a drizzle of honey on top for added sweetness and a touch of elegance. If you’re using sliced almonds or shredded coconut, sprinkle them on top now. It adds a lovely visual contrast and extra flavor.
  8. Serve immediately or refrigerate for up to 30 minutes before serving to allow the flavors to meld together. However, I recommend enjoying it fresh to maintain the granola’s crunch.

Pro Tips for the Best Peach Yogurt Parfait With Honey And Granola

  • Make sure to choose ripe peaches for the best flavor and texture. A common mistake is using unripe fruit, which can lead to a less enjoyable parfait. Look for peaches that are fragrant and slightly soft to the touch.
  • Use a clear glass to assemble your parfait; this not only makes for a beautiful presentation but also allows you to see the colorful layers, which adds to the enjoyment of eating it.
  • For an even creamier texture, consider whipping the Greek yogurt with a hand mixer for a couple of minutes before layering. This small adjustment makes a huge difference in mouthfeel.
  • Be mindful of the granola-to-yogurt ratio. Too much granola can overwhelm the parfait, while too little can make it feel too creamy. Aim for about 1/4 cup of granola per layer for the perfect balance.
  • If you’re making this for a gathering, consider preparing the yogurt and peaches ahead of time and layering them just before serving. This ensures the granola stays crunchy!

Variations & Serving Ideas

There are so many ways to get creative with your Peach Yogurt Parfait! For a tropical twist, swap out the peaches for mangoes or pineapples and top with coconut flakes. If you prefer a berry flavor, mix in some blueberries or strawberries with the peaches for added color and taste. For a nutty version, incorporate chopped walnuts or pecans instead of almonds.

As for serving ideas, this parfait pairs beautifully with a side of scrambled eggs for a hearty breakfast or fresh fruit salad for a light lunch. You might also enjoy it alongside whole grain toast with almond butter for an energizing snack. The contrast of flavors and textures will elevate your meal experience!

Storage, Make-Ahead & Reheating

The Peach Yogurt Parfait is best enjoyed fresh, but you can prepare some components ahead of time. Store the layered parfait in an airtight container in the refrigerator for up to 24 hours. However, be cautious; the granola may lose its crunch if stored too long. You can freeze the yogurt and peach mixture for up to 2 months; just remember to thaw it in the refrigerator overnight before serving.

If you plan to enjoy this dish the next day, it can taste even better as the flavors meld together. Just remember to add the granola right before serving to keep its delightful crunch!

Frequently Asked Questions

Can I make Peach Yogurt Parfait With Honey And Granola ahead of time?

Yes — in fact, it tastes even better the next day as the flavors meld. However, I recommend waiting to add the granola until just before serving to maintain its crunch.

What can I substitute for Greek yogurt?

If you prefer a lighter option, you can substitute Greek yogurt with regular yogurt or a dairy-free alternative like coconut yogurt. Just remember that this may alter the creaminess and flavor profile slightly.

Can I use frozen peaches for this parfait?

Absolutely! Just make sure to thaw the frozen peaches before using them. They will still add great flavor, though the texture may be slightly softer than fresh peaches.

How do I make the parfait vegan?

To make a vegan version, substitute the Greek yogurt with a plant-based yogurt alternative, and replace honey with maple syrup or agave nectar. This keeps the parfait sweet while adhering to a vegan diet.

What other fruits can I use in this recipe?

You can mix and match fruits based on your preference. Try using strawberries, blueberries, raspberries, or even bananas. Just make sure to adjust the lemon juice as needed to prevent browning.

Sweet Peach Yogurt Parfait Delight

Final Thoughts

The Peach Yogurt Parfait with Honey and Granola is a delightful blend of creamy yogurt, sweet peaches, and crunchy granola that creates a satisfying and nourishing treat. Each layer bursts with flavor, making it a perfect choice for breakfast or a light dessert.

This is the kind of recipe I come back to again and again, especially when I want something refreshing and wholesome to start my day. The harmony of sweet and tart flavors, combined with the delightful crunch, never fails to lift my spirits!

I encourage you to give this parfait a try and indulge in its comforting goodness. Feel free to share your results or even add your own twist—perhaps a sprinkle of cinnamon or a handful of nuts. Enjoy creating your perfect parfait!

Print
clock clock iconcutlery cutlery iconflag flag iconfolder folder iconinstagram instagram iconpinterest pinterest iconfacebook facebook iconprint print iconsquares squares iconheart heart iconheart solid heart solid icon

Peach Yogurt Parfait


  • Author: Lily author
  • Total Time: 15 minutes
  • Yield: 4 servings 1x
Pin Recipe
Print Recipe

Description

This Peach Yogurt Parfait combines creamy Greek yogurt, juicy peaches, and crunchy granola for a delightful treat. It’s a perfect breakfast or snack that captures the essence of summer in every bite.


Ingredients

Scale
  • For the Parfait:
  • 2 cups plain Greek yogurt (or vanilla yogurt for a sweeter option)
  • 2 large ripe peaches, diced (about 2 cups)
  • 1 tablespoon fresh lemon juice (to prevent browning of peaches)
  • 2 tablespoons honey (plus more for drizzling)
  • 1 teaspoon vanilla extract (optional for extra flavor)
  • For the Granola:
  • 1 cup granola (store-bought or homemade; see notes for a simple granola recipe)
  • 1/4 cup sliced almonds (optional for added crunch)
  • 1/4 cup shredded coconut (optional for added flavor)

Instructions

  1. Start by preparing the peaches. Wash them thoroughly, then slice and dice them into bite-sized pieces. In a medium bowl, toss the diced peaches with 1 tablespoon of fresh lemon juice to prevent browning. Set aside for about 5 minutes while the lemon juice works its magic.
  2. In a separate bowl, combine the Greek yogurt, 2 tablespoons of honey, and 1 teaspoon of vanilla extract if using. Stir the mixture until smooth and thoroughly blended. This should take about a minute. Avoid overmixing to maintain the creaminess of the yogurt.
  3. Now it’s time to layer your parfait. Grab a clear glass or bowl to showcase your beautiful creation. Start with a generous spoonful of the yogurt mixture at the bottom—about 1/4 cup will do. Use a spoon to spread it evenly.
  4. Add a layer of the diced peaches over the yogurt, ensuring they cover the yogurt completely. You might want to use about half of what you have prepared—roughly 1 cup. This layer should be visually appealing, so arrange the peaches neatly.
  5. Sprinkle 1/4 cup of granola over the peaches. This adds a delightful crunch. Make sure to distribute it evenly to ensure every bite has that satisfying texture. Avoid packing it down too tightly, as you want it to maintain its crunch.
  6. Repeat the layers: spoon in another 1/4 cup of yogurt, followed by another cup of peaches, and another sprinkle of granola. You should have at least two layers, but feel free to add more depending on your glass size.
  7. Finish off your parfait with a drizzle of honey on top for added sweetness and a touch of elegance. If you’re using sliced almonds or shredded coconut, sprinkle them on top now. It adds a lovely visual contrast and extra flavor.
  8. Serve immediately or refrigerate for up to 30 minutes before serving to allow the flavors to meld together. However, I recommend enjoying it fresh to maintain the granola’s crunch.
  • Prep Time: 15 mins
  • Cook Time: 0 mins
  • Category: Breakfast
  • Method: No-cook
  • Cuisine: American

Nutrition

  • Serving Size: 1 parfait
  • Calories: 250
  • Sugar: 20 g
  • Sodium: 50 mg
  • Fat: 5 g
  • Saturated Fat: 2 g
  • Unsaturated Fat: 3 g
  • Trans Fat: 0 g
  • Carbohydrates: 40 g
  • Fiber: 3 g
  • Protein: 10 g
  • Cholesterol: 10 mg

Keywords: Choose ripe peaches for the best flavor and texture. Use a clear glass for a beautiful presentation. For creaminess, consider whipping the yogurt before layering. Be mindful of the granola-to-yogurt ratio. Prepare yogurt and peaches ahead of time for gatherings, layering just before serving.

Did you make this recipe?

Share a photo and tag us — we can't wait to see what you've made!

Sun-Kissed Frozen Orange Cream Slush

As a child, summer days felt like they lasted forever. I remember the sticky heat wrapping around me as I played outside, my laughter mingling with the sounds of the neighborhood. But nothing could cool me down quite like the moment I’d spot my grandmother, laboring over her blender, whipping up her famous Frozen Orange Creamsicle Slush. That vibrant orange treat, with its frosty texture and sweet citrus aroma, was like a burst of sunshine in a cup. Just one sip, and I could feel the coolness wash over me, sparking pure joy.

This Frozen Orange Creamsicle Slush has a way of making you feel like a kid again. Its creamy, dreamy consistency is a delightful balance of bright orange and soft vanilla, inviting you to dive right in. The refreshing tang of orange dances on your tongue, while the smooth creaminess envelops you in a comforting embrace. It’s a nostalgic treat that’s perfect for hot summer afternoons or anytime you need a little pick-me-up.

What makes my version of this slush stand out is the addition of a hint of vanilla bean, which elevates the flavor and adds an extra layer of richness. Plus, it’s super easy to whip up with just a few simple ingredients that you probably already have on hand! So, if you’re ready to relive those sun-soaked memories, let me show you exactly how to make it.

Sun-Kissed Frozen Orange Cream Slush

Why You’ll Love This Recipe

  • Each slush is a perfect blend of creamy vanilla and zesty orange, creating a nostalgic flavor reminiscent of summer days.
  • This refreshing treat is ready in under 15 minutes, making it an ideal quick dessert for unexpected guests or hot afternoons.
  • With just 8 simple ingredients, it’s budget-friendly, ensuring you don’t have to break the bank to enjoy a delicious slush.
  • The slush has a perfectly smooth texture, thanks to the combination of ice and ice cream, providing a delightful contrast to the bright citrus flavors.
  • It’s highly customizable; you can easily adjust the sweetness and add fresh herbs for a unique twist that suits your taste.

Ingredients

  • 2 cups orange juice (freshly squeezed or store-bought)
  • 1 cup vanilla ice cream
  • 1 cup crushed ice
  • 1/2 cup milk (whole or 2%)
  • 1/4 cup granulated sugar (adjust based on sweetness preference)
  • 1 teaspoon vanilla extract
  • Zest of 1 orange (for added flavor)
  • Fresh orange slices and mint leaves (for garnish)

The star of this Frozen Orange Creamsicle Slush is the orange juice, which provides the vibrant, citrusy base. Freshly squeezed juice will yield the brightest flavor, but store-bought options can be just as convenient. If you’re opting for store-bought, choose 100% pure juice with no added sugars for the best results. Another essential ingredient is the vanilla ice cream; it adds creaminess and sweetness. You can substitute it with dairy-free ice cream if you’re looking for a vegan option. Whole or 2% milk complements the ice cream, creating a smooth blend. If you want a lower-calorie version, almond or oat milk can be good alternatives.

Lastly, the granulated sugar can be adjusted based on your sweetness preference. If you prefer a more natural sweetener, consider using honey or agave syrup. The orange zest enhances the flavor profile, providing an aromatic pop that brings the whole slush together. Don’t skip it! It adds an extra layer of brightness that makes this slush truly special.

Step-by-Step Instructions

  1. Start by preparing your ingredients. Gather 2 cups of orange juice, 1 cup of vanilla ice cream, and 1 cup of crushed ice. Make sure the ice is finely crushed, as larger chunks can make blending difficult.
  2. In a blender, combine the orange juice, vanilla ice cream, crushed ice, and 1/2 cup of milk. Add 1/4 cup of granulated sugar and 1 teaspoon of vanilla extract. If you like a sweeter slush, consider adding a bit more sugar at this stage.
  3. Add the zest of 1 orange to the blender. This step is crucial for enhancing the citrus flavor of your slush. Make sure not to include the bitter white pith—only the flavorful zest.
  4. Blend the mixture on medium-high speed for about 30-45 seconds. Stop once the ingredients are fully combined and the slush has a smooth, even consistency. If you notice large chunks of ice, blend for an additional 10-15 seconds. Avoid over-blending, as this can make the slush too liquidy.
  5. Once blended, taste the slush. If it needs more sweetness, add a little more sugar and blend for a few more seconds. If it’s too thick, you can add a splash of milk to reach your desired consistency.
  6. Pour the slush into glasses. This recipe typically serves 4, but you can easily double it for larger gatherings. Use a spoon to help guide the slush into the glasses if needed.
  7. Garnish each serving with fresh orange slices and mint leaves. The mint not only adds a pop of color but also a refreshing aroma that complements the citrus flavors beautifully.
  8. Serve immediately and enjoy! If you’ve made extra, you can refrigerate it for a short time, but it’s best enjoyed fresh.

Pro Tips for the Best Frozen Orange Creamsicle Slush

  • Don’t skip the orange zest! It’s a game-changer for flavor. Always zest before juicing to make it easier.
  • Use a high-powered blender for the best texture. A standard blender may struggle with ice, leading to uneven consistency. If you have a food processor, that can work too, but ensure the ice is finely crushed.
  • Adjust the ice-to-liquid ratio carefully. If your slush is too thick, it won’t blend well. Start with less ice and add more until you reach your preferred texture.
  • Be cautious with the sugar! Always start with the lower amount, as you can easily add more, but it’s hard to fix an overly sweet slush.
  • For a fun twist, consider adding a splash of coconut milk or a handful of fresh fruit like strawberries or pineapple. This not only enhances the flavor but also adds a beautiful color contrast.

Variations & Serving Ideas

There are countless ways to put a spin on your Frozen Orange Creamsicle Slush. Consider making a tropical version by adding in some pineapple juice or coconut milk for a delightful tropical twist. If you’re feeling adventurous, try incorporating a handful of frozen mango or peach slices for added sweetness. For a lighter version, swap out the vanilla ice cream for Greek yogurt for a creamy yet tangy alternative.

As for serving ideas, this refreshing slush pairs wonderfully with light summer dishes like grilled chicken skewers, fish tacos, or a simple salad topped with citrus vinaigrette. The bright, zesty flavors of the slush complement these dishes perfectly, making them an ideal pairing for a sunny day.

Storage, Make-Ahead & Reheating

This Frozen Orange Creamsicle Slush is best enjoyed fresh, but if you have leftovers, you can store them in an airtight container in the fridge for up to 2 days. Just keep in mind that the slush may lose some of its texture over time as the ice melts. It doesn’t freeze well, as the ice will turn into a solid block. If you must freeze it, blend again after thawing to restore the slushy consistency. This treat is best the day you make it, as the flavors meld together beautifully overnight, enhancing its deliciousness.

Frequently Asked Questions

Can I make Frozen Orange Creamsicle Slush ahead of time?

Yes — in fact, it tastes even better the next day as the flavors meld. However, it’s best to enjoy it fresh, as the texture can change if stored for too long. If you need to prepare it ahead, keep it in the fridge and re-blend before serving.

What kind of orange juice should I use?

For the best flavor, use freshly squeezed orange juice. However, if you’re short on time, opt for 100% pure store-bought juice without added sugars. This will ensure that your slush remains flavorful and refreshing.

Can I substitute the vanilla ice cream?

Absolutely! If you’re looking for a dairy-free option, coconut milk ice cream or a non-dairy vanilla ice cream can work wonderfully. They will still provide the creamy texture and sweetness you desire.

How can I adjust the sweetness of my slush?

You can easily adjust the sweetness by modifying the amount of sugar added. Start with 1/4 cup and taste the mixture before blending. If you prefer it sweeter, add more sugar gradually until it reaches your desired level.

What should I do if my slush is too thick?

If your slush is too thick, simply add a splash of milk or orange juice and blend again. This will help achieve a more drinkable consistency while maintaining the slushy texture. Adjust gradually to reach your preferred thickness.

Sun-Kissed Frozen Orange Cream Slush

Final Thoughts

The Frozen Orange Creamsicle Slush is a delightful blend of refreshing citrus and creamy goodness, making it a perfect treat for warm days or any time you crave a taste of nostalgia. The way the bright orange flavor dances with the creamy texture truly elevates this slush, transforming it into a satisfying escape from the everyday.

This is the kind of recipe I come back to again and again, especially when I’m looking to cool down or impress guests at a summer gathering. It’s simple to make and always brings smiles all around! I encourage you to try this recipe for yourself—don’t hesitate to share your results or even put your own spin on it. Happy slushing!

Print
clock clock iconcutlery cutlery iconflag flag iconfolder folder iconinstagram instagram iconpinterest pinterest iconfacebook facebook iconprint print iconsquares squares iconheart heart iconheart solid heart solid icon

Frozen Orange Creamsicle Slush


  • Author: Lily author
  • Total Time: 15 minutes
  • Yield: 4 servings 1x
Pin Recipe
Print Recipe

Description

This Frozen Orange Creamsicle Slush is a refreshing treat that combines creamy vanilla and zesty orange flavors. Perfect for hot summer days, it brings back nostalgic memories with every sip.


Ingredients

Scale
  • 2 cups orange juice (freshly squeezed or store-bought)
  • 1 cup vanilla ice cream
  • 1 cup crushed ice
  • 1/2 cup milk (whole or 2%)
  • 1/4 cup granulated sugar (adjust based on sweetness preference)
  • 1 teaspoon vanilla extract
  • Zest of 1 orange (for added flavor)
  • Fresh orange slices and mint leaves (for garnish)

Instructions

  1. Start by preparing your ingredients. Gather 2 cups of orange juice, 1 cup of vanilla ice cream, and 1 cup of crushed ice. Make sure the ice is finely crushed, as larger chunks can make blending difficult.
  2. In a blender, combine the orange juice, vanilla ice cream, crushed ice, and 1/2 cup of milk. Add 1/4 cup of granulated sugar and 1 teaspoon of vanilla extract. If you like a sweeter slush, consider adding a bit more sugar at this stage.
  3. Add the zest of 1 orange to the blender. This step is crucial for enhancing the citrus flavor of your slush. Make sure not to include the bitter white pith—only the flavorful zest.
  4. Blend the mixture on medium-high speed for about 30-45 seconds. Stop once the ingredients are fully combined and the slush has a smooth, even consistency. If you notice large chunks of ice, blend for an additional 10-15 seconds. Avoid over-blending, as this can make the slush too liquidy.
  5. Once blended, taste the slush. If it needs more sweetness, add a little more sugar and blend for a few more seconds. If it’s too thick, you can add a splash of milk to reach your desired consistency.
  6. Pour the slush into glasses. This recipe typically serves 4, but you can easily double it for larger gatherings. Use a spoon to help guide the slush into the glasses if needed.
  7. Garnish each serving with fresh orange slices and mint leaves. The mint not only adds a pop of color but also a refreshing aroma that complements the citrus flavors beautifully.
  8. Serve immediately and enjoy! If you’ve made extra, you can refrigerate it for a short time, but it's best enjoyed fresh.
  • Prep Time: 15 min
  • Cook Time: 0 min
  • Category: Dessert
  • Method: Blending
  • Cuisine: American

Nutrition

  • Serving Size: 1 serving
  • Calories: 200
  • Sugar: 30 g
  • Sodium: 50 mg
  • Fat: 5 g
  • Saturated Fat: 3 g
  • Unsaturated Fat: 2 g
  • Trans Fat: 0 g
  • Carbohydrates: 40 g
  • Fiber: 1 g
  • Protein: 2 g
  • Cholesterol: 20 mg

Keywords: Don't skip the orange zest! It's a game-changer for flavor. Always zest before juicing to make it easier.

Did you make this recipe?

Share a photo and tag us — we can't wait to see what you've made!

Zesty Lemon Poppy Seed Delight

One rainy afternoon, I found myself in my grandmother’s cozy kitchen, the kind that always smelled like warmth and love. She was whipping up her famous Lemon Poppy Seed Loaf, a recipe that had been passed down through generations. As the batter came together, the zesty aroma of fresh lemons filled the air, mingling perfectly with the nutty fragrance of poppy seeds. I can still picture her, apron-clad, as she expertly drizzled a vibrant citrus icing over the loaf, creating a glossy, sun-kissed finish that beckoned us to dive in. It was a moment that sparked my own passion for baking, and this recipe has become a cherished staple in my home ever since.

When you take a bite of this Lemon Poppy Seed Loaf, it’s like a burst of sunshine on your palate. The loaf is beautifully golden, with a tender crumb that melts in your mouth. Each slice is speckled with tiny poppy seeds, adding a delightful crunch that contrasts beautifully with the tangy sweetness of the lemon. And that citrus icing? It’s the finishing touch that elevates this loaf from ordinary to extraordinary, with its bright, zesty flavor dancing on your taste buds.

This recipe stands out because it embraces simplicity while delivering on flavor. I’ve added a hint of vanilla to the batter, enhancing the overall taste and making it even more indulgent. Trust me, once you make this Lemon Poppy Seed Loaf With Citrus Icing, it’ll become a go-to in your baking repertoire.

So, let me show you exactly how to make it!

Zesty Lemon Poppy Seed Delight

Why You’ll Love This Recipe

  • Moist and tender crumb that melts in your mouth, thanks to the perfect balance of butter and buttermilk.
  • Bright, zesty lemon flavor paired with crunchy poppy seeds, creating a delightful texture and taste experience.
  • Easy to whip up in just about an hour, perfect for last-minute gatherings or a cozy afternoon treat.
  • Budget-friendly with everyday ingredients, making it an accessible option for all home bakers.
  • The citrus icing adds a sweet tang that elevates the loaf, turning a simple recipe into a showstopper!

Ingredients

  • 1 ½ cups (190g) all-purpose flour
  • 1 teaspoon baking powder
  • ½ teaspoon baking soda
  • ½ teaspoon salt
  • 3 tablespoons poppy seeds
  • ½ cup (115g) unsalted butter, softened to room temperature
  • 1 cup (200g) granulated sugar
  • 2 large eggs
  • 1 teaspoon vanilla extract
  • 1 teaspoon lemon zest (from about 1 medium lemon)
  • ½ cup (120ml) buttermilk
  • 2 tablespoons fresh lemon juice

For the Citrus Icing:

  • 1 cup (120g) powdered sugar
  • 2 tablespoons fresh lemon juice
  • 1 tablespoon orange juice
  • 1 teaspoon lemon zest (for garnish, optional)

Let’s dive into the key ingredients that make this Lemon Poppy Seed Loaf so special. The all-purpose flour provides the structure and base for the loaf, while the baking powder and baking soda ensure it rises perfectly, giving the loaf a light texture. For a gluten-free variation, you could substitute the flour with a gluten-free all-purpose blend. Poppy seeds not only add a delightful crunch but also contribute to the unique flavor profile that pairs well with the citrus notes.

Unsalted butter is crucial for achieving the buttery richness that makes this loaf so moist. If you’re looking for a dairy-free option, coconut oil or a vegan butter can be used instead. The buttermilk is another essential component, providing acidity that activates the baking soda for a fluffy texture. If you don’t have buttermilk on hand, you can easily make a substitute by mixing ½ cup of milk with 1 tablespoon of vinegar or lemon juice and letting it sit for about 5 minutes.

Step-by-Step Instructions

  1. Preheat your oven to 350°F (175°C). Grease a 9×5-inch loaf pan or line it with parchment paper for easy removal later.
  2. In a medium mixing bowl, whisk together 1 ½ cups of all-purpose flour, 1 teaspoon of baking powder, ½ teaspoon of baking soda, ½ teaspoon of salt, and 3 tablespoons of poppy seeds. This helps to evenly distribute the baking agents and ensures a uniform rise.
  3. In a large mixing bowl, cream together ½ cup of softened unsalted butter and 1 cup of granulated sugar using an electric mixer on medium speed for about 3-4 minutes, until the mixture is light and fluffy. Make sure to scrape down the sides of the bowl occasionally.
  4. Add 2 large eggs, 1 teaspoon of vanilla extract, and 1 teaspoon of lemon zest to the creamed butter and sugar, mixing until fully combined. You want a smooth consistency, so ensure there are no lumps of butter.
  5. In a small bowl, combine ½ cup of buttermilk and 2 tablespoons of fresh lemon juice. Alternately add the dry ingredients and buttermilk mixture to the butter mixture, starting and ending with the dry ingredients. Mix just until combined; do not overmix, as this can lead to a dense loaf.
  6. Pour the batter into the prepared loaf pan. Smooth the top with a spatula, ensuring it’s even. Bake in the preheated oven for 50-60 minutes, or until a toothpick inserted in the center comes out clean. The edges should be lightly golden brown, and the center should feel just set.
  7. Once baked, remove the loaf from the oven and allow it to cool in the pan for about 10 minutes. Then, transfer it to a wire rack to cool completely. Resist the urge to slice too soon, as it will be crumbly if it’s still warm.
  8. While the loaf is cooling, prepare the citrus icing. In a medium bowl, whisk together 1 cup of powdered sugar, 2 tablespoons of fresh lemon juice, and 1 tablespoon of orange juice until smooth. If the icing is too thick, you can add a little more juice to reach your desired consistency.
  9. Once the loaf is completely cool, drizzle the citrus icing over the top. If you like, sprinkle with an additional teaspoon of lemon zest for an extra pop of flavor and color.

Pro Tips for the Best Lemon Poppy Seed Loaf With Citrus Icing

  • Be careful not to overmix your batter; this is a common mistake that can lead to a dense loaf. Mix just until the dry ingredients are incorporated for a light and fluffy texture.
  • Use room temperature ingredients, especially the butter and eggs. This helps to create a smoother batter and ensures even baking. Take your eggs out of the fridge about 30 minutes before you start.
  • For a more pronounced lemon flavor, consider adding a little lemon extract in addition to the zest and juice. Just a half teaspoon can elevate the citrus notes significantly.
  • When measuring your flour, spoon it into the measuring cup and level it off with a knife instead of scooping directly from the bag. This prevents packing and ensures you don’t end up with a dry loaf.
  • Invest in a good quality loaf pan; it makes a difference in heat distribution, which ensures even baking. If your pan is dark-coated, reduce the oven temperature by 25°F to prevent over-browning.

Variations & Serving Ideas

For a delightful twist, consider adding blueberries or raspberries to the batter for a fruity burst of flavor. You can also experiment with different citrus fruits—try lime or grapefruit zest and juice for a refreshing change. For a healthier option, substitute half of the all-purpose flour with whole wheat flour for added fiber without compromising too much on texture.

This Lemon Poppy Seed Loaf pairs beautifully with a light salad, such as a mixed greens salad with a vinaigrette, or a cup of tea for a cozy afternoon treat. It also complements a creamy cheese platter, as the acidity of the loaf balances rich cheeses perfectly. Lastly, a scoop of vanilla ice cream on the side creates a delightful contrast of temperatures and flavors!

Storage, Make-Ahead & Reheating

This Lemon Poppy Seed Loaf can be stored at room temperature for up to 3 days if wrapped tightly in plastic wrap. If you want to keep it longer, it freezes well for up to 3 months. To freeze, wrap the loaf tightly in plastic wrap and then in aluminum foil to prevent freezer burn.

When you’re ready to enjoy it again, simply thaw it in the fridge overnight. Reheat individual slices in the microwave for 15-20 seconds or in a toaster oven until warmed through. Interestingly, many people find that this loaf tastes even better the next day, as the flavors have time to meld!

Frequently Asked Questions

Can I make Lemon Poppy Seed Loaf With Citrus Icing ahead of time?

Yes — in fact, it tastes even better the next day! You can make the loaf a day in advance, allowing the flavors to develop. Just be sure to store it in an airtight container to maintain its moisture.

Can I substitute the poppy seeds?

Absolutely! If you don’t have poppy seeds on hand or prefer an alternative, you can use sesame seeds for a similar crunch or omit them entirely for a smooth loaf.

What can I use instead of buttermilk?

If you don’t have buttermilk, you can easily create a substitute by mixing ½ cup of milk (dairy or plant-based) with 1 tablespoon of vinegar or lemon juice. Let it sit for 5 minutes before using in the recipe.

How can I make this recipe gluten-free?

To make a gluten-free version of this Lemon Poppy Seed Loaf, substitute the all-purpose flour with a gluten-free all-purpose flour blend. Just ensure that the blend contains a binding agent like xanthan gum for the best results.

What is the best way to store leftover loaf?

Leftover Lemon Poppy Seed Loaf should be stored in an airtight container at room temperature for up to 3 days. For longer storage, wrap it tightly and freeze for up to 3 months. Thaw it before serving for the best texture.

Zesty Lemon Poppy Seed Delight

Final Thoughts

The Lemon Poppy Seed Loaf with Citrus Icing is truly a delightful treat that brings a burst of brightness to any occasion. The zesty lemon flavor combined with the subtle crunch of poppy seeds creates a satisfying balance, while the citrus icing adds a touch of sweetness that perfectly complements the loaf’s tanginess.

This is the kind of recipe I come back to again and again, especially when I want to brighten up a gloomy day or celebrate a small victory. The aroma that fills the kitchen as it bakes is absolutely heavenly! I encourage you to give this recipe a try; you might just find it becoming a beloved staple in your home. Don’t forget to share your results or even add your own unique twist—I can’t wait to see what you create!

Print
clock clock iconcutlery cutlery iconflag flag iconfolder folder iconinstagram instagram iconpinterest pinterest iconfacebook facebook iconprint print iconsquares squares iconheart heart iconheart solid heart solid icon

Lemon Poppy Seed Loaf


  • Author: Lily author
  • Total Time: 15 minute
  • Yield: 1 loaf 1x
Pin Recipe
Print Recipe

Description

This Lemon Poppy Seed Loaf is a delightful treat that combines zesty lemon flavor with crunchy poppy seeds. Topped with a citrus icing, it’s perfect for any occasion.


Ingredients

Scale
  • 1 ½ cups (190g) all-purpose flour
  • 1 teaspoon baking powder
  • ½ teaspoon baking soda
  • ½ teaspoon salt
  • 3 tablespoons poppy seeds
  • ½ cup (115g) unsalted butter, softened to room temperature
  • 1 cup (200g) granulated sugar
  • 2 large eggs
  • 1 teaspoon vanilla extract
  • 1 teaspoon lemon zest (from about 1 medium lemon)
  • ½ cup (120ml) buttermilk
  • 2 tablespoons fresh lemon juice
  • 1 cup (120g) powdered sugar
  • 2 tablespoons fresh lemon juice
  • 1 tablespoon orange juice
  • 1 teaspoon lemon zest (for garnish, optional)

Instructions

  1. Preheat your oven to 350°F (175°C). Grease a 9×5-inch loaf pan or line it with parchment paper for easy removal later.
  2. In a medium mixing bowl, whisk together 1 ½ cups of all-purpose flour, 1 teaspoon of baking powder, ½ teaspoon of baking soda, ½ teaspoon of salt, and 3 tablespoons of poppy seeds. This helps to evenly distribute the baking agents and ensures a uniform rise.
  3. In a large mixing bowl, cream together ½ cup of softened unsalted butter and 1 cup of granulated sugar using an electric mixer on medium speed for about 3-4 minutes, until the mixture is light and fluffy. Make sure to scrape down the sides of the bowl occasionally.
  4. Add 2 large eggs, 1 teaspoon of vanilla extract, and 1 teaspoon of lemon zest to the creamed butter and sugar, mixing until fully combined. You want a smooth consistency, so ensure there are no lumps of butter.
  5. In a small bowl, combine ½ cup of buttermilk and 2 tablespoons of fresh lemon juice. Alternately add the dry ingredients and buttermilk mixture to the butter mixture, starting and ending with the dry ingredients. Mix just until combined; do not overmix, as this can lead to a dense loaf.
  6. Pour the batter into the prepared loaf pan. Smooth the top with a spatula, ensuring it’s even. Bake in the preheated oven for 50-60 minutes, or until a toothpick inserted in the center comes out clean. The edges should be lightly golden brown, and the center should feel just set.
  7. Once baked, remove the loaf from the oven and allow it to cool in the pan for about 10 minutes. Then, transfer it to a wire rack to cool completely. Resist the urge to slice too soon, as it will be crumbly if it’s still warm.
  8. While the loaf is cooling, prepare the citrus icing. In a medium bowl, whisk together 1 cup of powdered sugar, 2 tablespoons of fresh lemon juice, and 1 tablespoon of orange juice until smooth. If the icing is too thick, you can add a little more juice to reach your desired consistency.
  9. Once the loaf is completely cool, drizzle the citrus icing over the top. If you like, sprinkle with an additional teaspoon of lemon zest for an extra pop of flavor and color.
  • Prep Time: 15 mins
  • Cook Time: 50-60 mins
  • Category: Dessert
  • Method: Baking
  • Cuisine: American

Nutrition

  • Serving Size: 1 slice
  • Calories: 200
  • Sugar: 15 g
  • Sodium: 150 mg
  • Fat: 8 g
  • Saturated Fat: 5 g
  • Unsaturated Fat: 3 g
  • Trans Fat: 0 g
  • Carbohydrates: 30 g
  • Fiber: 1 g
  • Protein: 3 g
  • Cholesterol: 40 mg

Keywords: Be careful not to overmix your batter; this is a common mistake that can lead to a dense loaf. Use room temperature ingredients for a smoother batter and even baking.

Did you make this recipe?

Share a photo and tag us — we can't wait to see what you've made!

  • Privacy Policy
  • Terms Of Service
  • Contact
  • About
  • GDPR

Copyright © 2025 Homesmad