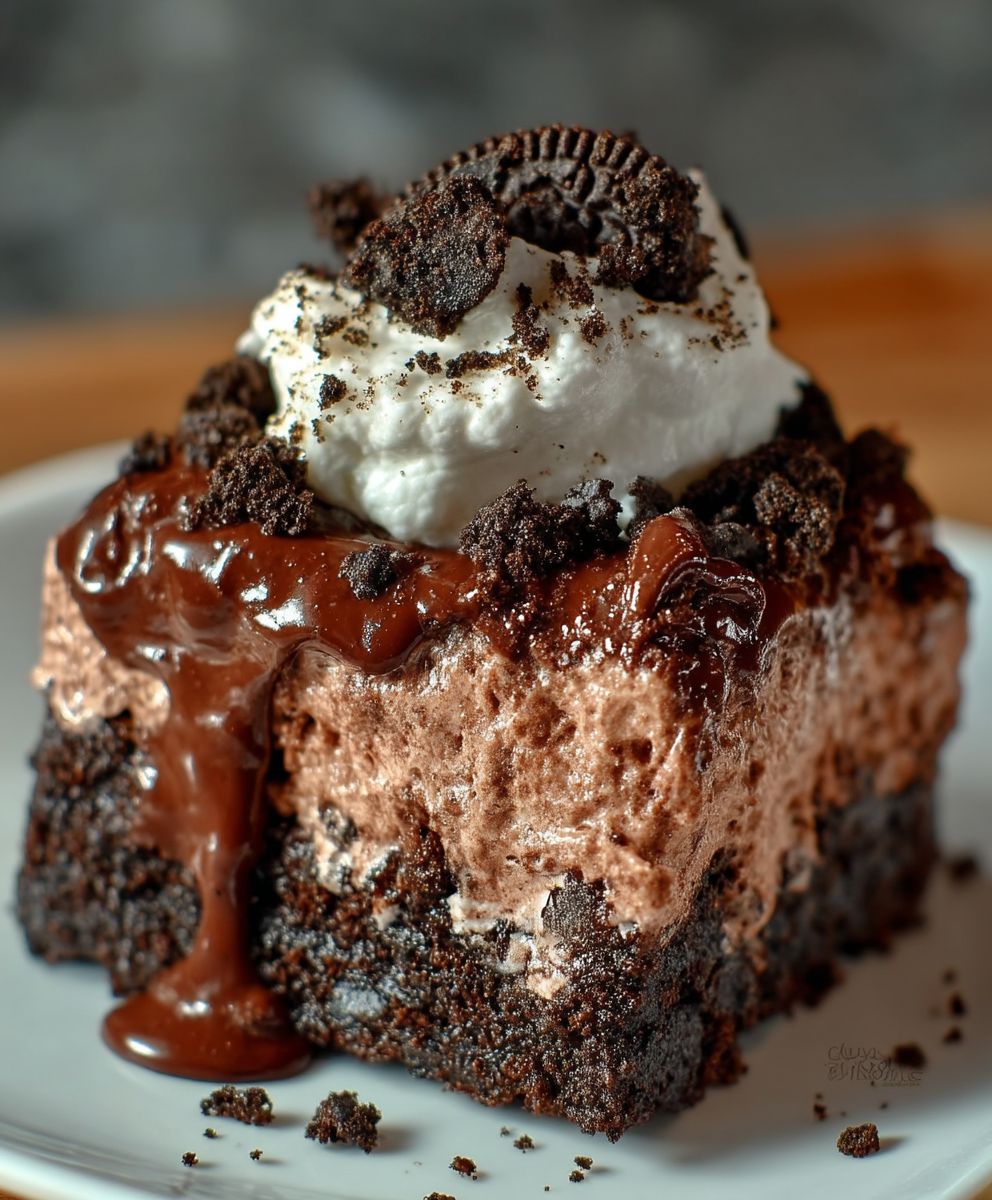
Oreo Dirt Cake: Prepare to unearth a dessert sensation that will transport you back to childhood! Remember the thrill of digging into a cup of “dirt” filled with gummy worms? Well, this isn’t just a nostalgic treat; it’s a sophisticated, crowd-pleasing dessert that’s surprisingly easy to make. This whimsical dessert is a guaranteed hit at parties, potlucks, or even just a fun family night.
While its exact origins are shrouded in mystery, the concept of “dirt cake” has been around for decades, evolving from simple pudding and cookie crumbles to the layered masterpiece we know and love today. It taps into our inherent love for playful presentation and delicious flavors. The combination of creamy pudding, rich chocolate cookies, and those iconic gummy worms creates a textural and flavorful symphony that’s hard to resist.
People adore Oreo Dirt Cake for its delightful simplicity and customizable nature. It’s a no-bake dessert, making it perfect for warm weather or when you’re short on time. The creamy, cool layers are incredibly refreshing, and the crunchy Oreo “dirt” provides a satisfying contrast. Plus, who can resist the charm of those little gummy worms peeking out from the top? Get ready to dig in and experience the joy of this classic treat!

Ingredients:
- 1 (15 ounce) package Oreo cookies, finely crushed (reserve about 1/2 cup for topping)
- 1 (8 ounce) package cream cheese, softened
- 1/2 cup (1 stick) unsalted butter, softened
- 3 1/2 cups powdered sugar
- 1 (16 ounce) container frozen whipped topping, thawed, divided
- 2 (3.4 ounce) packages instant vanilla pudding mix
- 3 1/2 cups milk
- 1 package gummy worms
- Optional: Chocolate rocks, silk flowers, small gardening shovel for decoration
Preparing the “Dirt”
1. First things first, let’s get those Oreos crushed! You can use a food processor for this, pulsing until you have fine crumbs. If you don’t have a food processor, no worries! Just place the Oreos in a large zip-top bag, seal it tightly, and use a rolling pin or even a heavy can to crush them into fine crumbs. Remember to reserve about 1/2 cup of the crushed Oreos for the very top of the cake – this will be our final layer of “dirt.” Set the crushed Oreos aside for now.
Making the Creamy Filling
2. Now, for the creamy, dreamy filling! In a large bowl, beat the softened cream cheese and softened butter together with an electric mixer until they are light and fluffy. This is a crucial step, so don’t rush it! You want to make sure there are no lumps and that the mixture is smooth and creamy. This usually takes about 3-5 minutes on medium speed.
3. Gradually add the powdered sugar to the cream cheese mixture, beating on low speed until it is fully incorporated. Be careful not to add all the powdered sugar at once, or you’ll end up with a cloud of sugar dust! Add it in about 1/2 cup increments, mixing well after each addition. Once all the powdered sugar is added, increase the speed to medium and beat for another 2-3 minutes until the mixture is smooth and creamy.
4. Gently fold in half of the thawed whipped topping into the cream cheese mixture. Be gentle here! You want to keep the whipped topping light and airy. Use a spatula to fold it in, scraping down the sides of the bowl as needed. Set this creamy mixture aside.
Preparing the Pudding Layer
5. In a separate large bowl, whisk together the instant vanilla pudding mix and the milk until well combined. Continue whisking for about 2 minutes until the pudding starts to thicken. Let the pudding stand for about 5 minutes to fully set up. This will ensure that the pudding layer is nice and firm in our dirt cake.
Assembling the Oreo Dirt Cake
6. Now comes the fun part – assembling the dirt cake! Choose your serving dish. A clear glass bowl or trifle dish works best because it allows you to see all the beautiful layers. You can also use a 9×13 inch baking dish if you prefer.
7. Spread a layer of crushed Oreos on the bottom of the dish. This will be our first layer of “dirt.” Use about 1/3 of the crushed Oreos for this layer. Press down lightly to create an even base.
8. Next, spread the cream cheese mixture evenly over the Oreo layer. This is our creamy, sweet layer that adds richness to the cake.
9. Now, spread the vanilla pudding evenly over the cream cheese layer. Make sure to cover the entire cream cheese layer with the pudding.
10. Repeat the layers: Add another layer of crushed Oreos (about 1/3 of the remaining crushed Oreos), followed by the remaining whipped topping. Spread the whipped topping evenly over the pudding layer.
11. Finally, sprinkle the remaining crushed Oreos (the 1/2 cup we reserved earlier) over the top of the whipped topping. This is our final layer of “dirt” that completes the look of the dirt cake.
Decorating the Dirt Cake
12. Now for the really fun part – decorating! Arrange the gummy worms on top of the dirt cake, making them look like they are crawling out of the “dirt.” Get creative with this! You can bury some of the worms partially in the Oreo crumbs to make them look more realistic.
13. If you want to add even more decoration, you can use chocolate rocks to create a “rocky” landscape, or add silk flowers to make it look like plants are growing out of the dirt. A small gardening shovel placed on top or next to the cake adds a cute and thematic touch.
Chilling and Serving
14. Cover the dirt cake with plastic wrap and refrigerate for at least 4 hours, or preferably overnight. This allows the flavors to meld together and the cake to set up properly. The longer it chills, the better it will taste!
15. When you’re ready to serve, remove the dirt cake from the refrigerator and let it sit for a few minutes to soften slightly. This will make it easier to scoop and serve.
16. Scoop out generous portions of the dirt cake and serve immediately. Enjoy the delicious combination of creamy filling, crunchy Oreos, and chewy gummy worms!
Tips and Variations:
* Cookie Variations: While Oreo cookies are the classic choice for dirt cake, you can experiment with other types of cookies. Chocolate chip cookies, peanut butter cookies, or even graham crackers would all work well.
* Pudding Flavors: Vanilla pudding is the traditional choice, but you can also use chocolate pudding, butterscotch pudding, or even cheesecake pudding for a different flavor profile.
* Fruit Additions: Add a layer of sliced bananas, strawberries, or blueberries between the layers for a fruity twist.
* Chocolate Chips: Sprinkle mini chocolate chips between the layers for an extra dose of chocolatey goodness.
* Nuts: Add chopped nuts, such as pecans or walnuts, to the Oreo crumbs for added texture and flavor.
* Individual Servings: For a fun and portable treat, assemble the dirt cake in individual clear cups or mason jars. This is perfect for parties or picnics.
* Boozy Version: For an adult version of dirt cake, add a splash of coffee liqueur or chocolate liqueur to the pudding mixture.
* Dietary Considerations: To make a gluten-free dirt cake, use gluten-free Oreo cookies and gluten-free pudding mix. To make a dairy-free dirt cake, use dairy-free cream cheese, butter, whipped topping, and milk.
* Make Ahead: Dirt cake is a great make-ahead dessert. You can assemble it up to 2 days in advance and store it in the refrigerator until you’re ready to serve.
* Storage: Leftover dirt cake can be stored in the refrigerator for up to 3 days. Cover it tightly with plastic wrap to prevent it from drying out.
* Presentation: Get creative with your presentation! Use different sizes and shapes of serving dishes, and experiment with different arrangements of gummy worms and other decorations.
* Seasonal Variations: Adapt the dirt cake to different seasons by using seasonal decorations. For example, use candy corn and pumpkin candies for Halloween, or red and green sprinkles for Christmas.
* Theme Parties: Tailor the dirt cake to match the theme of your party. For example, use dinosaur-shaped gummy candies for a dinosaur-themed party, or pirate-themed decorations for a pirate party.
* Layering Technique: Ensure each layer is evenly distributed for a visually appealing and balanced flavor profile in every bite.
* Whipped Topping Stability: To prevent the whipped topping from deflating, consider using stabilized whipped cream or adding a small amount of gelatin to the whipped topping before folding it into the cream cheese mixture.
* Cream Cheese Temperature: Make sure the cream cheese is fully softened to room temperature before beating it. This will prevent lumps and ensure a smooth and creamy filling.
* Powdered Sugar Sifting: Sifting the powdered sugar before adding it to the cream cheese mixture will help prevent lumps and ensure a smooth texture.
* Milk Type: While whole milk is recommended for the pudding, you can use other types of milk, such as 2% milk, skim milk, or even non-dairy milk, depending on your preference.
* Gummy Worm Placement: Consider placing some gummy worms partially buried in the Oreo “dirt” to create a more realistic and visually appealing effect.
* Chocolate Rock Selection: Choose chocolate rocks that are different sizes and colors to create a more natural-looking “rocky” landscape.
* Flower Arrangement: If using silk flowers, arrange them in a way that looks natural and adds a pop of color to the dirt cake.
* Shovel Size: Choose a small gardening shovel that is proportionate to the size of the dirt cake.
* Chilling Time Importance: Don’t skip the chilling time! This is essential for allowing the flavors to meld together and the cake to set up properly.
* Serving Temperature: Serve the dirt cake chilled for the best flavor and texture.
* Scooping Technique
Conclusion:
This Oreo Dirt Cake isn’t just a dessert; it’s a nostalgic trip back to childhood, a guaranteed crowd-pleaser, and, frankly, a ridiculously easy way to impress your friends and family. Seriously, if you’re looking for a dessert that delivers maximum flavor with minimal effort, look no further. The creamy, dreamy layers of pudding and whipped topping, punctuated by the delightful crunch of Oreo cookies, create a symphony of textures and tastes that’s simply irresistible. It’s the kind of dessert that disappears in minutes, leaving everyone wanting more.
But beyond its simplicity and deliciousness, this recipe is a must-try because it’s endlessly adaptable. Feel free to get creative and personalize it to your liking! Want to add a touch of sophistication? Try using a high-quality dark chocolate pudding instead of vanilla. Craving something a little more decadent? Swirl in some peanut butter or Nutella between the layers. For a festive touch, especially around Halloween, add gummy worms or candy corn. And if you’re feeling particularly adventurous, consider incorporating other cookie varieties alongside the Oreos – maybe some chocolate chip cookies or even some peanut butter cookies for a truly unique flavor profile.
Serving suggestions are just as versatile. While this Oreo Dirt Cake is perfectly delicious served straight from the refrigerator, you can also get creative with presentation. Serve it in individual mason jars for a charming and portable treat. Layer it in a trifle bowl for a stunning centerpiece at your next party. Or, for a fun twist, freeze it for a few hours to create a delightful Oreo Dirt Cake ice cream cake.
And don’t forget the garnishes! A sprinkle of crushed Oreos on top is always a classic choice, but you can also add fresh berries, chocolate shavings, or even a dusting of cocoa powder for an extra touch of elegance. For a truly whimsical presentation, consider adding a few edible flowers or some miniature garden gnomes. The possibilities are endless!
I truly believe that this recipe is a winner, and I’m confident that you’ll love it as much as I do. It’s the perfect dessert for any occasion, from casual weeknight dinners to elaborate birthday celebrations. It’s also a fantastic recipe to make with kids, as they’ll love helping to crush the Oreos and layer the ingredients.
So, what are you waiting for? Gather your ingredients, preheat your oven (just kidding, no baking required!), and get ready to create a dessert masterpiece. I’m so excited for you to try this Oreo Dirt Cake recipe!
Once you’ve made it, I’d absolutely love to hear about your experience. Did you make any variations? What did your friends and family think? Share your photos and stories in the comments below! I can’t wait to see your creations and hear all about your Oreo Dirt Cake adventures. Happy baking (or, in this case, layering)!
Oreo Dirt Cake: The Ultimate No-Bake Dessert Recipe
A fun and easy no-bake dessert featuring layers of crushed Oreos, creamy filling, vanilla pudding, and gummy worms! Perfect for kids and adults alike.
Ingredients
Instructions
Recipe Notes
- Cookie Variations: Experiment with other cookies like chocolate chip, peanut butter, or graham crackers.
- Pudding Flavors: Try chocolate, butterscotch, or cheesecake pudding.
- Fruit Additions: Add sliced bananas, strawberries, or blueberries between layers.
- Chocolate Chips: Sprinkle mini chocolate chips between layers.
- Nuts: Add chopped nuts to the Oreo crumbs.
- Individual Servings: Assemble in clear cups or mason jars.
- Boozy Version: Add coffee liqueur or chocolate liqueur to the pudding mixture.
- Dietary Considerations: Use gluten-free Oreos and pudding for a gluten-free version. Use dairy-free alternatives for a dairy-free version.
- Make Ahead: Assemble up to 2 days in advance.
- Storage: Store leftovers in the refrigerator for up to 3 days.
- Presentation: Get creative with serving dishes and decorations.
- Seasonal Variations: Adapt decorations for different seasons.
- Theme Parties: Tailor decorations to match the party theme.
- Layering Technique: Ensure each layer is evenly distributed.
- Whipped Topping Stability: Use stabilized whipped cream or add gelatin to prevent deflating.
- Cream Cheese Temperature: Ensure cream cheese is fully softened.
- Powdered Sugar Sifting: Sift powdered sugar to prevent lumps.
- Milk Type: Use whole milk for pudding, or other types as preferred.
- Gummy Worm Placement: Partially bury gummy worms for a realistic effect.
- Chocolate Rock Selection: Choose different sizes and colors of chocolate rocks.
- Flower Arrangement: Arrange silk flowers naturally.
- Shovel Size: Choose a small gardening shovel.
- Chilling Time Importance: Don’t skip chilling time.
- Serving Temperature: Serve chilled.
- Scooping Technique: Scoop generously.