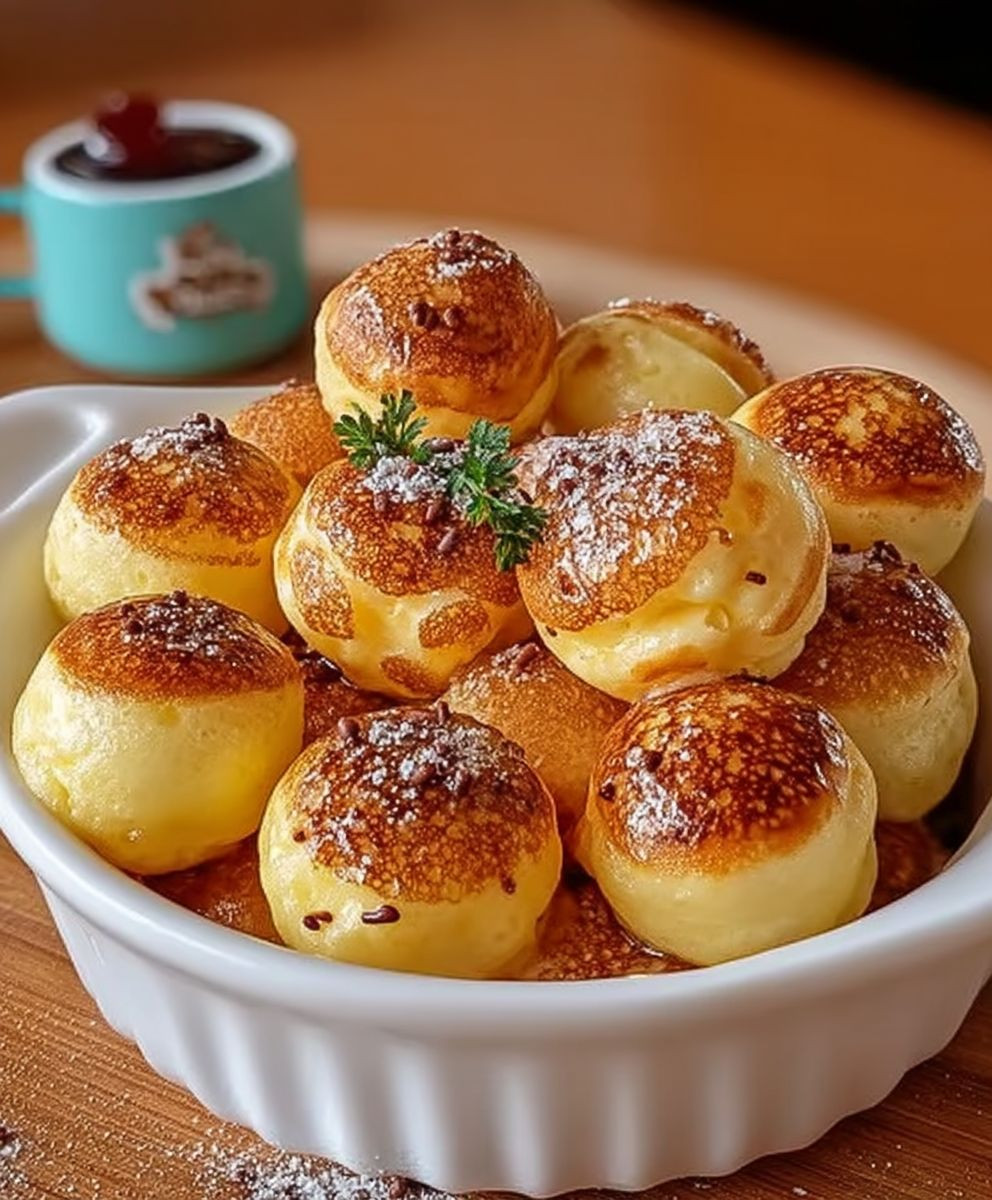
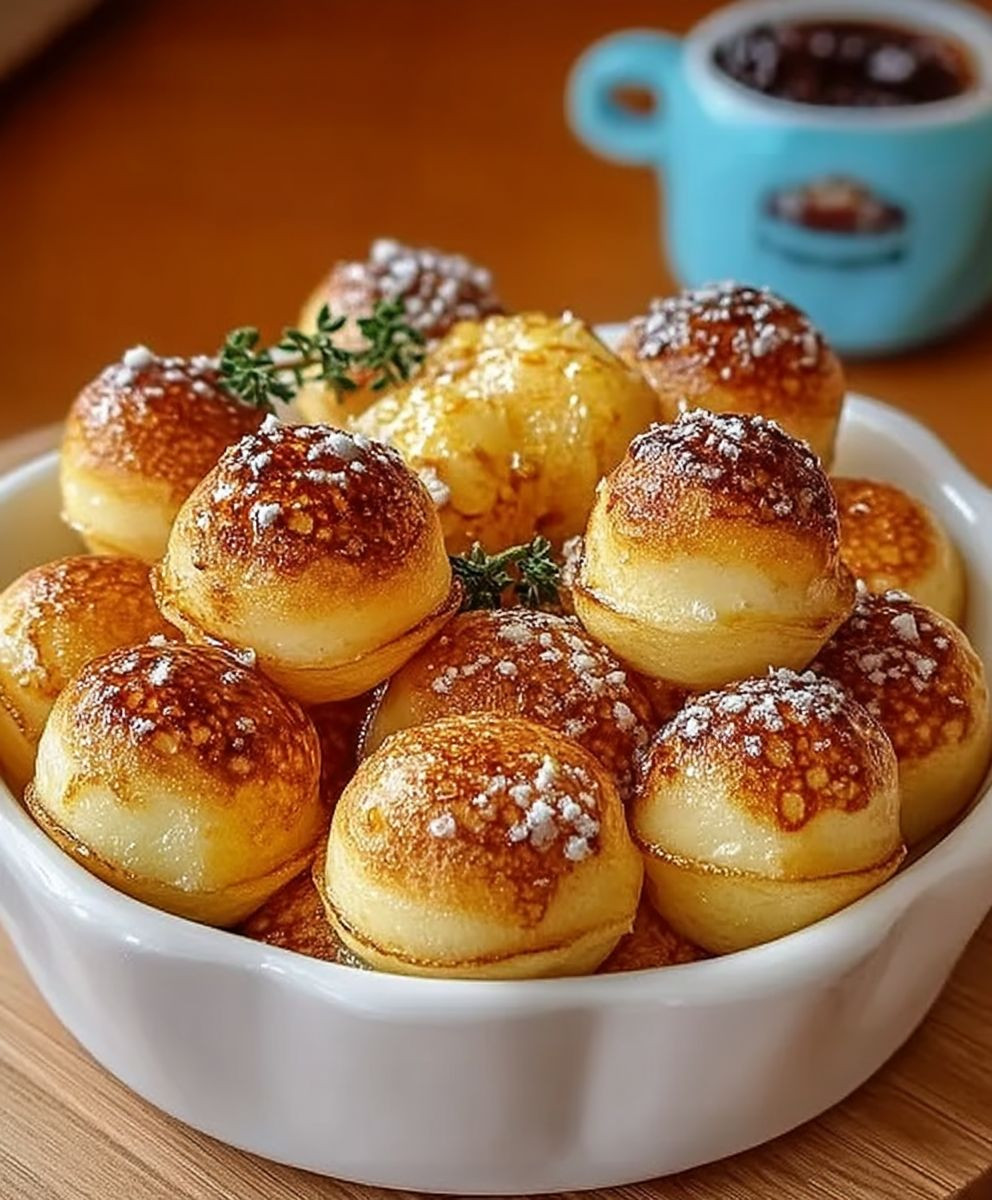
Pancake poppers: bite-sized bursts of breakfast bliss that are about to revolutionize your mornings! Forget standing over a hot griddle flipping pancakes one at a time. Imagine popping perfectly round, golden-brown spheres of fluffy goodness straight into your mouth. Intrigued? You should be!
While the history of pancakes stretches back centuries, with variations found in cultures worldwide, pancake poppers are a relatively modern invention, born from the desire for convenience and, let’s be honest, pure fun! They take the classic comfort of pancakes and shrink it down to a delightful, easily manageable size. Think of them as the playful, younger sibling of the traditional pancake stack.
What makes these little delights so irresistible? It’s a combination of factors. First, there’s the taste: that familiar, comforting blend of sweet and savory that makes pancakes a breakfast staple. Then, there’s the texture: a slightly crispy exterior giving way to a soft, pillowy interior. But perhaps the biggest draw is the convenience. They’re perfect for busy mornings, kid-friendly snacks, or even a fun dessert. Plus, they’re incredibly versatile – dip them in syrup, dust them with powdered sugar, or even add chocolate chips or berries to the batter for a personalized touch. Get ready to experience pancakes in a whole new, poppable way!
Ingredients:
- 1 ½ cups all-purpose flour
- 3 ½ teaspoons baking powder
- ¼ teaspoon baking soda
- 1 teaspoon salt
- 1 tablespoon granulated sugar
- 1 ¼ cups milk
- 1 large egg, lightly beaten
- 3 tablespoons unsalted butter, melted
- 1 teaspoon vanilla extract
- Vegetable oil, for cooking
- Optional toppings: Maple syrup, powdered sugar, fresh berries, chocolate chips, whipped cream, sprinkles
Preparing the Batter:
- In a large bowl, whisk together the flour, baking powder, baking soda, salt, and sugar. This ensures that the dry ingredients are evenly distributed, which is crucial for a light and fluffy texture. I like to use a whisk for this step to really incorporate air into the mixture.
- In a separate bowl, whisk together the milk, egg, melted butter, and vanilla extract. Make sure the butter isn’t too hot when you add it to the egg mixture, or you might end up with scrambled eggs! Room temperature or slightly cooled melted butter is ideal.
- Pour the wet ingredients into the dry ingredients and gently fold until just combined. Be careful not to overmix! Overmixing develops the gluten in the flour, which can result in tough pancakes. A few lumps are perfectly fine. The batter should be thick but pourable.
- Let the batter rest for 5-10 minutes. This allows the gluten to relax and the baking powder to activate, resulting in even lighter and fluffier pancake poppers. I usually use this time to prepare my toppings and get my cooking station ready.
Cooking Process:
- Heat a lightly oiled griddle or frying pan over medium heat. You can test if the pan is hot enough by flicking a few drops of water onto the surface. If the water sizzles and evaporates quickly, the pan is ready. If it just sits there, it needs more time.
- Using a small cookie scoop or a spoon, drop rounded tablespoons of batter onto the hot griddle. I find that a cookie scoop helps to create uniform poppers, but a spoon works just as well. Leave a little space between each popper so they have room to expand.
- Cook for 2-3 minutes per side, or until golden brown and cooked through. You’ll know they’re ready to flip when bubbles start to form on the surface and the edges look set. Use a thin spatula to carefully flip the poppers.
- To check if they’re cooked through, you can insert a toothpick into the center of a popper. If it comes out clean, they’re done. If it comes out with wet batter, cook them for another minute or two.
- Remove the cooked pancake poppers from the griddle and place them on a wire rack to cool slightly. This helps to prevent them from becoming soggy.
- Repeat with the remaining batter, adding more oil to the griddle as needed. It’s important to keep the griddle lightly oiled to prevent the poppers from sticking.
Tips for Perfect Pancake Poppers:
- Don’t overmix the batter: This is the most important tip for achieving light and fluffy pancake poppers. Overmixing develops the gluten in the flour, which can result in tough pancakes.
- Use a hot griddle: A hot griddle is essential for achieving a golden-brown crust and preventing the poppers from sticking.
- Don’t overcrowd the griddle: Overcrowding the griddle will lower the temperature and result in unevenly cooked poppers.
- Use a cookie scoop: A cookie scoop helps to create uniform poppers, which cook more evenly.
- Keep the griddle lightly oiled: This will prevent the poppers from sticking and ensure a golden-brown crust.
- Let the batter rest: Letting the batter rest for 5-10 minutes allows the gluten to relax and the baking powder to activate, resulting in even lighter and fluffier pancake poppers.
- Adjust the heat as needed: If the poppers are browning too quickly, lower the heat. If they’re not browning enough, increase the heat.
- Keep cooked poppers warm: Place the cooked poppers in a warm oven (200°F) until ready to serve. This will prevent them from becoming cold and soggy.
Variations and Add-ins:
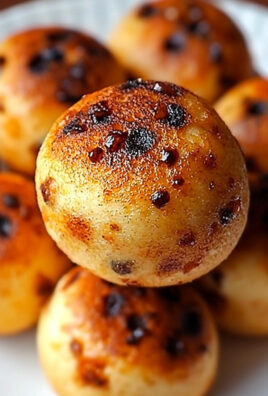
- Chocolate Chip Pancake Poppers: Add ½ cup of chocolate chips to the batter before cooking. I prefer semi-sweet chocolate chips, but you can use any kind you like.
- Blueberry Pancake Poppers: Add ½ cup of fresh or frozen blueberries to the batter before cooking. If using frozen blueberries, don’t thaw them first.
- Banana Pancake Poppers: Mash one ripe banana and add it to the batter before cooking. This will add a delicious banana flavor and make the poppers extra moist.
- Cinnamon Roll Pancake Poppers: Swirl a mixture of melted butter, cinnamon, and brown sugar into the batter before cooking. This will create a delicious cinnamon roll flavor.
- Savory Pancake Poppers: Omit the sugar and add chopped cooked bacon, shredded cheese, or diced vegetables to the batter before cooking. These are great for a savory breakfast or brunch.
- Gluten-Free Pancake Poppers: Use a gluten-free all-purpose flour blend in place of the regular flour. Make sure to choose a blend that contains xanthan gum, which will help to bind the batter.
- Vegan Pancake Poppers: Use plant-based milk and a flax egg (1 tablespoon ground flaxseed mixed with 3 tablespoons water) in place of the regular milk and egg. Make sure to use vegan butter or oil for cooking.
Serving Suggestions:
- Serve the pancake poppers warm with your favorite toppings, such as maple syrup, powdered sugar, fresh berries, chocolate chips, whipped cream, or sprinkles.
- Thread the poppers onto skewers for a fun and festive presentation.
- Serve them as part of a pancake bar with a variety of toppings and sauces.
- Pack them in lunchboxes for a sweet treat.
- Enjoy them as a quick and easy breakfast or snack.
Storage Instructions:
- Store leftover pancake poppers in an airtight container in the refrigerator for up to 3 days.
- Reheat them in the microwave, oven, or toaster oven until warmed through.
- You can also freeze the pancake poppers for longer storage. Place them in a single layer on a baking sheet and freeze for 1-2 hours, or until solid. Then, transfer them to a freezer bag or container and store for up to 2 months. Reheat from frozen in the microwave, oven, or toaster oven.
Detailed Explanation of Ingredients:
- All-Purpose Flour: This is the base of the pancake poppers, providing structure and texture. I recommend using unbleached all-purpose flour for the best results.
- Baking Powder: This is a leavening agent that helps the pancake poppers rise and become light and fluffy. Make sure your baking powder is fresh, as it loses its potency over time.
- Baking Soda: This is another leavening agent that helps to create a light and airy texture. It also reacts with the acidity in the milk to create carbon dioxide, which further helps the poppers rise.
- Salt: Salt enhances the flavor of the pancake poppers and balances the sweetness.
- Granulated Sugar: Sugar adds sweetness and helps to create a golden-brown crust. You can adjust the amount of sugar to your liking.
- Milk: Milk provides moisture and helps to create a smooth batter. You can use any type of milk you like, including dairy or non-dairy milk.
- Egg: The egg binds the ingredients together and adds richness and moisture. It also helps to create a light and fluffy texture.
- Unsalted Butter: Melted butter adds flavor and richness to the pancake poppers. You can use salted butter if you prefer, but reduce the amount of salt in the recipe accordingly.
- Vanilla Extract: Vanilla extract enhances the flavor of the pancake poppers. You can use pure vanilla extract or imitation vanilla extract.
- Vegetable Oil: Vegetable oil is used to grease the griddle and prevent the pancake poppers from sticking. You can use any type of vegetable oil you like, such as canola oil, sunflower oil, or corn oil.
Troubleshooting:
- Pancake poppers are too flat: This could be due to several factors, such as using old baking powder, overmixing the batter, or not using a
Conclusion:
And there you have it! These Pancake Poppers are truly a game-changer for breakfast, brunch, or even a fun dessert. I know, I know, I might be a little biased, but trust me on this one. The combination of fluffy, bite-sized pancakes and endless topping possibilities makes them an absolute must-try. They’re quick, easy, and incredibly satisfying – what more could you ask for?
Why are these Pancake Poppers a must-try? Well, for starters, they’re perfect for portion control. No more struggling to finish a giant stack of pancakes! These little guys are just the right size for a quick and delicious bite. Plus, they’re incredibly versatile. You can customize them with your favorite flavors and toppings to create a truly unique and personalized breakfast experience. Think chocolate chips, blueberries, sprinkles, or even a savory twist with some crumbled bacon and cheese. The possibilities are endless!
But the real magic lies in their simplicity. This recipe requires minimal ingredients and effort, making it perfect for busy mornings or when you just don’t feel like spending hours in the kitchen. And let’s be honest, who doesn’t love a good shortcut? These Pancake Poppers deliver all the deliciousness of traditional pancakes without all the fuss.
Serving Suggestions and Variations:
Don’t be afraid to get creative with your toppings! Classic maple syrup is always a winner, but why not try something a little different? A drizzle of honey, a dollop of whipped cream, or a sprinkle of powdered sugar can elevate these poppers to a whole new level. For a more decadent treat, try dipping them in melted chocolate or Nutella.
If you’re feeling adventurous, you can even experiment with different pancake batter flavors. Add a teaspoon of vanilla extract for a hint of sweetness, or a pinch of cinnamon for a warm and cozy flavor. For a healthier option, try using whole wheat flour or adding some mashed banana to the batter.
Here are a few of my favorite variations:
* Chocolate Chip Pancake Poppers: Simply add chocolate chips to the batter before baking.
* Blueberry Pancake Poppers: Fold in fresh or frozen blueberries for a burst of fruity flavor.
* Cinnamon Roll Pancake Poppers: Swirl a mixture of cinnamon, sugar, and melted butter into the batter before baking.
* Savory Pancake Poppers: Add crumbled bacon, shredded cheese, and chopped chives to the batter for a savory twist.These Pancake Poppers are also fantastic for kids! They’re easy to eat, fun to decorate, and a great way to get them involved in the cooking process. Let them choose their own toppings and create their own unique flavor combinations. It’s a guaranteed way to make breakfast a little more exciting.
I truly believe that this recipe will become a staple in your kitchen. It’s a crowd-pleaser, a time-saver, and a guaranteed way to start your day off right. So, what are you waiting for? Grab your ingredients, preheat your oven, and get ready to experience the joy of Pancake Poppers!
I’m so excited for you to try this recipe! Once you do, I’d love to hear about your experience. What toppings did you use? What variations did you try? Did your family love them as much as mine does? Share your photos and stories in the comments below. I can’t wait to see what you create! Happy cooking!
Pancake Poppers: The Ultimate Guide to Delicious Bite-Sized Treats
Fluffy, bite-sized pancake poppers, easy to make and customizable with your favorite toppings for a fun breakfast or snack!
By: LilyCategory: BreakfastDifficulty: EasyCuisine: AmericanYield: 24 pancake poppersDietary: VegetarianIngredients
Instructions
Recipe Notes
- Don’t overmix the batter: This is the most important tip for achieving light and fluffy pancake poppers.
- Use a hot griddle: A hot griddle is essential for achieving a golden-brown crust and preventing the poppers from sticking.
- Let the batter rest: Letting the batter rest for 5-10 minutes allows the gluten to relax and the baking powder to activate, resulting in even lighter and fluffier pancake poppers.
- Variations: Add chocolate chips, blueberries, mashed banana, or swirl in cinnamon roll filling. For savory poppers, omit the sugar and add bacon, cheese, or vegetables.
- Serving Suggestions: Serve warm with your favorite toppings like maple syrup, powdered sugar, berries, chocolate chips, whipped cream, or sprinkles.
- Storage Instructions: Store leftover pancake poppers in an airtight container in the refrigerator for up to 3 days. Reheat in the microwave, oven, or toaster oven. You can also freeze them for longer storage.
Frequently Asked Questions
→ How do I ensure the bread stays moist?Use fresh, ripe ingredients and avoid overmixing the batter. Store in an airtight container.→ Can I substitute ingredients?Yes, you can substitute similar ingredients while maintaining the basic ratios for best results.→ How long does this bread keep?Store tightly wrapped at room temperature for 2-3 days, or refrigerate for up to a week.→ What if I don't have all the spices?You can adjust spices to taste or substitute with similar warming spices.→ Can I freeze this bread?Yes, wrap individual slices and freeze for up to 3 months. Thaw at room temperature before serving.

