Philly Cheese Steak Sandwich: just the name conjures images of sizzling steak, melted cheese, and a soft, chewy roll. But have you ever tried making one at home that truly rivals the iconic originals found on the streets of Philadelphia? I’m here to tell you, it’s absolutely possible, and I’m going to show you how!
This isn’t just any sandwich; it’s a cultural icon. Born in the early 20th century in South Philadelphia, the Philly Cheese Steak quickly became a local favorite, and its popularity has since exploded across the nation. Legend has it that the original was created by brothers Pat and Harry Olivieri, who initially sold steak sandwiches without cheese. The addition of provolone came later, and the rest, as they say, is history.
What makes the Philly Cheese Steak Sandwich so irresistible? It’s the perfect combination of textures and flavors. The thinly sliced steak is tender and juicy, the melted cheese adds a creamy richness, and the soft roll provides the perfect vessel for all that deliciousness. Whether you prefer yours with provolone, Cheez Whiz, or onions, there’s a version of this classic sandwich to satisfy every craving. Plus, it’s relatively quick and easy to make, making it a perfect weeknight meal or a crowd-pleasing option for game day. So, let’s get started and bring a taste of Philadelphia to your kitchen!

Ingredients:
- 1 pound thinly sliced ribeye steak (or shaved steak)
- 1 large onion, thinly sliced
- 2 bell peppers (1 green, 1 red), thinly sliced
- 4 hoagie rolls (about 6-8 inches long), soft and preferably Amoroso’s if available
- 4 slices provolone cheese (or white American cheese)
- 2 tablespoons olive oil
- 1 tablespoon butter
- 1 teaspoon garlic powder
- 1/2 teaspoon onion powder
- 1/4 teaspoon black pepper
- 1/4 teaspoon salt (or to taste)
- Optional: Cheese Wiz or other cheese sauce
- Optional: Hot sauce
Preparing the Vegetables:
First things first, let’s get our veggies prepped and ready to go. This will make the cooking process much smoother and faster. Trust me, you don’t want to be scrambling to chop onions while your steak is sizzling!
- Slice the Onion: Peel the onion and cut it in half from top to bottom. Place the flat side down on your cutting board and thinly slice it into half-moons. You want them to be thin enough to cook quickly and evenly.
- Slice the Bell Peppers: Wash the bell peppers thoroughly. Cut off the top and bottom, then slice down the sides to remove the core and seeds. Lay the pepper flat and slice it into thin strips, similar to the onions. I like to use a mix of green and red peppers for color and a slightly different flavor profile, but you can use whatever you prefer.
Cooking the Steak and Vegetables:
Now for the main event! This is where the magic happens. We’re going to cook the steak and vegetables together to create that classic Philly cheesesteak flavor.
- Heat the Oil and Butter: In a large skillet or griddle over medium-high heat, add the olive oil and butter. The combination of oil and butter helps to prevent the butter from burning and adds a rich flavor to the steak and vegetables. Let the oil and butter melt and heat up until shimmering.
- Sauté the Vegetables: Add the sliced onions and bell peppers to the skillet. Sauté them, stirring occasionally, until they are softened and slightly caramelized. This usually takes about 8-10 minutes. You want them to be tender and have a nice, slightly sweet flavor. Don’t rush this step; the caramelized onions and peppers are key to the overall taste.
- Season the Vegetables: Sprinkle the vegetables with garlic powder, onion powder, salt, and pepper. Stir to combine and cook for another minute or two, allowing the spices to bloom and release their flavors.
- Move Vegetables to the Side: Once the vegetables are cooked to your liking, push them to one side of the skillet or remove them to a separate bowl. This will give you space to cook the steak.
- Cook the Steak: Add the thinly sliced ribeye steak to the skillet. If you’re using a smaller skillet, you may need to cook the steak in batches to avoid overcrowding the pan. Overcrowding will lower the temperature of the pan and cause the steak to steam instead of sear.
- Break Up the Steak: Use a spatula to break up the steak into smaller pieces as it cooks. This will make it easier to distribute the steak evenly on the hoagie rolls.
- Season the Steak: Sprinkle the steak with a little more salt and pepper to taste. Remember, the steak is the star of the show, so don’t be afraid to season it generously.
- Cook the Steak to Your Liking: Cook the steak until it is browned and cooked through, about 3-5 minutes, depending on the thickness of the slices and your desired level of doneness. Be careful not to overcook the steak, as it will become tough and dry. You want it to be tender and juicy.
- Combine Steak and Vegetables: Once the steak is cooked, mix it with the sautéed onions and bell peppers. Stir everything together to combine the flavors.
Assembling the Cheesesteaks:
Almost there! Now it’s time to assemble our delicious Philly cheesesteaks. This is the final step, so let’s make it count.
- Prepare the Hoagie Rolls: If desired, you can lightly toast the hoagie rolls in the oven or on a grill. This will help to prevent them from getting soggy when you add the steak and cheese. I personally prefer them toasted for a little extra crunch.
- Add the Cheese: Divide the steak and vegetable mixture into four equal portions. Place each portion on a hoagie roll. Top each portion with a slice of provolone cheese (or white American cheese).
- Melt the Cheese: There are a few ways to melt the cheese. The easiest way is to place the assembled cheesesteaks under a broiler for a minute or two, until the cheese is melted and bubbly. Watch them carefully to prevent the bread from burning. Alternatively, you can cover the skillet with a lid for a minute or two, allowing the cheese to melt from the residual heat. You can also use a culinary torch to melt the cheese for a more visually appealing result.
- Add Optional Toppings: If desired, add any optional toppings, such as Cheese Wiz or hot sauce. Cheese Wiz is a classic Philly cheesesteak topping, but it’s not for everyone. Hot sauce adds a nice kick of heat.
- Serve Immediately: Serve the Philly cheesesteaks immediately while they are hot and the cheese is melted and gooey. Enjoy!
Tips for the Best Philly Cheesesteak:
- Use High-Quality Steak: The quality of the steak is crucial for a great Philly cheesesteak. Ribeye is the traditional choice, but you can also use sirloin or flank steak. Make sure the steak is thinly sliced for the best results.
- Don’t Overcook the Steak: Overcooked steak will be tough and dry. Cook the steak just until it is browned and cooked through.
- Caramelize the Onions and Peppers: Caramelized onions and peppers add a depth of flavor to the cheesesteak. Don’t rush this step.
- Use Soft Hoagie Rolls: Soft hoagie rolls are essential for a good Philly cheesesteak. Amoroso’s rolls are the gold standard, but any soft, slightly chewy hoagie roll will work.
- Melt the Cheese Properly: Melted cheese is a must for a Philly cheesesteak. Use a broiler, lid, or culinary torch to melt the cheese until it is bubbly and gooey.
- Don’t Be Afraid to Experiment: Feel free to experiment with different toppings and variations to create your own signature Philly cheesesteak.
Variations:
- Pizza Cheesesteak: Add marinara sauce and mozzarella cheese for a pizza-inspired cheesesteak.
- Mushroom Cheesesteak: Add sautéed mushrooms to the steak and vegetable mixture.
- Buffalo Cheesesteak: Toss the steak in buffalo sauce and top with blue cheese dressing.
- Chicken Cheesesteak: Substitute thinly sliced chicken breast for the ribeye steak.
Storage:
Leftover Philly cheesesteaks can be stored in the refrigerator for up to 3 days. To reheat, wrap the cheesesteak in foil and bake in a preheated oven at 350°F (175°C) for about 15-20 minutes, or until heated through. You can also reheat them in a skillet over medium heat, but the bread may become a little soggy.
I hope you enjoy this recipe for Philly cheesesteak sandwiches! It’s a classic dish that’s sure to please everyone. Feel free to customize it to your liking and make it your own. Happy cooking!
Conclusion:
Okay, friends, let’s be honest – if you’ve made it this far, you’re already craving a Philly Cheese Steak Sandwich, and I don’t blame you! This isn’t just another sandwich; it’s an experience, a taste of Philadelphia right in your own kitchen. The combination of thinly sliced, perfectly seasoned steak, the melt-in-your-mouth cheese, and those soft, chewy rolls is simply irresistible. It’s the kind of meal that satisfies on every level, from the first bite to the last.
But why is this recipe a must-try? Because it’s authentic, it’s achievable, and it’s customizable. I’ve broken down each step to ensure even a novice cook can create a truly delicious and satisfying Philly Cheese Steak. Forget those pale imitations you might find elsewhere; this recipe delivers the real deal, the kind that makes you close your eyes and savor every single morsel.
And the best part? You can make it your own! While I’m a purist at heart, I also love experimenting. For a classic touch, stick with provolone or American cheese. But if you’re feeling adventurous, try using a sharp cheddar or even a creamy Havarti for a different flavor profile. Want to add some heat? A sprinkle of red pepper flakes or a drizzle of hot sauce will do the trick.
Serving suggestions? Keep it simple! A side of crispy fries or a classic coleslaw complements the richness of the sandwich perfectly. Or, for a lighter option, try a fresh green salad with a vinaigrette dressing. You could even cut the sandwiches into smaller portions and serve them as appetizers at your next gathering. Imagine the look on your guests’ faces when they bite into these mini masterpieces!
But don’t just take my word for it. The real magic happens when you get into the kitchen and create your own Philly Cheese Steak Sandwich masterpiece. I’ve poured my heart and soul into perfecting this recipe, and I’m confident you’ll love it as much as I do.
So, what are you waiting for? Gather your ingredients, fire up your skillet, and prepare to be amazed. I promise, this is one culinary adventure you won’t regret. And once you’ve tasted the deliciousness for yourself, I want to hear all about it! Share your photos, your variations, and your experiences in the comments below. Let’s build a community of Philly Cheese Steak lovers, one delicious sandwich at a time. I can’t wait to see what you create! Let me know if you prefer onions or peppers, or both! I’m always looking for new ways to enjoy this classic sandwich.
Remember, cooking should be fun and rewarding. Don’t be afraid to experiment and make this recipe your own. And most importantly, enjoy the process and the delicious results! Happy cooking!
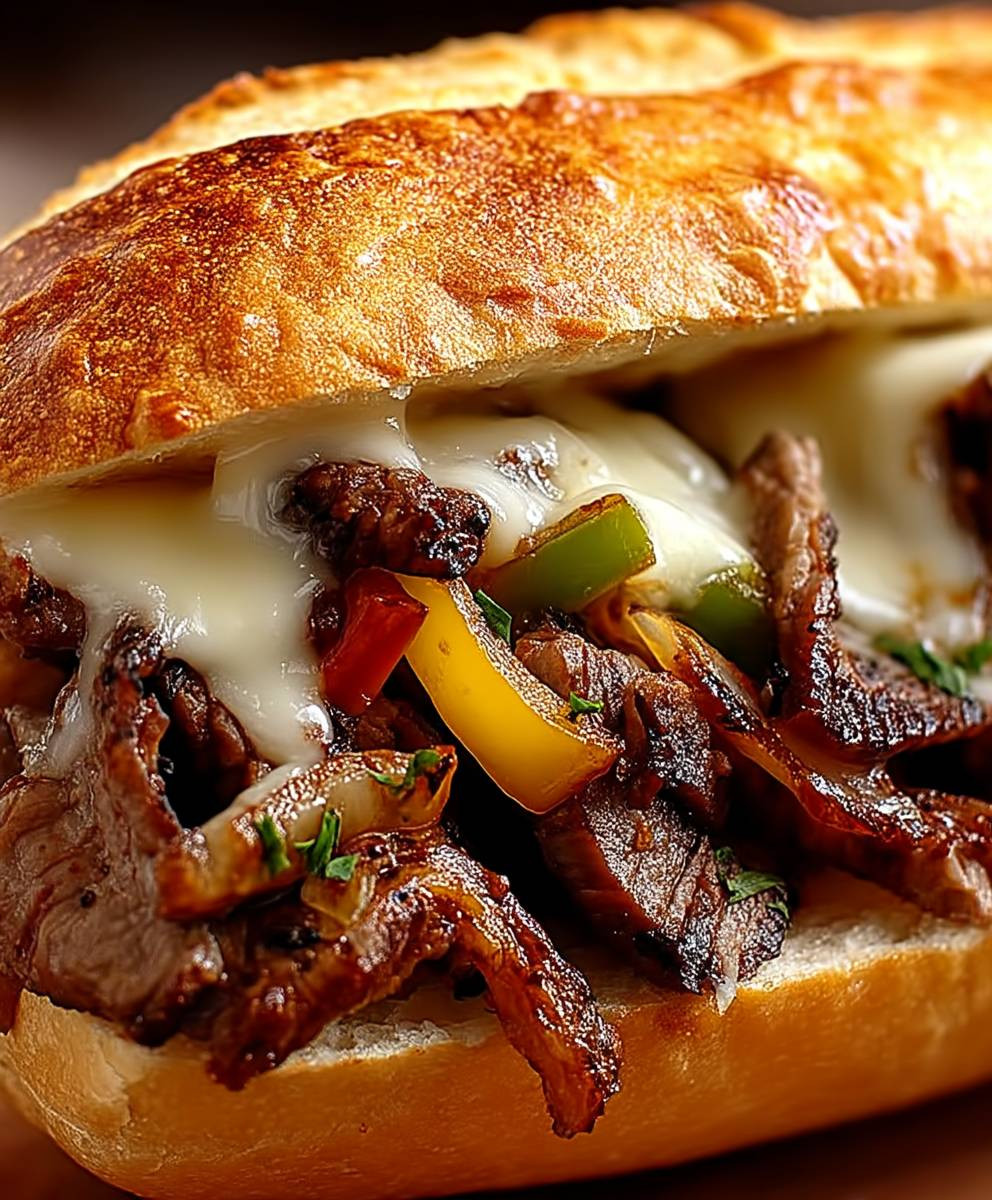
Philly Cheese Steak Sandwich: The Ultimate Guide to Making It at Home
Classic Philly Cheesesteak with thinly sliced ribeye, caramelized onions and peppers, and melted provolone cheese on a soft hoagie roll.
Ingredients
Instructions
Recipe Notes
- Use high-quality, thinly sliced ribeye steak for the best results.
- Don’t overcook the steak.
- Caramelize the onions and peppers for a deeper flavor.
- Use soft hoagie rolls.
- Melt the cheese properly for a gooey texture.
- Experiment with different toppings and variations.
- Leftovers can be stored in the refrigerator for up to 3 days. Reheat in the oven or skillet.