Philly Cheesesteak Breadsticks are a delightful twist on the classic Philadelphia favorite that many of us know and love. Imagine the rich, savory flavors of a traditional cheesesteak, all wrapped up in a warm, cheesy breadstick. This recipe not only pays homage to the iconic sandwich but also brings a fun and shareable element to your dining experience. The history of the cheesesteak dates back to the 1930s in Philadelphia, where it quickly became a beloved street food. Today, people adore Philly Cheesesteak Breadsticks for their irresistible combination of tender steak, gooey cheese, and the satisfying crunch of baked bread. Whether you’re hosting a game day gathering or simply craving a comforting snack, these breadsticks are the perfect solution. Trust me, once you try them, you’ll understand why they have become a favorite in my kitchen!

Ingredients:
- 1 pound of ground beef
- 1 tablespoon olive oil
- 1 medium onion, finely chopped
- 1 green bell pepper, finely chopped
- 1 cup mushrooms, sliced (optional)
- 2 cloves garlic, minced
- 1 teaspoon Worcestershire sauce
- Salt and pepper to taste
- 1 package (13.8 oz) refrigerated pizza dough
- 8 ounces provolone cheese, sliced
- 1 cup shredded mozzarella cheese
- 1 egg, beaten (for egg wash)
- 1 tablespoon Italian seasoning (optional)
Preparing the Filling
1. In a large skillet, heat the olive oil over medium heat. Once hot, add the chopped onion and green bell pepper. Sauté for about 3-4 minutes until they start to soften. 2. If you’re using mushrooms, add them to the skillet now and cook for an additional 2-3 minutes until they are tender. 3. Add the minced garlic to the skillet and cook for another minute, stirring frequently to prevent burning. 4. Increase the heat to medium-high and add the ground beef to the skillet. Break it up with a spatula and cook until browned, about 5-7 minutes. Make sure to drain any excess fat if necessary. 5. Stir in the Worcestershire sauce, and season with salt, pepper, and Italian seasoning if using. Mix well and let it cook for another minute. Remove from heat and set aside to cool slightly.Preparing the Dough
6. Preheat your oven to 400°F (200°C). Line a baking sheet with parchment paper to prevent sticking. 7. Unroll the refrigerated pizza dough onto a lightly floured surface. If the dough is too thick, you can roll it out gently with a rolling pin to about ¼ inch thickness. 8. Once the dough is rolled out, cut it into rectangles, approximately 4 inches by 6 inches. You should be able to get about 8-10 rectangles, depending on how you cut them.Assembling the Breadsticks
9. Take a rectangle of dough and place a generous spoonful of the beef filling in the center. Be careful not to overfill, as this can make sealing difficult. 10. Lay a slice of provolone cheese over the filling, followed by a sprinkle of shredded mozzarella cheese. 11. Fold the dough over the filling to create a pocket. Pinch the edges together to seal, ensuring no filling escapes during baking. You can use a fork to crimp the edges for a decorative touch. 12. Repeat this process with the remaining rectangles of dough and filling until everything is assembled.Finishing Touches
13. Place the assembled breadsticks on the prepared baking sheet, leaving some space between each one to allow for expansion. 14. Brush the tops of the breadsticks with the beaten egg. This will give them a beautiful golden color when baked. 15. If you like, you can sprinkle a little extra Italian seasoning or some grated Parmesan cheese on top for added flavor.Baking the Breadsticks
16. Place the baking sheet in the preheated oven and bake for 15-20 minutes, or until the breadsticks are golden brown and the cheese is melted and bubbly. 17. Once baked, remove the breadsticks from the oven and let them cool for a few minutes on the baking sheet.Serving Suggestions
18. Serve the Philly cheesesteak breadsticks warm, with a side of marinara sauce or your favorite dipping sauce. They make a fantastic appetizer or a fun main dish! 19. If you have any leftovers (which is rare, but it happens!), store them in an airtight container in the refrigerator for up to 3 days. Reheat in the oven or microwave before serving.Tips and Variations
20. Feel free to customize the filling! You can add jalapeños for a spicy kick, or swap out the ground beef for shredded chicken or turkey. 21. For a vegetarian version, use a mix of sautéed vegetables like zucchini, spinach, and eggplant instead of meat. 22. If you want to make these ahead of time, you can assemble the breadsticks and freeze them before baking. Just place them on a baking sheet, freeze until solid, then transfer to a freezer bag. When you’re ready to bake, just add a few extra minutes to the baking time. 23. Experiment with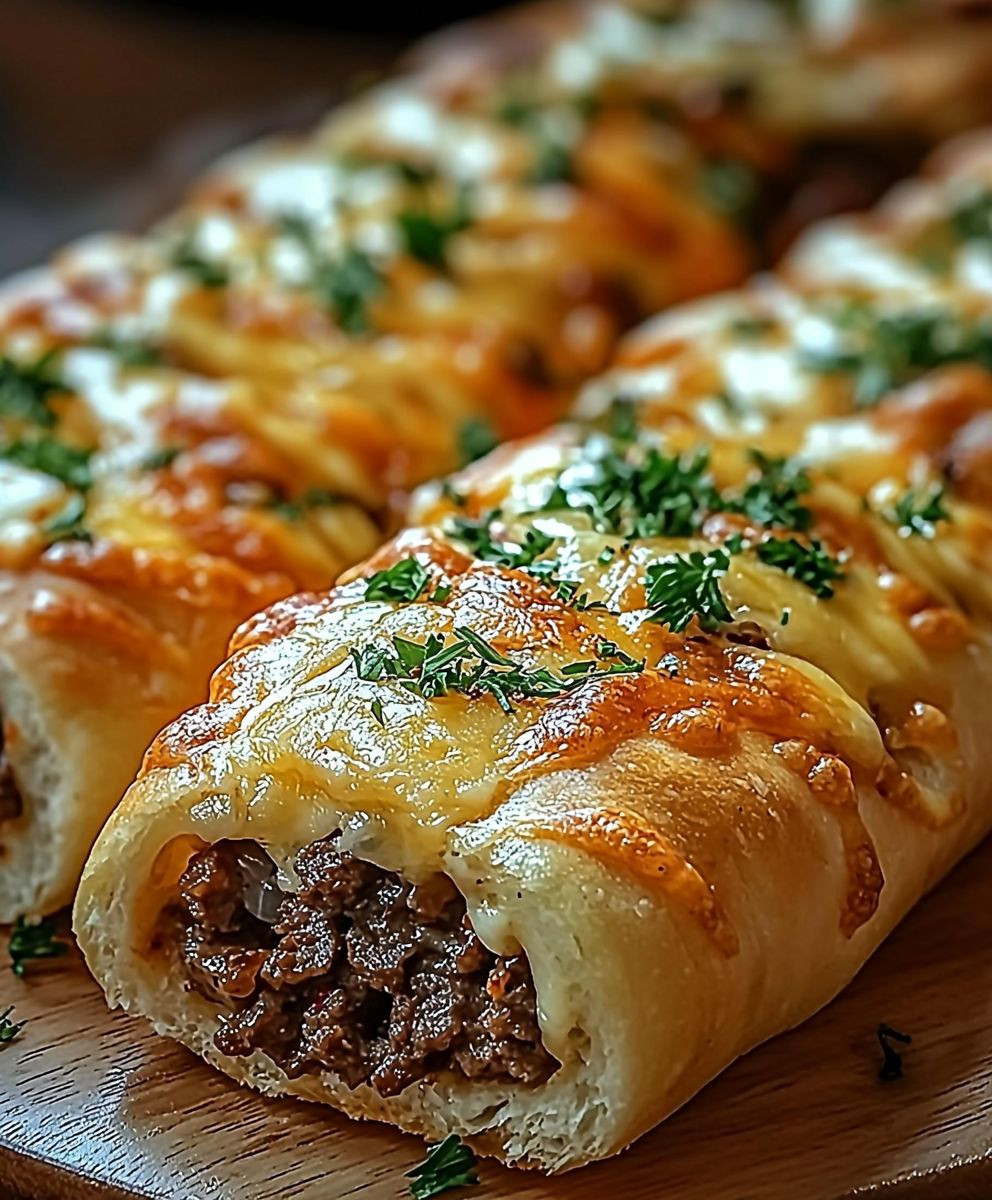
Conclusion:
In conclusion, these Philly Cheesesteak Breadsticks are an absolute must-try for anyone looking to elevate their snack game or impress guests at their next gathering. The combination of tender steak, gooey cheese, and the perfect blend of seasonings wrapped in a warm, golden breadstick is simply irresistible. Whether you serve them as an appetizer, a game-day snack, or even as a fun twist on dinner, they are sure to be a hit with everyone. For a delightful variation, consider adding sautéed onions and peppers for an extra layer of flavor, or switch up the cheese with provolone or pepper jack for a spicy kick. You can also experiment with different dipping sauces, such as a zesty marinara or a creamy ranch, to complement the rich flavors of the breadsticks. I encourage you to give this recipe a try and share your experience with friends and family. I would love to hear how your Philly Cheesesteak Breadsticks turn out and any creative twists you add to make them your own. So roll up your sleeves, gather your ingredients, and get ready to enjoy a delicious treat that will have everyone coming back for more! Print
Philly Cheesesteak Breadsticks: A Delicious Twist on a Classic Favorite
- Total Time: 40 minutes
- Yield: 8–10 breadsticks 1x
Description
These Philly Cheesesteak Breadsticks are a delicious twist on the classic sandwich, featuring a savory filling of ground beef, sautéed vegetables, and melted cheese, all wrapped in flaky pizza dough. Perfect for appetizers or main dishes, they are sure to impress at any gathering!
Ingredients
- 1 pound of ground beef
- 1 tablespoon olive oil
- 1 medium onion, finely chopped
- 1 green bell pepper, finely chopped
- 1 cup mushrooms, sliced (optional)
- 2 cloves garlic, minced
- 1 teaspoon Worcestershire sauce
- Salt and pepper to taste
- 1 package (13.8 oz) refrigerated pizza dough
- 8 ounces provolone cheese, sliced
- 1 cup shredded mozzarella cheese
- 1 egg, beaten (for egg wash)
- 1 tablespoon Italian seasoning (optional)
Instructions
- In a large skillet, heat the olive oil over medium heat. Add the chopped onion and green bell pepper, sautéing for 3-4 minutes until softened. If using mushrooms, add them now and cook for an additional 2-3 minutes. Stir in the minced garlic and cook for another minute.
- Increase the heat to medium-high and add the ground beef, breaking it up with a spatula. Cook until browned, about 5-7 minutes, draining any excess fat. Stir in Worcestershire sauce, season with salt, pepper, and Italian seasoning if using. Remove from heat and let cool slightly.
- Preheat your oven to 400°F (200°C) and line a baking sheet with parchment paper. Unroll the pizza dough onto a floured surface, rolling it out to about ¼ inch thickness if necessary. Cut into rectangles, approximately 4 inches by 6 inches.
- Place a generous spoonful of the beef filling in the center of each rectangle. Top with a slice of provolone cheese and a sprinkle of mozzarella. Fold the dough over the filling to create a pocket, pinching the edges to seal. Use a fork to crimp the edges if desired.
- Place the assembled breadsticks on the prepared baking sheet, leaving space between each. Brush the tops with the beaten egg and sprinkle with extra Italian seasoning or grated Parmesan cheese if desired.
- Bake in the preheated oven for 15-20 minutes, or until golden brown and the cheese is melted and bubbly. Let cool for a few minutes before serving.
Notes
- Serve warm with marinara sauce or your favorite dipping sauce.
- Leftovers can be stored in an airtight container in the refrigerator for up to 3 days. Reheat in the oven or microwave.
- Customize the filling with jalapeños for spice, or swap ground beef for shredded chicken or turkey. For a vegetarian option, use sautéed vegetables.
- Prep Time: 20 minutes
- Cook Time: 20 minutes