Pineapple upside down cakes! Just the name conjures up images of golden, caramelized sweetness and a delightfully retro dessert. Have you ever wondered about the magic behind this classic treat? It’s more than just a cake; it’s a slice of history, a testament to resourceful baking, and a guaranteed crowd-pleaser.
While the exact origins are debated, the concept of upside-down cakes dates back centuries, with variations appearing in different cultures. The modern pineapple version gained immense popularity in the early 20th century, thanks in part to the commercial availability of canned pineapple. This tropical fruit, once a symbol of luxury, became accessible to home bakers, sparking a wave of culinary creativity.
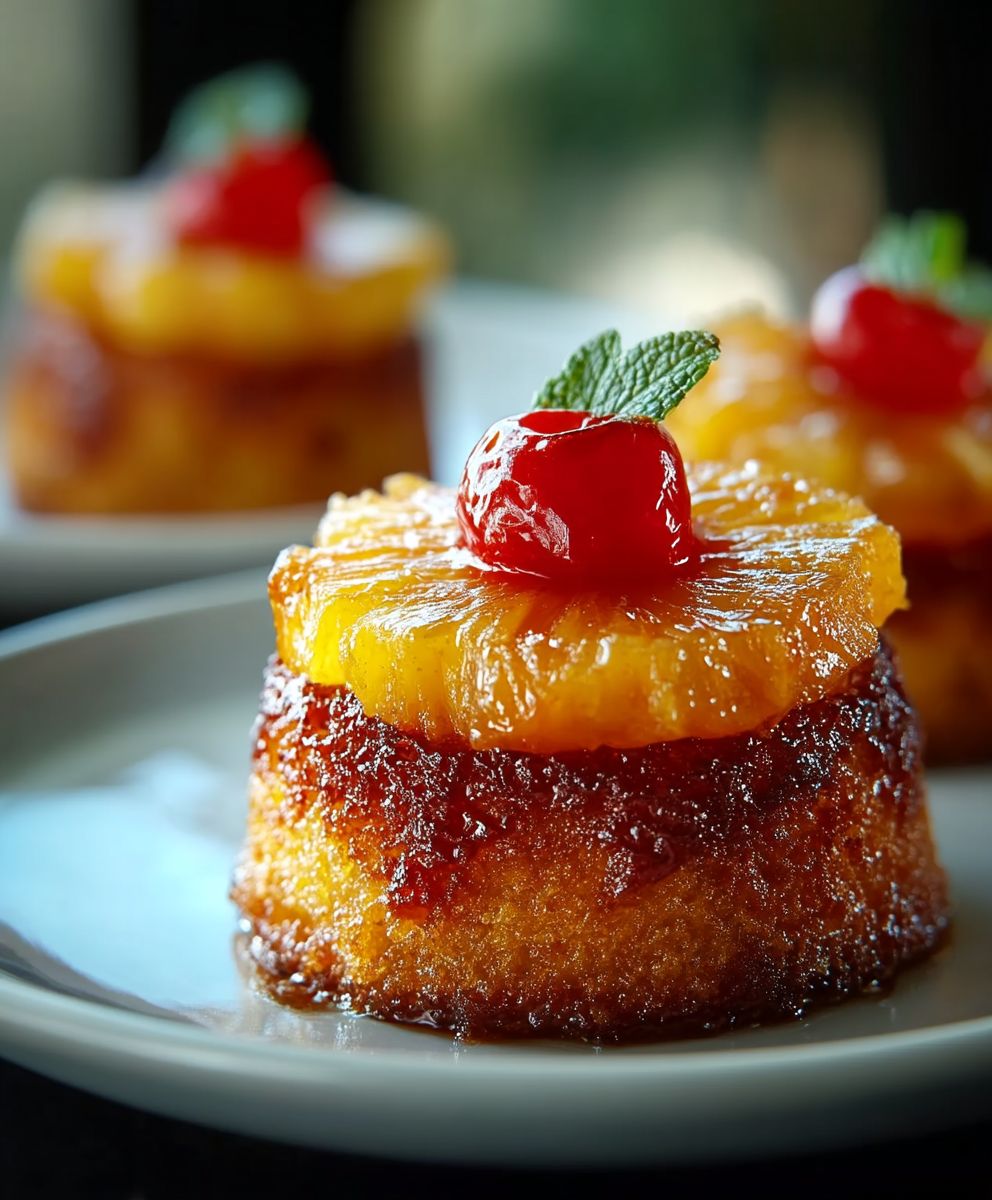
What makes pineapple upside down cakes so irresistible? It’s the perfect combination of textures and flavors. The moist, buttery cake contrasts beautifully with the soft, tangy pineapple and the rich, caramel topping. The visual appeal is undeniable, too! That beautiful pattern of pineapple rings and maraschino cherries is a feast for the eyes. Plus, it’s surprisingly easy to make, making it a fantastic option for both novice and experienced bakers. So, are you ready to bake a little sunshine into your day? Let’s get started!

Ingredients:
- For the Caramel Topping:
- 1 cup (2 sticks) unsalted butter
- 1 cup packed light brown sugar
- 1 (20 ounce) can pineapple slices, drained (juice reserved)
- Maraschino cherries, halved (optional)
- For the Cake Batter:
- 2 cups all-purpose flour
- 2 teaspoons baking powder
- 1/2 teaspoon salt
- 1 cup (2 sticks) unsalted butter, softened
- 1 3/4 cups granulated sugar
- 2 large eggs
- 1 teaspoon vanilla extract
- 3/4 cup reserved pineapple juice (from the can)
Preparing the Caramel Topping
Okay, let’s get started with the most visually appealing part – the caramel topping! This is what makes the pineapple upside-down cake so special, so pay close attention to the details.
- Melt the Butter: In a 9-inch cast-iron skillet (or a similar oven-safe skillet), melt the butter over medium heat. Make sure the butter is completely melted and evenly distributed in the skillet. You don’t want any cold spots!
- Add the Brown Sugar: Once the butter is melted, add the packed light brown sugar. Stir constantly until the brown sugar is completely dissolved and the mixture is smooth. This usually takes about 2-3 minutes. Be careful not to burn the sugar; keep the heat at medium.
- Simmer the Caramel: Reduce the heat to low and let the caramel simmer for about 2-3 minutes, stirring occasionally. This will help the caramel thicken slightly. You’re looking for a nice, glossy consistency.
- Arrange the Pineapple: Remove the skillet from the heat. Now comes the fun part! Arrange the pineapple slices in a single layer over the caramel. You can overlap them slightly if needed. Try to create a visually pleasing pattern. I like to put one slice in the center and then arrange the others around it.
- Add the Cherries (Optional): If you’re using maraschino cherries, place a halved cherry in the center of each pineapple slice. This adds a pop of color and a touch of sweetness. You can also place cherries in any gaps between the pineapple slices.
Preparing the Cake Batter
Now that the caramel topping is ready, let’s move on to the cake batter. This is a pretty straightforward cake recipe, but there are a few key steps to ensure a light and fluffy texture.
- Preheat the Oven: Preheat your oven to 350°F (175°C). This is crucial for even baking.
- Combine Dry Ingredients: In a medium bowl, whisk together the flour, baking powder, and salt. Whisking helps to evenly distribute the baking powder and salt, which is important for the cake’s texture.
- Cream Butter and Sugar: In a large bowl (or the bowl of a stand mixer), cream together the softened butter and granulated sugar until light and fluffy. This usually takes about 3-5 minutes. The mixture should be pale and airy. This step is essential for incorporating air into the batter, which will make the cake light and tender.
- Add Eggs: Beat in the eggs one at a time, mixing well after each addition. Make sure each egg is fully incorporated before adding the next.
- Add Vanilla Extract: Stir in the vanilla extract.
- Alternate Dry and Wet Ingredients: Gradually add the dry ingredients to the wet ingredients, alternating with the reserved pineapple juice, beginning and ending with the dry ingredients. So, add about 1/3 of the dry ingredients, then 1/2 of the pineapple juice, then another 1/3 of the dry ingredients, then the remaining pineapple juice, and finally the last 1/3 of the dry ingredients. Mix until just combined. Be careful not to overmix the batter, as this can result in a tough cake. Overmixing develops the gluten in the flour, which can make the cake dense.
Baking the Cake
We’re almost there! Now it’s time to bake the cake and let the magic happen.
- Pour Batter into Skillet: Carefully pour the cake batter over the pineapple and caramel in the skillet. Spread the batter evenly to cover the entire surface.
- Bake: Bake in the preheated oven for 45-55 minutes, or until a wooden skewer inserted into the center comes out clean. The baking time may vary depending on your oven, so start checking for doneness around 45 minutes.
- Cool Slightly: Let the cake cool in the skillet for about 10-15 minutes. This allows the caramel to set slightly and makes it easier to invert the cake.
Inverting and Serving
This is the moment of truth! Inverting the cake can be a little nerve-wracking, but if you follow these steps, you’ll be fine.
- Loosen the Edges: Run a thin knife or spatula around the edges of the cake to loosen it from the skillet. This will help prevent the cake from sticking when you invert it.
- Invert the Cake: Place a large serving plate or platter over the skillet. Carefully and quickly invert the skillet onto the plate. The cake should release easily. If it doesn’t, gently tap the bottom of the skillet.
- Serve: Serve the pineapple upside-down cake warm or at room temperature. You can serve it plain or with a dollop of whipped cream or a scoop of vanilla ice cream. Enjoy!
Tips for Success
- Don’t Overmix the Batter: Overmixing can lead to a tough cake. Mix until just combined.
- Use Room Temperature Ingredients: Room temperature butter and eggs will cream together more easily and create a lighter, fluffier cake.
- Check for Doneness: Use a wooden skewer to check for doneness. If the skewer comes out clean, the cake is ready.
- Cool Slightly Before Inverting: Cooling the cake slightly before inverting allows the caramel to set and makes it easier to release the cake from the skillet.
- Use a Good Quality Skillet: A cast-iron skillet is ideal for this recipe because it distributes heat evenly and creates a beautiful caramel topping. However, any oven-safe skillet will work.
Variations
- Add Spices: Add a pinch of cinnamon, nutmeg, or cloves to the batter for a warm, spiced flavor.
- Use Different Fruits: Try using other fruits, such as peaches, apples, or cranberries, instead of pineapple.
- Add Nuts: Sprinkle chopped pecans or walnuts over the caramel topping for added texture and flavor.
- Make Mini Cakes: Bake the batter in muffin tins for individual pineapple upside-down cakes.
I hope you enjoy this recipe as much as I do! It’s a classic for a reason, and it’s sure to impress your family and friends. Happy baking!
Conclusion:
So, there you have it! This Pineapple Upside Down Cake recipe is truly a must-try, and I’m not just saying that. The combination of the tangy pineapple, the sweet caramel, and the moist, buttery cake is simply irresistible. It’s a classic for a reason, and this version is guaranteed to become a family favorite.
But why is it a must-try, you ask? Well, beyond the incredible flavor profile, it’s surprisingly simple to make. Yes, it looks impressive, but the steps are straightforward, and the results are always stunning. It’s the perfect dessert to impress guests without spending hours in the kitchen. Plus, the aroma that fills your home while it’s baking is pure bliss! It’s a comforting, nostalgic scent that evokes feelings of warmth and happiness. Who wouldn’t want that?
Beyond the basic recipe, there are so many ways to customize this Pineapple Upside Down Cake to your liking. For a richer flavor, try using brown butter in the cake batter. It adds a nutty depth that complements the pineapple beautifully. Or, if you’re feeling adventurous, add a splash of rum or bourbon to the caramel sauce for an extra kick.
Serving suggestions? Oh, the possibilities! A scoop of vanilla ice cream is the classic pairing, and for good reason. The cold, creamy ice cream melts slightly over the warm cake, creating a delightful contrast in textures and temperatures. Whipped cream is another excellent choice, especially if you add a hint of vanilla extract or a sprinkle of cinnamon. For a more sophisticated presentation, try serving it with a dollop of mascarpone cheese and a drizzle of honey.
If you’re looking for variations, consider using different fruits in place of the pineapple. Sliced peaches, apples, or even cranberries would all work beautifully. You could also add chopped nuts, such as pecans or walnuts, to the caramel layer for added crunch and flavor. For a gluten-free option, simply substitute the all-purpose flour with a gluten-free blend.
But honestly, the best way to experience the magic of this Pineapple Upside Down Cake is to make it yourself. Don’t be intimidated by the “upside down” part – it’s easier than you think! Just follow the instructions carefully, and you’ll be rewarded with a delicious and beautiful dessert that everyone will love.
I truly believe that this recipe is a winner, and I can’t wait for you to try it. So, gather your ingredients, preheat your oven, and get ready to bake some happiness!
And most importantly, I want to hear about your experience! Did you try any variations? Did you serve it with ice cream or whipped cream? What did your family and friends think? Share your photos and stories in the comments below. I’m always eager to see your creations and learn from your experiences. Happy baking! Let me know if you have any questions, and I’ll do my best to help. Enjoy your delicious Pineapple Upside Down Cake!
Pineapple Upside Down Cakes: The Ultimate Recipe and Baking Guide
Buttery caramel topping, juicy pineapple, and fluffy cake make this classic Pineapple Upside-Down Cake a delightful treat.
Ingredients
Instructions
Recipe Notes
- Don’t Overmix the Batter: Overmixing can lead to a tough cake. Mix until just combined.
- Use Room Temperature Ingredients: Room temperature butter and eggs will cream together more easily and create a lighter, fluffier cake.
- Check for Doneness: Use a wooden skewer to check for doneness. If the skewer comes out clean, the cake is ready.
- Cool Slightly Before Inverting: Cooling the cake slightly before inverting allows the caramel to set and makes it easier to release the cake from the skillet.
- Use a Good Quality Skillet: A cast-iron skillet is ideal for this recipe because it distributes heat evenly and creates a beautiful caramel topping. However, any oven-safe skillet will work.