• Skip to primary navigation
  • Skip to main content
  • Skip to primary sidebar
Homesmad

Homesmad

  • Home
  • Breakfast & Brunch
  • Appetizers & Snacks
  • Dinner
  • Dessert
  • About
  • Privacy Policy
  • Contact
Homesmad
  • Home
  • Breakfast & Brunch
  • Appetizers & Snacks
  • Dinner
  • Dessert
  • About
  • Privacy Policy
  • Contact

Pizza Grilled Cheese Recipe: Melty, Cheesy, Irresistible!

October 23, 2025 by Lily author

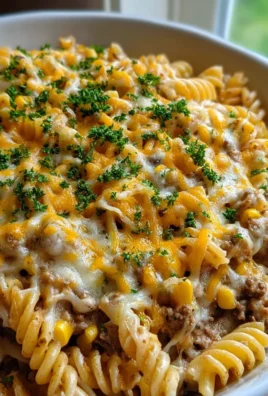
Pizza Grilled Cheese – imagine a world where you never have to choose between the ultimate comfort of a gooey, crispy grilled cheese and the irresistible flavors of your favorite pizza. We’ve all been there: a craving for something warm, cheesy, and utterly satisfying, perhaps with a hint of savory pepperoni and a touch of tangy marinara. What if we told you that culinary fusion has evolved to bring you the best of both worlds, neatly packed into one incredible sandwich? This inspired creation is more than just a meal; it’s a delightful solution to a common culinary dilemma.

While the classic grilled cheese sandwich boasts a rich history as a staple of American comfort food, and pizza’s roots stretch back centuries as a beloved global dish, the ingenious concept of combining them is a more recent, delightful innovation. It’s born from a simple, brilliant idea: why not marry the satisfying crunch and molten interior of a grilled cheese with the iconic taste profile of a pizza? This modern culinary marvel offers not just convenience, but a truly unique and memorable experience that bridges the gap between two beloved classics.

People absolutely adore this dish not only for its incredible ease of preparation – often quicker than ordering delivery! – but primarily for its phenomenal taste and texture. Every bite of this innovative Pizza Grilled Cheese delivers a symphony of sensations: the golden-brown, buttery exterior gives way to a luscious, stretchy cheese pull, intertwined with vibrant tomato sauce and your preferred pizza toppings. It’s the perfect blend of savory, tangy, and utterly indulgent, proving that some of the best culinary inventions come from simply asking, “What if we put that in that?” Prepare to elevate your comfort food game with this ingenious hybrid.

Pizza Grilled Cheese Recipe: Melty, Cheesy, Irresistible! this RECIPE

Ingredients:

  • For the Bread:
    • 8 slices of your favorite sturdy sandwich bread. I love using a good quality sourdough or a thick-cut Texas toast for that extra satisfying crunch and structure, but really, any bread you love will work wonderfully for your Pizza Grilled Cheese adventure.
  • For the Cheese Core:
    • 1 cup shredded low-moisture mozzarella cheese. This is crucial for that iconic pizza stretch! Fresh mozzarella can release too much water, so stick with the low-moisture kind for the best melt.
    • ½ cup shredded provolone cheese. It adds a lovely tang and another layer of gooeyness. You can use mild or sharp, depending on your preference.
    • ¼ cup grated Parmesan cheese (or Pecorino Romano for a sharper kick). This isn’t just for flavor, it helps create a beautifully crisp crust on the inside of your sandwich, almost like a frico.
  • For the Pizza Elements:
    • ½ cup your favorite pizza sauce or marinara sauce. A good quality, thick sauce is key here so it doesn’t make your bread soggy. I prefer one with a rich tomato flavor and a bit of seasoning.
    • ¼ cup mini pepperoni slices, or regular pepperoni cut into quarters. Mini pepperonis are fantastic because they distribute evenly and crisp up beautifully within the sandwich. If you can’t find them, regular ones work just fine, just give them a little chop.
    • Optional additions for extra flavor and texture:
      • 1 tablespoon finely diced red onion.
      • 1 tablespoon finely diced green bell pepper.
      • ½ teaspoon dried oregano or Italian seasoning blend.
      • A pinch of red pepper flakes for a little heat.
  • For Cooking:
    • 4-6 tablespoons unsalted butter, softened. This is what gives your Pizza Grilled Cheese that irresistible golden-brown, crispy exterior. You can also use mayonnaise on the outside for an equally golden and tangy crust, which some people swear by!

Gathering Your Delicious Components for the Ultimate Pizza Grilled Cheese

  1. Prepare Your Workstation: Before you even think about firing up the stove, let’s get everything organized. This makes the assembly process smooth and enjoyable. I always find that having my ingredients ready to go prevents any last-minute scrambling and ensures a perfectly cooked Pizza Grilled Cheese. Grab a cutting board, a good knife, and a few small bowls for your cheese and sauce.
  2. Shred the Cheese (If Not Pre-Shredded): If your mozzarella and provolone aren’t already shredded, now’s the time to do it. While pre-shredded cheese is convenient, I often find that blocks of cheese melt more smoothly and consistently because they don’t contain the anti-caking agents found in some pre-shredded varieties. Aim for medium shreds; too fine and it can melt too quickly and become oily, too coarse and it won’t melt evenly.
  3. Prepare Your Pizza Toppings:

    • Pepperoni: If using regular-sized pepperoni, lay a few slices on your cutting board and use a sharp knife to cut them into quarters or smaller pieces. This ensures that every bite of your Pizza Grilled Cheese gets a little bit of that savory, spicy goodness.
    • Optional Veggies: If you’re incorporating red onion or green bell pepper, make sure they are very finely diced. We want them to integrate seamlessly into the sandwich and cook through without adding too much bulk or crunch. Think tiny little confetti pieces!
    • Seasonings: Measure out your dried oregano or Italian seasoning, and red pepper flakes if using. These small additions truly elevate the “pizza” aspect of your grilled cheese.
  4. Soften the Butter: Take your unsalted butter out of the fridge a little while before you start, so it can come to room temperature and become beautifully spreadable. This is important for easily coating your bread. If you’re short on time, you can gently microwave it for a few seconds, but be careful not to melt it completely; we want it soft, not liquid.
  5. Portion the Pizza Sauce: Have your ½ cup of pizza sauce ready. I like to put it in a small bowl, making it easy to spread onto the bread without making a mess. A thicker sauce is preferable here; a watery sauce can make your bread soggy and compromise the structural integrity of your delicious Pizza Grilled Cheese.

Assembling Your Perfect Pizza Grilled Cheese Sandwiches

  1. Lay Out Your Bread: Take your eight slices of bread and lay them out on a clean, dry surface, like your cutting board or a large plate. This setup allows you to create four individual Pizza Grilled Cheese sandwiches simultaneously. I find it helpful to work in pairs, envisioning each pair as one complete sandwich.
  2. Butter the Exterior Sides: This step is critical for achieving that coveted golden-brown, crispy crust. Take your softened butter and generously spread it on one side of each of the eight slices of bread. You’re buttering the sides that will eventually face the hot pan. Don’t be shy with the butter; it’s essential for flavor and texture! Aim for an even coating right to the edges. This butter layer is what provides the signature sizzle and rich flavor to your Pizza Grilled Cheese.
  3. Arrange for Assembly: Now, flip four of the buttered slices over so the unbuttered side is facing up. These will be the bottom slices of your sandwiches. Keep the other four buttered slices nearby; they’ll be the tops.
  4. Spread the Sauce: On the unbuttered side of each of your four bottom slices, spread a thin, even layer of pizza sauce. About 1 to 1 ½ tablespoons per slice is usually perfect. The key here is a thin layer; too much sauce will make your bread soggy, and we absolutely do not want a soggy Pizza Grilled Cheese! Make sure to spread it almost to the edges but leave a small border to prevent overflow when the cheese melts.
  5. Layer the Cheese Foundation: This is where the magic truly begins! On top of the sauced bread, sprinkle an even layer of your shredded mozzarella and provolone mix. I like to start with a base of cheese because it helps to “glue” everything together once it melts and creates a barrier for the sauce. Divide your ½ cup of mozzarella and ¼ cup of provolone evenly among the four sandwiches.
  6. Add the Pepperoni Power: Now, distribute your mini pepperoni pieces (or chopped regular pepperoni) over the cheese layer on each sandwich. Make sure they’re spread out well so you get pepperoni in every single bite of your Pizza Grilled Cheese. This is the heart of the “pizza” experience!
  7. Introduce Optional Veggies and Seasonings: If you’re using finely diced red onion, green bell pepper, dried oregano, or red pepper flakes, now’s the time to sprinkle them over the pepperoni. These additions bring extra layers of flavor and a subtle textural contrast that truly elevates your homemade Pizza Grilled Cheese.
  8. The Parmesan Sprinkle: Take your ¼ cup of grated Parmesan and divide it among the four sandwiches, sprinkling it generously over the toppings. This Parmesan isn’t just for flavor; it contributes to an amazing gooey-yet-firm cheese layer once melted and adds a lovely savory depth.
  9. Top with More Cheese (Optional but Recommended for Extra Gooeyness): If you want an extra cheesy Pizza Grilled Cheese (and who doesn’t?), add a very light sprinkle of the mozzarella/provolone mix on top of the other toppings. This helps to further bind everything together and ensures maximum cheese pull.
  10. Place the Top Bread Slices: Carefully take your remaining four buttered bread slices and place them butter-side-up onto your assembled sandwiches. Gently press down on each sandwich to lightly compress the fillings. This helps to ensure everything stays together during cooking. You’ve now officially assembled your incredible Pizza Grilled Cheese creations, ready for the heat!

The Cooking Process: Achieving the Perfect Golden-Brown Crust and Gooey Interior

  1. Preheat Your Pan: This step is paramount for a perfectly cooked Pizza Grilled Cheese. Place a large non-stick skillet or a cast-iron griddle over medium-low heat. Resist the urge to turn the heat up too high! A common mistake with grilled cheese (and especially with something as loaded as a Pizza Grilled Cheese) is cooking it too quickly. We need gentle, consistent heat to ensure the bread toasts to a beautiful golden-brown without burning and, more importantly, to allow all that wonderful cheese inside to melt completely and become gloriously gooey. Give your pan a good 3-5 minutes to come to temperature. You should feel a gentle warmth radiating from it.
  2. Place Your Sandwiches: Once your pan is properly preheated, carefully place two of your assembled Pizza Grilled Cheese sandwiches into the pan, butter-side down. Don’t overcrowd the pan; leave enough space between them so you can easily flip them and for even heat distribution. If your pan is smaller, you might need to cook them one at a time, or in two batches.
  3. The Initial Cook (First Side): Let the sandwiches cook undisturbed for about 4-6 minutes on the first side. During this time, you’ll want to keep a watchful eye on them. You’re looking for a rich, golden-brown color on the bread.

    • Listen: You should hear a gentle sizzle from the butter. If it’s too aggressive, your heat is too high.
    • Look: Occasionally, gently lift a corner of one sandwich with a spatula to peek at the underside. If it’s browning too quickly, slightly reduce your heat. If it’s not browning at all, you might need to nudge the heat up a tiny bit.
    • The Melt Begins: While the bread is toasting, the heat from the pan will start to warm the cheese and toppings inside.
  4. Optional: Cover to Encourage Melting: For an extra gooey interior, especially important with a hearty Pizza Grilled Cheese, you can place a lid over the skillet for the last 2-3 minutes of the initial cooking side. This traps the heat and creates a little oven effect, helping the cheese to melt more thoroughly from the top down. Just make sure the lid isn’t touching the sandwiches.
  5. The Flip: Once the first side is beautifully golden-brown and the cheese inside has started to soften, it’s time for the flip! Using a wide, sturdy spatula, carefully slide it under one sandwich, making sure you support the entire base. With a confident, swift motion, flip the sandwich over to cook the second buttered side. Repeat with the other sandwich.
  6. Cook the Second Side: Continue to cook the sandwiches for another 4-6 minutes on the second side, or until that side is also golden-brown and crispy.

    • Pressing Gently (Optional): Some people like to gently press down on the sandwiches with their spatula during this phase. This helps to ensure maximum contact with the hot pan for a crispier crust and helps to flatten the sandwich slightly, encouraging the cheese to melt and spread evenly. However, don’t press too hard, or you might squeeze out all the delicious filling!
    • Aroma Check: By now, your kitchen should be filled with the incredible aroma of toasted bread, melting cheese, and savory pepperoni. This is a good sign that your Pizza Grilled Cheese is on its way to perfection!
    • Visual Cues for Melt: You might even see a little bit of cheese starting to ooze out the sides, or feel the sandwich give slightly when gently pressed, indicating that the core is warm and molten.
  7. Final Check and Removal: Your Pizza Grilled Cheese is perfectly cooked when both sides are a deep golden-brown, wonderfully crispy, and when you can feel that the cheese inside is completely melted and gooey. You can gently lift one and feel its weight – a fully melted sandwich will feel cohesive and substantial. Carefully transfer the finished sandwiches from the pan to a cutting board.
  8. Repeat with Remaining Sandwiches: If you have more sandwiches to cook, add a little extra butter to the pan if needed (the first batch often absorbs a fair bit) and repeat the cooking process for the remaining Pizza Grilled Cheese creations.

Serving Your Delectable Pizza Grilled Cheese

  1. Let It Rest (Briefly!): I know, I know, you want to dive right in! But giving your Pizza Grilled Cheese about 1-2 minutes to rest on the cutting board after it comes off the pan is actually beneficial. This short rest allows the super-hot cheese to set just a tiny bit, making it less likely to ooze out uncontrollably when you cut it, and it also allows the flavors to meld beautifully. Plus, it gives you a moment to admire your handiwork!
  2. The Perfect Cut: Using a sharp chef’s knife or even a serrated knife, cut each Pizza Grilled Cheese sandwich in half. My personal favorite way to cut grilled cheese is diagonally; I find it creates a more appealing presentation and is easier to handle, plus it showcases that incredible cross-section of melted cheese and fillings! You’ll love seeing all those layers.
  3. Serve Immediately: This dish is truly best enjoyed hot and fresh, while the cheese is still wonderfully gooey and the bread is crisp. Arrange your halved Pizza Grilled Cheese sandwiches on plates.
  4. Optional Dipping Sauce: For an extra layer of “pizza” experience, consider serving your Pizza Grilled Cheese with a small bowl of warm marinara or extra pizza sauce on the side for dipping. It’s like having your pizza crust AND your grilled cheese at the same time! A little side of ranch dressing also pairs surprisingly well for those who love that combo with pizza.
  5. Enjoy the Experience: Take a bite, and savor the glorious combination of crispy, buttery bread, rich tomato sauce, savory pepperoni, and that incredible stretchy, gooey melted cheese. This isn’t just a sandwich; it’s an experience! You’ve successfully created a culinary masterpiece that combines two beloved comfort foods into one utterly irresistible creation. Each bite of this Pizza Grilled Cheese is a journey of texture and flavor, a true testament to simple ingredients coming together in a spectacular way.

There you have it! Your very own, incredibly delicious, homemade Pizza Grilled Cheese. It’s perfect for a quick lunch, a fun dinner, or even a late-night snack when those pizza cravings hit hard. Experiment with different cheeses or a sprinkle of garlic powder in the butter for even more flavor. Enjoy every single gooey, crispy bite!

Pizza Grilled Cheese Recipe: Melty, Cheesy, Irresistible!

Conclusion:

And there you have it, my friends! We’ve journeyed through the simple yet incredibly satisfying steps to create what I genuinely believe is one of the most brilliant culinary mash-ups you’ll ever encounter. This isn’t just another sandwich; it’s a nostalgic trip to your favorite pizza parlor combined with the ultimate comfort of a perfectly golden, cheesy grilled sandwich. It’s a revelation, a game-changer for lunch, dinner, or even a late-night snack craving. The crispy, buttery bread, the melted, stretchy cheese, the tangy kiss of marinara, and those delightful, slightly crisp pepperoni slices – every single component plays its part in a symphony of flavors and textures that is truly irresistible. I cannot stress enough how much joy this humble creation brings, making it an absolute must-try for anyone who appreciates bold flavors and comforting simplicity.

What makes this recipe stand out is its effortless ability to transform basic ingredients into something extraordinary. It’s the kind of dish that requires minimal effort but delivers maximum satisfaction, perfect for those busy weeknights when you still want to serve up something delicious and homemade. Forget complicated recipes; this is all about celebrating the pure, unadulterated joy of good food. Every bite offers that perfect balance of savory, cheesy, and slightly acidic notes that will have you reaching for more. I often find myself craving this particular combination, and once you try it, I’m confident you’ll understand exactly why I rave about it so much. It truly takes the familiar and elevates it to an exciting new level of deliciousness, making it a staple in my own kitchen and hopefully soon in yours too!

Elevate Your Experience: Serving Suggestions & Creative Variations

Now that you’ve mastered the basic technique for crafting this phenomenal dish, let’s talk about how you can further enhance your dining experience or even put your own personal twist on it. For a classic, comforting meal, I highly recommend serving your freshly made Pizza Grilled Cheese alongside a warm bowl of creamy tomato soup. The rich, tangy soup is the perfect companion, offering a delightful contrast to the sandwich’s savory profile and ideal for dipping. Alternatively, a crisp, fresh green salad with a light vinaigrette can cut through the richness beautifully, providing a refreshing counterpoint that makes the meal feel complete. If you’re leaning into the pizza theme, a side of warm marinara sauce for dipping takes the experience to an even higher level of indulgence, allowing for extra sauciness with every bite. Don’t underestimate the power of a simple bowl of potato chips or a handful of crunchy carrot and celery sticks to add a satisfying textural element.

But why stop there? This recipe is incredibly adaptable, inviting you to experiment with different fillings and flavors. For the cheese lovers out there, consider adding a blend of provolone and mozzarella for an even stretchier, more authentic pizza-like pull. A sprinkle of Parmesan cheese on the outside of the bread as it grills can create an incredibly savory, crispy crust that adds another layer of flavor. If pepperoni isn’t your only pizza topping love, feel free to incorporate other finely diced cooked toppings like crumbled sausage, sautéed mushrooms, or bell peppers. Just be sure to pre-cook any vegetable additions to avoid excess moisture. A pinch of red pepper flakes mixed into your marinara sauce or sprinkled over the cheese before grilling can introduce a wonderful, subtle kick of heat for those who enjoy a bit of spice. You could even swap out the white bread for a hearty sourdough or a rustic Italian loaf for a different texture and flavor base. The possibilities are truly endless, limited only by your imagination and what you have on hand in your kitchen. Embrace the culinary adventurer within you!

Your Turn: Try It, Share It, Love It!

My biggest hope is that this recipe inspires you to get into your kitchen and experience the magic of this incredible fusion firsthand. Seriously, don’t just read about it – make it! You’ll be amazed at how quickly and easily you can whip up something so utterly delicious. Once you’ve created your very own masterpiece, I’d absolutely love to hear all about your experience. Did you stick to the classic? Did you venture into creative variations with extra toppings or different cheeses? Did you find the perfect side dish that made your meal unforgettable? Your insights, your photos, and your personal twists are what make this culinary community so vibrant and exciting. Please, don’t hesitate to share your thoughts in the comments below or tag me on social media with your creations. I’m genuinely excited to see your Pizza Grilled Cheese masterpieces and hear your honest feedback. Let’s make some delicious memories together! Happy cooking, everyone!


Pizza Grilled Cheese

Pizza Grilled Cheese

A delicious fusion of classic grilled cheese and savory pizza, featuring crispy, buttery bread, melted mozzarella and Parmesan, tangy marinara, and turkey pepperoni for an irresistible, quick meal.

Prep Time
20 Minutes

Cook Time
12 Minutes

Total Time
32 Minutes

Servings
2 servings

Ingredients

  • 4 slices bread (sourdough, white, or whole wheat)
  • 2 tbsp softened butter
  • ½ cup marinara or pizza sauce
  • 1 cup shredded mozzarella cheese
  • ¼ cup grated Parmesan cheese
  • 12 slices turkey pepperoni
  • ½ tsp garlic powder
  • ½ tsp Italian seasoning
  • 2 tbsp chopped fresh basil (optional)

Instructions

  1. Step 1
    Ensure butter is softened. If not pre-shredded, shred mozzarella and Parmesan cheese. Have turkey pepperoni, marinara sauce, garlic powder, Italian seasoning, and optional fresh basil ready.
  2. Step 2
    Generously spread softened butter on one side of each of the four bread slices. These buttered sides will face the pan.
  3. Step 3
    Lay two unbuttered bread sides up on a clean surface. Spread a thin layer (approx. 1-1.5 tbsp per slice) of marinara sauce on each. Layer with half of the shredded mozzarella, then turkey pepperoni, garlic powder, Italian seasoning, and half of the grated Parmesan cheese. If using, sprinkle fresh basil.
  4. Step 4
    Top with the remaining mozzarella and Parmesan. Place the other two buttered bread slices on top, butter-side-up. Gently press down on each sandwich to secure fillings.
  5. Step 5
    Heat a large non-stick skillet or griddle over medium-low heat for 3-5 minutes. Place sandwiches, butter-side down, into the preheated pan. Cook for 4-6 minutes, or until the bottom is golden-brown and crispy, and cheese begins to soften. For extra melt, you may cover the pan for the last 2-3 minutes.
  6. Step 6
    Using a wide spatula, carefully flip each sandwich. Continue to cook for another 4-6 minutes, or until the second side is golden-brown and crispy, and the cheese inside is completely melted and gooey.
  7. Step 7
    Transfer cooked sandwiches to a cutting board. Let rest for 1-2 minutes, then cut each sandwich diagonally in half. Serve immediately, optionally with warm marinara sauce for dipping.

Important Information

Nutrition Facts (Per Serving)

It is important to consider this information as approximate and not to use it as definitive health advice.

Allergy Information

Please check ingredients for potential allergens and consult a health professional if in doubt.

« Previous Post
Salted Caramel Butter Bars: Irresistible & Tasty Dessert
Next Post »
Greek Roasted Garlic Spinach White Pizza: Flavorful Delight

If you enjoyed this…

Smashburger Quesadillas: Juicy Beef & Melty Cheese Delight!

Delicious Black Eyed Peas with Beef Bacon – Soul Food Recipe

Baked Boursin Salmon – Creamy, Flavorful & Perfectly Baked

Baked Boursin Salmon – Creamy, Flavorful & Perfectly Baked

Primary Sidebar

Browse by Diet

BreakfastDinnerLunchDessertAppetizer

Sweet Peach Yogurt Parfait Delight

One of my fondest memories is from a lazy summer afternoon spent at my grandmother’s house. The sun filtered through the kitchen window, casting a warm glow over the table where she would create her culinary magic. It was during one of those blissful moments that I first tasted her Peach Yogurt Parfait with Honey and Granola. The sweet aroma of ripe peaches mingling with creamy yogurt and the crunch of granola was nothing short of heavenly. It felt like summer captured in a bowl, and I still remember the joy of diving in with a spoon, each layer revealing a new burst of flavor.

When I think about that parfait, I can almost hear the gentle hum of the bees outside, reminding me of the floral notes that honey brings to every bite. The vibrant yellows and soft oranges of the peaches contrast beautifully with the creamy white yogurt and the golden crunch of granola. It’s a dish that not only looks delightful but also tastes like a celebration of fresh, wholesome ingredients.

What makes my version of this Peach Yogurt Parfait special is the careful balance of flavors and textures. I use ripe, juicy peaches, drizzled with locally sourced honey, and a homemade granola that’s bursting with nuts and seeds for an extra crunch. It’s a simple dish, but every layer is crafted with love and attention.

Let me show you exactly how to make this delightful parfait, so you can bring a bit of that summer magic into your kitchen!

Sweet Peach Yogurt Parfait Delight

Why You’ll Love This Recipe

  • Delightfully creamy texture from the Greek yogurt, paired with the juicy sweetness of fresh peaches.
  • Ready in under 20 minutes, making it a quick and satisfying breakfast or snack option.
  • Budget-friendly, using common ingredients that you may already have in your pantry.
  • Customizable with your favorite granola and nuts, allowing you to tailor each parfait to your taste.
  • Perfectly balanced flavors with the bright acidity of lemon juice and the sweetness of honey enhancing the peaches.

Ingredients

  • For the Parfait:
  • 2 cups plain Greek yogurt (or vanilla yogurt for a sweeter option)
  • 2 large ripe peaches, diced (about 2 cups)
  • 1 tablespoon fresh lemon juice (to prevent browning of peaches)
  • 2 tablespoons honey (plus more for drizzling)
  • 1 teaspoon vanilla extract (optional for extra flavor)
  • For the Granola:
  • 1 cup granola (store-bought or homemade; see notes for a simple granola recipe)
  • 1/4 cup sliced almonds (optional for added crunch)
  • 1/4 cup shredded coconut (optional for added flavor)

Let’s dive into some key ingredients that make this Peach Yogurt Parfait so delightful! First, the Greek yogurt is not only creamy but also packed with protein, making it a satisfying option for breakfast or a snack. If you’re looking for a sweeter option, you can easily substitute it with vanilla yogurt, though it may alter the overall flavor balance. Next, the ripe peaches are the star of the show; their natural sweetness shines through, so I recommend choosing peaches that yield slightly to pressure, indicating they’re perfectly ripe. If peaches aren’t in season, feel free to use nectarines or even frozen peaches—just thaw them before use. Finally, honey adds a lovely floral sweetness that ties everything together. If you prefer, maple syrup can serve as a delicious substitute.

Step-by-Step Instructions

  1. Start by preparing the peaches. Wash them thoroughly, then slice and dice them into bite-sized pieces. In a medium bowl, toss the diced peaches with 1 tablespoon of fresh lemon juice to prevent browning. Set aside for about 5 minutes while the lemon juice works its magic.
  2. In a separate bowl, combine the Greek yogurt, 2 tablespoons of honey, and 1 teaspoon of vanilla extract if using. Stir the mixture until smooth and thoroughly blended. This should take about a minute. Avoid overmixing to maintain the creaminess of the yogurt.
  3. Now it’s time to layer your parfait. Grab a clear glass or bowl to showcase your beautiful creation. Start with a generous spoonful of the yogurt mixture at the bottom—about 1/4 cup will do. Use a spoon to spread it evenly.
  4. Add a layer of the diced peaches over the yogurt, ensuring they cover the yogurt completely. You might want to use about half of what you have prepared—roughly 1 cup. This layer should be visually appealing, so arrange the peaches neatly.
  5. Sprinkle 1/4 cup of granola over the peaches. This adds a delightful crunch. Make sure to distribute it evenly to ensure every bite has that satisfying texture. Avoid packing it down too tightly, as you want it to maintain its crunch.
  6. Repeat the layers: spoon in another 1/4 cup of yogurt, followed by another cup of peaches, and another sprinkle of granola. You should have at least two layers, but feel free to add more depending on your glass size.
  7. Finish off your parfait with a drizzle of honey on top for added sweetness and a touch of elegance. If you’re using sliced almonds or shredded coconut, sprinkle them on top now. It adds a lovely visual contrast and extra flavor.
  8. Serve immediately or refrigerate for up to 30 minutes before serving to allow the flavors to meld together. However, I recommend enjoying it fresh to maintain the granola’s crunch.

Pro Tips for the Best Peach Yogurt Parfait With Honey And Granola

  • Make sure to choose ripe peaches for the best flavor and texture. A common mistake is using unripe fruit, which can lead to a less enjoyable parfait. Look for peaches that are fragrant and slightly soft to the touch.
  • Use a clear glass to assemble your parfait; this not only makes for a beautiful presentation but also allows you to see the colorful layers, which adds to the enjoyment of eating it.
  • For an even creamier texture, consider whipping the Greek yogurt with a hand mixer for a couple of minutes before layering. This small adjustment makes a huge difference in mouthfeel.
  • Be mindful of the granola-to-yogurt ratio. Too much granola can overwhelm the parfait, while too little can make it feel too creamy. Aim for about 1/4 cup of granola per layer for the perfect balance.
  • If you’re making this for a gathering, consider preparing the yogurt and peaches ahead of time and layering them just before serving. This ensures the granola stays crunchy!

Variations & Serving Ideas

There are so many ways to get creative with your Peach Yogurt Parfait! For a tropical twist, swap out the peaches for mangoes or pineapples and top with coconut flakes. If you prefer a berry flavor, mix in some blueberries or strawberries with the peaches for added color and taste. For a nutty version, incorporate chopped walnuts or pecans instead of almonds.

As for serving ideas, this parfait pairs beautifully with a side of scrambled eggs for a hearty breakfast or fresh fruit salad for a light lunch. You might also enjoy it alongside whole grain toast with almond butter for an energizing snack. The contrast of flavors and textures will elevate your meal experience!

Storage, Make-Ahead & Reheating

The Peach Yogurt Parfait is best enjoyed fresh, but you can prepare some components ahead of time. Store the layered parfait in an airtight container in the refrigerator for up to 24 hours. However, be cautious; the granola may lose its crunch if stored too long. You can freeze the yogurt and peach mixture for up to 2 months; just remember to thaw it in the refrigerator overnight before serving.

If you plan to enjoy this dish the next day, it can taste even better as the flavors meld together. Just remember to add the granola right before serving to keep its delightful crunch!

Frequently Asked Questions

Can I make Peach Yogurt Parfait With Honey And Granola ahead of time?

Yes — in fact, it tastes even better the next day as the flavors meld. However, I recommend waiting to add the granola until just before serving to maintain its crunch.

What can I substitute for Greek yogurt?

If you prefer a lighter option, you can substitute Greek yogurt with regular yogurt or a dairy-free alternative like coconut yogurt. Just remember that this may alter the creaminess and flavor profile slightly.

Can I use frozen peaches for this parfait?

Absolutely! Just make sure to thaw the frozen peaches before using them. They will still add great flavor, though the texture may be slightly softer than fresh peaches.

How do I make the parfait vegan?

To make a vegan version, substitute the Greek yogurt with a plant-based yogurt alternative, and replace honey with maple syrup or agave nectar. This keeps the parfait sweet while adhering to a vegan diet.

What other fruits can I use in this recipe?

You can mix and match fruits based on your preference. Try using strawberries, blueberries, raspberries, or even bananas. Just make sure to adjust the lemon juice as needed to prevent browning.

Sweet Peach Yogurt Parfait Delight

Final Thoughts

The Peach Yogurt Parfait with Honey and Granola is a delightful blend of creamy yogurt, sweet peaches, and crunchy granola that creates a satisfying and nourishing treat. Each layer bursts with flavor, making it a perfect choice for breakfast or a light dessert.

This is the kind of recipe I come back to again and again, especially when I want something refreshing and wholesome to start my day. The harmony of sweet and tart flavors, combined with the delightful crunch, never fails to lift my spirits!

I encourage you to give this parfait a try and indulge in its comforting goodness. Feel free to share your results or even add your own twist—perhaps a sprinkle of cinnamon or a handful of nuts. Enjoy creating your perfect parfait!

Print
clock clock iconcutlery cutlery iconflag flag iconfolder folder iconinstagram instagram iconpinterest pinterest iconfacebook facebook iconprint print iconsquares squares iconheart heart iconheart solid heart solid icon

Peach Yogurt Parfait


  • Author: Lily author
  • Total Time: 15 minutes
  • Yield: 4 servings 1x
Pin Recipe
Print Recipe

Description

This Peach Yogurt Parfait combines creamy Greek yogurt, juicy peaches, and crunchy granola for a delightful treat. It’s a perfect breakfast or snack that captures the essence of summer in every bite.


Ingredients

Scale
  • For the Parfait:
  • 2 cups plain Greek yogurt (or vanilla yogurt for a sweeter option)
  • 2 large ripe peaches, diced (about 2 cups)
  • 1 tablespoon fresh lemon juice (to prevent browning of peaches)
  • 2 tablespoons honey (plus more for drizzling)
  • 1 teaspoon vanilla extract (optional for extra flavor)
  • For the Granola:
  • 1 cup granola (store-bought or homemade; see notes for a simple granola recipe)
  • 1/4 cup sliced almonds (optional for added crunch)
  • 1/4 cup shredded coconut (optional for added flavor)

Instructions

  1. Start by preparing the peaches. Wash them thoroughly, then slice and dice them into bite-sized pieces. In a medium bowl, toss the diced peaches with 1 tablespoon of fresh lemon juice to prevent browning. Set aside for about 5 minutes while the lemon juice works its magic.
  2. In a separate bowl, combine the Greek yogurt, 2 tablespoons of honey, and 1 teaspoon of vanilla extract if using. Stir the mixture until smooth and thoroughly blended. This should take about a minute. Avoid overmixing to maintain the creaminess of the yogurt.
  3. Now it’s time to layer your parfait. Grab a clear glass or bowl to showcase your beautiful creation. Start with a generous spoonful of the yogurt mixture at the bottom—about 1/4 cup will do. Use a spoon to spread it evenly.
  4. Add a layer of the diced peaches over the yogurt, ensuring they cover the yogurt completely. You might want to use about half of what you have prepared—roughly 1 cup. This layer should be visually appealing, so arrange the peaches neatly.
  5. Sprinkle 1/4 cup of granola over the peaches. This adds a delightful crunch. Make sure to distribute it evenly to ensure every bite has that satisfying texture. Avoid packing it down too tightly, as you want it to maintain its crunch.
  6. Repeat the layers: spoon in another 1/4 cup of yogurt, followed by another cup of peaches, and another sprinkle of granola. You should have at least two layers, but feel free to add more depending on your glass size.
  7. Finish off your parfait with a drizzle of honey on top for added sweetness and a touch of elegance. If you’re using sliced almonds or shredded coconut, sprinkle them on top now. It adds a lovely visual contrast and extra flavor.
  8. Serve immediately or refrigerate for up to 30 minutes before serving to allow the flavors to meld together. However, I recommend enjoying it fresh to maintain the granola’s crunch.
  • Prep Time: 15 mins
  • Cook Time: 0 mins
  • Category: Breakfast
  • Method: No-cook
  • Cuisine: American

Nutrition

  • Serving Size: 1 parfait
  • Calories: 250
  • Sugar: 20 g
  • Sodium: 50 mg
  • Fat: 5 g
  • Saturated Fat: 2 g
  • Unsaturated Fat: 3 g
  • Trans Fat: 0 g
  • Carbohydrates: 40 g
  • Fiber: 3 g
  • Protein: 10 g
  • Cholesterol: 10 mg

Keywords: Choose ripe peaches for the best flavor and texture. Use a clear glass for a beautiful presentation. For creaminess, consider whipping the yogurt before layering. Be mindful of the granola-to-yogurt ratio. Prepare yogurt and peaches ahead of time for gatherings, layering just before serving.

Did you make this recipe?

Share a photo and tag us — we can't wait to see what you've made!

Sun-Kissed Frozen Orange Cream Slush

As a child, summer days felt like they lasted forever. I remember the sticky heat wrapping around me as I played outside, my laughter mingling with the sounds of the neighborhood. But nothing could cool me down quite like the moment I’d spot my grandmother, laboring over her blender, whipping up her famous Frozen Orange Creamsicle Slush. That vibrant orange treat, with its frosty texture and sweet citrus aroma, was like a burst of sunshine in a cup. Just one sip, and I could feel the coolness wash over me, sparking pure joy.

This Frozen Orange Creamsicle Slush has a way of making you feel like a kid again. Its creamy, dreamy consistency is a delightful balance of bright orange and soft vanilla, inviting you to dive right in. The refreshing tang of orange dances on your tongue, while the smooth creaminess envelops you in a comforting embrace. It’s a nostalgic treat that’s perfect for hot summer afternoons or anytime you need a little pick-me-up.

What makes my version of this slush stand out is the addition of a hint of vanilla bean, which elevates the flavor and adds an extra layer of richness. Plus, it’s super easy to whip up with just a few simple ingredients that you probably already have on hand! So, if you’re ready to relive those sun-soaked memories, let me show you exactly how to make it.

Sun-Kissed Frozen Orange Cream Slush

Why You’ll Love This Recipe

  • Each slush is a perfect blend of creamy vanilla and zesty orange, creating a nostalgic flavor reminiscent of summer days.
  • This refreshing treat is ready in under 15 minutes, making it an ideal quick dessert for unexpected guests or hot afternoons.
  • With just 8 simple ingredients, it’s budget-friendly, ensuring you don’t have to break the bank to enjoy a delicious slush.
  • The slush has a perfectly smooth texture, thanks to the combination of ice and ice cream, providing a delightful contrast to the bright citrus flavors.
  • It’s highly customizable; you can easily adjust the sweetness and add fresh herbs for a unique twist that suits your taste.

Ingredients

  • 2 cups orange juice (freshly squeezed or store-bought)
  • 1 cup vanilla ice cream
  • 1 cup crushed ice
  • 1/2 cup milk (whole or 2%)
  • 1/4 cup granulated sugar (adjust based on sweetness preference)
  • 1 teaspoon vanilla extract
  • Zest of 1 orange (for added flavor)
  • Fresh orange slices and mint leaves (for garnish)

The star of this Frozen Orange Creamsicle Slush is the orange juice, which provides the vibrant, citrusy base. Freshly squeezed juice will yield the brightest flavor, but store-bought options can be just as convenient. If you’re opting for store-bought, choose 100% pure juice with no added sugars for the best results. Another essential ingredient is the vanilla ice cream; it adds creaminess and sweetness. You can substitute it with dairy-free ice cream if you’re looking for a vegan option. Whole or 2% milk complements the ice cream, creating a smooth blend. If you want a lower-calorie version, almond or oat milk can be good alternatives.

Lastly, the granulated sugar can be adjusted based on your sweetness preference. If you prefer a more natural sweetener, consider using honey or agave syrup. The orange zest enhances the flavor profile, providing an aromatic pop that brings the whole slush together. Don’t skip it! It adds an extra layer of brightness that makes this slush truly special.

Step-by-Step Instructions

  1. Start by preparing your ingredients. Gather 2 cups of orange juice, 1 cup of vanilla ice cream, and 1 cup of crushed ice. Make sure the ice is finely crushed, as larger chunks can make blending difficult.
  2. In a blender, combine the orange juice, vanilla ice cream, crushed ice, and 1/2 cup of milk. Add 1/4 cup of granulated sugar and 1 teaspoon of vanilla extract. If you like a sweeter slush, consider adding a bit more sugar at this stage.
  3. Add the zest of 1 orange to the blender. This step is crucial for enhancing the citrus flavor of your slush. Make sure not to include the bitter white pith—only the flavorful zest.
  4. Blend the mixture on medium-high speed for about 30-45 seconds. Stop once the ingredients are fully combined and the slush has a smooth, even consistency. If you notice large chunks of ice, blend for an additional 10-15 seconds. Avoid over-blending, as this can make the slush too liquidy.
  5. Once blended, taste the slush. If it needs more sweetness, add a little more sugar and blend for a few more seconds. If it’s too thick, you can add a splash of milk to reach your desired consistency.
  6. Pour the slush into glasses. This recipe typically serves 4, but you can easily double it for larger gatherings. Use a spoon to help guide the slush into the glasses if needed.
  7. Garnish each serving with fresh orange slices and mint leaves. The mint not only adds a pop of color but also a refreshing aroma that complements the citrus flavors beautifully.
  8. Serve immediately and enjoy! If you’ve made extra, you can refrigerate it for a short time, but it’s best enjoyed fresh.

Pro Tips for the Best Frozen Orange Creamsicle Slush

  • Don’t skip the orange zest! It’s a game-changer for flavor. Always zest before juicing to make it easier.
  • Use a high-powered blender for the best texture. A standard blender may struggle with ice, leading to uneven consistency. If you have a food processor, that can work too, but ensure the ice is finely crushed.
  • Adjust the ice-to-liquid ratio carefully. If your slush is too thick, it won’t blend well. Start with less ice and add more until you reach your preferred texture.
  • Be cautious with the sugar! Always start with the lower amount, as you can easily add more, but it’s hard to fix an overly sweet slush.
  • For a fun twist, consider adding a splash of coconut milk or a handful of fresh fruit like strawberries or pineapple. This not only enhances the flavor but also adds a beautiful color contrast.

Variations & Serving Ideas

There are countless ways to put a spin on your Frozen Orange Creamsicle Slush. Consider making a tropical version by adding in some pineapple juice or coconut milk for a delightful tropical twist. If you’re feeling adventurous, try incorporating a handful of frozen mango or peach slices for added sweetness. For a lighter version, swap out the vanilla ice cream for Greek yogurt for a creamy yet tangy alternative.

As for serving ideas, this refreshing slush pairs wonderfully with light summer dishes like grilled chicken skewers, fish tacos, or a simple salad topped with citrus vinaigrette. The bright, zesty flavors of the slush complement these dishes perfectly, making them an ideal pairing for a sunny day.

Storage, Make-Ahead & Reheating

This Frozen Orange Creamsicle Slush is best enjoyed fresh, but if you have leftovers, you can store them in an airtight container in the fridge for up to 2 days. Just keep in mind that the slush may lose some of its texture over time as the ice melts. It doesn’t freeze well, as the ice will turn into a solid block. If you must freeze it, blend again after thawing to restore the slushy consistency. This treat is best the day you make it, as the flavors meld together beautifully overnight, enhancing its deliciousness.

Frequently Asked Questions

Can I make Frozen Orange Creamsicle Slush ahead of time?

Yes — in fact, it tastes even better the next day as the flavors meld. However, it’s best to enjoy it fresh, as the texture can change if stored for too long. If you need to prepare it ahead, keep it in the fridge and re-blend before serving.

What kind of orange juice should I use?

For the best flavor, use freshly squeezed orange juice. However, if you’re short on time, opt for 100% pure store-bought juice without added sugars. This will ensure that your slush remains flavorful and refreshing.

Can I substitute the vanilla ice cream?

Absolutely! If you’re looking for a dairy-free option, coconut milk ice cream or a non-dairy vanilla ice cream can work wonderfully. They will still provide the creamy texture and sweetness you desire.

How can I adjust the sweetness of my slush?

You can easily adjust the sweetness by modifying the amount of sugar added. Start with 1/4 cup and taste the mixture before blending. If you prefer it sweeter, add more sugar gradually until it reaches your desired level.

What should I do if my slush is too thick?

If your slush is too thick, simply add a splash of milk or orange juice and blend again. This will help achieve a more drinkable consistency while maintaining the slushy texture. Adjust gradually to reach your preferred thickness.

Sun-Kissed Frozen Orange Cream Slush

Final Thoughts

The Frozen Orange Creamsicle Slush is a delightful blend of refreshing citrus and creamy goodness, making it a perfect treat for warm days or any time you crave a taste of nostalgia. The way the bright orange flavor dances with the creamy texture truly elevates this slush, transforming it into a satisfying escape from the everyday.

This is the kind of recipe I come back to again and again, especially when I’m looking to cool down or impress guests at a summer gathering. It’s simple to make and always brings smiles all around! I encourage you to try this recipe for yourself—don’t hesitate to share your results or even put your own spin on it. Happy slushing!

Print
clock clock iconcutlery cutlery iconflag flag iconfolder folder iconinstagram instagram iconpinterest pinterest iconfacebook facebook iconprint print iconsquares squares iconheart heart iconheart solid heart solid icon

Frozen Orange Creamsicle Slush


  • Author: Lily author
  • Total Time: 15 minutes
  • Yield: 4 servings 1x
Pin Recipe
Print Recipe

Description

This Frozen Orange Creamsicle Slush is a refreshing treat that combines creamy vanilla and zesty orange flavors. Perfect for hot summer days, it brings back nostalgic memories with every sip.


Ingredients

Scale
  • 2 cups orange juice (freshly squeezed or store-bought)
  • 1 cup vanilla ice cream
  • 1 cup crushed ice
  • 1/2 cup milk (whole or 2%)
  • 1/4 cup granulated sugar (adjust based on sweetness preference)
  • 1 teaspoon vanilla extract
  • Zest of 1 orange (for added flavor)
  • Fresh orange slices and mint leaves (for garnish)

Instructions

  1. Start by preparing your ingredients. Gather 2 cups of orange juice, 1 cup of vanilla ice cream, and 1 cup of crushed ice. Make sure the ice is finely crushed, as larger chunks can make blending difficult.
  2. In a blender, combine the orange juice, vanilla ice cream, crushed ice, and 1/2 cup of milk. Add 1/4 cup of granulated sugar and 1 teaspoon of vanilla extract. If you like a sweeter slush, consider adding a bit more sugar at this stage.
  3. Add the zest of 1 orange to the blender. This step is crucial for enhancing the citrus flavor of your slush. Make sure not to include the bitter white pith—only the flavorful zest.
  4. Blend the mixture on medium-high speed for about 30-45 seconds. Stop once the ingredients are fully combined and the slush has a smooth, even consistency. If you notice large chunks of ice, blend for an additional 10-15 seconds. Avoid over-blending, as this can make the slush too liquidy.
  5. Once blended, taste the slush. If it needs more sweetness, add a little more sugar and blend for a few more seconds. If it’s too thick, you can add a splash of milk to reach your desired consistency.
  6. Pour the slush into glasses. This recipe typically serves 4, but you can easily double it for larger gatherings. Use a spoon to help guide the slush into the glasses if needed.
  7. Garnish each serving with fresh orange slices and mint leaves. The mint not only adds a pop of color but also a refreshing aroma that complements the citrus flavors beautifully.
  8. Serve immediately and enjoy! If you’ve made extra, you can refrigerate it for a short time, but it's best enjoyed fresh.
  • Prep Time: 15 min
  • Cook Time: 0 min
  • Category: Dessert
  • Method: Blending
  • Cuisine: American

Nutrition

  • Serving Size: 1 serving
  • Calories: 200
  • Sugar: 30 g
  • Sodium: 50 mg
  • Fat: 5 g
  • Saturated Fat: 3 g
  • Unsaturated Fat: 2 g
  • Trans Fat: 0 g
  • Carbohydrates: 40 g
  • Fiber: 1 g
  • Protein: 2 g
  • Cholesterol: 20 mg

Keywords: Don't skip the orange zest! It's a game-changer for flavor. Always zest before juicing to make it easier.

Did you make this recipe?

Share a photo and tag us — we can't wait to see what you've made!

Zesty Lemon Poppy Seed Delight

One rainy afternoon, I found myself in my grandmother’s cozy kitchen, the kind that always smelled like warmth and love. She was whipping up her famous Lemon Poppy Seed Loaf, a recipe that had been passed down through generations. As the batter came together, the zesty aroma of fresh lemons filled the air, mingling perfectly with the nutty fragrance of poppy seeds. I can still picture her, apron-clad, as she expertly drizzled a vibrant citrus icing over the loaf, creating a glossy, sun-kissed finish that beckoned us to dive in. It was a moment that sparked my own passion for baking, and this recipe has become a cherished staple in my home ever since.

When you take a bite of this Lemon Poppy Seed Loaf, it’s like a burst of sunshine on your palate. The loaf is beautifully golden, with a tender crumb that melts in your mouth. Each slice is speckled with tiny poppy seeds, adding a delightful crunch that contrasts beautifully with the tangy sweetness of the lemon. And that citrus icing? It’s the finishing touch that elevates this loaf from ordinary to extraordinary, with its bright, zesty flavor dancing on your taste buds.

This recipe stands out because it embraces simplicity while delivering on flavor. I’ve added a hint of vanilla to the batter, enhancing the overall taste and making it even more indulgent. Trust me, once you make this Lemon Poppy Seed Loaf With Citrus Icing, it’ll become a go-to in your baking repertoire.

So, let me show you exactly how to make it!

Zesty Lemon Poppy Seed Delight

Why You’ll Love This Recipe

  • Moist and tender crumb that melts in your mouth, thanks to the perfect balance of butter and buttermilk.
  • Bright, zesty lemon flavor paired with crunchy poppy seeds, creating a delightful texture and taste experience.
  • Easy to whip up in just about an hour, perfect for last-minute gatherings or a cozy afternoon treat.
  • Budget-friendly with everyday ingredients, making it an accessible option for all home bakers.
  • The citrus icing adds a sweet tang that elevates the loaf, turning a simple recipe into a showstopper!

Ingredients

  • 1 ½ cups (190g) all-purpose flour
  • 1 teaspoon baking powder
  • ½ teaspoon baking soda
  • ½ teaspoon salt
  • 3 tablespoons poppy seeds
  • ½ cup (115g) unsalted butter, softened to room temperature
  • 1 cup (200g) granulated sugar
  • 2 large eggs
  • 1 teaspoon vanilla extract
  • 1 teaspoon lemon zest (from about 1 medium lemon)
  • ½ cup (120ml) buttermilk
  • 2 tablespoons fresh lemon juice

For the Citrus Icing:

  • 1 cup (120g) powdered sugar
  • 2 tablespoons fresh lemon juice
  • 1 tablespoon orange juice
  • 1 teaspoon lemon zest (for garnish, optional)

Let’s dive into the key ingredients that make this Lemon Poppy Seed Loaf so special. The all-purpose flour provides the structure and base for the loaf, while the baking powder and baking soda ensure it rises perfectly, giving the loaf a light texture. For a gluten-free variation, you could substitute the flour with a gluten-free all-purpose blend. Poppy seeds not only add a delightful crunch but also contribute to the unique flavor profile that pairs well with the citrus notes.

Unsalted butter is crucial for achieving the buttery richness that makes this loaf so moist. If you’re looking for a dairy-free option, coconut oil or a vegan butter can be used instead. The buttermilk is another essential component, providing acidity that activates the baking soda for a fluffy texture. If you don’t have buttermilk on hand, you can easily make a substitute by mixing ½ cup of milk with 1 tablespoon of vinegar or lemon juice and letting it sit for about 5 minutes.

Step-by-Step Instructions

  1. Preheat your oven to 350°F (175°C). Grease a 9×5-inch loaf pan or line it with parchment paper for easy removal later.
  2. In a medium mixing bowl, whisk together 1 ½ cups of all-purpose flour, 1 teaspoon of baking powder, ½ teaspoon of baking soda, ½ teaspoon of salt, and 3 tablespoons of poppy seeds. This helps to evenly distribute the baking agents and ensures a uniform rise.
  3. In a large mixing bowl, cream together ½ cup of softened unsalted butter and 1 cup of granulated sugar using an electric mixer on medium speed for about 3-4 minutes, until the mixture is light and fluffy. Make sure to scrape down the sides of the bowl occasionally.
  4. Add 2 large eggs, 1 teaspoon of vanilla extract, and 1 teaspoon of lemon zest to the creamed butter and sugar, mixing until fully combined. You want a smooth consistency, so ensure there are no lumps of butter.
  5. In a small bowl, combine ½ cup of buttermilk and 2 tablespoons of fresh lemon juice. Alternately add the dry ingredients and buttermilk mixture to the butter mixture, starting and ending with the dry ingredients. Mix just until combined; do not overmix, as this can lead to a dense loaf.
  6. Pour the batter into the prepared loaf pan. Smooth the top with a spatula, ensuring it’s even. Bake in the preheated oven for 50-60 minutes, or until a toothpick inserted in the center comes out clean. The edges should be lightly golden brown, and the center should feel just set.
  7. Once baked, remove the loaf from the oven and allow it to cool in the pan for about 10 minutes. Then, transfer it to a wire rack to cool completely. Resist the urge to slice too soon, as it will be crumbly if it’s still warm.
  8. While the loaf is cooling, prepare the citrus icing. In a medium bowl, whisk together 1 cup of powdered sugar, 2 tablespoons of fresh lemon juice, and 1 tablespoon of orange juice until smooth. If the icing is too thick, you can add a little more juice to reach your desired consistency.
  9. Once the loaf is completely cool, drizzle the citrus icing over the top. If you like, sprinkle with an additional teaspoon of lemon zest for an extra pop of flavor and color.

Pro Tips for the Best Lemon Poppy Seed Loaf With Citrus Icing

  • Be careful not to overmix your batter; this is a common mistake that can lead to a dense loaf. Mix just until the dry ingredients are incorporated for a light and fluffy texture.
  • Use room temperature ingredients, especially the butter and eggs. This helps to create a smoother batter and ensures even baking. Take your eggs out of the fridge about 30 minutes before you start.
  • For a more pronounced lemon flavor, consider adding a little lemon extract in addition to the zest and juice. Just a half teaspoon can elevate the citrus notes significantly.
  • When measuring your flour, spoon it into the measuring cup and level it off with a knife instead of scooping directly from the bag. This prevents packing and ensures you don’t end up with a dry loaf.
  • Invest in a good quality loaf pan; it makes a difference in heat distribution, which ensures even baking. If your pan is dark-coated, reduce the oven temperature by 25°F to prevent over-browning.

Variations & Serving Ideas

For a delightful twist, consider adding blueberries or raspberries to the batter for a fruity burst of flavor. You can also experiment with different citrus fruits—try lime or grapefruit zest and juice for a refreshing change. For a healthier option, substitute half of the all-purpose flour with whole wheat flour for added fiber without compromising too much on texture.

This Lemon Poppy Seed Loaf pairs beautifully with a light salad, such as a mixed greens salad with a vinaigrette, or a cup of tea for a cozy afternoon treat. It also complements a creamy cheese platter, as the acidity of the loaf balances rich cheeses perfectly. Lastly, a scoop of vanilla ice cream on the side creates a delightful contrast of temperatures and flavors!

Storage, Make-Ahead & Reheating

This Lemon Poppy Seed Loaf can be stored at room temperature for up to 3 days if wrapped tightly in plastic wrap. If you want to keep it longer, it freezes well for up to 3 months. To freeze, wrap the loaf tightly in plastic wrap and then in aluminum foil to prevent freezer burn.

When you’re ready to enjoy it again, simply thaw it in the fridge overnight. Reheat individual slices in the microwave for 15-20 seconds or in a toaster oven until warmed through. Interestingly, many people find that this loaf tastes even better the next day, as the flavors have time to meld!

Frequently Asked Questions

Can I make Lemon Poppy Seed Loaf With Citrus Icing ahead of time?

Yes — in fact, it tastes even better the next day! You can make the loaf a day in advance, allowing the flavors to develop. Just be sure to store it in an airtight container to maintain its moisture.

Can I substitute the poppy seeds?

Absolutely! If you don’t have poppy seeds on hand or prefer an alternative, you can use sesame seeds for a similar crunch or omit them entirely for a smooth loaf.

What can I use instead of buttermilk?

If you don’t have buttermilk, you can easily create a substitute by mixing ½ cup of milk (dairy or plant-based) with 1 tablespoon of vinegar or lemon juice. Let it sit for 5 minutes before using in the recipe.

How can I make this recipe gluten-free?

To make a gluten-free version of this Lemon Poppy Seed Loaf, substitute the all-purpose flour with a gluten-free all-purpose flour blend. Just ensure that the blend contains a binding agent like xanthan gum for the best results.

What is the best way to store leftover loaf?

Leftover Lemon Poppy Seed Loaf should be stored in an airtight container at room temperature for up to 3 days. For longer storage, wrap it tightly and freeze for up to 3 months. Thaw it before serving for the best texture.

Zesty Lemon Poppy Seed Delight

Final Thoughts

The Lemon Poppy Seed Loaf with Citrus Icing is truly a delightful treat that brings a burst of brightness to any occasion. The zesty lemon flavor combined with the subtle crunch of poppy seeds creates a satisfying balance, while the citrus icing adds a touch of sweetness that perfectly complements the loaf’s tanginess.

This is the kind of recipe I come back to again and again, especially when I want to brighten up a gloomy day or celebrate a small victory. The aroma that fills the kitchen as it bakes is absolutely heavenly! I encourage you to give this recipe a try; you might just find it becoming a beloved staple in your home. Don’t forget to share your results or even add your own unique twist—I can’t wait to see what you create!

Print
clock clock iconcutlery cutlery iconflag flag iconfolder folder iconinstagram instagram iconpinterest pinterest iconfacebook facebook iconprint print iconsquares squares iconheart heart iconheart solid heart solid icon

Lemon Poppy Seed Loaf


  • Author: Lily author
  • Total Time: 38 minute
  • Yield: 1 loaf 1x
Pin Recipe
Print Recipe

Description

This Lemon Poppy Seed Loaf is a delightful treat that combines zesty lemon flavor with crunchy poppy seeds. Topped with a citrus icing, it’s perfect for any occasion.


Ingredients

Scale
  • 1 ½ cups (190g) all-purpose flour
  • 1 teaspoon baking powder
  • ½ teaspoon baking soda
  • ½ teaspoon salt
  • 3 tablespoons poppy seeds
  • ½ cup (115g) unsalted butter, softened to room temperature
  • 1 cup (200g) granulated sugar
  • 2 large eggs
  • 1 teaspoon vanilla extract
  • 1 teaspoon lemon zest (from about 1 medium lemon)
  • ½ cup (120ml) buttermilk
  • 2 tablespoons fresh lemon juice
  • 1 cup (120g) powdered sugar
  • 2 tablespoons fresh lemon juice
  • 1 tablespoon orange juice
  • 1 teaspoon lemon zest (for garnish, optional)

Instructions

  1. Preheat your oven to 350°F (175°C). Grease a 9×5-inch loaf pan or line it with parchment paper for easy removal later.
  2. In a medium mixing bowl, whisk together 1 ½ cups of all-purpose flour, 1 teaspoon of baking powder, ½ teaspoon of baking soda, ½ teaspoon of salt, and 3 tablespoons of poppy seeds. This helps to evenly distribute the baking agents and ensures a uniform rise.
  3. In a large mixing bowl, cream together ½ cup of softened unsalted butter and 1 cup of granulated sugar using an electric mixer on medium speed for about 3-4 minutes, until the mixture is light and fluffy. Make sure to scrape down the sides of the bowl occasionally.
  4. Add 2 large eggs, 1 teaspoon of vanilla extract, and 1 teaspoon of lemon zest to the creamed butter and sugar, mixing until fully combined. You want a smooth consistency, so ensure there are no lumps of butter.
  5. In a small bowl, combine ½ cup of buttermilk and 2 tablespoons of fresh lemon juice. Alternately add the dry ingredients and buttermilk mixture to the butter mixture, starting and ending with the dry ingredients. Mix just until combined; do not overmix, as this can lead to a dense loaf.
  6. Pour the batter into the prepared loaf pan. Smooth the top with a spatula, ensuring it’s even. Bake in the preheated oven for 50-60 minutes, or until a toothpick inserted in the center comes out clean. The edges should be lightly golden brown, and the center should feel just set.
  7. Once baked, remove the loaf from the oven and allow it to cool in the pan for about 10 minutes. Then, transfer it to a wire rack to cool completely. Resist the urge to slice too soon, as it will be crumbly if it’s still warm.
  8. While the loaf is cooling, prepare the citrus icing. In a medium bowl, whisk together 1 cup of powdered sugar, 2 tablespoons of fresh lemon juice, and 1 tablespoon of orange juice until smooth. If the icing is too thick, you can add a little more juice to reach your desired consistency.
  9. Once the loaf is completely cool, drizzle the citrus icing over the top. If you like, sprinkle with an additional teaspoon of lemon zest for an extra pop of flavor and color.
  • Prep Time: 15 mins
  • Cook Time: 50-60 mins
  • Category: Dessert
  • Method: Baking
  • Cuisine: American

Nutrition

  • Serving Size: 1 slice
  • Calories: 200
  • Sugar: 15 g
  • Sodium: 150 mg
  • Fat: 8 g
  • Saturated Fat: 5 g
  • Unsaturated Fat: 3 g
  • Trans Fat: 0 g
  • Carbohydrates: 30 g
  • Fiber: 1 g
  • Protein: 3 g
  • Cholesterol: 40 mg

Keywords: Be careful not to overmix your batter; this is a common mistake that can lead to a dense loaf. Use room temperature ingredients for a smoother batter and even baking.

Did you make this recipe?

Share a photo and tag us — we can't wait to see what you've made!

  • Privacy Policy
  • Terms Of Service
  • Contact
  • About
  • GDPR

Copyright © 2025 Homesmad