Pumpkinchocolatemuffins.html invites you to experience the quintessential flavors of autumn, a truly irresistible combination that captures the heart and palate. I believe there’s nothing quite like the aroma of freshly baked pumpkin and spice filling your kitchen, especially when those warm notes are complemented by the decadent allure of melted chocolate. These aren’t just any muffins; they represent a beautiful fusion of tradition and indulgence, promising a comforting embrace with every single bite.
A Beloved Seasonal Pairing
While the concept of a muffin dates back centuries, evolving from simple quick breads, the ingenious pairing of pumpkin and chocolate is a more modern culinary masterpiece. Pumpkin itself boasts a rich history as a staple in North American cuisine, particularly during the vibrant fall harvest season. Combining its earthy sweetness with the universal appeal of chocolate creates a dish that perfectly encapsulates the desire for comforting, spiced baked goods that warm us from the inside out as the days grow shorter.
People adore these muffins for myriad reasons. The pumpkin purée ensures an incredibly moist and tender crumb, a texture that simply melts in your mouth. Then, you encounter those glorious pockets of chocolate chips, slightly gooey from the oven, providing a delightful counterpoint to the earthy sweetness of the pumpkin and the aromatic spices like cinnamon, nutmeg, and ginger. They offer the perfect balance of wholesome goodness and a touch of luxury, making them ideal for a cozy breakfast, an afternoon treat with coffee, or even a delightful dessert. Crafting your own Pumpkinchocolatemuffins.html at home is a rewarding experience, transforming simple ingredients into a truly memorable baked good that will undoubtedly become a seasonal favorite.
Ingredients:
-
For the Dry Ingredients:
- 2 ½ cups (300g) all-purpose flour, sifted
- 1 ½ cups (300g) granulated sugar
- 2 teaspoons baking powder
- 1 teaspoon baking soda
- 2 teaspoons ground cinnamon
- 1 teaspoon ground ginger
- ½ teaspoon ground nutmeg
- ¼ teaspoon ground cloves (optional, but highly recommended for depth)
- ½ teaspoon salt
-
For the Wet Ingredients:
- 1 ¾ cups (about one 15-ounce can, 425g) pure pumpkin puree (not pumpkin pie filling)
- ½ cup (120ml) vegetable oil, or any neutral oil like canola or grapeseed oil
- 2 large eggs, at room temperature
- ¼ cup (60ml) whole milk, or buttermilk for an extra tender crumb
- 2 teaspoons pure vanilla extract
-
For the Chocolate Chips:
- 1 ½ cups (250g) semi-sweet chocolate chips (or a mix of milk and dark chocolate chips for varied sweetness)
- Optional: 2 tablespoons additional chocolate chips for sprinkling on top before baking
Preparing the Dry Ingredients for Our Delicious Pumpkin Chocolate Muffins
- First things first, let’s get our dry ingredients perfectly combined. Take a large mixing bowl – you’ll want plenty of room for everything to come together. Into this bowl, I like to sift my all-purpose flour. Sifting isn’t just for fancy cakes; it really helps to aerate the flour and prevents lumps, ensuring our pumpkin chocolate muffins have a wonderfully light and even texture. If you don’t have a sifter, a whisk works almost as well; just make sure to whisk vigorously for about 30 seconds to break up any clumps. This step is a small effort that yields big results in the final texture of your muffins.
- Once the flour is in, add the granulated sugar, baking powder, and baking soda. These are our leavening agents, and they’re crucial for giving our muffins that lovely rise and airy interior. Don’t skip them! They work in tandem to create those delightful air pockets that make muffins so appealing.
- Now for the magic of the spices! Add the ground cinnamon, ground ginger, ground nutmeg, and if you’re feeling a little adventurous (which I always recommend with pumpkin recipes!), a touch of ground cloves. The combination of these spices is what gives these pumpkin muffins their quintessential warm, autumnal flavor. It’s truly what makes them special and fills your home with an inviting aroma even before they hit the oven. I find that a good quality, fresh spice blend makes all the difference here, so make sure your spices haven’t been sitting in the cupboard for years!
- Finally, sprinkle in the salt. A little salt goes a long way in baking; it doesn’t just add its own flavor, but it also enhances all the other flavors, making the sweetness and spice notes truly pop. It balances everything out beautifully, preventing the muffins from tasting overly sweet or one-note.
- Using a whisk, gently but thoroughly combine all these dry ingredients. You want to make sure there are no pockets of unmixed flour or concentrated spice. Whisk until everything is uniform in color and texture. This ensures that every bite of your pumpkin chocolate muffin is consistently spiced and perfectly balanced. Set this bowl aside for now; we’ll come back to it shortly.
Combining the Wet Ingredients for That Perfect Pumpkin Flavor
- In a separate, medium-sized mixing bowl, we’re going to bring together all our wet ingredients. This step is key for ensuring a smooth, well-emulsified base for our pumpkin chocolate muffins, which in turn contributes to their incredibly moist texture. A good whisk or even a hand mixer on low speed can be useful here.
- Start by adding the pure pumpkin puree. Please be sure to use 100% pure pumpkin puree and not pumpkin pie filling. Pumpkin pie filling has added sugars and spices that will throw off the balance of our recipe. I always double-check the label! This is where the rich, moist texture and signature pumpkin flavor come from, so choosing the right product is essential for the authentic taste of these pumpkin muffins.
- Pour in the vegetable oil. Oil helps to keep the muffins incredibly moist and tender, and it contributes to a beautiful crumb. You could also use canola or grapeseed oil if you prefer. Unlike butter, which can make baked goods dense when cooled, oil keeps things wonderfully soft and light for longer, making these pumpkin chocolate muffins stay fresh for days.
- Crack in your two large eggs. It’s best if your eggs are at room temperature as they emulsify more easily with the other wet ingredients, leading to a smoother batter and a more consistent final product. If you forgot to take them out ahead of time, you can quickly warm them by placing them in a bowl of warm (not hot!) water for 5-10 minutes. This small detail can make a surprising difference in the overall texture of your baked goods.
- Next, add the whole milk. If you want an even more tender crumb and a subtle tang that complements the pumpkin beautifully, I highly recommend using buttermilk. The acidity in buttermilk reacts wonderfully with the baking soda, enhancing the rise and contributing to a softer texture. If you don’t have buttermilk, you can easily make your own by adding one tablespoon of white vinegar or lemon juice to a measuring cup and then filling it up to the ¼ cup mark with whole milk. Let it sit for 5-10 minutes until it slightly curdles – don’t worry, that’s exactly what you want!
- Finally, stir in the pure vanilla extract. Vanilla is a flavor enhancer that ties all the other sweet and spicy notes together, adding a lovely aromatic depth to our pumpkin chocolate muffins. Use a good quality vanilla extract; it genuinely elevates the overall flavor profile.
- Using a whisk, mix these wet ingredients together until they are completely smooth and well combined. You should see a beautiful, uniform orange mixture. Make sure there are no streaks of egg yolk or pockets of oil. This ensures that the pumpkin flavor and moisture are evenly distributed throughout the batter, laying a perfect foundation for our delicious pumpkin chocolate muffins.
Mixing the Batter and Incorporating Those Lovely Chocolate Chips
- Now for the exciting part – bringing it all together! Take your bowl of dry ingredients and create a well in the center. This just means pushing the dry mix aside to form a small crater in the middle. This technique helps in gradually incorporating the wet into the dry, reducing the chances of overmixing.
- Pour the entire contents of your wet ingredient mixture directly into this well. Don’t hesitate; get it all in there!
- Using a large rubber spatula or a wooden spoon, begin to gently fold the wet ingredients into the dry. The key word here is gently. You want to mix until just combined. Overmixing is the enemy of tender muffins; it develops the gluten in the flour too much, leading to tough, chewy muffins instead of light and fluffy ones. Stop as soon as you see no more dry flour patches. It’s better to under-mix slightly than to over-mix.
- As soon as the mixture is about two-thirds combined, add your semi-sweet chocolate chips. I find 1 ½ cups to be the perfect amount for a generous chocolatey bite in every pumpkin muffin, but feel free to adjust to your preference. If you like a mix of textures and flavors, try using half semi-sweet and half dark chocolate chips for added complexity. You could even use white chocolate chips if you prefer a different kind of sweetness!
-
Continue folding the batter just until the last streaks of flour disappear and the chocolate chips are evenly distributed. It’s okay if there are a few small lumps; this is actually desirable and a sign that you haven’t overmixed. The batter will be quite thick, which is exactly what we want for substantial, moist pumpkin chocolate muffins that hold their shape beautifully.
Do not overmix! This is a critical step for tender muffins. A few lumps are perfectly fine and often preferred.
Baking Our Perfectly Spiced Pumpkin Chocolate Muffins
- Preheat your oven to 400°F (200°C). This initial higher temperature is a little trick I use to get a beautiful domed top on my muffins. The burst of heat helps them rise quickly and form that desirable bakery-style crown before the temperature drops for even baking.
- Line a standard 12-cup muffin tin with paper liners. Alternatively, you can grease and flour the muffin tin thoroughly, but liners make for easier cleanup and transport, and they prevent sticking. If you’re baking a bigger batch, prepare a second muffin tin accordingly. Make sure the liners are settled snugly in the cups.
- Using a large ice cream scoop or two spoons, evenly divide the thick pumpkin chocolate muffin batter among the 12 prepared muffin cups. I like to fill each cup almost to the very top – about three-quarters full – to ensure nice, substantial muffins. Don’t be shy; a full cup yields a generous muffin that will rise beautifully.
- If you saved some chocolate chips, now’s the time to sprinkle an extra tablespoon or two over the tops of the filled muffin cups. This not only looks appealing, creating a lovely visual texture, but also gives an extra burst of chocolate right on top, which is always a delightful surprise!
- Place the muffin tin into your preheated 400°F (200°C) oven. Bake for 5 minutes at this higher temperature. This initial blast of heat is key for achieving those perfect domes on your pumpkin chocolate muffins.
-
After 5 minutes, without opening the oven door, reduce the oven temperature to 375°F (190°C). This is where the magic happens for even cooking through the center. Continue to bake for an additional 15-20 minutes, or until a wooden skewer or toothpick inserted into the center of a muffin comes out clean or with just a few moist crumbs attached. The total baking time will be around 20-25 minutes.
Keep an eye on them, as oven temperatures can vary! If they’re browning too quickly, you might slightly reduce the temperature further.
- You’ll know your pumpkin chocolate muffins are ready when they are beautifully golden brown on top, well-risen, and smell absolutely incredible – filling your kitchen with the cozy aromas of pumpkin pie spice and melting chocolate. They should feel firm but springy to the touch.
Cooling and Serving Your Irresistible Pumpkin Chocolate Muffins
- Once baked to perfection, carefully remove the muffin tin from the oven. The smell will be intoxicating, but resist the urge to immediately devour them!
- Allow the muffins to cool in the tin for about 5-10 minutes. This short cooling period in the tin helps them set up and makes them easier to remove without breaking apart. It also allows the residual heat to continue cooking them slightly, ensuring a perfectly cooked interior.
- After 5-10 minutes, gently transfer the warm pumpkin chocolate muffins from the tin to a wire cooling rack to cool completely. Cooling them on a wire rack ensures that air circulates all around them, preventing the bottoms from becoming soggy and keeping that lovely tender texture throughout.
- While they are absolutely delicious warm (and I often can’t resist one straight off the rack, especially when the chocolate is still gooey!), they are also fantastic once fully cooled. The flavors deepen, and the texture becomes even more tender. They seem to gain character as they sit!
- These pumpkin chocolate muffins are perfect for breakfast, a snack, or even a simple dessert. They pair wonderfully with a cup of coffee, a glass of cold milk, or even a dollop of whipped cream for a more decadent treat. They are truly versatile and comforting.
- Storage Tip: Store any leftover pumpkin chocolate muffins in an airtight container at room temperature for up to 3-4 days. To keep them at their peak freshness, you can also place a paper towel at the bottom of the container to absorb any excess moisture. For longer storage, you can freeze them for up to 2-3 months. Just thaw them at room temperature or pop them in the microwave for 20-30 seconds for that fresh-baked warmth when you’re ready to enjoy that amazing pumpkin and chocolate goodness again.
- I truly hope you enjoy baking and devouring these incredibly moist and flavorful pumpkin chocolate muffins as much as I do! They are a delightful treat that brings so much warmth and comfort, especially during the cooler months, and are always a hit with family and friends.
There you have it – a detailed guide to baking the most delicious pumpkin chocolate muffins you’ll ever taste! Happy baking!
Conclusion:
And there you have it, my friends! As we wrap up our journey through this delightful recipe, I genuinely hope you’re feeling as inspired and eager to get baking as I am whenever I think about these sensational treats. From the very first moment the warm, spicy aroma of baking pumpkin and melting chocolate wafts through your kitchen, you’ll know you’re onto something truly special. This isn’t just another muffin recipe; it’s a warm hug on a plate, a comforting companion for your morning coffee, and a sweet, satisfying pick-me-up for any time of day. These muffins embody everything we love about homemade goodness: they’re moist, bursting with flavor, incredibly easy to make, and utterly irresistible. Trust me when I say, once you’ve experienced the rich, earthy notes of pumpkin perfectly complemented by the decadent sweetness of chocolate in a pillowy-soft muffin, your snack game will be forever changed.
What makes this recipe a must-try, you ask? It’s the impeccable balance. We’re not talking about an overly sweet confection that overwhelms your palate, nor is it a dry, crumbly disappointment. Instead, you’ll discover a harmonious blend where the natural sweetness of pumpkin puree meets the robust, comforting spices of autumn, all uplifted by generous pockets of gooey chocolate. The texture is simply divine—tender, moist, and wonderfully fluffy, holding its structure beautifully while practically melting in your mouth. This particular recipe, what I often internally refer to as my ‘Pumpkinchocolatemuffins.html’ delight, ensures that every bite is packed with that quintessential autumn-meets-indulgence flavor. It’s a guaranteed crowd-pleaser, perfect for sharing with loved ones or, let’s be honest, secretly stashing away for your own enjoyment throughout the week. It’s a recipe that delivers on comfort, flavor, and sheer baking joy, making it an essential addition to your baking repertoire.
Elevate Your Muffin Experience: Serving & Variation Ideas
Now, while these muffins are absolutely perfect straight out of the oven, perhaps still warm with chocolate chips glistening, I encourage you to get creative with how you enjoy them. For a truly luxurious experience, try serving them slightly warm with a generous dollop of freshly whipped cream, perhaps infused with a hint of vanilla or maple syrup. A sprinkle of cinnamon sugar or a light dusting of powdered sugar can add a lovely touch to their appearance and a subtle extra sweetness. For those who enjoy a richer dessert, a scoop of vanilla bean ice cream alongside a warm muffin creates a divine pairing that rivals any fancy restaurant dessert. Imagine that contrast of warm, spiced muffin and cold, creamy ice cream—pure bliss!
Don’t stop there with the imagination! This recipe is incredibly adaptable, inviting you to experiment and make it your own. If you’re a fan of nuts, consider folding in a handful of chopped pecans or walnuts with the chocolate chips for an added layer of crunch and nutty flavor. For an even more intense spice profile, feel free to increase the amounts of cinnamon, nutmeg, ginger, and allspice, or even add a pinch of cloves. Chocolate lovers can go wild! Swap out semi-sweet chips for dark chocolate chunks for a more sophisticated bitterness, or mix in some white chocolate chips for a sweeter, creamier contrast. You could even drizzle a simple cream cheese glaze over the cooled muffins for an extra touch of decadence. Simply whisk together powdered sugar, a little softened cream cheese, and a splash of milk or vanilla extract until smooth. For a healthier twist, you could experiment with adding a handful of dried cranberries or raisins, which would provide a lovely tartness against the sweet base. These muffins also make fantastic mini muffins, perfect for parties, brunches, or little lunchbox treats. Just adjust the baking time accordingly, usually to about 12-15 minutes.
Your Turn to Bake and Share!
My greatest joy comes from knowing that you’re creating delicious memories in your own kitchen. So, I wholeheartedly encourage you to roll up your sleeves, gather your ingredients, and give this wonderful pumpkin and chocolate muffin recipe a try. You’ll be amazed at how simple it is to achieve such extraordinary results. Don’t hesitate; the aroma alone is worth the effort! Once you’ve baked your batch, I would absolutely love to hear about your experience. Did you stick to the original recipe, or did you venture into some exciting variations? What did your family and friends think? Please share your baking stories, your triumphs, and even your funny kitchen mishaps in the comments section below. I’m always thrilled to connect with fellow food enthusiasts and see your culinary creations. Snap a picture of your beautiful muffins and share them with our community—let’s inspire each other to bake more, share more, and enjoy the simple pleasures of homemade treats. Happy baking, everyone!
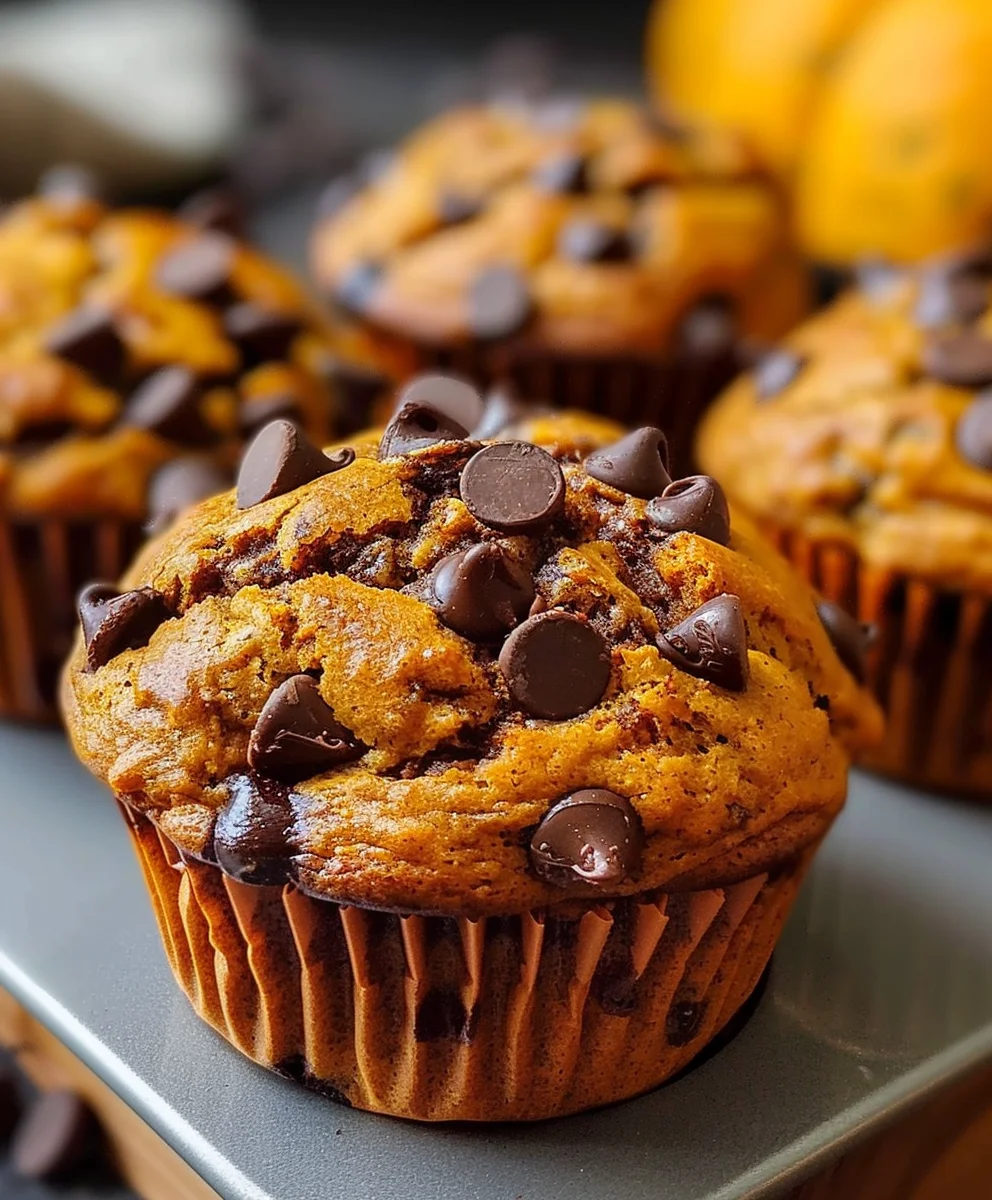
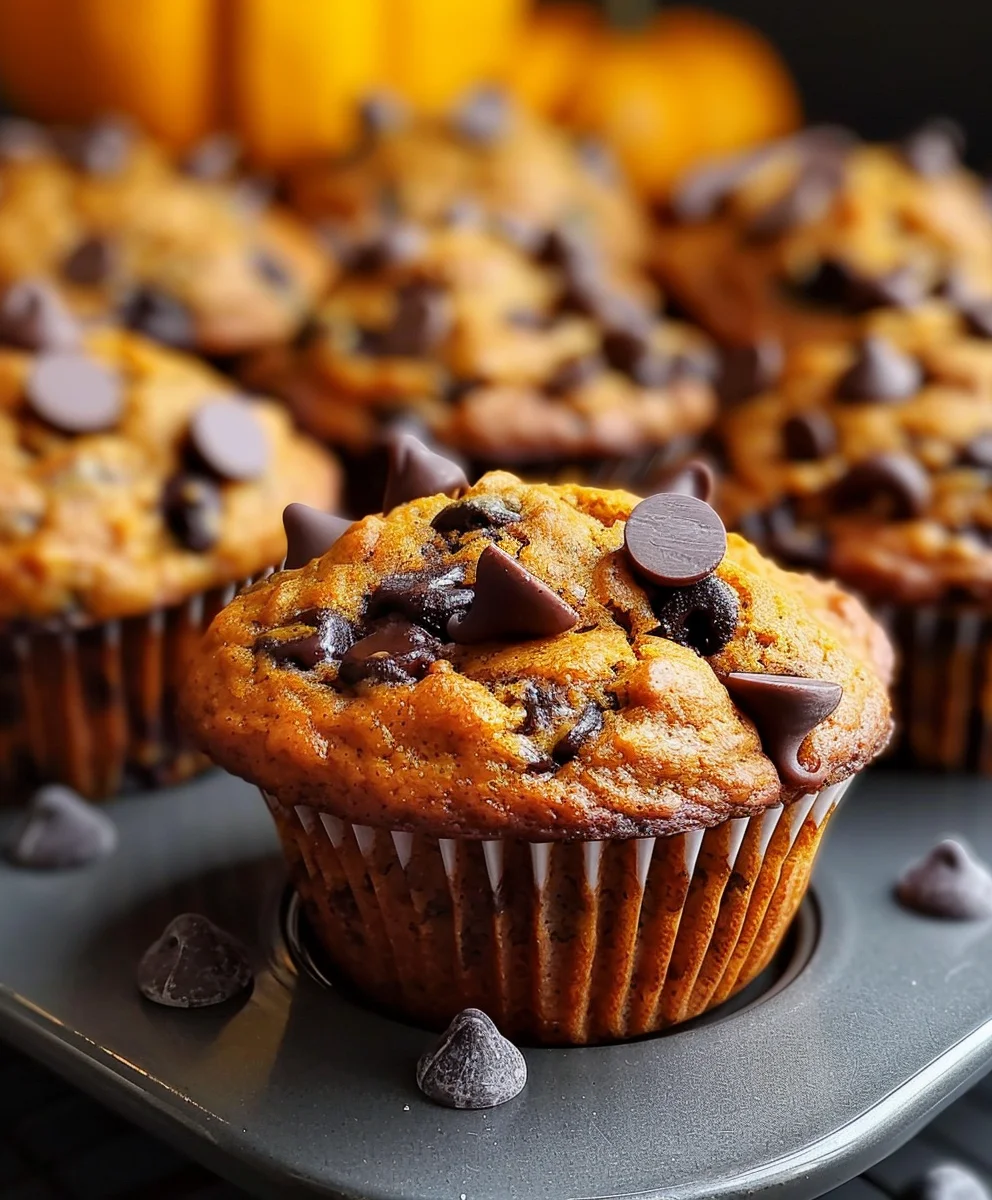
Pumpkin Chocolate Muffins: Your New Favorite Fall Bake
Fluffy pumpkin muffins loaded with chocolate chips, perfect for autumn mornings and cozy afternoons.
Ingredients
-
2 ½ cups (300g) all-purpose flour
-
1 ½ cups (300g) granulated sugar
-
2 tsp baking powder
-
1 tsp baking soda
-
2 tsp ground cinnamon
-
1 tsp ground ginger
-
½ tsp ground nutmeg
-
¼ tsp ground cloves (optional)
-
½ tsp salt
-
1 ¾ cups (425g) pure pumpkin puree
-
½ cup (120ml) vegetable oil
-
2 large eggs, room temperature
-
¼ cup (60ml) whole milk (or buttermilk)
-
2 tsp pure vanilla extract
-
1 ½ cups (250g) semi-sweet chocolate chips
-
2 tbsp chocolate chips (optional, for topping)
Instructions
-
Step 1
In a large mixing bowl, whisk together the all-purpose flour, granulated sugar, baking powder, baking soda, ground cinnamon, ground ginger, ground nutmeg, optional ground cloves, and salt until well combined. Set aside. -
Step 2
In a separate medium-sized mixing bowl, whisk together the pure pumpkin puree, vegetable oil, large eggs (at room temperature), whole milk (or buttermilk), and pure vanilla extract until completely smooth and uniform. -
Step 3
Create a well in the center of the dry ingredients. Pour the wet mixture into the well. Using a rubber spatula, gently fold the wet ingredients into the dry until just combined, being careful not to overmix. Once about two-thirds combined, fold in the 1 ½ cups of semi-sweet chocolate chips until evenly distributed and no dry flour streaks remain. A few lumps are fine. -
Step 4
Preheat your oven to 400°F (200°C). Line a standard 12-cup muffin tin with paper liners or grease thoroughly. -
Step 5
Evenly divide the thick pumpkin chocolate muffin batter among the 12 prepared muffin cups, filling each about three-quarters full. If desired, sprinkle the tops of the filled cups with the optional 2 tablespoons of additional chocolate chips. -
Step 6
Place the muffin tin into the preheated 400°F (200°C) oven and bake for 5 minutes. Without opening the oven door, reduce the oven temperature to 375°F (190°C) and continue to bake for an additional 15-20 minutes, or until a wooden skewer or toothpick inserted into the center of a muffin comes out clean or with just a few moist crumbs attached. Muffins should be golden brown and well-risen. -
Step 7
Carefully remove the muffin tin from the oven. Allow the muffins to cool in the tin for about 5-10 minutes. Gently transfer the warm muffins to a wire cooling rack to cool completely. While delicious warm, they are also fantastic once fully cooled. Store any leftovers in an airtight container at room temperature for up to 3-4 days, or freeze for longer storage.
Important Information
Nutrition Facts (Per Serving)
It is important to consider this information as approximate and not to use it as definitive health advice.
Allergy Information
Please check ingredients for potential allergens and consult a health professional if in doubt.