Quick Chicken Pot Pie Pasta is about to become your new favorite weeknight wonder! Have you ever found yourself yearning for the ultimate comfort food experience—the warm, creamy embrace of a classic chicken pot pie—but without the lengthy prep time often associated with it? I certainly have, and that’s precisely why this recipe is a game-changer for busy evenings.
The traditional chicken pot pie holds a special place in culinary history, evolving over centuries from simple, savory crust-covered dishes into the hearty, soul-satisfying meal we know and love today. It evokes feelings of home, family, and warmth, often appearing on tables during colder months or when a comforting meal is most desired. What makes this pasta version so universally appealing is how it distills all those cherished flavors and textures into an incredibly convenient format, merging two beloved comfort foods into one.
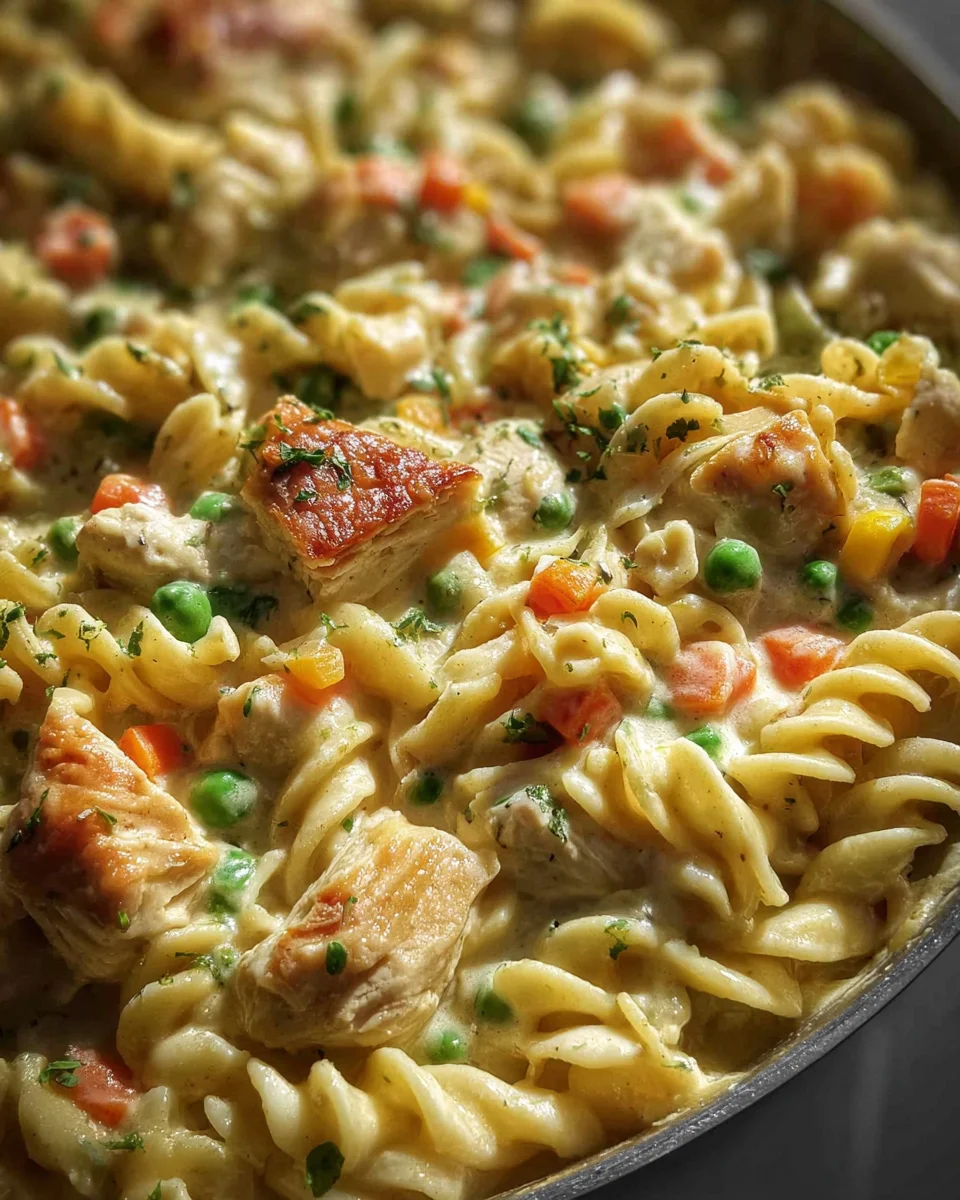
People absolutely adore this dish not only for its nostalgic taste, featuring tender chicken and a colorful medley of vegetables swimming in a rich, savory sauce, but also for its sheer convenience and the deeply satisfying experience it offers. The satisfying chew of pasta replaces the traditional pastry crust, making it quicker to prepare while still delivering that beloved creamy consistency and comforting aroma. It’s the perfect solution when you crave profound comfort and flavor but are short on time. This Quick Chicken Pot Pie Pasta truly delivers homemade goodness with unparalleled ease, making every spoonful a pure delight for the senses and a true hug in a bowl.
Ingredients:
- For the Chicken & Vegetables:
- 2 tablespoons olive oil or unsalted butter
- 1 ½ pounds boneless, skinless chicken breasts or thighs, cut into ½-inch to ¾-inch cubes
- 1 medium yellow onion, finely diced
- 2 carrots, peeled and finely diced (or ½ cup frozen diced carrots)
- 2 stalks celery, finely diced
- 1 ½ cups frozen peas
- 1 ½ cups frozen corn kernels
- 1 teaspoon dried thyme
- ½ teaspoon garlic powder
- ¼ teaspoon onion powder
- Salt and freshly ground black pepper to taste
- For the Creamy Sauce:
- ¼ cup unsalted butter
- ¼ cup all-purpose flour
- 4 cups low-sodium chicken broth
- 1 ½ cups whole milk (or half-and-half for a richer sauce)
- 1 bay leaf (optional, but highly recommended for depth)
- ½ teaspoon Dijon mustard (optional, for a subtle tang)
- Salt and freshly ground black pepper to taste
- For the Pasta:
- 12 ounces medium egg noodles, rotini, penne, or other small-to-medium pasta shape
- Water for boiling pasta
- 1 tablespoon salt for pasta water
- Optional Garnish:
- Fresh parsley, chopped
Prepping Our Ingredients for the Quick Chicken Pot Pie Pasta
- Prepare Your Chicken: If you haven’t already, take your boneless, skinless chicken breasts or thighs and carefully cut them into uniform ½-inch to ¾-inch cubes. Uniform pieces ensure even cooking, which is key for a tender chicken in our Quick Chicken Pot Pie Pasta. Pat them dry with paper towels; this helps them brown nicely later. Season the chicken generously with a pinch of salt and freshly ground black pepper.
- Chop Your Aromatics: Peel and finely dice your yellow onion. Next, peel your carrots and finely dice them as well. If you’re using fresh carrots, aim for pieces roughly the same size as your diced onion. If you’re opting for frozen diced carrots, you can skip this step, as they’re already prepped for you. Lastly, thoroughly wash and finely dice your celery stalks. Having all your vegetables prepped and ready to go in separate bowls will make the cooking process much smoother and more enjoyable. This is often referred to as “mise en place,” and it’s a chef’s best friend!
- Measure Dry Spices and Liquids: Take a moment to measure out your dried thyme, garlic powder, onion powder, and set them aside. Also, have your chicken broth, milk, and flour measured and ready to be incorporated. If you’re using a bay leaf and Dijon mustard, have those handy too. This organized approach prevents last-minute scrambling and ensures you don’t miss any critical components for our delicious dish.
Cooking the Quick Chicken Pot Pie Pasta Base
- Brown the Chicken: Place a large Dutch oven or a heavy-bottomed pot over medium-high heat. Add 2 tablespoons of olive oil or unsalted butter. Once the oil is shimmering or the butter is melted and slightly foamy, add the seasoned diced chicken in a single layer, making sure not to overcrowd the pot. You might need to do this in two batches to ensure proper browning. We’re looking for a beautiful golden-brown sear on all sides, which develops incredible flavor. Stir occasionally, allowing each piece to get that lovely crust. This step usually takes about 5-7 minutes per batch. Once browned, use a slotted spoon to transfer the chicken to a clean bowl and set it aside. Don’t worry if there are some browned bits stuck to the bottom of the pot; those are called “fond” and are packed with flavor that we’ll deglaze into our sauce.
- Sauté the Aromatics: Reduce the heat to medium. Add the finely diced onion, fresh carrots (if using), and celery to the same pot, adding another splash of olive oil or a knob of butter if needed. Sauté, stirring frequently, for about 6-8 minutes, or until the vegetables have softened and the onion becomes translucent. The aroma filling your kitchen right now should be absolutely delightful! Make sure to scrape up any of those delicious browned bits from the bottom of the pot with your wooden spoon; they’ll melt into the vegetables and contribute to a richer flavor foundation for our Quick Chicken Pot Pie Pasta.
- Build the Roux: Once the vegetables are tender, push them to one side of the pot. Add ¼ cup of unsalted butter to the empty side and let it melt. As soon as it’s melted, sprinkle in ¼ cup of all-purpose flour over the melted butter. Immediately begin whisking vigorously, combining the butter and flour to create a smooth paste, known as a roux. Continue to cook this roux, stirring constantly, for about 1-2 minutes. This step is crucial for cooking out the raw flour taste and achieving a silky-smooth sauce. The roux should turn a pale golden color and smell slightly nutty, but be careful not to burn it!
- Create the Creamy Sauce: Now comes the magic! While continuing to whisk, gradually pour in the 4 cups of low-sodium chicken broth, a little at a time. Start with about ½ cup, whisking until it’s fully incorporated and lump-free before adding more. This gradual addition helps prevent lumps and ensures a smooth, velvety sauce. Once all the broth is added, slowly whisk in the 1 ½ cups of whole milk (or half-and-half for an extra luxurious touch). Add the bay leaf (if using) and the ½ teaspoon of dried thyme, ½ teaspoon garlic powder, and ¼ teaspoon onion powder. If you’re using Dijon mustard, now is the time to stir it in as well.
- Simmer and Thicken: Bring the sauce to a gentle simmer over medium heat, stirring occasionally to prevent sticking. As it simmers, you’ll notice the sauce will begin to thicken beautifully, coating the back of your spoon. This process typically takes about 8-10 minutes. Once it reaches your desired consistency – not too thin, but not overly thick, as it will thicken slightly more as it cools and when the pasta is added – remove the bay leaf if you used one.
- Reintroduce Chicken and Veggies: Carefully return the browned chicken pieces to the pot with the thickened sauce. Add the 1 ½ cups of frozen peas and 1 ½ cups of frozen corn kernels. Stir everything together gently to combine. Allow the mixture to simmer for another 3-5 minutes, just long enough for the chicken to finish cooking through and for the frozen vegetables to heat up and become tender-crisp. Taste the sauce at this point and adjust seasonings with additional salt and freshly ground black pepper as needed. Remember, proper seasoning is paramount for a truly outstanding Quick Chicken Pot Pie Pasta!
Bringing It All Together: The Pasta and Sauce
- Cook the Pasta: While your sauce is simmering and warming, cook your pasta. Bring a large pot of generously salted water to a rolling boil. Add your 12 ounces of medium egg noodles, rotini, penne, or chosen pasta shape. Cook according to package directions until it’s al dente – that means tender but still firm to the bite. Do not overcook the pasta, as it will continue to absorb some sauce and soften further. Overcooked pasta can become mushy, which we definitely want to avoid in our pasta dish.
- Drain and Combine: Once your pasta is perfectly al dente, drain it thoroughly using a colander. There’s no need to rinse the pasta, as the starch on its surface will actually help the sauce adhere better. Immediately add the drained hot pasta directly into the pot with your creamy chicken and vegetable sauce.
-
Mix and Serve: Gently fold the pasta into the sauce, ensuring every piece is beautifully coated with the rich, creamy goodness. Stir carefully to avoid breaking up the pasta or chicken too much. Let it sit for a minute or two off the heat, allowing the pasta to absorb some of that incredible flavor.
A quick tip for the perfect consistency:
If the pasta seems a little too thick at this point, you can add a splash more chicken broth or milk to achieve your desired consistency. The pasta will continue to absorb liquid as it sits, so a slightly looser consistency initially is often ideal.
Serving Your Delicious Quick Chicken Pot Pie Pasta
- Garnish and Enjoy: Ladle generous portions of your warm and comforting Quick Chicken Pot Pie Pasta into bowls. If desired, sprinkle with fresh chopped parsley for a pop of color and fresh herbaceous flavor. This dish is truly a complete meal on its own, but it pairs wonderfully with a simple green salad and some crusty bread for soaking up every last bit of that amazing sauce.
- Storage Instructions: Leftovers of this delightful pasta dish can be stored in an airtight container in the refrigerator for up to 3-4 days. To reheat, you may need to add a splash of milk or chicken broth to loosen the sauce, as the pasta will have absorbed more liquid upon cooling. Gently warm on the stovetop over low heat or in the microwave until heated through. This Quick Chicken Pot Pie Pasta is fantastic as a packed lunch the next day, bringing warmth and comfort to your afternoon.
Conclusion:
There are some recipes that just hit differently, aren’t there? And for me, this isn’t just another dinner idea; it’s a culinary hug, a weeknight savior, and a genuine delight that I am absolutely thrilled to share with you. I truly believe that my Quick Chicken Pot Pie Pasta recipe is destined to become a beloved staple in your kitchen, capturing the comforting essence of a classic American dish and transforming it into a speedy, irresistibly creamy pasta masterpiece. It perfectly embodies everything I adore in a meal: minimal fuss, maximum flavor, and a hearty satisfaction that leaves everyone at the table smiling.
What makes this particular dish an absolute must-try? Well, for starters, it brilliantly sidesteps the time-consuming process of making and baking a traditional pot pie crust, yet it delivers all those beloved, savory, and creamy flavors we crave. Imagine tender pieces of chicken, sweet peas, and crisp carrots enveloped in a rich, velvety sauce, all tossed with your favorite pasta. It’s pure comfort food magic, elevated by its sheer simplicity and speed. It’s the kind of meal that promises to soothe the soul after a long day, without demanding hours of your precious time. The texture is divine – a perfect balance of chewy pasta, soft vegetables, and succulent chicken, all bound together by that luscious, savory sauce. It’s a symphony of flavors and textures that truly makes it stand out.
But the beauty of this Quick Chicken Pot Pie Pasta doesn’t stop at its core deliciousness; it also lies in its incredible versatility. While the recipe as written is perfection, I always encourage you, my fellow home cooks, to make it truly your own! When it comes to serving, a simple sprinkle of fresh, chopped herbs like bright green parsley or fragrant thyme not only adds a beautiful pop of color but also a wonderful aromatic lift that complements the richness of the sauce. And please, do yourself a favor and have some crusty bread on hand – you’ll want every last drop of that incredible sauce absorbed! Alternatively, a crisp, green side salad with a tangy vinaigrette would offer a delightful contrast, cutting through the creaminess beautifully.
Elevate Your Quick Chicken Pot Pie Pasta with Creative Variations:
Looking to switch things up or cater to different dietary preferences? Let your culinary creativity shine! If you want to boost the vegetable content, this recipe is incredibly forgiving. Consider adding a handful of fresh spinach or finely chopped kale during the last few minutes of cooking for an earthy, vibrant touch. Frozen corn or green beans can be added directly to the pot, requiring no pre-cooking. For a deeper flavor profile, sautéed mushrooms, perhaps cremini or shiitake, would introduce a wonderful umami richness. You could also include finely diced celery along with the onions and carrots at the beginning to build an even more robust flavor base.
For protein variations, while chicken is the star, don’t hesitate to use leftover roasted turkey for a fantastic post-holiday meal solution. If you’re aiming for a vegetarian dish, cooked chickpeas, cannellini beans, or even a blend of hearty wild mushrooms could perfectly replace the chicken, offering a satisfying and flavorful alternative. Want an extra layer of decadence? Stir in a tablespoon or two of cream cheese or even a generous sprinkle of grated sharp cheddar, Gruyère, or white cheddar cheese just before serving; it will melt into the sauce, creating an even more indulgent, gooey texture that is absolutely divine.
And let’s not forget about the pasta itself! While I often gravitate towards shapes like rotini, penne, or cavatappi for their sauce-catching abilities, feel free to use any short pasta you love. Orecchiette, shell pasta, or even bow ties would all work beautifully. For those who truly miss the classic pot pie crust, here’s a fun trick: crush some buttery crackers or even flaky biscuits and sprinkle them over the top just before serving for a delightful crunchy texture that mimics a pastry topping. Or, for a more elegant touch, bake a few small pieces of puff pastry until golden and crisp, then serve them as “croutons” on top!
So, what are you waiting for? I genuinely hope you’re feeling inspired to give this incredible recipe a try. The Quick Chicken Pot Pie Pasta isn’t just a meal; it’s an experience – one that promises warmth, comfort, and pure deliciousness with every single bite. It proves that incredibly satisfying, flavorful meals don’t have to be complicated or time-consuming. I firmly believe this recipe is destined to become a new favorite in your household, a go-to for those evenings when you crave something truly special without the fuss.
I absolutely adore hearing from you and seeing your culinary creations! Once you’ve whipped up this delightful dish, please, come back and share your experience. Did you add a unique twist? Was it a hit with your family and friends? Your feedback, creative ideas, and personal touches truly inspire me and countless other home cooks who visit this space. Tag me (hypothetically, of course!) or simply leave a comment letting me know how wonderfully it turned out. Happy cooking, my friends – I can’t wait to hear all about it!
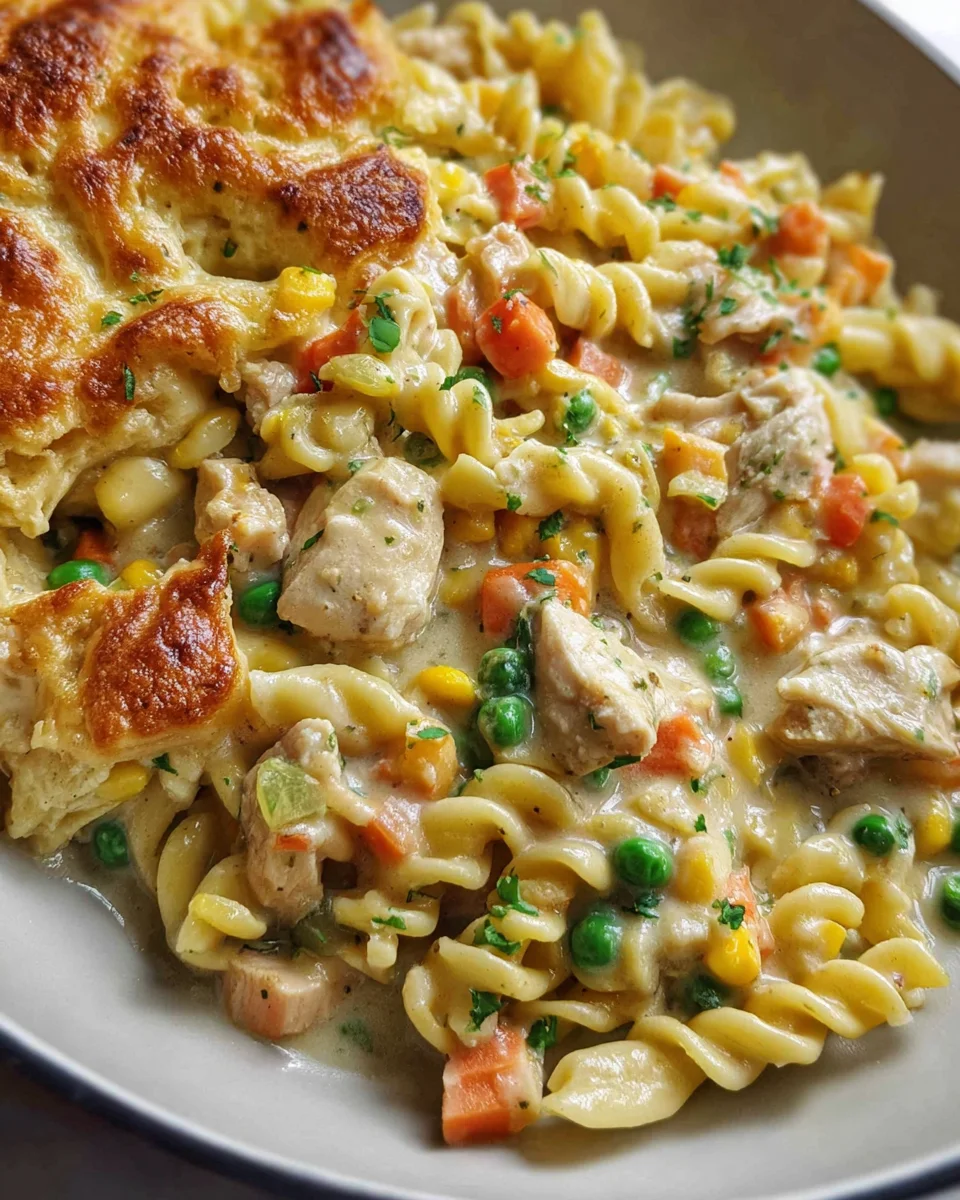
Quick Chicken Pot Pie Pasta
This Quick Chicken Pot Pie Pasta is a weeknight wonder, delivering the warm, creamy comfort of classic chicken pot pie in a convenient, hearty pasta dish. Featuring tender chicken, a colorful medley of vegetables, and a rich, savory sauce, it’s a deeply satisfying meal that’s quicker to prepare than traditional pot pie, making it a perfect ‘hug in a bowl’ for busy evenings.
Ingredients
Instructions
Important Information
Nutrition Facts (Per Serving)
It is important to consider this information as approximate and not to use it as definitive health advice.
Allergy Information
Please check ingredients for potential allergens and consult a health professional if in doubt.