• Skip to primary navigation
  • Skip to main content
  • Skip to primary sidebar
Homesmad

Homesmad

  • Home
  • Breakfast & Brunch
  • Appetizers & Snacks
  • Dinner
  • Dessert
  • About
  • Privacy Policy
  • Contact
Homesmad
  • Home
  • Breakfast & Brunch
  • Appetizers & Snacks
  • Dinner
  • Dessert
  • About
  • Privacy Policy
  • Contact

Quick Weeknight High Protein Creamy Beef Pasta Recipe

September 23, 2025 by Lily author

High Protein Creamy Beef Pasta Recipe For Quick Weeknight Dinners is more than just a title; it’s the culinary solution many of us actively seek when the clock ticks relentlessly towards dinnertime. We all know the demanding rhythm of weeknights—juggling professional commitments, family responsibilities, and the admirable desire to serve a wholesome, home-cooked meal without spending hours in the kitchen. As an avid home cook, I understand this challenge deeply, and I promise you, this exceptional dish rises to that very challenge, promising both unparalleled flavor and convenient preparation.

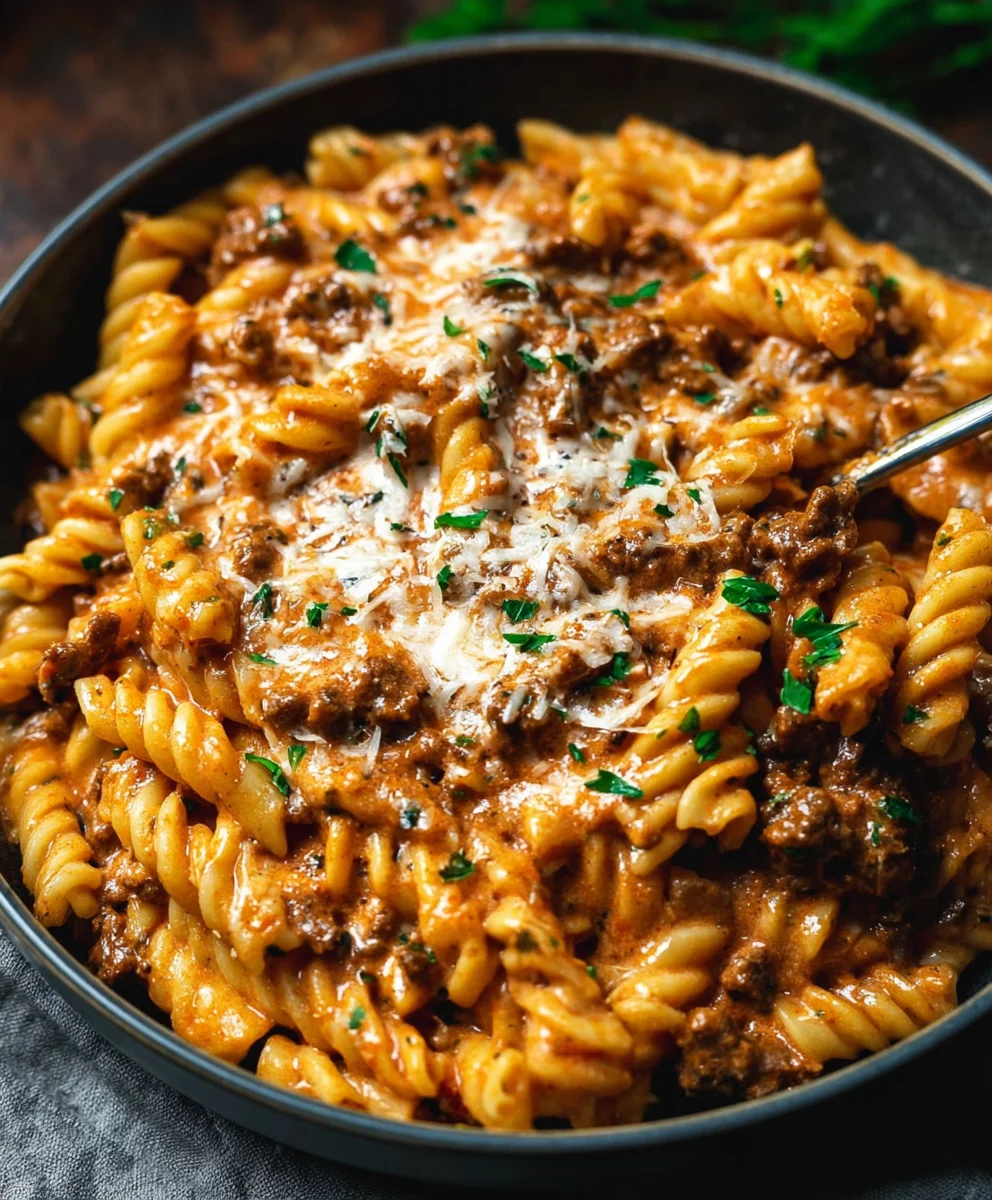
Imagine tender, perfectly seasoned ground beef, seamlessly integrated into a velvety, rich cream sauce that luxuriantly clings to every strand of al dente pasta. It’s a harmonious blend of textures and deeply satisfying, savory notes that truly nourishes the soul. While the exact historical blueprint for this specific modern iteration may be relatively recent, the timeless appeal of combining hearty meat with comforting pasta in a luscious sauce has been a beloved culinary tradition across numerous cultures, evolving from rustic Italian farmhouse meals to American comfort food staples. This recipe is a contemporary homage to that heritage, crafted with an emphasis on robust nutrition.

Why This Dish Will Become Your Weeknight Hero

Beyond its incredible taste and comforting embrace, people adore this recipe for its inherent practicality. It’s not only incredibly quick to prepare, making it ideal for those hectic evenings, but it’s also packed with protein, ensuring you feel satiated and energized long after the last bite. This High Protein Creamy Beef Pasta Recipe For Quick Weeknight Dinners masterfully proves that nutritious, utterly delicious, and incredibly satisfying meals are entirely achievable, even on your busiest schedule. Prepare to elevate your dinner routine!

Quick Weeknight High Protein Creamy Beef Pasta Recipe this RECIPE

Ingredients:

  • 1.5 pounds (about 680g) Lean Ground Beef: I always opt for lean ground beef (90/10 or 93/7) for this recipe. It’s the cornerstone of our “High Protein Creamy Beef Pasta Recipe,” providing a fantastic protein punch without excessive fat, which keeps the dish feeling light yet satisfying. This ensures our creamy sauce won’t be overly greasy.
  • 1 pound (about 450g) High-Protein Pasta: For this dish, I love using a short pasta shape like rigatoni, penne, or cavatappi, as they really grab onto that creamy sauce. To elevate the “high protein” aspect, I often reach for chickpea, lentil, or whole wheat pasta varieties. They add extra fiber and protein, making this a truly wholesome and filling weeknight dinner option.
  • 1 large Yellow Onion: Finely diced. This provides a foundational sweetness and aromatic depth to our sauce. Don’t underestimate the power of a well-sauteed onion!
  • 4-5 cloves Garlic: Minced. Garlic is non-negotiable in my kitchen; it infuses the entire dish with an incredible fragrance and robust flavor that makes this “Creamy Beef Pasta” truly irresistible.
  • 1-2 tablespoons Olive Oil: For sautéing our aromatics and browning the beef. A good quality olive oil makes all the difference in the initial flavor development.
  • 1 (28-ounce/794g) can Crushed Tomatoes: These form the rich, tangy base of our sauce. I find crushed tomatoes provide a nice balance between texture and smoothness, integrating beautifully with the other ingredients.
  • 2 tablespoons Tomato Paste: This little concentrated flavor bomb adds an incredible depth and umami to the sauce, intensifying the tomato flavor and giving it a more robust character. It’s key for that restaurant-quality taste.
  • 1.5 cups (about 360ml) Beef Broth: I prefer a good quality, low-sodium beef broth. It helps to thin the sauce to the perfect consistency while adding another layer of savory beef flavor that complements our ground beef beautifully.
  • 4 ounces (about 113g) Cream Cheese (full-fat or 1/3 less fat), softened: This is where the “creamy” magic happens! When melted into the sauce, cream cheese creates an incredibly luxurious, velvety texture that coats every piece of pasta and beef. It’s a key ingredient for the signature richness of our “High Protein Creamy Beef Pasta Recipe For Quick Weeknight Dinners.” Make sure it’s softened to prevent lumps.
  • 1/2 cup (about 50g) Grated Parmesan Cheese: Plus more for serving. Freshly grated Parmesan adds a salty, nutty, and umami finish that truly ties the entire dish together. It melts into the sauce, enhancing its richness, and a sprinkle on top is just divine.
  • 5 ounces (about 140g) Fresh Spinach: Roughly chopped, or left whole if you prefer. This is my secret weapon for adding some healthy greens and an extra boost of nutrients without really altering the flavor profile significantly. It wilts down beautifully into the sauce.
  • 1 teaspoon Dried Oregano: A classic herb that pairs wonderfully with tomatoes and beef, giving our sauce that comforting, Italian-inspired aroma.
  • 1/2 teaspoon Smoked Paprika: This adds a subtle, earthy smokiness that deepens the overall flavor of the beef and tomato sauce. It’s a small touch that makes a big difference.
  • 1/4 teaspoon Red Pepper Flakes (optional): For those who like a little kick! It provides a gentle warmth that balances the richness of the creamy sauce. Adjust to your heat preference.
  • Salt and Freshly Ground Black Pepper: To taste. Seasoning throughout the cooking process is vital for building layers of flavor. Don’t be shy about tasting and adjusting!
  • Fresh Parsley or Basil (for garnish): Roughly chopped. A sprinkle of fresh herbs at the end adds a pop of color and a burst of fresh flavor, elevating the presentation and overall taste of your “High Protein Creamy Beef Pasta.”

Preparing Our Delicious Foundation

Before we dive into the heart of our “High Protein Creamy Beef Pasta Recipe For Quick Weeknight Dinners,” a little preparation goes a long way. This initial stage is all about setting up our flavors for success.

  1. Chop and Mince with Care: First things first, let’s get our aromatics ready. I always start by finely dicing the large yellow onion. The finer the dice, the quicker it cooks down and melds into the sauce. Next, mince those 4-5 cloves of garlic. I personally love using a garlic press for speed, but a good old-fashioned knife works wonders too. If you’re including bell pepper, dice that up at this stage as well, aiming for pieces roughly the same size as your onion. Having everything prepped and ready to go before you even turn on the stove is a golden rule in my kitchen – it makes the cooking process so much smoother and more enjoyable.
  2. Browning the Beef to Perfection: Now, let’s get serious about flavor! Heat your large, deep skillet or Dutch oven over medium-high heat. Add about a tablespoon of olive oil. Once the oil is shimmering, add your 1.5 pounds of lean ground beef. Using a sturdy wooden spoon or spatula, break the beef into small, uniform pieces. This browning step is absolutely crucial for developing deep, savory flavors for our High Protein Creamy Beef Pasta. Don’t rush it! Allow the beef to get a beautiful golden-brown crust on some sides. Cook, stirring occasionally, until it’s fully cooked through and no longer pink. This usually takes about 7-10 minutes, depending on your stovetop and the pan.
  3. Draining the Excess: Even with lean ground beef, there might be some fat rendered. Once your beef is beautifully browned, carefully drain off any excess fat from the skillet. You can do this by tilting the pan and scooping out the fat with a spoon, or by transferring the beef to a colander lined with paper towels for a quick drain. Removing this excess fat ensures our “Creamy Beef Pasta” sauce remains rich and luxurious without feeling greasy, keeping it light yet incredibly flavorful. Transfer the browned beef to a separate bowl and set it aside for a moment.
  4. Sautéing Our Aromatics: Return the same skillet to medium heat. If your pan looks too dry after draining the fat, add another splash of olive oil (about half a tablespoon). Add your finely diced yellow onion to the skillet. Cook, stirring frequently, for about 5-7 minutes until the onion softens and becomes translucent. You’ll notice a lovely sweetness starting to develop, which is exactly what we want.
  5. Infusing with Garlic and Spices: Once the onions are soft, add your minced garlic to the skillet. Stir it in and cook for just about 60 seconds, or until fragrant. Be careful not to burn the garlic, as burnt garlic can taste bitter. This quick sauté releases its intense aroma and flavor. Immediately after, stir in the dried oregano, smoked paprika, and red pepper flakes (if you’re using them). Let these spices toast for another 30 seconds, stirring constantly. This brief toasting period awakens their flavors and aromas, creating a wonderfully fragrant base for our sauce. The entire kitchen will start smelling absolutely incredible at this point, signaling that we’re well on our way to a fantastic “High Protein Creamy Beef Pasta Recipe.”

Crafting the Rich and Creamy Sauce

This is where our “High Protein Creamy Beef Pasta” truly comes to life, as we build the layers of rich, savory, and undeniably creamy flavor. The sauce is the heart of this dish!

  1. Building the Tomato Base: To the fragrant onion and spice mixture in the skillet, add the two tablespoons of tomato paste. Stir the tomato paste into the aromatics and cook for about 2-3 minutes, stirring constantly. This step is crucial: cooking the tomato paste deepens its flavor, removing its raw edge and concentrating its sweetness and umami. You’ll notice it darken slightly and become very aromatic. After that, pour in the entire 28-ounce can of crushed tomatoes and add the 1.5 cups of beef broth. Stir everything together thoroughly, scraping up any browned bits from the bottom of the pan – those are pure flavor!
  2. Simmering for Depth: Bring the sauce to a gentle simmer. Once simmering, reduce the heat to low, cover the skillet, and let the sauce cook for at least 15-20 minutes. This simmering time is essential for the flavors to meld and deepen, creating a truly robust and complex sauce. The longer it simmers, the more harmonious the flavors become. Stir occasionally to prevent sticking. During this time, the sauce will thicken slightly and develop a beautiful, rich red color.
  3. Introducing the Creaminess: After the sauce has had a good simmer, stir in your softened 4 ounces of cream cheese. I find it easiest to dollop the cream cheese around the sauce, then stir it in gently until it’s completely melted and incorporated. It will transform the texture of the sauce, making it wonderfully smooth, velvety, and incredibly rich. This is the secret to that luscious “creamy” texture that makes our “High Protein Creamy Beef Pasta Recipe For Quick Weeknight Dinners” so irresistible. Keep the heat on low to ensure the cream cheese melts evenly without curdling.
  4. Adding the Greens and Beef: Once the cream cheese is fully incorporated and the sauce is perfectly creamy, it’s time to add our fresh spinach. If your spinach leaves are large, you can give them a rough chop; otherwise, whole leaves are fine as they wilt down considerably. Stir the spinach into the sauce. It will look like a lot at first, but it will quickly wilt and disappear into the rich sauce, adding a lovely freshness and a boost of nutrients. As the spinach wilts, return the previously browned lean ground beef to the skillet. Stir it well to ensure the beef is evenly coated in the creamy tomato sauce and thoroughly heated through. This entire process brings together all the savory elements into one harmonious mixture.

Perfectly Cooking Our Pasta

While our luxurious sauce is simmering away, we need to prepare the perfect vehicle for it: the pasta. Cooking pasta correctly is key to the overall success of our “High Protein Creamy Beef Pasta.”

  1. Boiling the Water: In a large pot, bring a generous amount of water to a rolling boil. Don’t skimp on the water; a large volume ensures the pasta cooks evenly and doesn’t stick together. Once it’s at a vigorous boil, add a generous amount of salt. I usually add about a tablespoon of kosher salt for every gallon of water – the water should taste like the sea! This seasons the pasta from the inside out, which is absolutely vital for flavor.
  2. Cooking the Pasta Al Dente: Add your 1 pound of high-protein pasta (rigatoni, penne, or cavatappi work wonderfully here) to the boiling salted water. Stir immediately to prevent the pasta from sticking. Cook according to the package directions, but aim for al dente. Al dente means “to the tooth,” meaning the pasta should be firm but still have a slight bite in the center. This is crucial because the pasta will finish cooking in the sauce, preventing it from becoming mushy. For high-protein pastas, cooking times can vary, so taste a piece a minute or two before the package suggests.
  3. Reserving Pasta Water: Before you drain your pasta, use a heatproof measuring cup or ladle to reserve about 1 to 1.5 cups of the starchy pasta cooking water. This pasta water is liquid gold! Its starchiness helps to emulsify the sauce, making it incredibly smooth and glossy, and helps it cling beautifully to the pasta. It’s also perfect for adjusting the consistency of our “Creamy Beef Pasta” if the sauce becomes too thick.
  4. Draining the Pasta: Once the pasta is perfectly al dente, carefully drain it in a colander. Do not rinse the pasta! Rinsing washes away the beneficial starches that help the sauce adhere. Give it a good shake to remove excess water, but don’t worry about it being bone dry. A little moisture is fine.

Bringing It All Together for a Weeknight Masterpiece

The final step is the most rewarding: combining our perfectly cooked pasta with that incredible “High Protein Creamy Beef Pasta” sauce. This is where all our hard work culminates into a truly satisfying and quick weeknight dinner.

  1. Combining Pasta and Sauce: Immediately transfer the drained, al dente pasta directly into the skillet with our rich and creamy beef sauce. I find it’s best to do this while both are still hot.
  2. Stirring in Parmesan: Add about half a cup of grated Parmesan cheese to the skillet. Gently toss the pasta, beef, and sauce together, ensuring every piece of pasta is beautifully coated in that luscious, creamy goodness. The heat from the pasta and sauce will melt the Parmesan, further enhancing the richness and binding everything together.
  3. Adjusting Consistency and Seasoning: If the sauce seems too thick at this point, or if you prefer a looser consistency, gradually add a splash of that reserved pasta water, stirring it in until you reach your desired texture. I usually start with about a quarter cup and add more if needed. This is also the moment for a final taste test. Season with additional salt and freshly ground black pepper as needed. Remember, proper seasoning is key to making all the flavors truly sing. You’ve put so much effort into this “High Protein Creamy Beef Pasta Recipe For Quick Weeknight Dinners,” so make sure it’s perfectly balanced.
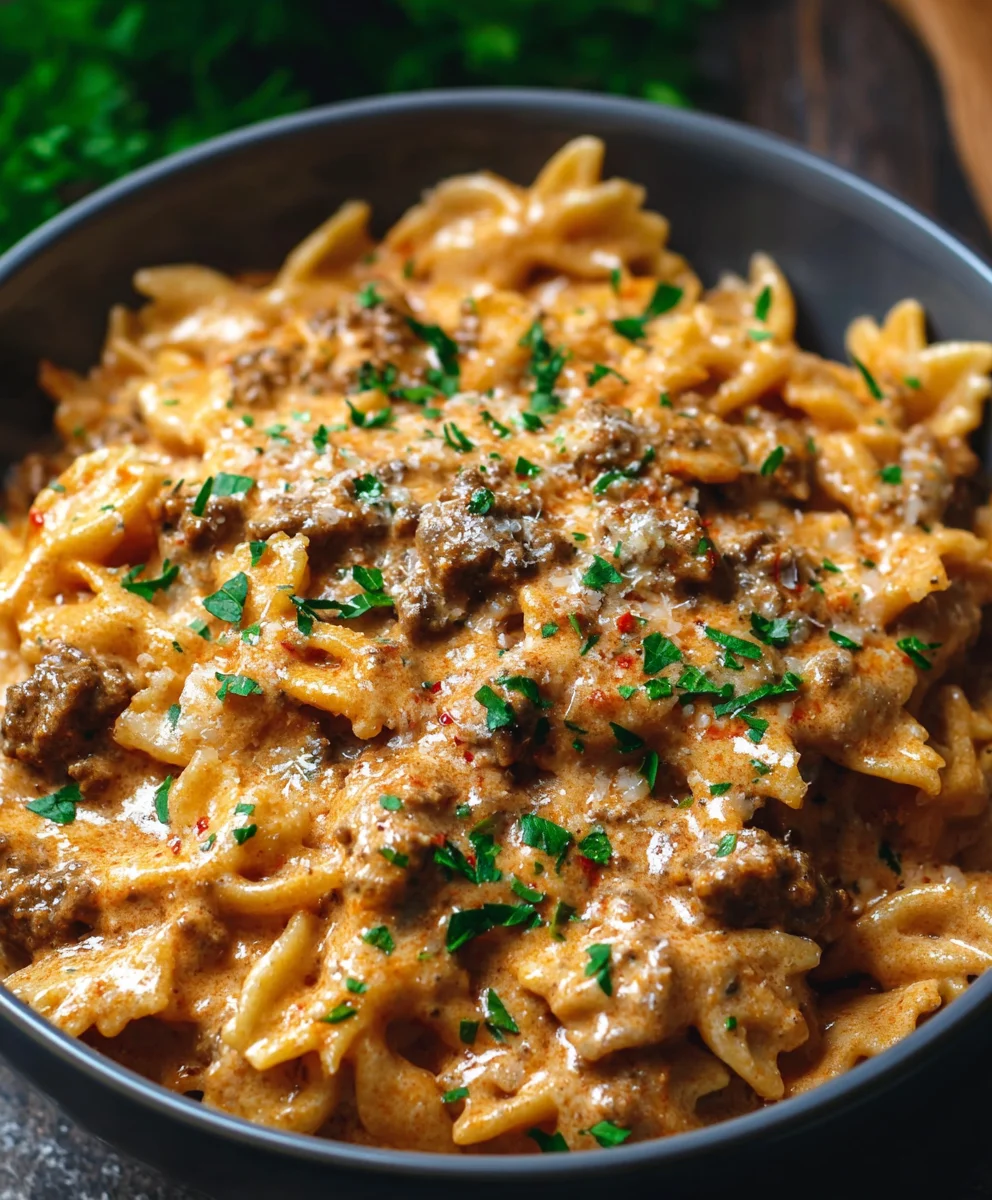
  4. Serving and Garnish: Divide the “High Protein Creamy Beef Pasta” among serving bowls. For an extra touch of freshness and flavor, garnish each serving with a sprinkle of freshly chopped parsley or basil. A final dusting of grated Parmesan cheese on top is also highly recommended. Serve immediately and enjoy the fruits of your labor! This dish is truly a satisfying and efficient way to get a delicious, protein-packed meal on the table any night of the week.

Quick Weeknight High Protein Creamy Beef Pasta Recipe

Conclusion:

So there you have it, folks! We’ve journeyed through the simple steps of creating what I genuinely believe will become a staple in your kitchen. This isn’t just another pasta dish; it’s a culinary hug, a weeknight savior, and a testament to how incredible wholesome, homemade food can be, even when you’re short on time. I’ve poured my heart into perfecting this particular combination of flavors and textures, ensuring that every bite is utterly satisfying and deeply comforting. It’s designed to banish those dinner dilemmas, offering a robust and fulfilling meal that truly nourishes both body and soul without demanding hours in the kitchen.

Why this High Protein Creamy Beef Pasta Recipe For Quick Weeknight Dinners is an absolute game-changer: First and foremost, it’s unbelievably fast. From start to finish, you’re looking at a meal that’s on your table quicker than takeout, and infinitely more rewarding. We’re talking about minimal prep and maximum flavor, which, let’s be honest, is the holy grail for any busy individual or family. The combination of tender, savory beef, perfectly al dente pasta, and that incredibly rich, velvety cream sauce creates a symphony of taste that’s hard to resist. But beyond its speed and deliciousness, it truly delivers on its promise of high protein. This isn’t just empty calories; it’s a meal packed with the fuel you need to power through the rest of your evening, making it ideal for post-workout recovery or simply staying full and satisfied. It’s the kind of dish that leaves you feeling pleasantly satiated, not overly heavy, and completely content. The robust flavors ensure that even the pickiest eaters will ask for seconds, making your dinner routine a breeze rather than a battle.

Elevate Your Dining Experience with These Serving Suggestions & Variations:

While this dish is a superstar all on its own, there are so many wonderful ways to customize it and make it uniquely yours. For a complete meal, I love serving this creamy beef pasta with a crisp, vibrant green salad dressed with a light vinaigrette. The freshness of the greens cuts through the richness of the pasta beautifully, creating a perfect balance. A side of warm, crusty garlic bread is also non-negotiable in my household – perfect for soaking up every last bit of that luscious sauce!

Thinking about variations? The possibilities are endless! Don’t hesitate to toss in some extra vegetables while the beef is browning or during the sauce simmering phase. Spinach, sliced mushrooms, bell peppers, or even frozen peas can add extra nutrients and color. If you’re looking for a bit of a kick, a pinch of red pepper flakes stirred into the sauce will awaken your palate. For a different protein profile, you could easily substitute ground turkey or chicken, though the beef truly shines here with its deep flavor. Want to make it gluten-free? Simply opt for your favorite gluten-free pasta. Dairy-free? Explore plant-based creams and milks, though the texture and richness will vary. You could also experiment with different cheese toppings – a sprinkle of smoked Gouda or even some crumbled blue cheese could introduce an exciting new dimension to the flavor profile. The beauty of this recipe lies in its adaptability; it’s a fantastic canvas for your culinary creativity, allowing you to tailor it to your family’s preferences or whatever ingredients you happen to have on hand.

Now, it’s your turn! I genuinely hope you’re feeling inspired to roll up your sleeves and give this incredible recipe a try this week. I promise you won’t be disappointed. There’s a unique joy in preparing a meal that is both incredibly delicious and wonderfully simple, and this dish embodies that perfectly. Imagine the aroma filling your kitchen, the smiles around your dinner table, and the satisfaction of knowing you’ve whipped up something truly special. Once you’ve experienced the magic of this quick and satisfying meal, I would absolutely love to hear about it! Please, don’t be shy – come back and share your thoughts, your successes, and even your own creative twists in the comments section below. Did you add extra veggies? Did you try a different cheese? Your insights and experiences inspire not only me but also other home cooks in our community. Happy cooking, and get ready to fall in love with your new favorite weeknight dinner solution!

FAQs – People Also Ask:

Can I make this High Protein Creamy Beef Pasta Recipe ahead of time?

Absolutely! This dish is fantastic for meal prep. You can prepare the entire recipe and store it in an airtight container in the refrigerator for up to 3-4 days. When reheating, I recommend adding a splash of milk or broth to loosen the sauce and restore its creamy texture. Gently warm it on the stovetop over low heat or in the microwave, stirring occasionally until heated through. The flavors often deepen overnight, making it even more delicious on day two!

What kind of pasta works best for this creamy beef recipe?

For this specific recipe, I find that short, sturdy pasta shapes work wonderfully as they hold onto the creamy sauce beautifully. Penne, rigatoni, rotini, or even cavatappi are excellent choices. Their nooks and ridges really grab that rich sauce, ensuring every bite is flavorful. However, feel free to use your favorite pasta shape! Just ensure you cook it to al dente according to package directions.

How can I make this creamy beef pasta recipe spicier?

If you love a little heat, it’s incredibly easy to add a spicy kick to this dish! My favorite method is to stir in about 1/2 to 1 teaspoon of red pepper flakes along with the garlic and beef, allowing the heat to infuse into the oil and beef. You could also add a dash of your favorite hot sauce or a pinch of cayenne pepper when you’re adding the seasonings to the sauce. Adjust the amount to your preferred level of spice!

Can I use a different type of meat for this High Protein Creamy Beef Pasta?

Yes, while ground beef lends a wonderful richness and flavor to this dish, you can certainly experiment with other proteins. Ground turkey or ground chicken are excellent leaner alternatives, though they may require a bit more seasoning to achieve a similar depth of flavor. You could also use Italian sausage (mild or hot, depending on your preference) for a different twist. Just ensure whatever meat you choose is fully cooked and drained of excess fat before proceeding with the sauce.

Is this High Protein Creamy Beef Pasta recipe freezer-friendly?

This recipe can be frozen, but with a slight caveat: creamy sauces, especially those with dairy, sometimes separate or become a bit grainy upon thawing and reheating. If you plan to freeze it, I recommend undercooking the pasta slightly. Allow the dish to cool completely before transferring it to freezer-safe containers. It can be frozen for up to 2-3 months. To reheat, thaw overnight in the refrigerator, then warm gently on the stovetop, adding a little extra milk or broth to help smooth out the sauce.

How can I make this recipe gluten-free or dairy-free?

Making this recipe adaptable to dietary needs is quite simple! For a gluten-free version, the only swap needed is to use your favorite gluten-free pasta; the rest of the ingredients are naturally gluten-free. For a dairy-free option, you’ll need to make a few substitutions: use a plant-based milk (like unsweetened almond or soy milk) instead of cow’s milk, and opt for a dairy-free cream cheese or cashew cream. You’ll also need to skip the Parmesan cheese or use a dairy-free Parmesan alternative. Be aware that the texture and richness of the sauce will be slightly different with dairy-free alternatives, but it will still be a delicious meal!


Quick Weeknight High Protein Creamy Beef Pasta Recipe

Quick Weeknight High Protein Creamy Beef Pasta Recipe

This High Protein Creamy Beef Pasta recipe offers a delicious and satisfying solution for busy weeknights. Featuring tender ground beef in a velvety sauce clinging to al dente pasta, it’s packed with protein and flavor, proving that nutritious and utterly delicious meals are achievable even on your busiest schedule.

Prep Time
15 Minutes

Cook Time
30 Minutes

Total Time
45 Minutes

Servings
4 servings

Ingredients

  • 8 oz penne pasta
  • 1 lb lean ground beef
  • 1 medium onion, chopped
  • 2 cloves garlic, minced
  • 1 can (15 oz) diced tomatoes (with juices)
  • 1 cup low-sodium beef broth
  • 1/2 cup plain Greek yogurt
  • 1/4 cup grated Parmesan cheese
  • 1 tbsp Italian seasoning
  • Salt and pepper to taste
  • Fresh basil or parsley, for garnish
  • Olive oil, for cooking

Instructions

  1. Step 1
    Chop the onion and mince the garlic.
  2. Step 2
    In a large skillet, heat a splash of olive oil over medium-high heat. Add 1 lb lean ground beef and cook, breaking it up, until browned. Drain any excess fat and set the beef aside.
  3. Step 3
    Return the skillet to medium heat. Add the chopped onion and sauté until softened, about 5-7 minutes. Add minced garlic and 1 tbsp Italian seasoning; cook for 1 minute until fragrant.
  4. Step 4
    Stir in 1 can (15 oz) diced tomatoes and 1 cup low-sodium beef broth. Bring to a gentle simmer, then reduce heat to low and cook for 10-15 minutes, allowing flavors to meld.
  5. Step 5
    While the sauce simmers, cook 8 oz penne pasta according to package directions until al dente. Reserve about 1 cup of the starchy pasta cooking water before draining.
  6. Step 6
    Stir the browned beef, 1/2 cup plain Greek yogurt, and 1/4 cup grated Parmesan cheese into the sauce until creamy and well combined. Keep heat on low.
  7. Step 7
    Add the drained pasta directly to the skillet with the sauce. Toss to coat evenly. If the sauce is too thick, gradually add some reserved pasta water until desired consistency is reached. Season with salt and freshly ground black pepper to taste.
  8. Step 8
    Serve immediately, garnished with fresh basil or parsley.

Important Information

Nutrition Facts (Per Serving)

It is important to consider this information as approximate and not to use it as definitive health advice.

Allergy Information

Please check ingredients for potential allergens and consult a health professional if in doubt.

« Previous Post
Ultimate Creamy Chicken Broccoli Pasta: A Family Favorite
Next Post »
Vibrant Chickpea Feta Avocado Salad: Healthy & Delicious

If you enjoyed this…

Irresistible Beef Bacon Cheeseburgers & Caramelized Onions

Irresistible Garlic Butter Beef Cheesy Bowtie Pasta

Ultimate Philly Cheesesteak Meatloaf Recipe – Must-Try!

Primary Sidebar

Browse by Diet

BreakfastDinnerLunchDessertAppetizer

Sweet Peach Yogurt Parfait Delight

One of my fondest memories is from a lazy summer afternoon spent at my grandmother’s house. The sun filtered through the kitchen window, casting a warm glow over the table where she would create her culinary magic. It was during one of those blissful moments that I first tasted her Peach Yogurt Parfait with Honey and Granola. The sweet aroma of ripe peaches mingling with creamy yogurt and the crunch of granola was nothing short of heavenly. It felt like summer captured in a bowl, and I still remember the joy of diving in with a spoon, each layer revealing a new burst of flavor.

When I think about that parfait, I can almost hear the gentle hum of the bees outside, reminding me of the floral notes that honey brings to every bite. The vibrant yellows and soft oranges of the peaches contrast beautifully with the creamy white yogurt and the golden crunch of granola. It’s a dish that not only looks delightful but also tastes like a celebration of fresh, wholesome ingredients.

What makes my version of this Peach Yogurt Parfait special is the careful balance of flavors and textures. I use ripe, juicy peaches, drizzled with locally sourced honey, and a homemade granola that’s bursting with nuts and seeds for an extra crunch. It’s a simple dish, but every layer is crafted with love and attention.

Let me show you exactly how to make this delightful parfait, so you can bring a bit of that summer magic into your kitchen!

Sweet Peach Yogurt Parfait Delight

Why You’ll Love This Recipe

  • Delightfully creamy texture from the Greek yogurt, paired with the juicy sweetness of fresh peaches.
  • Ready in under 20 minutes, making it a quick and satisfying breakfast or snack option.
  • Budget-friendly, using common ingredients that you may already have in your pantry.
  • Customizable with your favorite granola and nuts, allowing you to tailor each parfait to your taste.
  • Perfectly balanced flavors with the bright acidity of lemon juice and the sweetness of honey enhancing the peaches.

Ingredients

  • For the Parfait:
  • 2 cups plain Greek yogurt (or vanilla yogurt for a sweeter option)
  • 2 large ripe peaches, diced (about 2 cups)
  • 1 tablespoon fresh lemon juice (to prevent browning of peaches)
  • 2 tablespoons honey (plus more for drizzling)
  • 1 teaspoon vanilla extract (optional for extra flavor)
  • For the Granola:
  • 1 cup granola (store-bought or homemade; see notes for a simple granola recipe)
  • 1/4 cup sliced almonds (optional for added crunch)
  • 1/4 cup shredded coconut (optional for added flavor)

Let’s dive into some key ingredients that make this Peach Yogurt Parfait so delightful! First, the Greek yogurt is not only creamy but also packed with protein, making it a satisfying option for breakfast or a snack. If you’re looking for a sweeter option, you can easily substitute it with vanilla yogurt, though it may alter the overall flavor balance. Next, the ripe peaches are the star of the show; their natural sweetness shines through, so I recommend choosing peaches that yield slightly to pressure, indicating they’re perfectly ripe. If peaches aren’t in season, feel free to use nectarines or even frozen peaches—just thaw them before use. Finally, honey adds a lovely floral sweetness that ties everything together. If you prefer, maple syrup can serve as a delicious substitute.

Step-by-Step Instructions

  1. Start by preparing the peaches. Wash them thoroughly, then slice and dice them into bite-sized pieces. In a medium bowl, toss the diced peaches with 1 tablespoon of fresh lemon juice to prevent browning. Set aside for about 5 minutes while the lemon juice works its magic.
  2. In a separate bowl, combine the Greek yogurt, 2 tablespoons of honey, and 1 teaspoon of vanilla extract if using. Stir the mixture until smooth and thoroughly blended. This should take about a minute. Avoid overmixing to maintain the creaminess of the yogurt.
  3. Now it’s time to layer your parfait. Grab a clear glass or bowl to showcase your beautiful creation. Start with a generous spoonful of the yogurt mixture at the bottom—about 1/4 cup will do. Use a spoon to spread it evenly.
  4. Add a layer of the diced peaches over the yogurt, ensuring they cover the yogurt completely. You might want to use about half of what you have prepared—roughly 1 cup. This layer should be visually appealing, so arrange the peaches neatly.
  5. Sprinkle 1/4 cup of granola over the peaches. This adds a delightful crunch. Make sure to distribute it evenly to ensure every bite has that satisfying texture. Avoid packing it down too tightly, as you want it to maintain its crunch.
  6. Repeat the layers: spoon in another 1/4 cup of yogurt, followed by another cup of peaches, and another sprinkle of granola. You should have at least two layers, but feel free to add more depending on your glass size.
  7. Finish off your parfait with a drizzle of honey on top for added sweetness and a touch of elegance. If you’re using sliced almonds or shredded coconut, sprinkle them on top now. It adds a lovely visual contrast and extra flavor.
  8. Serve immediately or refrigerate for up to 30 minutes before serving to allow the flavors to meld together. However, I recommend enjoying it fresh to maintain the granola’s crunch.

Pro Tips for the Best Peach Yogurt Parfait With Honey And Granola

  • Make sure to choose ripe peaches for the best flavor and texture. A common mistake is using unripe fruit, which can lead to a less enjoyable parfait. Look for peaches that are fragrant and slightly soft to the touch.
  • Use a clear glass to assemble your parfait; this not only makes for a beautiful presentation but also allows you to see the colorful layers, which adds to the enjoyment of eating it.
  • For an even creamier texture, consider whipping the Greek yogurt with a hand mixer for a couple of minutes before layering. This small adjustment makes a huge difference in mouthfeel.
  • Be mindful of the granola-to-yogurt ratio. Too much granola can overwhelm the parfait, while too little can make it feel too creamy. Aim for about 1/4 cup of granola per layer for the perfect balance.
  • If you’re making this for a gathering, consider preparing the yogurt and peaches ahead of time and layering them just before serving. This ensures the granola stays crunchy!

Variations & Serving Ideas

There are so many ways to get creative with your Peach Yogurt Parfait! For a tropical twist, swap out the peaches for mangoes or pineapples and top with coconut flakes. If you prefer a berry flavor, mix in some blueberries or strawberries with the peaches for added color and taste. For a nutty version, incorporate chopped walnuts or pecans instead of almonds.

As for serving ideas, this parfait pairs beautifully with a side of scrambled eggs for a hearty breakfast or fresh fruit salad for a light lunch. You might also enjoy it alongside whole grain toast with almond butter for an energizing snack. The contrast of flavors and textures will elevate your meal experience!

Storage, Make-Ahead & Reheating

The Peach Yogurt Parfait is best enjoyed fresh, but you can prepare some components ahead of time. Store the layered parfait in an airtight container in the refrigerator for up to 24 hours. However, be cautious; the granola may lose its crunch if stored too long. You can freeze the yogurt and peach mixture for up to 2 months; just remember to thaw it in the refrigerator overnight before serving.

If you plan to enjoy this dish the next day, it can taste even better as the flavors meld together. Just remember to add the granola right before serving to keep its delightful crunch!

Frequently Asked Questions

Can I make Peach Yogurt Parfait With Honey And Granola ahead of time?

Yes — in fact, it tastes even better the next day as the flavors meld. However, I recommend waiting to add the granola until just before serving to maintain its crunch.

What can I substitute for Greek yogurt?

If you prefer a lighter option, you can substitute Greek yogurt with regular yogurt or a dairy-free alternative like coconut yogurt. Just remember that this may alter the creaminess and flavor profile slightly.

Can I use frozen peaches for this parfait?

Absolutely! Just make sure to thaw the frozen peaches before using them. They will still add great flavor, though the texture may be slightly softer than fresh peaches.

How do I make the parfait vegan?

To make a vegan version, substitute the Greek yogurt with a plant-based yogurt alternative, and replace honey with maple syrup or agave nectar. This keeps the parfait sweet while adhering to a vegan diet.

What other fruits can I use in this recipe?

You can mix and match fruits based on your preference. Try using strawberries, blueberries, raspberries, or even bananas. Just make sure to adjust the lemon juice as needed to prevent browning.

Sweet Peach Yogurt Parfait Delight

Final Thoughts

The Peach Yogurt Parfait with Honey and Granola is a delightful blend of creamy yogurt, sweet peaches, and crunchy granola that creates a satisfying and nourishing treat. Each layer bursts with flavor, making it a perfect choice for breakfast or a light dessert.

This is the kind of recipe I come back to again and again, especially when I want something refreshing and wholesome to start my day. The harmony of sweet and tart flavors, combined with the delightful crunch, never fails to lift my spirits!

I encourage you to give this parfait a try and indulge in its comforting goodness. Feel free to share your results or even add your own twist—perhaps a sprinkle of cinnamon or a handful of nuts. Enjoy creating your perfect parfait!

Print
clock clock iconcutlery cutlery iconflag flag iconfolder folder iconinstagram instagram iconpinterest pinterest iconfacebook facebook iconprint print iconsquares squares iconheart heart iconheart solid heart solid icon

Peach Yogurt Parfait


  • Author: Lily author
  • Total Time: 15 minutes
  • Yield: 4 servings 1x
Pin Recipe
Print Recipe

Description

This Peach Yogurt Parfait combines creamy Greek yogurt, juicy peaches, and crunchy granola for a delightful treat. It’s a perfect breakfast or snack that captures the essence of summer in every bite.


Ingredients

Scale
  • For the Parfait:
  • 2 cups plain Greek yogurt (or vanilla yogurt for a sweeter option)
  • 2 large ripe peaches, diced (about 2 cups)
  • 1 tablespoon fresh lemon juice (to prevent browning of peaches)
  • 2 tablespoons honey (plus more for drizzling)
  • 1 teaspoon vanilla extract (optional for extra flavor)
  • For the Granola:
  • 1 cup granola (store-bought or homemade; see notes for a simple granola recipe)
  • 1/4 cup sliced almonds (optional for added crunch)
  • 1/4 cup shredded coconut (optional for added flavor)

Instructions

  1. Start by preparing the peaches. Wash them thoroughly, then slice and dice them into bite-sized pieces. In a medium bowl, toss the diced peaches with 1 tablespoon of fresh lemon juice to prevent browning. Set aside for about 5 minutes while the lemon juice works its magic.
  2. In a separate bowl, combine the Greek yogurt, 2 tablespoons of honey, and 1 teaspoon of vanilla extract if using. Stir the mixture until smooth and thoroughly blended. This should take about a minute. Avoid overmixing to maintain the creaminess of the yogurt.
  3. Now it’s time to layer your parfait. Grab a clear glass or bowl to showcase your beautiful creation. Start with a generous spoonful of the yogurt mixture at the bottom—about 1/4 cup will do. Use a spoon to spread it evenly.
  4. Add a layer of the diced peaches over the yogurt, ensuring they cover the yogurt completely. You might want to use about half of what you have prepared—roughly 1 cup. This layer should be visually appealing, so arrange the peaches neatly.
  5. Sprinkle 1/4 cup of granola over the peaches. This adds a delightful crunch. Make sure to distribute it evenly to ensure every bite has that satisfying texture. Avoid packing it down too tightly, as you want it to maintain its crunch.
  6. Repeat the layers: spoon in another 1/4 cup of yogurt, followed by another cup of peaches, and another sprinkle of granola. You should have at least two layers, but feel free to add more depending on your glass size.
  7. Finish off your parfait with a drizzle of honey on top for added sweetness and a touch of elegance. If you’re using sliced almonds or shredded coconut, sprinkle them on top now. It adds a lovely visual contrast and extra flavor.
  8. Serve immediately or refrigerate for up to 30 minutes before serving to allow the flavors to meld together. However, I recommend enjoying it fresh to maintain the granola’s crunch.
  • Prep Time: 15 mins
  • Cook Time: 0 mins
  • Category: Breakfast
  • Method: No-cook
  • Cuisine: American

Nutrition

  • Serving Size: 1 parfait
  • Calories: 250
  • Sugar: 20 g
  • Sodium: 50 mg
  • Fat: 5 g
  • Saturated Fat: 2 g
  • Unsaturated Fat: 3 g
  • Trans Fat: 0 g
  • Carbohydrates: 40 g
  • Fiber: 3 g
  • Protein: 10 g
  • Cholesterol: 10 mg

Keywords: Choose ripe peaches for the best flavor and texture. Use a clear glass for a beautiful presentation. For creaminess, consider whipping the yogurt before layering. Be mindful of the granola-to-yogurt ratio. Prepare yogurt and peaches ahead of time for gatherings, layering just before serving.

Did you make this recipe?

Share a photo and tag us — we can't wait to see what you've made!

Sun-Kissed Frozen Orange Cream Slush

As a child, summer days felt like they lasted forever. I remember the sticky heat wrapping around me as I played outside, my laughter mingling with the sounds of the neighborhood. But nothing could cool me down quite like the moment I’d spot my grandmother, laboring over her blender, whipping up her famous Frozen Orange Creamsicle Slush. That vibrant orange treat, with its frosty texture and sweet citrus aroma, was like a burst of sunshine in a cup. Just one sip, and I could feel the coolness wash over me, sparking pure joy.

This Frozen Orange Creamsicle Slush has a way of making you feel like a kid again. Its creamy, dreamy consistency is a delightful balance of bright orange and soft vanilla, inviting you to dive right in. The refreshing tang of orange dances on your tongue, while the smooth creaminess envelops you in a comforting embrace. It’s a nostalgic treat that’s perfect for hot summer afternoons or anytime you need a little pick-me-up.

What makes my version of this slush stand out is the addition of a hint of vanilla bean, which elevates the flavor and adds an extra layer of richness. Plus, it’s super easy to whip up with just a few simple ingredients that you probably already have on hand! So, if you’re ready to relive those sun-soaked memories, let me show you exactly how to make it.

Sun-Kissed Frozen Orange Cream Slush

Why You’ll Love This Recipe

  • Each slush is a perfect blend of creamy vanilla and zesty orange, creating a nostalgic flavor reminiscent of summer days.
  • This refreshing treat is ready in under 15 minutes, making it an ideal quick dessert for unexpected guests or hot afternoons.
  • With just 8 simple ingredients, it’s budget-friendly, ensuring you don’t have to break the bank to enjoy a delicious slush.
  • The slush has a perfectly smooth texture, thanks to the combination of ice and ice cream, providing a delightful contrast to the bright citrus flavors.
  • It’s highly customizable; you can easily adjust the sweetness and add fresh herbs for a unique twist that suits your taste.

Ingredients

  • 2 cups orange juice (freshly squeezed or store-bought)
  • 1 cup vanilla ice cream
  • 1 cup crushed ice
  • 1/2 cup milk (whole or 2%)
  • 1/4 cup granulated sugar (adjust based on sweetness preference)
  • 1 teaspoon vanilla extract
  • Zest of 1 orange (for added flavor)
  • Fresh orange slices and mint leaves (for garnish)

The star of this Frozen Orange Creamsicle Slush is the orange juice, which provides the vibrant, citrusy base. Freshly squeezed juice will yield the brightest flavor, but store-bought options can be just as convenient. If you’re opting for store-bought, choose 100% pure juice with no added sugars for the best results. Another essential ingredient is the vanilla ice cream; it adds creaminess and sweetness. You can substitute it with dairy-free ice cream if you’re looking for a vegan option. Whole or 2% milk complements the ice cream, creating a smooth blend. If you want a lower-calorie version, almond or oat milk can be good alternatives.

Lastly, the granulated sugar can be adjusted based on your sweetness preference. If you prefer a more natural sweetener, consider using honey or agave syrup. The orange zest enhances the flavor profile, providing an aromatic pop that brings the whole slush together. Don’t skip it! It adds an extra layer of brightness that makes this slush truly special.

Step-by-Step Instructions

  1. Start by preparing your ingredients. Gather 2 cups of orange juice, 1 cup of vanilla ice cream, and 1 cup of crushed ice. Make sure the ice is finely crushed, as larger chunks can make blending difficult.
  2. In a blender, combine the orange juice, vanilla ice cream, crushed ice, and 1/2 cup of milk. Add 1/4 cup of granulated sugar and 1 teaspoon of vanilla extract. If you like a sweeter slush, consider adding a bit more sugar at this stage.
  3. Add the zest of 1 orange to the blender. This step is crucial for enhancing the citrus flavor of your slush. Make sure not to include the bitter white pith—only the flavorful zest.
  4. Blend the mixture on medium-high speed for about 30-45 seconds. Stop once the ingredients are fully combined and the slush has a smooth, even consistency. If you notice large chunks of ice, blend for an additional 10-15 seconds. Avoid over-blending, as this can make the slush too liquidy.
  5. Once blended, taste the slush. If it needs more sweetness, add a little more sugar and blend for a few more seconds. If it’s too thick, you can add a splash of milk to reach your desired consistency.
  6. Pour the slush into glasses. This recipe typically serves 4, but you can easily double it for larger gatherings. Use a spoon to help guide the slush into the glasses if needed.
  7. Garnish each serving with fresh orange slices and mint leaves. The mint not only adds a pop of color but also a refreshing aroma that complements the citrus flavors beautifully.
  8. Serve immediately and enjoy! If you’ve made extra, you can refrigerate it for a short time, but it’s best enjoyed fresh.

Pro Tips for the Best Frozen Orange Creamsicle Slush

  • Don’t skip the orange zest! It’s a game-changer for flavor. Always zest before juicing to make it easier.
  • Use a high-powered blender for the best texture. A standard blender may struggle with ice, leading to uneven consistency. If you have a food processor, that can work too, but ensure the ice is finely crushed.
  • Adjust the ice-to-liquid ratio carefully. If your slush is too thick, it won’t blend well. Start with less ice and add more until you reach your preferred texture.
  • Be cautious with the sugar! Always start with the lower amount, as you can easily add more, but it’s hard to fix an overly sweet slush.
  • For a fun twist, consider adding a splash of coconut milk or a handful of fresh fruit like strawberries or pineapple. This not only enhances the flavor but also adds a beautiful color contrast.

Variations & Serving Ideas

There are countless ways to put a spin on your Frozen Orange Creamsicle Slush. Consider making a tropical version by adding in some pineapple juice or coconut milk for a delightful tropical twist. If you’re feeling adventurous, try incorporating a handful of frozen mango or peach slices for added sweetness. For a lighter version, swap out the vanilla ice cream for Greek yogurt for a creamy yet tangy alternative.

As for serving ideas, this refreshing slush pairs wonderfully with light summer dishes like grilled chicken skewers, fish tacos, or a simple salad topped with citrus vinaigrette. The bright, zesty flavors of the slush complement these dishes perfectly, making them an ideal pairing for a sunny day.

Storage, Make-Ahead & Reheating

This Frozen Orange Creamsicle Slush is best enjoyed fresh, but if you have leftovers, you can store them in an airtight container in the fridge for up to 2 days. Just keep in mind that the slush may lose some of its texture over time as the ice melts. It doesn’t freeze well, as the ice will turn into a solid block. If you must freeze it, blend again after thawing to restore the slushy consistency. This treat is best the day you make it, as the flavors meld together beautifully overnight, enhancing its deliciousness.

Frequently Asked Questions

Can I make Frozen Orange Creamsicle Slush ahead of time?

Yes — in fact, it tastes even better the next day as the flavors meld. However, it’s best to enjoy it fresh, as the texture can change if stored for too long. If you need to prepare it ahead, keep it in the fridge and re-blend before serving.

What kind of orange juice should I use?

For the best flavor, use freshly squeezed orange juice. However, if you’re short on time, opt for 100% pure store-bought juice without added sugars. This will ensure that your slush remains flavorful and refreshing.

Can I substitute the vanilla ice cream?

Absolutely! If you’re looking for a dairy-free option, coconut milk ice cream or a non-dairy vanilla ice cream can work wonderfully. They will still provide the creamy texture and sweetness you desire.

How can I adjust the sweetness of my slush?

You can easily adjust the sweetness by modifying the amount of sugar added. Start with 1/4 cup and taste the mixture before blending. If you prefer it sweeter, add more sugar gradually until it reaches your desired level.

What should I do if my slush is too thick?

If your slush is too thick, simply add a splash of milk or orange juice and blend again. This will help achieve a more drinkable consistency while maintaining the slushy texture. Adjust gradually to reach your preferred thickness.

Sun-Kissed Frozen Orange Cream Slush

Final Thoughts

The Frozen Orange Creamsicle Slush is a delightful blend of refreshing citrus and creamy goodness, making it a perfect treat for warm days or any time you crave a taste of nostalgia. The way the bright orange flavor dances with the creamy texture truly elevates this slush, transforming it into a satisfying escape from the everyday.

This is the kind of recipe I come back to again and again, especially when I’m looking to cool down or impress guests at a summer gathering. It’s simple to make and always brings smiles all around! I encourage you to try this recipe for yourself—don’t hesitate to share your results or even put your own spin on it. Happy slushing!

Print
clock clock iconcutlery cutlery iconflag flag iconfolder folder iconinstagram instagram iconpinterest pinterest iconfacebook facebook iconprint print iconsquares squares iconheart heart iconheart solid heart solid icon

Frozen Orange Creamsicle Slush


  • Author: Lily author
  • Total Time: 15 minutes
  • Yield: 4 servings 1x
Pin Recipe
Print Recipe

Description

This Frozen Orange Creamsicle Slush is a refreshing treat that combines creamy vanilla and zesty orange flavors. Perfect for hot summer days, it brings back nostalgic memories with every sip.


Ingredients

Scale
  • 2 cups orange juice (freshly squeezed or store-bought)
  • 1 cup vanilla ice cream
  • 1 cup crushed ice
  • 1/2 cup milk (whole or 2%)
  • 1/4 cup granulated sugar (adjust based on sweetness preference)
  • 1 teaspoon vanilla extract
  • Zest of 1 orange (for added flavor)
  • Fresh orange slices and mint leaves (for garnish)

Instructions

  1. Start by preparing your ingredients. Gather 2 cups of orange juice, 1 cup of vanilla ice cream, and 1 cup of crushed ice. Make sure the ice is finely crushed, as larger chunks can make blending difficult.
  2. In a blender, combine the orange juice, vanilla ice cream, crushed ice, and 1/2 cup of milk. Add 1/4 cup of granulated sugar and 1 teaspoon of vanilla extract. If you like a sweeter slush, consider adding a bit more sugar at this stage.
  3. Add the zest of 1 orange to the blender. This step is crucial for enhancing the citrus flavor of your slush. Make sure not to include the bitter white pith—only the flavorful zest.
  4. Blend the mixture on medium-high speed for about 30-45 seconds. Stop once the ingredients are fully combined and the slush has a smooth, even consistency. If you notice large chunks of ice, blend for an additional 10-15 seconds. Avoid over-blending, as this can make the slush too liquidy.
  5. Once blended, taste the slush. If it needs more sweetness, add a little more sugar and blend for a few more seconds. If it’s too thick, you can add a splash of milk to reach your desired consistency.
  6. Pour the slush into glasses. This recipe typically serves 4, but you can easily double it for larger gatherings. Use a spoon to help guide the slush into the glasses if needed.
  7. Garnish each serving with fresh orange slices and mint leaves. The mint not only adds a pop of color but also a refreshing aroma that complements the citrus flavors beautifully.
  8. Serve immediately and enjoy! If you’ve made extra, you can refrigerate it for a short time, but it's best enjoyed fresh.
  • Prep Time: 15 min
  • Cook Time: 0 min
  • Category: Dessert
  • Method: Blending
  • Cuisine: American

Nutrition

  • Serving Size: 1 serving
  • Calories: 200
  • Sugar: 30 g
  • Sodium: 50 mg
  • Fat: 5 g
  • Saturated Fat: 3 g
  • Unsaturated Fat: 2 g
  • Trans Fat: 0 g
  • Carbohydrates: 40 g
  • Fiber: 1 g
  • Protein: 2 g
  • Cholesterol: 20 mg

Keywords: Don't skip the orange zest! It's a game-changer for flavor. Always zest before juicing to make it easier.

Did you make this recipe?

Share a photo and tag us — we can't wait to see what you've made!

Zesty Lemon Poppy Seed Delight

One rainy afternoon, I found myself in my grandmother’s cozy kitchen, the kind that always smelled like warmth and love. She was whipping up her famous Lemon Poppy Seed Loaf, a recipe that had been passed down through generations. As the batter came together, the zesty aroma of fresh lemons filled the air, mingling perfectly with the nutty fragrance of poppy seeds. I can still picture her, apron-clad, as she expertly drizzled a vibrant citrus icing over the loaf, creating a glossy, sun-kissed finish that beckoned us to dive in. It was a moment that sparked my own passion for baking, and this recipe has become a cherished staple in my home ever since.

When you take a bite of this Lemon Poppy Seed Loaf, it’s like a burst of sunshine on your palate. The loaf is beautifully golden, with a tender crumb that melts in your mouth. Each slice is speckled with tiny poppy seeds, adding a delightful crunch that contrasts beautifully with the tangy sweetness of the lemon. And that citrus icing? It’s the finishing touch that elevates this loaf from ordinary to extraordinary, with its bright, zesty flavor dancing on your taste buds.

This recipe stands out because it embraces simplicity while delivering on flavor. I’ve added a hint of vanilla to the batter, enhancing the overall taste and making it even more indulgent. Trust me, once you make this Lemon Poppy Seed Loaf With Citrus Icing, it’ll become a go-to in your baking repertoire.

So, let me show you exactly how to make it!

Zesty Lemon Poppy Seed Delight

Why You’ll Love This Recipe

  • Moist and tender crumb that melts in your mouth, thanks to the perfect balance of butter and buttermilk.
  • Bright, zesty lemon flavor paired with crunchy poppy seeds, creating a delightful texture and taste experience.
  • Easy to whip up in just about an hour, perfect for last-minute gatherings or a cozy afternoon treat.
  • Budget-friendly with everyday ingredients, making it an accessible option for all home bakers.
  • The citrus icing adds a sweet tang that elevates the loaf, turning a simple recipe into a showstopper!

Ingredients

  • 1 ½ cups (190g) all-purpose flour
  • 1 teaspoon baking powder
  • ½ teaspoon baking soda
  • ½ teaspoon salt
  • 3 tablespoons poppy seeds
  • ½ cup (115g) unsalted butter, softened to room temperature
  • 1 cup (200g) granulated sugar
  • 2 large eggs
  • 1 teaspoon vanilla extract
  • 1 teaspoon lemon zest (from about 1 medium lemon)
  • ½ cup (120ml) buttermilk
  • 2 tablespoons fresh lemon juice

For the Citrus Icing:

  • 1 cup (120g) powdered sugar
  • 2 tablespoons fresh lemon juice
  • 1 tablespoon orange juice
  • 1 teaspoon lemon zest (for garnish, optional)

Let’s dive into the key ingredients that make this Lemon Poppy Seed Loaf so special. The all-purpose flour provides the structure and base for the loaf, while the baking powder and baking soda ensure it rises perfectly, giving the loaf a light texture. For a gluten-free variation, you could substitute the flour with a gluten-free all-purpose blend. Poppy seeds not only add a delightful crunch but also contribute to the unique flavor profile that pairs well with the citrus notes.

Unsalted butter is crucial for achieving the buttery richness that makes this loaf so moist. If you’re looking for a dairy-free option, coconut oil or a vegan butter can be used instead. The buttermilk is another essential component, providing acidity that activates the baking soda for a fluffy texture. If you don’t have buttermilk on hand, you can easily make a substitute by mixing ½ cup of milk with 1 tablespoon of vinegar or lemon juice and letting it sit for about 5 minutes.

Step-by-Step Instructions

  1. Preheat your oven to 350°F (175°C). Grease a 9×5-inch loaf pan or line it with parchment paper for easy removal later.
  2. In a medium mixing bowl, whisk together 1 ½ cups of all-purpose flour, 1 teaspoon of baking powder, ½ teaspoon of baking soda, ½ teaspoon of salt, and 3 tablespoons of poppy seeds. This helps to evenly distribute the baking agents and ensures a uniform rise.
  3. In a large mixing bowl, cream together ½ cup of softened unsalted butter and 1 cup of granulated sugar using an electric mixer on medium speed for about 3-4 minutes, until the mixture is light and fluffy. Make sure to scrape down the sides of the bowl occasionally.
  4. Add 2 large eggs, 1 teaspoon of vanilla extract, and 1 teaspoon of lemon zest to the creamed butter and sugar, mixing until fully combined. You want a smooth consistency, so ensure there are no lumps of butter.
  5. In a small bowl, combine ½ cup of buttermilk and 2 tablespoons of fresh lemon juice. Alternately add the dry ingredients and buttermilk mixture to the butter mixture, starting and ending with the dry ingredients. Mix just until combined; do not overmix, as this can lead to a dense loaf.
  6. Pour the batter into the prepared loaf pan. Smooth the top with a spatula, ensuring it’s even. Bake in the preheated oven for 50-60 minutes, or until a toothpick inserted in the center comes out clean. The edges should be lightly golden brown, and the center should feel just set.
  7. Once baked, remove the loaf from the oven and allow it to cool in the pan for about 10 minutes. Then, transfer it to a wire rack to cool completely. Resist the urge to slice too soon, as it will be crumbly if it’s still warm.
  8. While the loaf is cooling, prepare the citrus icing. In a medium bowl, whisk together 1 cup of powdered sugar, 2 tablespoons of fresh lemon juice, and 1 tablespoon of orange juice until smooth. If the icing is too thick, you can add a little more juice to reach your desired consistency.
  9. Once the loaf is completely cool, drizzle the citrus icing over the top. If you like, sprinkle with an additional teaspoon of lemon zest for an extra pop of flavor and color.

Pro Tips for the Best Lemon Poppy Seed Loaf With Citrus Icing

  • Be careful not to overmix your batter; this is a common mistake that can lead to a dense loaf. Mix just until the dry ingredients are incorporated for a light and fluffy texture.
  • Use room temperature ingredients, especially the butter and eggs. This helps to create a smoother batter and ensures even baking. Take your eggs out of the fridge about 30 minutes before you start.
  • For a more pronounced lemon flavor, consider adding a little lemon extract in addition to the zest and juice. Just a half teaspoon can elevate the citrus notes significantly.
  • When measuring your flour, spoon it into the measuring cup and level it off with a knife instead of scooping directly from the bag. This prevents packing and ensures you don’t end up with a dry loaf.
  • Invest in a good quality loaf pan; it makes a difference in heat distribution, which ensures even baking. If your pan is dark-coated, reduce the oven temperature by 25°F to prevent over-browning.

Variations & Serving Ideas

For a delightful twist, consider adding blueberries or raspberries to the batter for a fruity burst of flavor. You can also experiment with different citrus fruits—try lime or grapefruit zest and juice for a refreshing change. For a healthier option, substitute half of the all-purpose flour with whole wheat flour for added fiber without compromising too much on texture.

This Lemon Poppy Seed Loaf pairs beautifully with a light salad, such as a mixed greens salad with a vinaigrette, or a cup of tea for a cozy afternoon treat. It also complements a creamy cheese platter, as the acidity of the loaf balances rich cheeses perfectly. Lastly, a scoop of vanilla ice cream on the side creates a delightful contrast of temperatures and flavors!

Storage, Make-Ahead & Reheating

This Lemon Poppy Seed Loaf can be stored at room temperature for up to 3 days if wrapped tightly in plastic wrap. If you want to keep it longer, it freezes well for up to 3 months. To freeze, wrap the loaf tightly in plastic wrap and then in aluminum foil to prevent freezer burn.

When you’re ready to enjoy it again, simply thaw it in the fridge overnight. Reheat individual slices in the microwave for 15-20 seconds or in a toaster oven until warmed through. Interestingly, many people find that this loaf tastes even better the next day, as the flavors have time to meld!

Frequently Asked Questions

Can I make Lemon Poppy Seed Loaf With Citrus Icing ahead of time?

Yes — in fact, it tastes even better the next day! You can make the loaf a day in advance, allowing the flavors to develop. Just be sure to store it in an airtight container to maintain its moisture.

Can I substitute the poppy seeds?

Absolutely! If you don’t have poppy seeds on hand or prefer an alternative, you can use sesame seeds for a similar crunch or omit them entirely for a smooth loaf.

What can I use instead of buttermilk?

If you don’t have buttermilk, you can easily create a substitute by mixing ½ cup of milk (dairy or plant-based) with 1 tablespoon of vinegar or lemon juice. Let it sit for 5 minutes before using in the recipe.

How can I make this recipe gluten-free?

To make a gluten-free version of this Lemon Poppy Seed Loaf, substitute the all-purpose flour with a gluten-free all-purpose flour blend. Just ensure that the blend contains a binding agent like xanthan gum for the best results.

What is the best way to store leftover loaf?

Leftover Lemon Poppy Seed Loaf should be stored in an airtight container at room temperature for up to 3 days. For longer storage, wrap it tightly and freeze for up to 3 months. Thaw it before serving for the best texture.

Zesty Lemon Poppy Seed Delight

Final Thoughts

The Lemon Poppy Seed Loaf with Citrus Icing is truly a delightful treat that brings a burst of brightness to any occasion. The zesty lemon flavor combined with the subtle crunch of poppy seeds creates a satisfying balance, while the citrus icing adds a touch of sweetness that perfectly complements the loaf’s tanginess.

This is the kind of recipe I come back to again and again, especially when I want to brighten up a gloomy day or celebrate a small victory. The aroma that fills the kitchen as it bakes is absolutely heavenly! I encourage you to give this recipe a try; you might just find it becoming a beloved staple in your home. Don’t forget to share your results or even add your own unique twist—I can’t wait to see what you create!

Print
clock clock iconcutlery cutlery iconflag flag iconfolder folder iconinstagram instagram iconpinterest pinterest iconfacebook facebook iconprint print iconsquares squares iconheart heart iconheart solid heart solid icon

Lemon Poppy Seed Loaf


  • Author: Lily author
  • Total Time: 11 minute
  • Yield: 1 loaf 1x
Pin Recipe
Print Recipe

Description

This Lemon Poppy Seed Loaf is a delightful treat that combines zesty lemon flavor with crunchy poppy seeds. Topped with a citrus icing, it’s perfect for any occasion.


Ingredients

Scale
  • 1 ½ cups (190g) all-purpose flour
  • 1 teaspoon baking powder
  • ½ teaspoon baking soda
  • ½ teaspoon salt
  • 3 tablespoons poppy seeds
  • ½ cup (115g) unsalted butter, softened to room temperature
  • 1 cup (200g) granulated sugar
  • 2 large eggs
  • 1 teaspoon vanilla extract
  • 1 teaspoon lemon zest (from about 1 medium lemon)
  • ½ cup (120ml) buttermilk
  • 2 tablespoons fresh lemon juice
  • 1 cup (120g) powdered sugar
  • 2 tablespoons fresh lemon juice
  • 1 tablespoon orange juice
  • 1 teaspoon lemon zest (for garnish, optional)

Instructions

  1. Preheat your oven to 350°F (175°C). Grease a 9×5-inch loaf pan or line it with parchment paper for easy removal later.
  2. In a medium mixing bowl, whisk together 1 ½ cups of all-purpose flour, 1 teaspoon of baking powder, ½ teaspoon of baking soda, ½ teaspoon of salt, and 3 tablespoons of poppy seeds. This helps to evenly distribute the baking agents and ensures a uniform rise.
  3. In a large mixing bowl, cream together ½ cup of softened unsalted butter and 1 cup of granulated sugar using an electric mixer on medium speed for about 3-4 minutes, until the mixture is light and fluffy. Make sure to scrape down the sides of the bowl occasionally.
  4. Add 2 large eggs, 1 teaspoon of vanilla extract, and 1 teaspoon of lemon zest to the creamed butter and sugar, mixing until fully combined. You want a smooth consistency, so ensure there are no lumps of butter.
  5. In a small bowl, combine ½ cup of buttermilk and 2 tablespoons of fresh lemon juice. Alternately add the dry ingredients and buttermilk mixture to the butter mixture, starting and ending with the dry ingredients. Mix just until combined; do not overmix, as this can lead to a dense loaf.
  6. Pour the batter into the prepared loaf pan. Smooth the top with a spatula, ensuring it’s even. Bake in the preheated oven for 50-60 minutes, or until a toothpick inserted in the center comes out clean. The edges should be lightly golden brown, and the center should feel just set.
  7. Once baked, remove the loaf from the oven and allow it to cool in the pan for about 10 minutes. Then, transfer it to a wire rack to cool completely. Resist the urge to slice too soon, as it will be crumbly if it’s still warm.
  8. While the loaf is cooling, prepare the citrus icing. In a medium bowl, whisk together 1 cup of powdered sugar, 2 tablespoons of fresh lemon juice, and 1 tablespoon of orange juice until smooth. If the icing is too thick, you can add a little more juice to reach your desired consistency.
  9. Once the loaf is completely cool, drizzle the citrus icing over the top. If you like, sprinkle with an additional teaspoon of lemon zest for an extra pop of flavor and color.
  • Prep Time: 15 mins
  • Cook Time: 50-60 mins
  • Category: Dessert
  • Method: Baking
  • Cuisine: American

Nutrition

  • Serving Size: 1 slice
  • Calories: 200
  • Sugar: 15 g
  • Sodium: 150 mg
  • Fat: 8 g
  • Saturated Fat: 5 g
  • Unsaturated Fat: 3 g
  • Trans Fat: 0 g
  • Carbohydrates: 30 g
  • Fiber: 1 g
  • Protein: 3 g
  • Cholesterol: 40 mg

Keywords: Be careful not to overmix your batter; this is a common mistake that can lead to a dense loaf. Use room temperature ingredients for a smoother batter and even baking.

Did you make this recipe?

Share a photo and tag us — we can't wait to see what you've made!

  • Privacy Policy
  • Terms Of Service
  • Contact
  • About
  • GDPR

Copyright © 2025 Homesmad