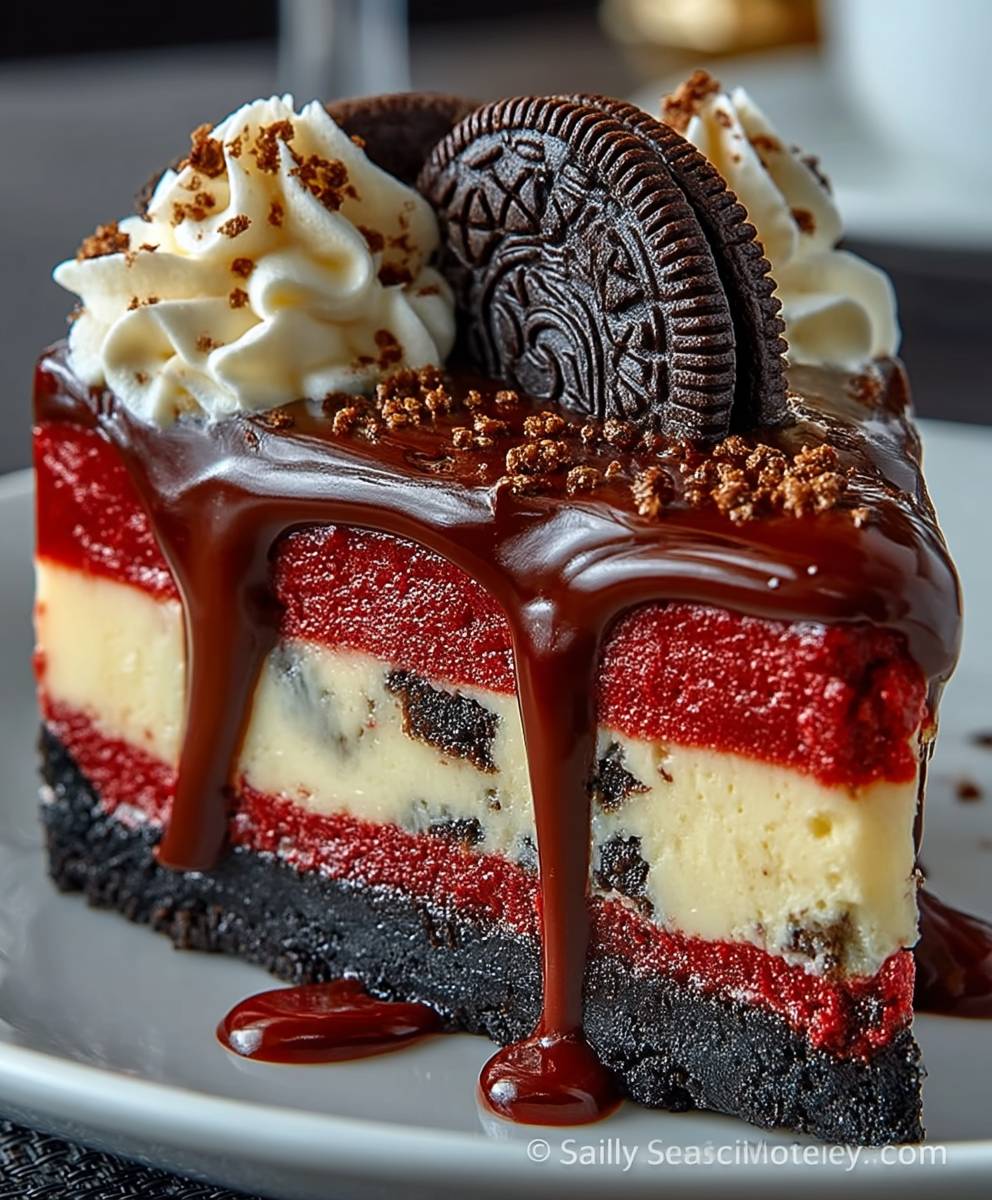
Red Velvet Oreo Cheesecake: Prepare to be utterly captivated by a dessert that’s as visually stunning as it is delicious! Imagine the classic, creamy decadence of cheesecake, swirled with the vibrant, slightly tangy flavor of red velvet cake, and then punctuated with the satisfying crunch of Oreo cookies. It’s a symphony of textures and tastes that will leave you craving more.
While the exact origins of red velvet cake are debated, its popularity soared in the mid-20th century, often associated with upscale hotels and restaurants. The distinctive red hue, originally derived from a chemical reaction between cocoa and acidic ingredients, has become synonymous with elegance and indulgence. Oreos, on the other hand, are a beloved American classic, a symbol of childhood nostalgia and simple pleasures. Combining these iconic flavors with the rich tradition of cheesecake creates a truly unforgettable dessert experience.
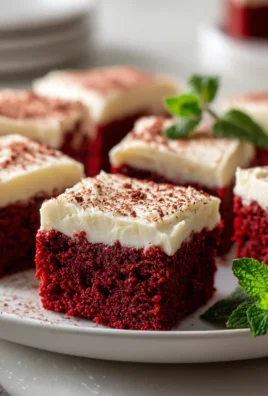
People adore this Red Velvet Oreo Cheesecake because it offers the best of all worlds. The creamy, smooth cheesecake filling melts in your mouth, while the red velvet swirls add a subtle cocoa flavor and a beautiful visual contrast. The Oreo cookie crust provides a delightful crunch that complements the soft textures perfectly. Plus, it’s a showstopper! This Red Velvet Oreo Cheesecake is guaranteed to impress your guests and become a new favorite for any special occasion. Let’s get baking!

Ingredients:
- For the Oreo Crust:
- 24 Oreo cookies, finely crushed (about 2 cups)
- 6 tablespoons (3 ounces) unsalted butter, melted
- For the Red Velvet Cheesecake Filling:
- 32 ounces (4 packages) cream cheese, softened to room temperature
- 1 ½ cups granulated sugar
- 4 large eggs, room temperature
- 1 cup sour cream, room temperature
- 2 tablespoons unsweetened cocoa powder
- 1 tablespoon red food coloring (gel is preferred)
- 1 teaspoon vanilla extract
- ½ teaspoon white vinegar
- ½ teaspoon baking soda
- Pinch of salt
- For the Oreo Swirl:
- 12 Oreo cookies, coarsely chopped
- For the Red Velvet Whipped Cream Topping (Optional):
- 1 ½ cups heavy cream, cold
- ¼ cup powdered sugar
- ½ teaspoon vanilla extract
- ½ teaspoon red food coloring (gel is preferred)
- 6 Oreo cookies, crushed for garnish
Preparing the Oreo Crust:
- Crush the Oreos: In a food processor, pulse the Oreo cookies until they are finely crushed. Alternatively, you can place them in a large zip-top bag and crush them with a rolling pin. Make sure there are no large chunks remaining.
- Combine with Butter: In a medium bowl, combine the crushed Oreo cookies with the melted butter. Mix well until the mixture resembles wet sand.
- Press into Pan: Press the Oreo mixture firmly into the bottom of a 9-inch springform pan. Use the bottom of a measuring cup or your fingers to create an even and compact crust.
- Pre-bake the Crust (Optional): For a sturdier crust, you can pre-bake it in a preheated oven at 350°F (175°C) for 8-10 minutes. This helps to set the crust and prevent it from becoming soggy. Let it cool completely before adding the filling.
Making the Red Velvet Cheesecake Filling:
- Cream the Cream Cheese and Sugar: In a large mixing bowl, beat the softened cream cheese with an electric mixer until smooth and creamy. Gradually add the granulated sugar and continue to beat until well combined and fluffy. Scrape down the sides of the bowl as needed to ensure everything is evenly mixed. This step is crucial for a smooth cheesecake.
- Add Eggs One at a Time: Add the eggs one at a time, beating well after each addition. Make sure each egg is fully incorporated before adding the next. Overmixing at this stage can incorporate too much air into the batter, which can cause the cheesecake to crack during baking.
- Incorporate Sour Cream and Extracts: Add the sour cream, vanilla extract, red food coloring, cocoa powder, white vinegar, and baking soda to the cream cheese mixture. Beat until just combined. Be careful not to overmix. The vinegar and baking soda react to create the characteristic red velvet tang.
- Fold in Oreo Pieces: Gently fold in the coarsely chopped Oreo cookies into the cheesecake batter. Distribute them evenly throughout the mixture.
- Pour into Crust: Pour the cheesecake filling over the prepared Oreo crust in the springform pan. Smooth the top with a spatula.
Baking the Red Velvet Oreo Cheesecake:
- Prepare a Water Bath: Wrap the bottom of the springform pan tightly with heavy-duty aluminum foil to prevent water from seeping in. Place the wrapped pan inside a larger roasting pan.
- Add Hot Water: Carefully pour hot water into the roasting pan, filling it about halfway up the sides of the springform pan. The water bath helps to create a moist environment in the oven, which prevents the cheesecake from cracking and ensures even baking.
- Bake the Cheesecake: Bake in a preheated oven at 325°F (160°C) for 70-80 minutes, or until the edges are set but the center still has a slight jiggle. The baking time may vary depending on your oven, so keep a close eye on it.
- Turn Off Oven and Let Cool: Once the cheesecake is done, turn off the oven and crack the oven door slightly. Let the cheesecake cool in the oven for 1 hour. This gradual cooling process helps to prevent cracking.
- Refrigerate: After 1 hour, remove the cheesecake from the water bath and let it cool completely on a wire rack. Once cooled, cover it with plastic wrap and refrigerate for at least 6 hours, or preferably overnight. This allows the cheesecake to set completely and develop its flavor.
Making the Red Velvet Whipped Cream Topping (Optional):
- Chill Bowl and Whisk: Place the mixing bowl and whisk attachment in the freezer for about 15-20 minutes before making the whipped cream. This helps the cream whip up faster and hold its shape better.
- Whip the Cream: Pour the cold heavy cream into the chilled mixing bowl. Beat with an electric mixer on medium speed until soft peaks form.
- Add Sugar and Vanilla: Gradually add the powdered sugar and vanilla extract to the whipped cream. Continue to beat until stiff peaks form. Be careful not to overwhip, as this can turn the cream into butter.
- Add Red Food Coloring: Gently fold in the red food coloring until the whipped cream is evenly tinted.
Assembling the Red Velvet Oreo Cheesecake:
- Remove from Pan: Carefully remove the chilled cheesecake from the springform pan. Run a thin knife around the edges of the pan to loosen the cheesecake before releasing the sides.
- Add Whipped Cream: If using, spread the red velvet whipped cream evenly over the top of the cheesecake. You can also pipe the whipped cream using a piping bag and tip for a more decorative look.
- Garnish: Sprinkle the crushed Oreo cookies over the whipped cream topping. You can also add additional Oreo halves or other decorations as desired.
- Slice and Serve: Slice the Red Velvet Oreo Cheesecake with a sharp knife and serve chilled. Enjoy! This cheesecake is best enjoyed cold.
Tips for Success:
- Room Temperature Ingredients: Using room temperature cream cheese, eggs, and sour cream is essential for a smooth and creamy cheesecake. Cold ingredients can cause lumps in the batter.
- Don’t Overmix: Overmixing the cheesecake batter can incorporate too much air, which can lead to cracking during baking. Mix until just combined.
- Water Bath is Key: The water bath is crucial for preventing cracking and ensuring even baking. Don’t skip this step!
- Cooling Process: The gradual cooling process in the oven and refrigerator is important for preventing cracking and allowing the cheesecake to set properly.
- Storage: Store leftover cheesecake in the refrigerator for up to 5 days.
Variations:
- Chocolate Ganache: Drizzle a chocolate ganache over the top of the cheesecake for an extra decadent touch.
- Oreo Drip: Create an Oreo drip by melting white chocolate and mixing in crushed Oreos. Drizzle it around the edges of the cheesecake.
- Red Velvet Crumbs: Sprinkle red velvet cake crumbs over the top of the cheesecake for added texture and flavor.
- Different Oreo Flavors: Experiment with different Oreo flavors, such as Golden Oreos or Mint Oreos, to customize the cheesecake to your liking.
Troubleshooting:
- Cracked Cheesecake: If your cheesecake cracks, don’t worry! It will still taste delicious. You can cover the cracks with whipped cream or ganache. To prevent cracking, make sure to use a water bath, don’t overmix the batter, and cool the cheesecake gradually.
- Soggy Crust: To prevent a soggy crust, pre-bake it for a few minutes before adding the filling. You can also brush the crust with melted chocolate to create a barrier against moisture.
- Lumpy Batter: If your batter is lumpy, it could be because the cream cheese was not softened enough. Make sure to bring the cream cheese to room temperature before using it. You can also try using an immersion blender to smooth out the batter.
Conclusion:
This Red Velvet Oreo Cheesecake is truly an experience, not just a dessert. It’s the perfect marriage of textures and flavors, from the crunchy Oreo crust to the smooth, tangy cheesecake filling, all punctuated by the unmistakable taste of red velvet. It’s decadent, impressive, and surprisingly easy to make, making it a must-try for any home baker looking to wow their friends and family. I promise, once you taste it, you’ll understand why I’m so enthusiastic!
But the best part? It’s incredibly versatile! While I personally adore it chilled straight from the fridge, a few serving suggestions can elevate this cheesecake even further. Consider topping each slice with a dollop of freshly whipped cream and a sprinkle of crushed Oreos for an extra layer of indulgence. A drizzle of white chocolate ganache adds a touch of elegance and complements the red velvet beautifully. For a more festive presentation, garnish with fresh raspberries or strawberries – the bright colors contrast wonderfully with the deep red of the cake.
And if you’re feeling adventurous, there are plenty of variations you can explore! Swap out the classic Oreos for Golden Oreos for a completely different flavor profile. Add a swirl of cream cheese frosting to the top before baking for an even richer texture. Or, for a truly decadent treat, incorporate chunks of red velvet cake into the cheesecake filling itself. You could even make mini cheesecakes in muffin tins for individual portions – perfect for parties or portion control (though I can’t guarantee you’ll only eat one!).
Don’t be intimidated by the seemingly complex layers – this recipe is designed to be straightforward and achievable for bakers of all skill levels. The key is to follow the instructions carefully and allow ample time for chilling, which is crucial for achieving that perfect cheesecake texture. Trust me, the end result is well worth the effort.
I’ve poured my heart into perfecting this Red Velvet Oreo Cheesecake recipe, and I’m so excited for you to try it. It’s become a staple in my own kitchen, and I know it will become one in yours too. It’s the perfect dessert for birthdays, holidays, or any occasion that calls for a little bit of sweetness and celebration.
So, what are you waiting for? Gather your ingredients, preheat your oven, and get ready to create a masterpiece. I’m confident that you’ll be absolutely thrilled with the results. And most importantly, I want to hear all about your experience! Did you try any of the variations I suggested? Did you add your own unique twist? Share your photos and stories in the comments below – I can’t wait to see your creations and hear what you think! Happy baking! I am sure you will love this recipe as much as I do.
Red Velvet Oreo Cheesecake: The Ultimate Dessert Recipe
Decadent Red Velvet Oreo Cheesecake with a rich Oreo crust, creamy red velvet filling swirled with Oreo pieces, and optional red velvet whipped cream topping.
Ingredients
Instructions
Recipe Notes
- Room Temperature Ingredients: Using room temperature cream cheese, eggs, and sour cream is essential for a smooth and creamy cheesecake. Cold ingredients can cause lumps in the batter.
- Don’t Overmix: Overmixing the cheesecake batter can incorporate too much air, which can lead to cracking during baking. Mix until just combined.
- Water Bath is Key: The water bath is crucial for preventing cracking and ensuring even baking. Don’t skip this step!
- Cooling Process: The gradual cooling process in the oven and refrigerator is important for preventing cracking and allowing the cheesecake to set properly.
- Storage: Store leftover cheesecake in the refrigerator for up to 5 days.
- Cracked Cheesecake: If your cheesecake cracks, don’t worry! It will still taste delicious. You can cover the cracks with whipped cream or ganache. To prevent cracking, make sure to use a water bath, don’t overmix the batter, and cool the cheesecake gradually.
- Soggy Crust: To prevent a soggy crust, pre-bake it for a few minutes before adding the filling. You can also brush the crust with melted chocolate to create a barrier against moisture.
- Lumpy Batter: If your batter is lumpy, it could be because the cream cheese was not softened enough. Make sure to bring the cream cheese to room temperature before using it. You can also try using an immersion blender to smooth out the batter.