Roasted Garlic Aioli Sauce is a culinary gem that elevates any dish it graces. This creamy, flavorful sauce has its roots in Mediterranean cuisine, where garlic and olive oil are staples. The process of roasting garlic transforms its pungent bite into a sweet, mellow flavor, making it a beloved ingredient in many households. I remember the first time I tasted roasted garlic aioli; the rich, velvety texture paired with the subtle nuttiness of the roasted garlic was simply unforgettable.
People adore this sauce not only for its exquisite taste but also for its versatility. Whether you’re slathering it on sandwiches, dipping crispy fries, or drizzling it over grilled vegetables, roasted garlic aioli sauce adds a delightful depth to every bite. Plus, it’s incredibly easy to make at home, allowing you to impress your family and friends with minimal effort. Join me as we explore the simple steps to create this irresistible roasted garlic aioli sauce that will surely become a staple in your kitchen!

Ingredients:
- 1 head of garlic
- 1 cup mayonnaise
- 2 tablespoons fresh lemon juice
- 1 teaspoon Dijon mustard
- 1/2 teaspoon salt
- 1/4 teaspoon black pepper
- 1 tablespoon olive oil (optional, for a richer flavor)
- Fresh herbs (like parsley or chives, for garnish, optional)
Preparing the Roasted Garlic
1. Preheat your oven to 400°F (200°C). This is the perfect temperature for roasting garlic, allowing it to become sweet and caramelized. 2. While the oven is heating, take your head of garlic and peel away the outer layers of the skin, leaving the individual cloves intact. You want to keep the head whole. 3. Cut about 1/4 inch off the top of the garlic head, exposing the individual cloves. This will help the garlic roast evenly and make it easier to squeeze out later. 4. Drizzle a little olive oil over the exposed cloves, making sure they are well coated. This will help them roast beautifully and add flavor. 5. Wrap the garlic head in aluminum foil, creating a tight package to trap the steam. This will help the garlic cook evenly and become soft. 6. Place the wrapped garlic in the preheated oven and roast for about 30-35 minutes. You’ll know it’s done when the cloves are soft and golden brown. 7. Once roasted, remove the garlic from the oven and let it cool for a few minutes. Be careful when unwrapping the foil, as steam will escape. 8. After it has cooled enough to handle, squeeze the roasted garlic cloves out of their skins into a small bowl. You should have a smooth, creamy paste. Set this aside for now.Making the Aioli
9. In a medium mixing bowl, combine the mayonnaise, roasted garlic paste, lemon juice, Dijon mustard, salt, and black pepper. 10. Using a whisk or a fork, mix everything together until it’s well combined. The roasted garlic will blend into the mayonnaise, creating a creamy and flavorful base. 11. If you want to add a richer flavor, drizzle in the olive oil while whisking. This step is optional, but it can enhance the overall taste of your aioli. 12. Taste your aioli and adjust the seasoning if necessary. You might want to add a little more salt, lemon juice, or even a pinch of cayenne pepper for a kick.Chilling the Aioli
13. Once you’re satisfied with the flavor, cover the bowl with plastic wrap or transfer the aioli to an airtight container. 14. Refrigerate the aioli for at least 30 minutes before serving. This allows the flavors to meld together beautifully, making it even more delicious.Serving Suggestions
15. After chilling, give the aioli a good stir before serving. You can garnish it with freshly chopped herbs like parsley or chives for a pop of color and added flavor. 16. This roasted garlic aioli is incredibly versatile! Serve it as a dip for fresh vegetables, a spread for sandwiches, or a sauce for grilled meats and seafood. It’s also fantastic with fries or as a topping for burgers. 17. If you have leftovers (which is rare because it’s so good!), store the aioli in the refrigerator in an airtight container. It should last for about a week, but trust me, it won’t last that long!Tips for Perfect Aioli
18. If you prefer a lighter version, you can substitute half of the mayonnaise with Greek yogurt. This will give you a tangy flavor while keeping it creamy. 19. For a smoky twist, consider adding a pinch of smoked paprika or a few drops of liquid smoke to the aioli. This can elevate the flavor profile and add depth. 20. If you’re feeling adventurous, try adding other ingredients like roasted red peppers, sun-dried tomatoes, or even a splash of hot sauce for a spicy kick. 21. Remember, the key to a great aioli is balancing the flavors. Don’t be afraid to experiment with different herbs and spices to find your perfect combination. 22. Lastly, always use fresh ingredients. Fresh garlic and high-quality mayonnaise will make a noticeable difference in the taste of your aioli. Enjoy your homemade roasted garlic aioli! It’s a simple yet impressive sauce that will elevate any dish you serve it with. Happy cooking!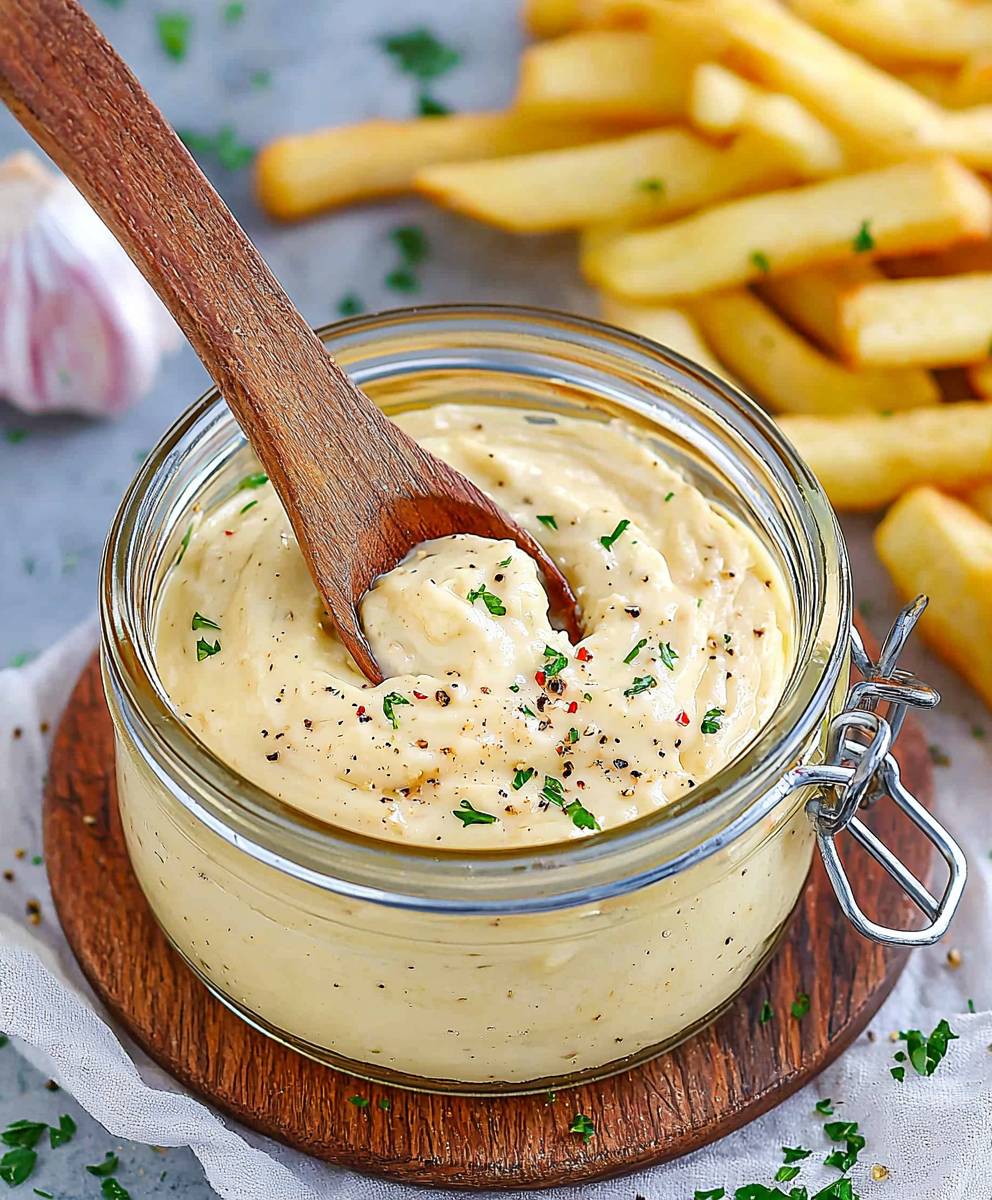
Conclusion:
In summary, this Roasted Garlic Aioli Sauce is an absolute must-try for anyone looking to elevate their culinary game. The rich, creamy texture combined with the deep, savory flavor of roasted garlic makes it a versatile condiment that can enhance a variety of dishes. Whether you’re slathering it on a fresh sandwich, using it as a dip for crispy fries, or drizzling it over grilled vegetables, this aioli will undoubtedly impress your family and friends. Feel free to get creative with your serving suggestions! You can add fresh herbs like basil or parsley for a burst of color and flavor, or even a squeeze of lemon juice for a zesty twist. If you’re feeling adventurous, try incorporating different spices or even a hint of smoked paprika to give it a unique flair. The possibilities are endless! I encourage you to give this Roasted Garlic Aioli Sauce a try and experience the deliciousness for yourself. Once you’ve whipped up a batch, I’d love to hear about your experience! Share your thoughts, variations, or even photos of your creations. Let’s spread the love for this delightful sauce together! Print
Roasted Garlic Aioli Sauce: A Simple Recipe for Flavorful Dishes
- Total Time: 50 minutes
- Yield: 1 cup 1x
Description
This Roasted Garlic Aioli is a creamy and flavorful sauce that blends the sweetness of roasted garlic with tangy lemon and rich mayonnaise. Ideal as a dip, spread, or sauce, it enhances any dish with its delicious taste.
Ingredients
- 1 head of garlic
- 1 cup mayonnaise
- 2 tablespoons fresh lemon juice
- 1 teaspoon Dijon mustard
- 1/2 teaspoon salt
- 1/4 teaspoon black pepper
- 1 tablespoon olive oil (optional, for a richer flavor)
- Fresh herbs (like parsley or chives, for garnish, optional)
Instructions
- Preheat your oven to 400°F (200°C).
- Peel away the outer layers of the garlic head, keeping the cloves intact.
- Cut about 1/4 inch off the top of the garlic head to expose the cloves.
- Drizzle olive oil over the exposed cloves.
- Wrap the garlic head in aluminum foil tightly.
- Roast in the preheated oven for 30-35 minutes until the cloves are soft and golden brown.
- Remove from the oven and let cool for a few minutes before unwrapping.
- Squeeze the roasted garlic cloves into a small bowl to create a smooth paste.
- In a medium mixing bowl, combine mayonnaise, roasted garlic paste, lemon juice, Dijon mustard, salt, and black pepper.
- Whisk until well combined.
- If desired, drizzle in olive oil while whisking for a richer flavor.
- Taste and adjust seasoning as needed.
- Cover the bowl with plastic wrap or transfer to an airtight container.
- Refrigerate for at least 30 minutes to allow flavors to meld.
- Stir the aioli before serving and garnish with fresh herbs if desired.
- Serve as a dip for vegetables, a spread for sandwiches, or a sauce for grilled meats and seafood. It’s also great with fries or on burgers.
- Store leftovers in an airtight container in the refrigerator for up to a week.
Notes
- For a lighter version, substitute half of the mayonnaise with Greek yogurt.
- Add smoked paprika or liquid smoke for a smoky flavor.
- Experiment with additional ingredients like roasted red peppers or hot sauce for a unique twist.
- Always use fresh ingredients for the best flavor.
- Prep Time: 15 minutes
- Cook Time: 35 minutes