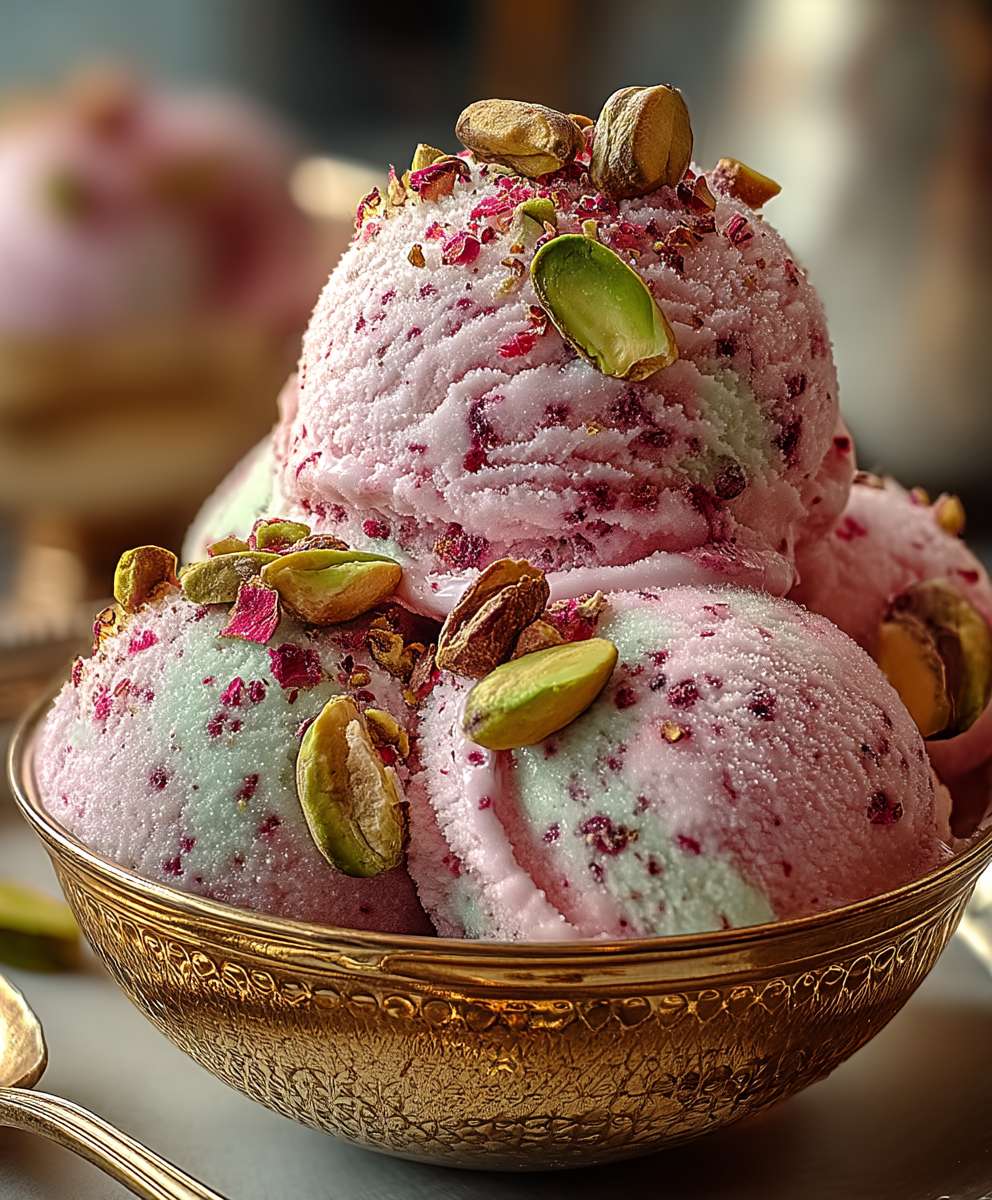
Rosewater Pistachio Gelato: Prepare to be transported to a sun-drenched Sicilian piazza with every spoonful of this exquisite frozen treat! Forget everything you think you know about ice cream; this is gelato, and it’s in a league of its own. I’m about to share my closely guarded recipe for a dessert that’s not just delicious, it’s an experience.
Gelato, unlike its American cousin, is churned slower, resulting in a denser, richer texture and more intense flavor. The combination of rosewater and pistachio is a classic pairing, particularly in Middle Eastern and Mediterranean cuisines. Rosewater, with its delicate floral aroma, has been used for centuries in desserts and beverages, adding a touch of elegance and sophistication. Pistachios, with their subtly sweet and nutty flavor, provide the perfect counterpoint, creating a symphony of flavors that dance on your palate.
What makes this rosewater pistachio gelato so irresistible? It’s the perfect balance of sweet, floral, and nutty notes, combined with a luxuriously smooth and creamy texture. It’s also surprisingly easy to make at home! No need for fancy equipment; with a few simple ingredients and a little patience, you can create a dessert that will impress your friends and family. This gelato is not only a delightful treat on a hot summer day but also a sophisticated ending to any meal. Get ready to indulge in a taste of pure bliss!

Ingredients:
- 1 ½ cups whole milk
- ¾ cup heavy cream
- ¾ cup granulated sugar
- Pinch of sea salt
- ¼ cup shelled, unsalted pistachios, finely ground
- 2 tablespoons light corn syrup
- 1 teaspoon rosewater
- ¼ teaspoon almond extract (optional, enhances pistachio flavor)
- Green food coloring (optional, for a more vibrant color)
- Additional chopped pistachios for garnish (optional)
Preparing the Pistachio Infusion:
This step is crucial for extracting the maximum pistachio flavor. We’re essentially creating a pistachio-infused milk base that will form the foundation of our gelato.
- Grind the Pistachios: Start by finely grinding your shelled, unsalted pistachios. You can use a food processor or a spice grinder for this. The finer the grind, the more flavor you’ll extract. Be careful not to over-process them into a paste. We want a fine, almost flour-like consistency.
- Combine Milk and Pistachios: In a medium saucepan, combine the whole milk and the ground pistachios. Stir well to ensure the pistachios are evenly distributed throughout the milk.
- Heat the Mixture: Place the saucepan over medium heat. We’re not looking to boil the milk, just to gently heat it. Stir constantly to prevent the pistachios from sticking to the bottom of the pan and burning.
- Infuse the Flavor: Once the milk is steaming (small bubbles forming around the edges), remove the saucepan from the heat. Cover the saucepan with a lid and let the pistachio-milk mixture steep for at least 1 hour, or even better, for 2-3 hours. The longer it steeps, the more intense the pistachio flavor will be. This allows the milk to fully absorb the oils and essence from the pistachios.
- Strain the Mixture: After the steeping time, strain the pistachio-infused milk through a fine-mesh sieve lined with cheesecloth. This will remove the ground pistachios, leaving you with a smooth, flavorful milk base. Press down on the pistachios in the sieve to extract as much liquid as possible. Discard the solids.
Creating the Gelato Base:
Now that we have our pistachio-infused milk, we can move on to creating the gelato base. This involves combining the milk with the other ingredients and cooking it to the right consistency.
- Combine Ingredients: In the same saucepan (cleaned, of course!), combine the strained pistachio-infused milk, heavy cream, granulated sugar, and sea salt. Stir well to dissolve the sugar completely.
- Cook the Base: Place the saucepan over medium heat. Stir constantly to prevent scorching. We’re aiming to cook the base until it thickens slightly and coats the back of a spoon. This usually takes about 5-7 minutes. You’ll know it’s ready when you can run your finger across the back of the spoon and the line remains distinct. Be careful not to overcook the base, as this can result in a grainy texture.
- Add Corn Syrup: Stir in the light corn syrup. Corn syrup helps to prevent ice crystals from forming, resulting in a smoother, creamier gelato.
- Cool the Base: Remove the saucepan from the heat and pour the gelato base into a clean bowl. Cover the bowl with plastic wrap, pressing the plastic wrap directly onto the surface of the base. This prevents a skin from forming.
- Chill the Base: Refrigerate the gelato base for at least 4 hours, or preferably overnight. This allows the flavors to meld together and the base to fully chill, which is essential for proper churning.
Adding the Finishing Touches:
Before churning, we’ll add the rosewater, almond extract (if using), and green food coloring (if using) to enhance the flavor and appearance of our gelato.
- Incorporate Flavorings: Once the gelato base is thoroughly chilled, remove it from the refrigerator. Stir in the rosewater and almond extract (if using). Start with the recommended amount of rosewater and adjust to your taste. Rosewater can be quite potent, so a little goes a long way.
- Add Color (Optional): If you want to add a touch of green food coloring, do so now. Add a few drops at a time, stirring well after each addition, until you reach your desired shade of green. Remember that the color will intensify slightly during churning.
Churning the Gelato:
This is where the magic happens! Churning incorporates air into the base, creating the light and airy texture that is characteristic of gelato.
- Prepare Your Ice Cream Maker: Follow the manufacturer’s instructions for your ice cream maker. If you have a freezer bowl ice cream maker, make sure the bowl is thoroughly frozen (usually at least 24 hours).
- Churn the Base: Pour the chilled gelato base into the prepared ice cream maker. Churn according to the manufacturer’s instructions, usually for about 20-25 minutes, or until the gelato reaches a soft-serve consistency.
Freezing and Serving:
After churning, the gelato will be soft and creamy, but it needs further freezing to achieve the perfect scoopable texture.
- Transfer to a Container: Transfer the churned gelato to an airtight container. A freezer-safe container with a tight-fitting lid is ideal.
- Freeze the Gelato: Freeze the gelato for at least 2-3 hours, or until it is firm enough to scoop.
- Soften Before Serving: Before serving, let the gelato sit at room temperature for a few minutes to soften slightly. This will make it easier to scoop and will enhance the flavor.
- Garnish and Serve: Scoop the gelato into bowls or cones. Garnish with additional chopped pistachios, if desired. Enjoy!
Tips for Success:
- Use High-Quality Ingredients: The quality of your ingredients will directly impact the flavor of your gelato. Use fresh, high-quality pistachios, whole milk, and heavy cream for the best results.
- Don’t Overchurn: Overchurning can result in a grainy texture. Churn the gelato until it reaches a soft-serve consistency, then transfer it to the freezer to firm up.
- Adjust Sweetness to Taste: The amount of sugar in this recipe is a guideline. Adjust it to your taste preferences.
- Experiment with Flavors: Feel free to experiment with other flavor combinations. You could add a touch of cardamom or orange zest to complement the pistachio and rosewater.
- Proper Storage: Store your gelato in an airtight container in the freezer for up to 2 weeks. After that, the texture may start to deteriorate.
Troubleshooting:
- Grainy Texture: This can be caused by overcooking the base or not chilling it properly. Make sure to cook the base gently and chill it thoroughly before churning.
- Icy Texture: This can be caused by not using enough sugar or corn syrup. Make sure to use the recommended amounts of these ingredients.
- Weak Pistachio Flavor: Make sure to use high-quality pistachios and steep the milk for a sufficient amount of time. You can also increase the amount of pistachios used in the infusion.
Conclusion:
This Rosewater Pistachio Gelato isn’t just a dessert; it’s an experience. The delicate floral notes of rosewater dance with the rich, nutty flavor of pistachios, creating a symphony of taste that’s both refreshing and utterly indulgent. I truly believe this recipe is a must-try because it elevates the simple pleasure of gelato to something truly special, something you’ll want to make again and again. It’s the perfect ending to a summer barbecue, a sophisticated treat for a dinner party, or simply a little something to brighten your day.
But the beauty of this recipe lies not only in its exquisite flavor profile but also in its versatility. Feel free to experiment with different variations to suit your own preferences. For a more intense pistachio flavor, try toasting the pistachios lightly before grinding them. This will bring out their natural oils and enhance their nutty aroma. If you’re feeling adventurous, you could add a swirl of raspberry jam for a delightful contrast of sweet and tart. Or, for a truly decadent experience, drizzle a little honey over the top just before serving.
Serving Suggestions:
* Serve in chilled bowls or elegant glasses for a sophisticated presentation.
* Garnish with chopped pistachios, rose petals (make sure they are food grade!), or a sprig of mint.
* Pair with a crisp biscotti or a delicate almond cookie for added texture and flavor.
* For a truly indulgent treat, serve alongside a slice of warm baklava.
* Create a gelato float by adding a scoop to sparkling water or prosecco.
Variations to Explore:
* Rosewater Almond Gelato: Substitute the pistachios with blanched almonds for a slightly different nutty flavor.
* Cardamom Rosewater Gelato: Add a pinch of ground cardamom for a warm, aromatic spice note.
* Vegan Rosewater Pistachio Gelato: Use coconut milk or cashew cream instead of dairy milk for a delicious vegan alternative.
* Rosewater Pistachio Ice Cream Sandwiches: Make cookies and sandwich the gelato between them.
I’m confident that you’ll absolutely love this Rosewater Pistachio Gelato. It’s a recipe that’s both easy to follow and incredibly rewarding. The combination of flavors is simply divine, and the creamy texture is irresistible. It’s a guaranteed crowd-pleaser, and I can’t wait for you to try it!
So, what are you waiting for? Gather your ingredients, dust off your ice cream maker, and get ready to embark on a culinary adventure. I promise you won’t be disappointed. And most importantly, I’d love to hear about your experience! Did you try any of the variations? Did you make any tweaks to the recipe? What did your friends and family think? Please share your thoughts and photos in the comments below. Your feedback is invaluable, and I’m always eager to learn from your culinary creations. Happy gelato making! Let me know how your batch of Rosewater Pistachio Gelato turns out!
Rosewater Pistachio Gelato: A Delicious Homemade Recipe
Creamy, homemade pistachio gelato with rosewater and a hint of almond. A vibrant, smooth Italian-style ice cream.
Ingredients
Instructions
Recipe Notes
- Use high-quality ingredients for the best flavor.
- Don’t overchurn the gelato.
- Adjust sweetness to taste.
- Experiment with other flavor combinations like cardamom or orange zest.
- Store in an airtight container in the freezer for up to 2 weeks.
- If the texture is grainy, make sure to cook the base gently and chill it thoroughly before churning.
- If the texture is icy, make sure to use the recommended amounts of sugar and corn syrup.
- If the pistachio flavor is weak, use high-quality pistachios and steep the milk for a sufficient amount of time.