Sausage Ditalini Soup: just the name conjures up images of cozy nights, steaming bowls, and the kind of comfort food that warms you from the inside out. Have you ever craved a dish that feels like a hug? This is it! This hearty soup is more than just a meal; it’s an experience, a journey back to simpler times and family gatherings.
Ditalini pasta, those adorable little thimbles, have a rich history in Italian cuisine, often featured in soups and stews across various regions. Paired with savory sausage, this soup is a testament to the beauty of simple ingredients coming together to create something truly extraordinary. It’s a dish that speaks of resourcefulness and the Italian tradition of making the most of what you have.
But what is it about Sausage Ditalini Soup that makes it so universally loved? Perhaps it’s the satisfying chew of the pasta against the rich, meaty flavor of the sausage. Or maybe it’s the ease with which it comes together, making it a perfect weeknight meal. Whatever the reason, this soup is a guaranteed crowd-pleaser. I find that people love it because it’s both comforting and flavorful, a delightful combination that satisfies on so many levels. So, grab your favorite pot, and let’s get cooking! I’m excited to share my version of this classic Sausage Ditalini Soup with you.
Ingredients:
- 1 pound Italian sausage, sweet or hot (I prefer sweet for this recipe!)
- 1 tablespoon olive oil
- 1 large onion, chopped
- 2 carrots, peeled and chopped
- 2 celery stalks, chopped
- 4 cloves garlic, minced
- 8 cups chicken broth (low sodium is best so you can control the salt)
- 1 (14.5 ounce) can diced tomatoes, undrained
- 1 (15 ounce) can cannellini beans, rinsed and drained
- 1 teaspoon dried oregano
- 1/2 teaspoon dried basil
- 1/4 teaspoon red pepper flakes (optional, for a little kick!)
- 1 cup ditalini pasta
- 1/2 cup grated Parmesan cheese, plus more for serving
- Salt and pepper to taste
- Fresh parsley, chopped, for garnish
Preparing the Sausage and Vegetables:
- First, we’re going to brown the sausage. Remove the sausage from its casings, if necessary. In a large pot or Dutch oven, heat the olive oil over medium-high heat. Add the sausage and cook, breaking it up with a spoon, until it’s browned and cooked through. This usually takes about 5-7 minutes. Make sure to crumble it well so you don’t have big chunks in your soup.
- Once the sausage is browned, remove it from the pot with a slotted spoon and set it aside. Leave the rendered fat in the pot – that’s where all the flavor is! If there’s an excessive amount of fat, you can drain off a little, but don’t get rid of it all.
- Now, add the chopped onion, carrots, and celery to the pot. Cook, stirring occasionally, until the vegetables are softened, about 5-7 minutes. This is called a mirepoix, and it’s the foundation of so many delicious soups and stews. You want the onions to be translucent and the carrots and celery to be slightly tender.
- Next, add the minced garlic to the pot and cook for about 1 minute more, until fragrant. Be careful not to burn the garlic, as it can become bitter. The aroma of garlic cooking is one of my favorite things!
Building the Soup:
- Return the cooked sausage to the pot with the vegetables.
- Pour in the chicken broth and add the diced tomatoes (undrained), cannellini beans (rinsed and drained), dried oregano, dried basil, and red pepper flakes (if using). Give everything a good stir to combine.
- Bring the soup to a boil, then reduce the heat to low, cover, and simmer for at least 15 minutes, or up to 30 minutes. The longer it simmers, the more the flavors will meld together. I often let it simmer for as long as I can!
Cooking the Pasta and Finishing Touches:
- After the soup has simmered, add the ditalini pasta to the pot. Cook according to the package directions, usually about 8-10 minutes, or until the pasta is tender. Be sure to stir occasionally to prevent the pasta from sticking to the bottom of the pot.
- Once the pasta is cooked, stir in the grated Parmesan cheese. The cheese will melt into the soup, adding a creamy richness and salty flavor.
- Season the soup with salt and pepper to taste. Remember that the chicken broth and Parmesan cheese already contain salt, so start with a small amount and add more as needed.
- Ladle the soup into bowls and garnish with fresh chopped parsley and extra grated Parmesan cheese. Serve immediately and enjoy!
Tips and Variations:
- Spice it up: If you like a spicier soup, use hot Italian sausage or add more red pepper flakes. You could even add a pinch of cayenne pepper.
- Add greens: Stir in some chopped spinach, kale, or escarole during the last few minutes of cooking for added nutrients and flavor.
- Use different beans: Cannellini beans are my favorite, but you can also use Great Northern beans, kidney beans, or even chickpeas.
- Make it vegetarian: Omit the sausage and use vegetable broth instead of chicken broth. You can also add some extra vegetables, such as zucchini or bell peppers.
- Slow Cooker Option: Brown the sausage and sauté the vegetables as directed. Then, transfer everything to a slow cooker. Add the remaining ingredients (except the pasta and Parmesan cheese). Cook on low for 6-8 hours or on high for 3-4 hours. Stir in the pasta during the last 30 minutes of cooking. Stir in the Parmesan cheese before serving.
- Freezing Instructions: Let the soup cool completely before transferring it to freezer-safe containers or bags. Leave some headspace in the containers, as the soup will expand when frozen. Freeze for up to 3 months. To thaw, place the soup in the refrigerator overnight or use the defrost setting on your microwave. Reheat on the stovetop or in the microwave until heated through. Note that the pasta may become a bit softer after freezing and thawing.
- Make Ahead Tip: You can make the soup a day or two ahead of time. The flavors will meld together even more as it sits in the refrigerator. Just add the pasta right before serving to prevent it from getting mushy.
- Broth Consistency: If you prefer a thicker soup, you can mash some of the cannellini beans with a fork before adding them to the pot. This will help to thicken the broth. Alternatively, you can whisk together a tablespoon of cornstarch with a tablespoon of cold water and stir it into the soup during the last few minutes of cooking.
- Serving Suggestions: Serve this soup with a side of crusty bread for dipping. It’s also delicious with a simple green salad.
Nutritional Information (approximate, per serving):
Calories: 350
Protein: 25g
Fat: 15g
Carbohydrates: 30g
Fiber: 5g
Why I Love This Recipe:
This Sausage Ditalini Soup is one of my go-to recipes for a comforting and satisfying meal. It’s packed with flavor, easy to make, and perfect for a chilly day. I love that it’s customizable – you can easily adjust the ingredients to suit your taste preferences. Plus, it’s a great way to use up leftover vegetables. I hope you enjoy this recipe as much as I do!

Conclusion:
This Sausage Ditalini Soup isn’t just another soup recipe; it’s a warm hug in a bowl, a comforting classic elevated with simple yet impactful flavors. It’s a must-try because it’s incredibly easy to make, uses readily available ingredients, and delivers a deeply satisfying and flavorful experience that the whole family will adore. From the savory Italian sausage to the perfectly cooked ditalini pasta, every spoonful is a delightful combination of textures and tastes. Trust me, this soup will become a regular in your rotation!
But the best part? It’s incredibly versatile! Feel free to get creative and adapt it to your own preferences. For a spicier kick, use hot Italian sausage or add a pinch of red pepper flakes. If you’re looking for a vegetarian option, simply omit the sausage and add more vegetables like zucchini, spinach, or kale. Cannellini beans or chickpeas would also be a fantastic addition for extra protein and fiber.
Serving suggestions are endless! I personally love to serve this soup with a generous sprinkle of grated Parmesan cheese and a crusty piece of bread for dipping. A dollop of ricotta cheese on top adds a creamy richness that’s simply divine. For a lighter meal, pair it with a simple side salad. It’s also fantastic as a starter for a larger Italian-themed dinner.
And don’t forget about leftovers! This soup tastes even better the next day as the flavors meld together even more. It’s perfect for meal prepping and packing for lunch. Store it in an airtight container in the refrigerator for up to three days. You can also freeze it for longer storage – just be sure to let it cool completely before transferring it to freezer-safe containers.
I’ve poured my heart into perfecting this recipe, and I’m confident that you’ll love it as much as I do. It’s the perfect weeknight meal, a comforting remedy for a chilly day, and a guaranteed crowd-pleaser. This Sausage Ditalini Soup is truly a winner!
So, what are you waiting for? Gather your ingredients, put on your apron, and get ready to create a culinary masterpiece. I’m so excited for you to try this recipe and experience the joy of homemade soup.
Once you’ve made it, I’d absolutely love to hear about your experience! Did you make any variations? What did your family think? Share your photos and comments below – I can’t wait to see your creations and hear your feedback. Your insights will not only help me improve the recipe but also inspire other home cooks to give it a try. Happy cooking, and enjoy every delicious spoonful of your homemade Sausage Ditalini Soup! I’m sure you’ll agree that this is a recipe worth sharing and making again and again.
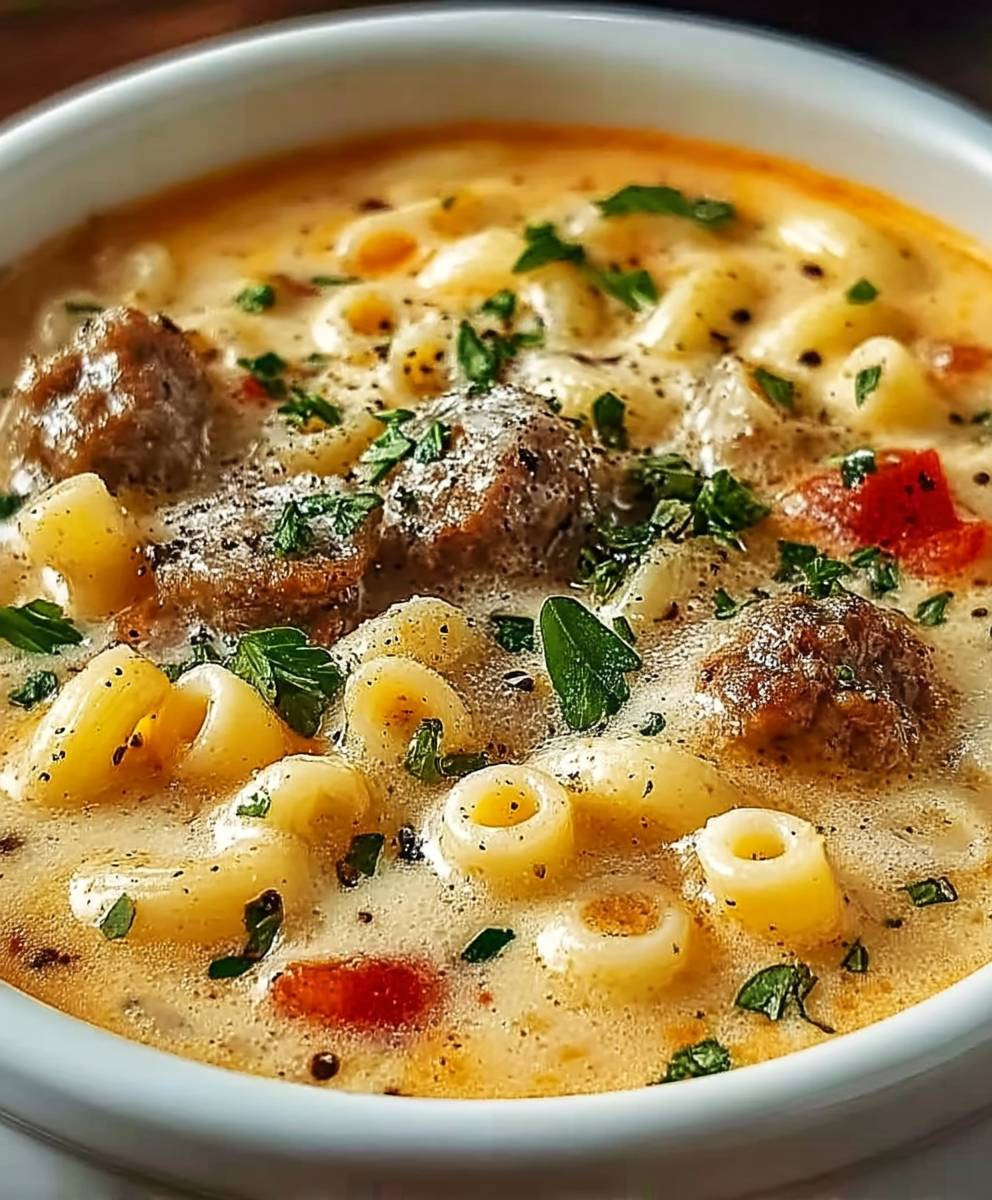
Sausage Ditalini Soup: A Hearty and Delicious Recipe
Hearty Sausage Ditalini Soup with Italian sausage, vegetables, cannellini beans, and ditalini pasta in a savory broth. Comforting and customizable!
Ingredients
Instructions
Recipe Notes
- Spice it up: Use hot Italian sausage or add more red pepper flakes for a spicier soup.
- Add greens: Stir in chopped spinach, kale, or escarole during the last few minutes of cooking.
- Use different beans: Substitute cannellini beans with Great Northern beans, kidney beans, or chickpeas.
- Make it vegetarian: Omit the sausage and use vegetable broth. Add extra vegetables like zucchini or bell peppers.
- Slow Cooker Option: Brown sausage and sauté vegetables. Transfer to a slow cooker. Add remaining ingredients (except pasta and Parmesan). Cook on low for 6-8 hours or on high for 3-4 hours. Stir in pasta during the last 30 minutes. Stir in Parmesan before serving.
- Freezing Instructions: Cool completely before freezing in freezer-safe containers. Freeze for up to 3 months. Thaw in the refrigerator overnight or use the defrost setting on your microwave. Reheat on the stovetop or in the microwave.
- Make Ahead Tip: Make the soup a day or two ahead of time. Add the pasta right before serving.
- Broth Consistency: Mash some of the cannellini beans to thicken the broth. Alternatively, whisk together a tablespoon of cornstarch with a tablespoon of cold water and stir it into the soup during the last few minutes of cooking.
- Serving Suggestions: Serve with crusty bread for dipping or a simple green salad.