• Skip to primary navigation
  • Skip to main content
  • Skip to primary sidebar
Homesmad

Homesmad

  • Home
  • Breakfast & Brunch
  • Appetizers & Snacks
  • Dinner
  • Dessert
  • About
  • Privacy Policy
  • Contact
Homesmad
  • Home
  • Breakfast & Brunch
  • Appetizers & Snacks
  • Dinner
  • Dessert
  • About
  • Privacy Policy
  • Contact

Spaghetti Squash Au Gratin: Healthy & Delicious Recipe

November 24, 2025 by Lily author

Spaghetti Squash Au Gratin A Delicious And Healthy Recipe – doesn’t that just sound like the perfect blend of comfort and conscious eating? We all yearn for those wonderfully creamy, cheesy dishes that provide a sense of warmth and pure culinary joy, especially when the weather turns cooler or we simply need a little extra something to brighten our day. But what if I told you that you could truly indulge in such a dish, savoring every forkful, without any of the guilt often associated with rich comfort foods?

This magnificent creation takes the classic “au gratin” concept, a celebrated French culinary technique traditionally involving a savory dish topped with a browned crust of cheese or breadcrumbs, and masterfully reinvents it for modern palates. By substituting pasta with the naturally sweet, tender strands of spaghetti squash, we unlock a world of flavor and texture that is both deeply satisfying and incredibly nutritious. People adore this dish not just for its incredible creamy, savory taste and the delightful contrast of tender squash with a crispy topping, but also for its clever ability to pack a healthy punch. It’s the perfect blend of indulgence and mindful eating. I’ve personally found that preparing Spaghetti Squash Au Gratin A Delicious And Healthy Recipe is an incredibly rewarding experience, offering a wholesome meal that truly nourishes the body and soul. Get ready to transform your dinner table!

Spaghetti Squash Au Gratin: Healthy & Delicious Recipe this RECIPE

Ingredients:

Creating a truly magnificent Spaghetti Squash Au Gratin A Delicious And Healthy Recipe starts with selecting the freshest, most flavorful ingredients. Here’s everything you’ll need to embark on this culinary adventure:

  • For the Spaghetti Squash:
    • 2 medium spaghetti squash (approximately 2.5 – 3 pounds each). When selecting, look for firm squash that feels heavy for its size, with no soft spots or blemishes.
    • 2 tablespoons olive oil. I prefer extra virgin olive oil for its rich flavor, but any good quality olive oil will do.
    • 1 teaspoon sea salt. Fine sea salt or kosher salt works best here for even seasoning.
    • 1/2 teaspoon freshly ground black pepper. Always grind your own; the aroma and flavor are unparalleled.
  • For the Rich and Creamy Cheese Sauce:
    • 4 tablespoons unsalted butter. Using unsalted butter gives you better control over the final saltiness of your sauce.
    • 4 tablespoons all-purpose flour. This will create the roux, the foundational thickener for our sauce.
    • 3 cups whole milk. While you can use lower fat milk, whole milk truly contributes to the luxurious creaminess we’re aiming for in this au gratin. Warm it slightly before adding for a smoother sauce.
    • 1 teaspoon Dijon mustard. Don’t skip this! It won’t make your sauce taste like mustard, but rather enhances the cheese flavor and adds a subtle tang.
    • 1/2 teaspoon garlic powder. For a gentle, underlying savory note.
    • 1/4 teaspoon ground nutmeg. This spice pairs wonderfully with cheese sauces, adding warmth and depth.
    • 1/2 teaspoon sea salt. Adjust to your taste, but start here.
    • 1/4 teaspoon freshly ground black pepper. Again, adjust to your preference.
    • 1 cup shredded sharp cheddar cheese. I always recommend grating your own cheese from a block; pre-shredded varieties often contain anti-caking agents that can make your sauce gritty. Sharp cheddar provides a robust flavor.
    • 1 cup shredded Gruyère cheese. Gruyère offers a nutty, complex flavor and melts beautifully, creating that classic au gratin texture.
    • 1/2 cup grated Parmesan cheese. For an extra layer of salty, umami goodness. Freshly grated is absolutely essential here.
  • For the Topping and Garnish:
    • 1/2 cup Panko breadcrumbs. These Japanese-style breadcrumbs are lighter and crispier than regular breadcrumbs, creating a superior golden crust.
    • 2 tablespoons melted unsalted butter. To toss with the breadcrumbs for an extra crispy topping.
    • 1/4 cup chopped fresh parsley (optional). For a pop of color and freshness when serving your finished au gratin.

Preparing the Spaghetti Squash:

The foundation of our Spaghetti Squash Au Gratin A Delicious And Healthy Recipe is, naturally, the spaghetti squash itself. Roasting it correctly ensures it’s tender, flavorful, and ready to absorb all that cheesy goodness. This step is crucial, so let’s get it right!

  1. Preheat Your Oven and Prep Your Squash:

    First things first, preheat your oven to a comfortable 400°F (200°C). While the oven warms up, prepare your spaghetti squash. Carefully, using a sturdy chef’s knife, cut each spaghetti squash in half lengthwise. This can be a bit challenging, so ensure your knife is sharp and you have a stable surface. If you find it difficult to cut raw, you can microwave the whole squash for 3-5 minutes to soften the skin slightly, making it easier to slice. Once halved, use a spoon to scoop out and discard the seeds and any stringy bits from the center cavity. Think of it like carving a pumpkin, but on a smaller, more delicate scale.

  2. Season and Roast for Perfection:

    Now it’s time to bring out the flavor! Drizzle the cut sides of the spaghetti squash with 2 tablespoons of olive oil. Use your hands or a pastry brush to ensure the entire cut surface is lightly coated. Season generously with 1 teaspoon of sea salt and 1/2 teaspoon of freshly ground black pepper. Place the squash halves cut-side down on a large baking sheet. I like to line my baking sheet with parchment paper or a silicone baking mat for easy cleanup – nobody wants stuck-on squash!

    Roast in your preheated oven for approximately 40-50 minutes, or until the squash is fork-tender. You’ll know it’s ready when you can easily pierce the skin and flesh with a fork, and the edges might start to caramelize slightly, developing a lovely golden-brown hue. Roasting not only cooks the squash but also deepens its natural sweetness, which is absolutely vital for this dish.

  3. Cool and Shred:

    Once roasted, carefully remove the squash from the oven and let it cool for about 10-15 minutes on the baking sheet. It will still be hot, so handle with care. Once cool enough to touch, use a fork to scrape the flesh from each squash half. The strands should easily pull away, resembling spaghetti noodles. This is where the magic of “spaghetti squash” truly comes to life! Transfer all the scraped spaghetti squash strands into a large bowl. It’s important to give the squash a gentle squeeze or press in a colander to remove any excess moisture. Too much water will dilute our delicious cheese sauce and make our gratin less creamy and more watery, which we definitely want to avoid for the best Spaghetti Squash Au Gratin A Delicious And Healthy Recipe experience.

Crafting the Velvety Cheese Sauce:

The cheese sauce is the heart and soul of any au gratin, and our version for this Spaghetti Squash Au Gratin A Delicious And Healthy Recipe is no exception. It needs to be rich, creamy, and bursting with flavor. Let’s make a sauce that will have everyone asking for seconds!

  1. The Foundation: A Perfect Roux:

    In a large saucepan or a Dutch oven, melt 4 tablespoons of unsalted butter over medium heat. Once the butter is fully melted and slightly shimmering, sprinkle in 4 tablespoons of all-purpose flour. Whisk continuously for 1-2 minutes, creating a smooth paste known as a roux. This step is crucial for thickening our sauce. You want to cook the flour just long enough to remove the raw flour taste but not so long that it browns excessively, which could affect the final color of your sauce. It should look like a pale, slightly bubbly paste.

  2. Building Layers of Flavor:

    Gradually, pour in 3 cups of whole milk, whisking constantly to prevent lumps from forming. I find it helpful to add the milk in about three additions, whisking thoroughly after each addition until smooth before adding more. Once all the milk is incorporated and the sauce begins to thicken, reduce the heat to low. Now, whisk in 1 teaspoon of Dijon mustard, 1/2 teaspoon of garlic powder, and 1/4 teaspoon of ground nutmeg. These ingredients add subtle yet profound layers of flavor that truly elevate the cheese sauce. Season with 1/2 teaspoon of sea salt and 1/4 teaspoon of freshly ground black pepper. Continue to gently whisk and simmer for another 3-5 minutes, allowing the sauce to thicken to a luxurious, pourable consistency. It should coat the back of a spoon without being too thin or too thick.

  3. The Cheese Meltdown:

    Remove the saucepan from the heat. This is an important trick to prevent your cheese from becoming stringy or greasy. Add 1 cup of shredded sharp cheddar cheese, 1 cup of shredded Gruyère cheese, and 1/2 cup of grated Parmesan cheese to the warm milk mixture. Stir gently with a wooden spoon or spatula until all the cheeses are completely melted and incorporated into a smooth, velvety sauce. Do not return the sauce to high heat after adding the cheese; residual heat from the pan and the sauce is enough to melt the cheese perfectly. Taste and adjust seasoning as needed – you might want a pinch more salt or pepper, depending on your cheeses and personal preference. This cheese sauce is truly the star of our Spaghetti Squash Au Gratin A Delicious And Healthy Recipe!

Assembling and Baking Your Au Gratin:

We’re in the home stretch now! With your perfectly roasted spaghetti squash and rich, creamy cheese sauce ready, it’s time to bring everything together into a beautiful, bubbly Spaghetti Squash Au Gratin A Delicious And Healthy Recipe that will impress everyone at the table. This is where the magic happens and flavors meld.

  1. Combine and Prepare for Baking:

    Take your large bowl of shredded spaghetti squash and pour the entire batch of luscious cheese sauce over it. Using a large spoon or spatula, gently fold the cheese sauce into the spaghetti squash strands until every single strand is evenly coated. You want to ensure that each bite will be infused with that incredible cheesy flavor. Once fully combined, pour this mixture into a greased 9×13-inch baking dish. Make sure to spread it out evenly so that it bakes consistently and forms a beautiful gratin.
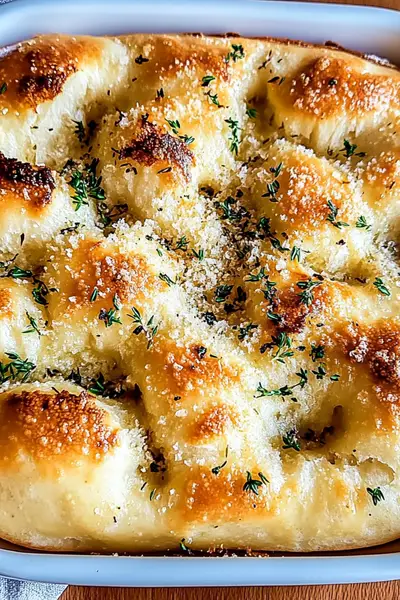
  2. The Golden Topping:

    In a small bowl, combine 1/2 cup of Panko breadcrumbs with 2 tablespoons of melted unsalted butter. Toss them together until the breadcrumbs are uniformly moistened. This step is key for achieving that irresistible crispy, golden-brown crust. Sprinkle the buttered Panko breadcrumbs evenly over the top of the spaghetti squash and cheese mixture in the baking dish. If you have any extra Parmesan cheese, a light dusting over the breadcrumbs wouldn’t hurt for an extra layer of savory flavor and even more browning!

  3. Bake to Perfection:

    Place your baking dish in the preheated 400°F (200°C) oven. Bake for approximately 25-30 minutes, or until the au gratin is bubbly around the edges and the breadcrumb topping is beautifully golden brown and crispy. The exact time may vary slightly depending on your oven, so keep an eye on it. You want to see that satisfying sizzle and rich color that tells you it’s perfectly done. This final bake allows all the flavors to meld together and gives us that quintessential gratin texture and crust.
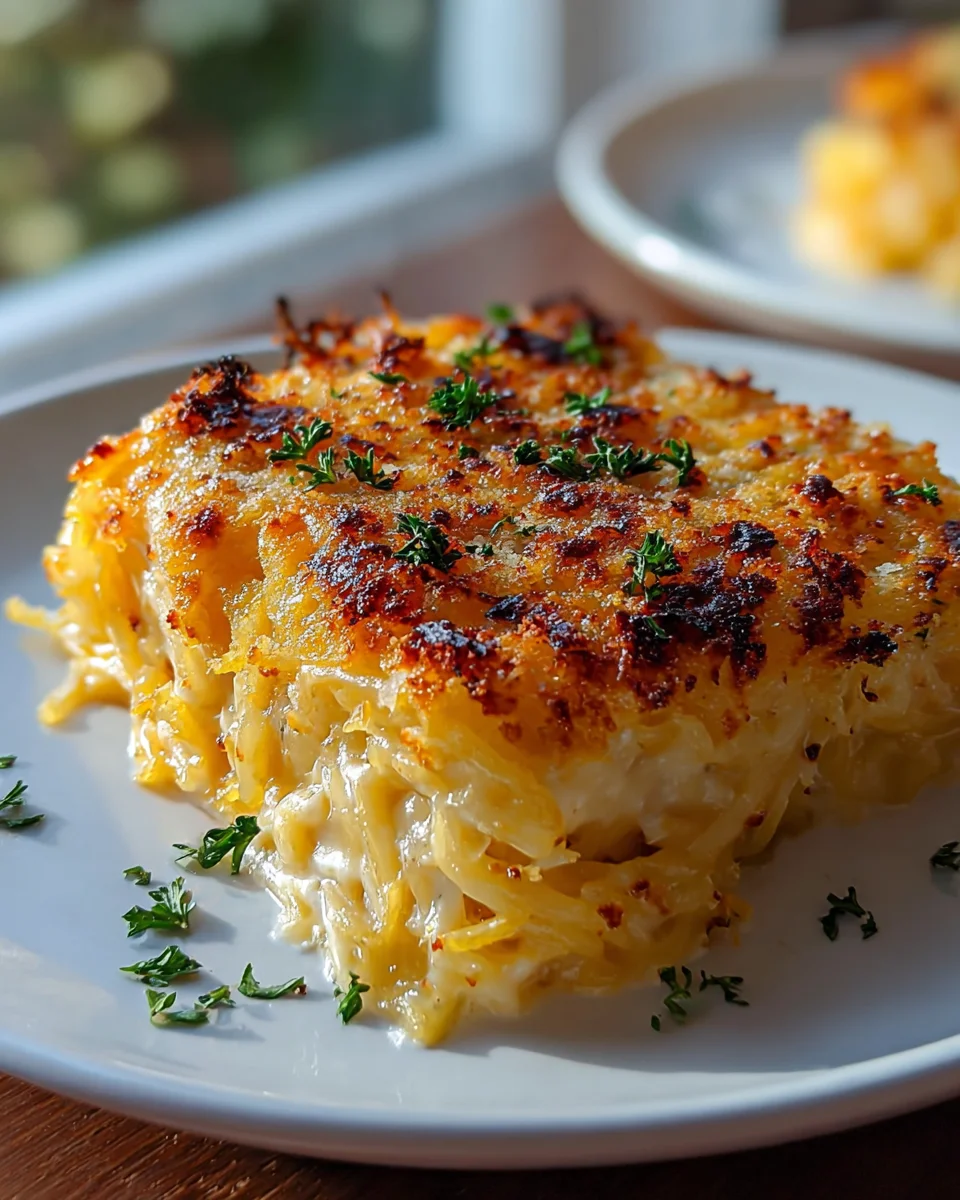
  4. Rest and Serve:

    Once your Spaghetti Squash Au Gratin A Delicious And Healthy Recipe emerges from the oven, resist the urge to dive in immediately! Allow it to rest for about 5-10 minutes before serving. This brief resting period allows the cheese sauce to set slightly, making it easier to serve clean portions without the whole dish collapsing. Garnish with a sprinkle of fresh chopped parsley, if desired, for a touch of color and freshness. Serve warm as a delicious side dish or a comforting main course.

Serving Suggestions and Extra Tips:

Congratulations! You’ve successfully prepared a delectable Spaghetti Squash Au Gratin A Delicious And Healthy Recipe. But the journey doesn’t end there. Here are some ideas for serving, variations to try, and tips to make your next batch even better:

  1. Perfect Pairings:

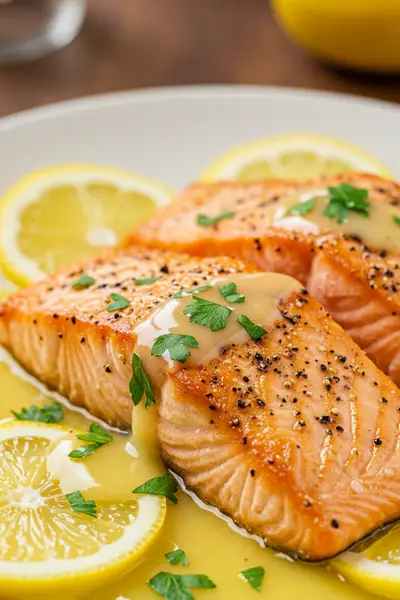
    This au gratin is incredibly versatile. It makes a fantastic vegetarian main course, offering satisfying richness and comforting warmth. If you’re looking for a side dish, it pairs wonderfully with roasted chicken, grilled steak, or a simple baked salmon. A crisp green salad with a light vinaigrette is always a good complement, cutting through the richness of the cheese sauce and adding a refreshing element to the meal. You could also serve it alongside some crusty bread to sop up any extra sauce – trust me, you won’t want to leave any behind!

  2. Make It Your Own: Delightful Variations:

    • Add Protein: To make this dish a more complete meal, consider adding cooked, shredded chicken, crumbled cooked bacon, or even some sautéed mushrooms to the spaghetti squash and cheese sauce mixture before baking. Cooked sausage or ham would also be fantastic additions for a heartier meal.
    • Veggie Boost: Feel free to incorporate other vegetables! Sautéed spinach, roasted broccoli florets, or caramelized onions would all be excellent additions, boosting both flavor and nutrition. Just make sure to cook them down a bit to remove excess moisture before adding to the mix.
    • Spice It Up: For those who love a bit of heat, a pinch of red pepper flakes added to the cheese sauce or sprinkled over the top before baking will provide a lovely kick.
    • Herbaceous Twist: While I love the simplicity of this recipe, feel free to experiment with other herbs in your cheese sauce. A touch of fresh thyme or rosemary would add a beautiful aromatic dimension.
  3. Make-Ahead and Storage Tips:

    This Spaghetti Squash Au Gratin A Delicious And Healthy Recipe is a fantastic make-ahead dish. You can assemble the entire au gratin, including the breadcrumb topping, up to a day in advance. Cover it tightly with plastic wrap and refrigerate. When you’re ready to bake, remove it from the fridge about 30 minutes before baking to allow it to come closer to room temperature, then bake as directed, adding an extra 5-10 minutes if needed. Leftovers, if you’re lucky enough to have any, can be stored in an airtight container in the refrigerator for up to 3-4 days. Reheat gently in the oven or microwave until warmed through. Sometimes I like to add a tiny splash of milk when reheating in the microwave to help revive the sauce’s creaminess.

  4. Why This Recipe Works:

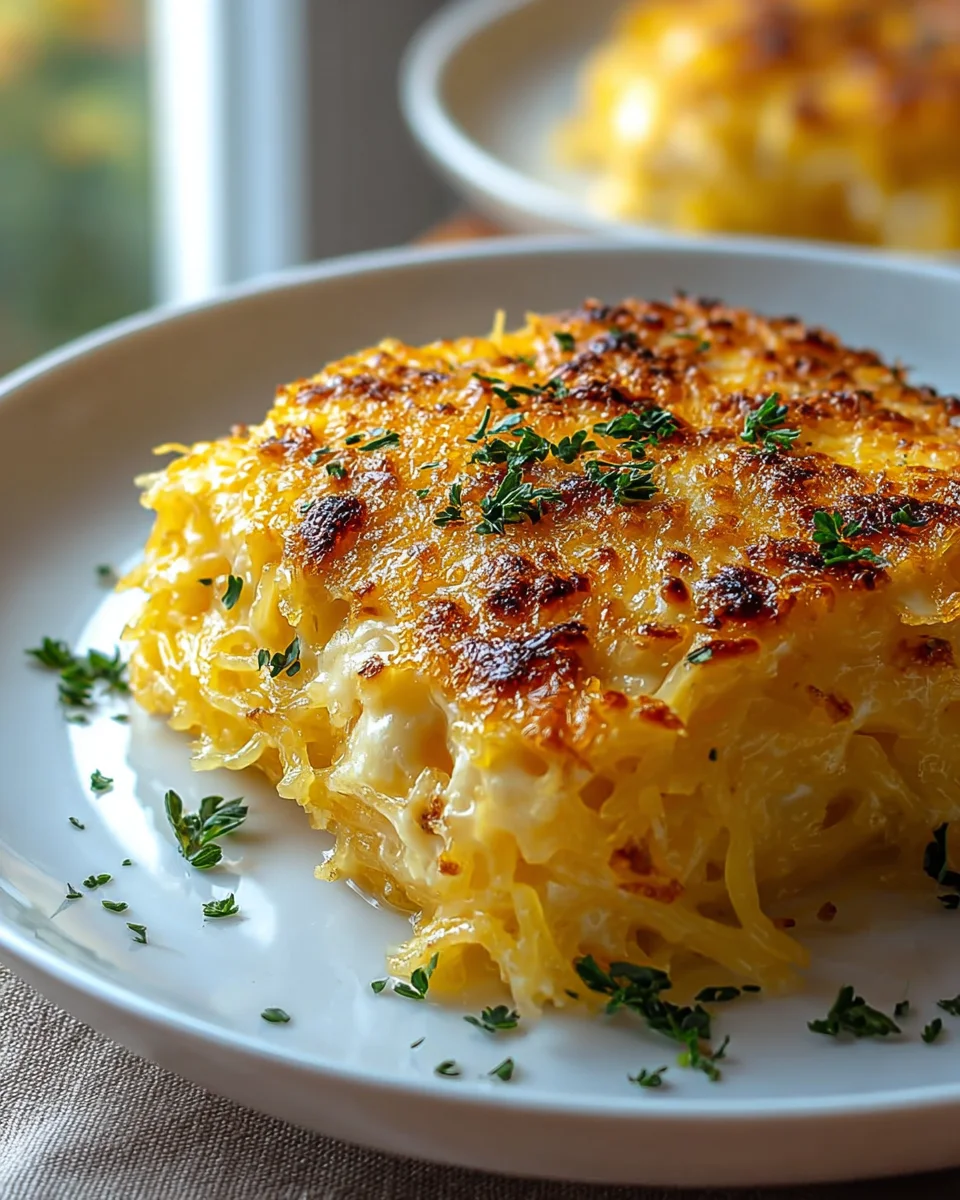
    What makes this specific Spaghetti Squash Au Gratin A Delicious And Healthy Recipe so special is the balance of textures and flavors. The naturally slightly sweet and tender strands of spaghetti squash provide a wonderful, lighter alternative to pasta, making it a healthier option without sacrificing comfort. The robust, creamy cheese sauce, with its hints of Dijon and nutmeg, clings perfectly to every strand, ensuring each bite is packed with savory goodness. And that crispy, golden Panko topping? It adds the perfect contrast, delivering a satisfying crunch that completes the dish. It’s a truly comforting and satisfying meal that’s perfect for any occasion, proving that healthy eating can be incredibly delicious.

Spaghetti Squash Au Gratin: Healthy & Delicious Recipe

Conclusion:

Well, there you have it! I truly hope you’re feeling as excited as I am about this incredible dish. What we’ve explored together isn’t just another recipe; it’s a revelation. This creation seamlessly blends wholesome goodness with indulgent comfort, proving that eating well doesn’t mean sacrificing flavor or satisfaction. The delicate, pasta-like strands of spaghetti squash provide the perfect canvas, offering a lighter alternative to traditional heavy sides while still delivering a surprisingly hearty texture. When combined with that golden, bubbling, cheesy topping, it transforms into something truly magical – a meal that warms the soul and delights the palate. It’s truly a testament to how simple ingredients can come together to create something extraordinary and deeply satisfying.

This particular rendition stands out because it strikes such a fantastic balance. You get all the comforting familiarity of a classic au gratin, but with the added nutritional benefits of a wonderful winter squash. It’s a clever and delicious way to sneak more vegetables into your diet, and trust me, even the pickiest eaters are often won over by its cheesy charm and delightful texture. If you’ve been searching for a dish that feels special enough for a gathering but is straightforward enough for a weeknight dinner, then you’ve absolutely found your match.

The Spaghetti Squash Au Gratin A Delicious And Healthy Recipe is truly a game-changer in your culinary repertoire, offering a delightful twist on comfort food that you’ll want to make again and again.

It’s versatile, deeply flavorful, and remarkably good for you – a combination that’s hard to beat!

Now, let’s talk about how to make this dish even more amazing on your table. For serving suggestions, I love to present this au gratin as a comforting main course for a light vegetarian meal, perhaps alongside a crisp green salad dressed with a simple vinaigrette and some crusty artisan bread to sop up any lingering cheesy goodness. It also makes an exceptional side dish for roasted chicken, grilled fish, or even a perfectly seared steak. The subtle sweetness of the squash beautifully complements savory proteins, making it a versatile companion for almost any entrée. Don’t be afraid to make a larger batch; it reheats wonderfully, making it perfect for meal prepping a few healthy and delicious lunches throughout the week, ensuring you have something wholesome and satisfying ready to go.

And for those of you who love to personalize your cooking, the possibilities for variations are practically endless! Consider experimenting with different cheeses – a sharp cheddar will give you a bolder flavor, while a mix of Gruyere and Parmesan offers a more sophisticated, nutty profile. For an extra creamy kick, a touch of cream cheese or mascarpone can be stirred into the sauce. To boost the protein content, feel free to fold in cooked shredded chicken, crispy bacon bits, or even sautéed mushrooms for an earthy depth. A handful of fresh spinach or some finely diced bell peppers can add extra color and nutrients. A sprinkle of fresh thyme or a grating of nutmeg in the cheese sauce can elevate the aroma and taste to another level, adding layers of complexity. You could even add a crunchy topping before baking, like panko breadcrumbs mixed with a little melted butter, for an extra textural dimension that adds to the overall experience.

So, now it’s your turn! I genuinely hope you’re inspired to bring this fantastic dish into your own kitchen very soon. Don’t let its elegant appearance intimidate you; it’s truly a joy to prepare, and the reward is absolutely worth every minute. Gather your ingredients, get cooking, and prepare to be utterly delighted by the outcome. Once you’ve experienced the deliciousness and seen the smiles it brings, I would absolutely love to hear about it! Please, share your creations, your personal twists, and your family’s reactions with me. Tag me on social media or leave a comment below, because there’s nothing I love more than seeing how you make these recipes your own and sharing in your culinary successes. Happy cooking, and enjoy every single delightful bite of your very own Spaghetti Squash Au Gratin A Delicious And Healthy Recipe!


Spaghetti Squash Au Gratin: Healthy & Delicious Recipe

Indulge in this comforting and nutritious Spaghetti Squash Au Gratin, a clever reinvention of the classic au gratin. Tender spaghetti squash strands are coated in a rich, creamy cheese sauce, then topped with crispy Panko breadcrumbs and baked to golden perfection. It’s the perfect blend of indulgence and mindful eating.

Prep Time
30 Minutes
Cook Time
20 Minutes
Total Time
50 Minutes
Servings
8 servings

Ingredients


Instructions


Important Information

Nutrition Facts (Per Serving)

It is important to consider this information as approximate and not to use it as definitive health advice.

Allergy Information

Please check ingredients for potential allergens and consult a health professional if in doubt.

« Previous Post
Ultimate Sourdough Pesto Grilled Cheese - Easy Recipe
Next Post »
Dill Pickle Parmesan Chicken: Exciting Recipe You'll Love

If you enjoyed this…

Vegan Pumpkin Wild Rice Soup: Hearty & Flavorful!

Cajun Potato Stuffed Bell Peppers: Flavor-Packed Delight!

Christmas Pomegranate Goat Cheese Bites

Christmas Pomegranate Goat Cheese Bites: A Festive and Delicious Holiday Treat

Primary Sidebar

Browse by Diet

BreakfastDinnerLunchDessertAppetizer

Sweet Peach Yogurt Parfait Delight

One of my fondest memories is from a lazy summer afternoon spent at my grandmother’s house. The sun filtered through the kitchen window, casting a warm glow over the table where she would create her culinary magic. It was during one of those blissful moments that I first tasted her Peach Yogurt Parfait with Honey and Granola. The sweet aroma of ripe peaches mingling with creamy yogurt and the crunch of granola was nothing short of heavenly. It felt like summer captured in a bowl, and I still remember the joy of diving in with a spoon, each layer revealing a new burst of flavor.

When I think about that parfait, I can almost hear the gentle hum of the bees outside, reminding me of the floral notes that honey brings to every bite. The vibrant yellows and soft oranges of the peaches contrast beautifully with the creamy white yogurt and the golden crunch of granola. It’s a dish that not only looks delightful but also tastes like a celebration of fresh, wholesome ingredients.

What makes my version of this Peach Yogurt Parfait special is the careful balance of flavors and textures. I use ripe, juicy peaches, drizzled with locally sourced honey, and a homemade granola that’s bursting with nuts and seeds for an extra crunch. It’s a simple dish, but every layer is crafted with love and attention.

Let me show you exactly how to make this delightful parfait, so you can bring a bit of that summer magic into your kitchen!

Sweet Peach Yogurt Parfait Delight

Why You’ll Love This Recipe

  • Delightfully creamy texture from the Greek yogurt, paired with the juicy sweetness of fresh peaches.
  • Ready in under 20 minutes, making it a quick and satisfying breakfast or snack option.
  • Budget-friendly, using common ingredients that you may already have in your pantry.
  • Customizable with your favorite granola and nuts, allowing you to tailor each parfait to your taste.
  • Perfectly balanced flavors with the bright acidity of lemon juice and the sweetness of honey enhancing the peaches.

Ingredients

  • For the Parfait:
  • 2 cups plain Greek yogurt (or vanilla yogurt for a sweeter option)
  • 2 large ripe peaches, diced (about 2 cups)
  • 1 tablespoon fresh lemon juice (to prevent browning of peaches)
  • 2 tablespoons honey (plus more for drizzling)
  • 1 teaspoon vanilla extract (optional for extra flavor)
  • For the Granola:
  • 1 cup granola (store-bought or homemade; see notes for a simple granola recipe)
  • 1/4 cup sliced almonds (optional for added crunch)
  • 1/4 cup shredded coconut (optional for added flavor)

Let’s dive into some key ingredients that make this Peach Yogurt Parfait so delightful! First, the Greek yogurt is not only creamy but also packed with protein, making it a satisfying option for breakfast or a snack. If you’re looking for a sweeter option, you can easily substitute it with vanilla yogurt, though it may alter the overall flavor balance. Next, the ripe peaches are the star of the show; their natural sweetness shines through, so I recommend choosing peaches that yield slightly to pressure, indicating they’re perfectly ripe. If peaches aren’t in season, feel free to use nectarines or even frozen peaches—just thaw them before use. Finally, honey adds a lovely floral sweetness that ties everything together. If you prefer, maple syrup can serve as a delicious substitute.

Step-by-Step Instructions

  1. Start by preparing the peaches. Wash them thoroughly, then slice and dice them into bite-sized pieces. In a medium bowl, toss the diced peaches with 1 tablespoon of fresh lemon juice to prevent browning. Set aside for about 5 minutes while the lemon juice works its magic.
  2. In a separate bowl, combine the Greek yogurt, 2 tablespoons of honey, and 1 teaspoon of vanilla extract if using. Stir the mixture until smooth and thoroughly blended. This should take about a minute. Avoid overmixing to maintain the creaminess of the yogurt.
  3. Now it’s time to layer your parfait. Grab a clear glass or bowl to showcase your beautiful creation. Start with a generous spoonful of the yogurt mixture at the bottom—about 1/4 cup will do. Use a spoon to spread it evenly.
  4. Add a layer of the diced peaches over the yogurt, ensuring they cover the yogurt completely. You might want to use about half of what you have prepared—roughly 1 cup. This layer should be visually appealing, so arrange the peaches neatly.
  5. Sprinkle 1/4 cup of granola over the peaches. This adds a delightful crunch. Make sure to distribute it evenly to ensure every bite has that satisfying texture. Avoid packing it down too tightly, as you want it to maintain its crunch.
  6. Repeat the layers: spoon in another 1/4 cup of yogurt, followed by another cup of peaches, and another sprinkle of granola. You should have at least two layers, but feel free to add more depending on your glass size.
  7. Finish off your parfait with a drizzle of honey on top for added sweetness and a touch of elegance. If you’re using sliced almonds or shredded coconut, sprinkle them on top now. It adds a lovely visual contrast and extra flavor.
  8. Serve immediately or refrigerate for up to 30 minutes before serving to allow the flavors to meld together. However, I recommend enjoying it fresh to maintain the granola’s crunch.

Pro Tips for the Best Peach Yogurt Parfait With Honey And Granola

  • Make sure to choose ripe peaches for the best flavor and texture. A common mistake is using unripe fruit, which can lead to a less enjoyable parfait. Look for peaches that are fragrant and slightly soft to the touch.
  • Use a clear glass to assemble your parfait; this not only makes for a beautiful presentation but also allows you to see the colorful layers, which adds to the enjoyment of eating it.
  • For an even creamier texture, consider whipping the Greek yogurt with a hand mixer for a couple of minutes before layering. This small adjustment makes a huge difference in mouthfeel.
  • Be mindful of the granola-to-yogurt ratio. Too much granola can overwhelm the parfait, while too little can make it feel too creamy. Aim for about 1/4 cup of granola per layer for the perfect balance.
  • If you’re making this for a gathering, consider preparing the yogurt and peaches ahead of time and layering them just before serving. This ensures the granola stays crunchy!

Variations & Serving Ideas

There are so many ways to get creative with your Peach Yogurt Parfait! For a tropical twist, swap out the peaches for mangoes or pineapples and top with coconut flakes. If you prefer a berry flavor, mix in some blueberries or strawberries with the peaches for added color and taste. For a nutty version, incorporate chopped walnuts or pecans instead of almonds.

As for serving ideas, this parfait pairs beautifully with a side of scrambled eggs for a hearty breakfast or fresh fruit salad for a light lunch. You might also enjoy it alongside whole grain toast with almond butter for an energizing snack. The contrast of flavors and textures will elevate your meal experience!

Storage, Make-Ahead & Reheating

The Peach Yogurt Parfait is best enjoyed fresh, but you can prepare some components ahead of time. Store the layered parfait in an airtight container in the refrigerator for up to 24 hours. However, be cautious; the granola may lose its crunch if stored too long. You can freeze the yogurt and peach mixture for up to 2 months; just remember to thaw it in the refrigerator overnight before serving.

If you plan to enjoy this dish the next day, it can taste even better as the flavors meld together. Just remember to add the granola right before serving to keep its delightful crunch!

Frequently Asked Questions

Can I make Peach Yogurt Parfait With Honey And Granola ahead of time?

Yes — in fact, it tastes even better the next day as the flavors meld. However, I recommend waiting to add the granola until just before serving to maintain its crunch.

What can I substitute for Greek yogurt?

If you prefer a lighter option, you can substitute Greek yogurt with regular yogurt or a dairy-free alternative like coconut yogurt. Just remember that this may alter the creaminess and flavor profile slightly.

Can I use frozen peaches for this parfait?

Absolutely! Just make sure to thaw the frozen peaches before using them. They will still add great flavor, though the texture may be slightly softer than fresh peaches.

How do I make the parfait vegan?

To make a vegan version, substitute the Greek yogurt with a plant-based yogurt alternative, and replace honey with maple syrup or agave nectar. This keeps the parfait sweet while adhering to a vegan diet.

What other fruits can I use in this recipe?

You can mix and match fruits based on your preference. Try using strawberries, blueberries, raspberries, or even bananas. Just make sure to adjust the lemon juice as needed to prevent browning.

Sweet Peach Yogurt Parfait Delight

Final Thoughts

The Peach Yogurt Parfait with Honey and Granola is a delightful blend of creamy yogurt, sweet peaches, and crunchy granola that creates a satisfying and nourishing treat. Each layer bursts with flavor, making it a perfect choice for breakfast or a light dessert.

This is the kind of recipe I come back to again and again, especially when I want something refreshing and wholesome to start my day. The harmony of sweet and tart flavors, combined with the delightful crunch, never fails to lift my spirits!

I encourage you to give this parfait a try and indulge in its comforting goodness. Feel free to share your results or even add your own twist—perhaps a sprinkle of cinnamon or a handful of nuts. Enjoy creating your perfect parfait!

Print
clock clock iconcutlery cutlery iconflag flag iconfolder folder iconinstagram instagram iconpinterest pinterest iconfacebook facebook iconprint print iconsquares squares iconheart heart iconheart solid heart solid icon

Peach Yogurt Parfait


  • Author: Lily author
  • Total Time: 15 minutes
  • Yield: 4 servings 1x
Pin Recipe
Print Recipe

Description

This Peach Yogurt Parfait combines creamy Greek yogurt, juicy peaches, and crunchy granola for a delightful treat. It’s a perfect breakfast or snack that captures the essence of summer in every bite.


Ingredients

Scale
  • For the Parfait:
  • 2 cups plain Greek yogurt (or vanilla yogurt for a sweeter option)
  • 2 large ripe peaches, diced (about 2 cups)
  • 1 tablespoon fresh lemon juice (to prevent browning of peaches)
  • 2 tablespoons honey (plus more for drizzling)
  • 1 teaspoon vanilla extract (optional for extra flavor)
  • For the Granola:
  • 1 cup granola (store-bought or homemade; see notes for a simple granola recipe)
  • 1/4 cup sliced almonds (optional for added crunch)
  • 1/4 cup shredded coconut (optional for added flavor)

Instructions

  1. Start by preparing the peaches. Wash them thoroughly, then slice and dice them into bite-sized pieces. In a medium bowl, toss the diced peaches with 1 tablespoon of fresh lemon juice to prevent browning. Set aside for about 5 minutes while the lemon juice works its magic.
  2. In a separate bowl, combine the Greek yogurt, 2 tablespoons of honey, and 1 teaspoon of vanilla extract if using. Stir the mixture until smooth and thoroughly blended. This should take about a minute. Avoid overmixing to maintain the creaminess of the yogurt.
  3. Now it’s time to layer your parfait. Grab a clear glass or bowl to showcase your beautiful creation. Start with a generous spoonful of the yogurt mixture at the bottom—about 1/4 cup will do. Use a spoon to spread it evenly.
  4. Add a layer of the diced peaches over the yogurt, ensuring they cover the yogurt completely. You might want to use about half of what you have prepared—roughly 1 cup. This layer should be visually appealing, so arrange the peaches neatly.
  5. Sprinkle 1/4 cup of granola over the peaches. This adds a delightful crunch. Make sure to distribute it evenly to ensure every bite has that satisfying texture. Avoid packing it down too tightly, as you want it to maintain its crunch.
  6. Repeat the layers: spoon in another 1/4 cup of yogurt, followed by another cup of peaches, and another sprinkle of granola. You should have at least two layers, but feel free to add more depending on your glass size.
  7. Finish off your parfait with a drizzle of honey on top for added sweetness and a touch of elegance. If you’re using sliced almonds or shredded coconut, sprinkle them on top now. It adds a lovely visual contrast and extra flavor.
  8. Serve immediately or refrigerate for up to 30 minutes before serving to allow the flavors to meld together. However, I recommend enjoying it fresh to maintain the granola’s crunch.
  • Prep Time: 15 mins
  • Cook Time: 0 mins
  • Category: Breakfast
  • Method: No-cook
  • Cuisine: American

Nutrition

  • Serving Size: 1 parfait
  • Calories: 250
  • Sugar: 20 g
  • Sodium: 50 mg
  • Fat: 5 g
  • Saturated Fat: 2 g
  • Unsaturated Fat: 3 g
  • Trans Fat: 0 g
  • Carbohydrates: 40 g
  • Fiber: 3 g
  • Protein: 10 g
  • Cholesterol: 10 mg

Keywords: Choose ripe peaches for the best flavor and texture. Use a clear glass for a beautiful presentation. For creaminess, consider whipping the yogurt before layering. Be mindful of the granola-to-yogurt ratio. Prepare yogurt and peaches ahead of time for gatherings, layering just before serving.

Did you make this recipe?

Share a photo and tag us — we can't wait to see what you've made!

Sun-Kissed Frozen Orange Cream Slush

As a child, summer days felt like they lasted forever. I remember the sticky heat wrapping around me as I played outside, my laughter mingling with the sounds of the neighborhood. But nothing could cool me down quite like the moment I’d spot my grandmother, laboring over her blender, whipping up her famous Frozen Orange Creamsicle Slush. That vibrant orange treat, with its frosty texture and sweet citrus aroma, was like a burst of sunshine in a cup. Just one sip, and I could feel the coolness wash over me, sparking pure joy.

This Frozen Orange Creamsicle Slush has a way of making you feel like a kid again. Its creamy, dreamy consistency is a delightful balance of bright orange and soft vanilla, inviting you to dive right in. The refreshing tang of orange dances on your tongue, while the smooth creaminess envelops you in a comforting embrace. It’s a nostalgic treat that’s perfect for hot summer afternoons or anytime you need a little pick-me-up.

What makes my version of this slush stand out is the addition of a hint of vanilla bean, which elevates the flavor and adds an extra layer of richness. Plus, it’s super easy to whip up with just a few simple ingredients that you probably already have on hand! So, if you’re ready to relive those sun-soaked memories, let me show you exactly how to make it.

Sun-Kissed Frozen Orange Cream Slush

Why You’ll Love This Recipe

  • Each slush is a perfect blend of creamy vanilla and zesty orange, creating a nostalgic flavor reminiscent of summer days.
  • This refreshing treat is ready in under 15 minutes, making it an ideal quick dessert for unexpected guests or hot afternoons.
  • With just 8 simple ingredients, it’s budget-friendly, ensuring you don’t have to break the bank to enjoy a delicious slush.
  • The slush has a perfectly smooth texture, thanks to the combination of ice and ice cream, providing a delightful contrast to the bright citrus flavors.
  • It’s highly customizable; you can easily adjust the sweetness and add fresh herbs for a unique twist that suits your taste.

Ingredients

  • 2 cups orange juice (freshly squeezed or store-bought)
  • 1 cup vanilla ice cream
  • 1 cup crushed ice
  • 1/2 cup milk (whole or 2%)
  • 1/4 cup granulated sugar (adjust based on sweetness preference)
  • 1 teaspoon vanilla extract
  • Zest of 1 orange (for added flavor)
  • Fresh orange slices and mint leaves (for garnish)

The star of this Frozen Orange Creamsicle Slush is the orange juice, which provides the vibrant, citrusy base. Freshly squeezed juice will yield the brightest flavor, but store-bought options can be just as convenient. If you’re opting for store-bought, choose 100% pure juice with no added sugars for the best results. Another essential ingredient is the vanilla ice cream; it adds creaminess and sweetness. You can substitute it with dairy-free ice cream if you’re looking for a vegan option. Whole or 2% milk complements the ice cream, creating a smooth blend. If you want a lower-calorie version, almond or oat milk can be good alternatives.

Lastly, the granulated sugar can be adjusted based on your sweetness preference. If you prefer a more natural sweetener, consider using honey or agave syrup. The orange zest enhances the flavor profile, providing an aromatic pop that brings the whole slush together. Don’t skip it! It adds an extra layer of brightness that makes this slush truly special.

Step-by-Step Instructions

  1. Start by preparing your ingredients. Gather 2 cups of orange juice, 1 cup of vanilla ice cream, and 1 cup of crushed ice. Make sure the ice is finely crushed, as larger chunks can make blending difficult.
  2. In a blender, combine the orange juice, vanilla ice cream, crushed ice, and 1/2 cup of milk. Add 1/4 cup of granulated sugar and 1 teaspoon of vanilla extract. If you like a sweeter slush, consider adding a bit more sugar at this stage.
  3. Add the zest of 1 orange to the blender. This step is crucial for enhancing the citrus flavor of your slush. Make sure not to include the bitter white pith—only the flavorful zest.
  4. Blend the mixture on medium-high speed for about 30-45 seconds. Stop once the ingredients are fully combined and the slush has a smooth, even consistency. If you notice large chunks of ice, blend for an additional 10-15 seconds. Avoid over-blending, as this can make the slush too liquidy.
  5. Once blended, taste the slush. If it needs more sweetness, add a little more sugar and blend for a few more seconds. If it’s too thick, you can add a splash of milk to reach your desired consistency.
  6. Pour the slush into glasses. This recipe typically serves 4, but you can easily double it for larger gatherings. Use a spoon to help guide the slush into the glasses if needed.
  7. Garnish each serving with fresh orange slices and mint leaves. The mint not only adds a pop of color but also a refreshing aroma that complements the citrus flavors beautifully.
  8. Serve immediately and enjoy! If you’ve made extra, you can refrigerate it for a short time, but it’s best enjoyed fresh.

Pro Tips for the Best Frozen Orange Creamsicle Slush

  • Don’t skip the orange zest! It’s a game-changer for flavor. Always zest before juicing to make it easier.
  • Use a high-powered blender for the best texture. A standard blender may struggle with ice, leading to uneven consistency. If you have a food processor, that can work too, but ensure the ice is finely crushed.
  • Adjust the ice-to-liquid ratio carefully. If your slush is too thick, it won’t blend well. Start with less ice and add more until you reach your preferred texture.
  • Be cautious with the sugar! Always start with the lower amount, as you can easily add more, but it’s hard to fix an overly sweet slush.
  • For a fun twist, consider adding a splash of coconut milk or a handful of fresh fruit like strawberries or pineapple. This not only enhances the flavor but also adds a beautiful color contrast.

Variations & Serving Ideas

There are countless ways to put a spin on your Frozen Orange Creamsicle Slush. Consider making a tropical version by adding in some pineapple juice or coconut milk for a delightful tropical twist. If you’re feeling adventurous, try incorporating a handful of frozen mango or peach slices for added sweetness. For a lighter version, swap out the vanilla ice cream for Greek yogurt for a creamy yet tangy alternative.

As for serving ideas, this refreshing slush pairs wonderfully with light summer dishes like grilled chicken skewers, fish tacos, or a simple salad topped with citrus vinaigrette. The bright, zesty flavors of the slush complement these dishes perfectly, making them an ideal pairing for a sunny day.

Storage, Make-Ahead & Reheating

This Frozen Orange Creamsicle Slush is best enjoyed fresh, but if you have leftovers, you can store them in an airtight container in the fridge for up to 2 days. Just keep in mind that the slush may lose some of its texture over time as the ice melts. It doesn’t freeze well, as the ice will turn into a solid block. If you must freeze it, blend again after thawing to restore the slushy consistency. This treat is best the day you make it, as the flavors meld together beautifully overnight, enhancing its deliciousness.

Frequently Asked Questions

Can I make Frozen Orange Creamsicle Slush ahead of time?

Yes — in fact, it tastes even better the next day as the flavors meld. However, it’s best to enjoy it fresh, as the texture can change if stored for too long. If you need to prepare it ahead, keep it in the fridge and re-blend before serving.

What kind of orange juice should I use?

For the best flavor, use freshly squeezed orange juice. However, if you’re short on time, opt for 100% pure store-bought juice without added sugars. This will ensure that your slush remains flavorful and refreshing.

Can I substitute the vanilla ice cream?

Absolutely! If you’re looking for a dairy-free option, coconut milk ice cream or a non-dairy vanilla ice cream can work wonderfully. They will still provide the creamy texture and sweetness you desire.

How can I adjust the sweetness of my slush?

You can easily adjust the sweetness by modifying the amount of sugar added. Start with 1/4 cup and taste the mixture before blending. If you prefer it sweeter, add more sugar gradually until it reaches your desired level.

What should I do if my slush is too thick?

If your slush is too thick, simply add a splash of milk or orange juice and blend again. This will help achieve a more drinkable consistency while maintaining the slushy texture. Adjust gradually to reach your preferred thickness.

Sun-Kissed Frozen Orange Cream Slush

Final Thoughts

The Frozen Orange Creamsicle Slush is a delightful blend of refreshing citrus and creamy goodness, making it a perfect treat for warm days or any time you crave a taste of nostalgia. The way the bright orange flavor dances with the creamy texture truly elevates this slush, transforming it into a satisfying escape from the everyday.

This is the kind of recipe I come back to again and again, especially when I’m looking to cool down or impress guests at a summer gathering. It’s simple to make and always brings smiles all around! I encourage you to try this recipe for yourself—don’t hesitate to share your results or even put your own spin on it. Happy slushing!

Print
clock clock iconcutlery cutlery iconflag flag iconfolder folder iconinstagram instagram iconpinterest pinterest iconfacebook facebook iconprint print iconsquares squares iconheart heart iconheart solid heart solid icon

Frozen Orange Creamsicle Slush


  • Author: Lily author
  • Total Time: 15 minutes
  • Yield: 4 servings 1x
Pin Recipe
Print Recipe

Description

This Frozen Orange Creamsicle Slush is a refreshing treat that combines creamy vanilla and zesty orange flavors. Perfect for hot summer days, it brings back nostalgic memories with every sip.


Ingredients

Scale
  • 2 cups orange juice (freshly squeezed or store-bought)
  • 1 cup vanilla ice cream
  • 1 cup crushed ice
  • 1/2 cup milk (whole or 2%)
  • 1/4 cup granulated sugar (adjust based on sweetness preference)
  • 1 teaspoon vanilla extract
  • Zest of 1 orange (for added flavor)
  • Fresh orange slices and mint leaves (for garnish)

Instructions

  1. Start by preparing your ingredients. Gather 2 cups of orange juice, 1 cup of vanilla ice cream, and 1 cup of crushed ice. Make sure the ice is finely crushed, as larger chunks can make blending difficult.
  2. In a blender, combine the orange juice, vanilla ice cream, crushed ice, and 1/2 cup of milk. Add 1/4 cup of granulated sugar and 1 teaspoon of vanilla extract. If you like a sweeter slush, consider adding a bit more sugar at this stage.
  3. Add the zest of 1 orange to the blender. This step is crucial for enhancing the citrus flavor of your slush. Make sure not to include the bitter white pith—only the flavorful zest.
  4. Blend the mixture on medium-high speed for about 30-45 seconds. Stop once the ingredients are fully combined and the slush has a smooth, even consistency. If you notice large chunks of ice, blend for an additional 10-15 seconds. Avoid over-blending, as this can make the slush too liquidy.
  5. Once blended, taste the slush. If it needs more sweetness, add a little more sugar and blend for a few more seconds. If it’s too thick, you can add a splash of milk to reach your desired consistency.
  6. Pour the slush into glasses. This recipe typically serves 4, but you can easily double it for larger gatherings. Use a spoon to help guide the slush into the glasses if needed.
  7. Garnish each serving with fresh orange slices and mint leaves. The mint not only adds a pop of color but also a refreshing aroma that complements the citrus flavors beautifully.
  8. Serve immediately and enjoy! If you’ve made extra, you can refrigerate it for a short time, but it's best enjoyed fresh.
  • Prep Time: 15 min
  • Cook Time: 0 min
  • Category: Dessert
  • Method: Blending
  • Cuisine: American

Nutrition

  • Serving Size: 1 serving
  • Calories: 200
  • Sugar: 30 g
  • Sodium: 50 mg
  • Fat: 5 g
  • Saturated Fat: 3 g
  • Unsaturated Fat: 2 g
  • Trans Fat: 0 g
  • Carbohydrates: 40 g
  • Fiber: 1 g
  • Protein: 2 g
  • Cholesterol: 20 mg

Keywords: Don't skip the orange zest! It's a game-changer for flavor. Always zest before juicing to make it easier.

Did you make this recipe?

Share a photo and tag us — we can't wait to see what you've made!

Zesty Lemon Poppy Seed Delight

One rainy afternoon, I found myself in my grandmother’s cozy kitchen, the kind that always smelled like warmth and love. She was whipping up her famous Lemon Poppy Seed Loaf, a recipe that had been passed down through generations. As the batter came together, the zesty aroma of fresh lemons filled the air, mingling perfectly with the nutty fragrance of poppy seeds. I can still picture her, apron-clad, as she expertly drizzled a vibrant citrus icing over the loaf, creating a glossy, sun-kissed finish that beckoned us to dive in. It was a moment that sparked my own passion for baking, and this recipe has become a cherished staple in my home ever since.

When you take a bite of this Lemon Poppy Seed Loaf, it’s like a burst of sunshine on your palate. The loaf is beautifully golden, with a tender crumb that melts in your mouth. Each slice is speckled with tiny poppy seeds, adding a delightful crunch that contrasts beautifully with the tangy sweetness of the lemon. And that citrus icing? It’s the finishing touch that elevates this loaf from ordinary to extraordinary, with its bright, zesty flavor dancing on your taste buds.

This recipe stands out because it embraces simplicity while delivering on flavor. I’ve added a hint of vanilla to the batter, enhancing the overall taste and making it even more indulgent. Trust me, once you make this Lemon Poppy Seed Loaf With Citrus Icing, it’ll become a go-to in your baking repertoire.

So, let me show you exactly how to make it!

Zesty Lemon Poppy Seed Delight

Why You’ll Love This Recipe

  • Moist and tender crumb that melts in your mouth, thanks to the perfect balance of butter and buttermilk.
  • Bright, zesty lemon flavor paired with crunchy poppy seeds, creating a delightful texture and taste experience.
  • Easy to whip up in just about an hour, perfect for last-minute gatherings or a cozy afternoon treat.
  • Budget-friendly with everyday ingredients, making it an accessible option for all home bakers.
  • The citrus icing adds a sweet tang that elevates the loaf, turning a simple recipe into a showstopper!

Ingredients

  • 1 ½ cups (190g) all-purpose flour
  • 1 teaspoon baking powder
  • ½ teaspoon baking soda
  • ½ teaspoon salt
  • 3 tablespoons poppy seeds
  • ½ cup (115g) unsalted butter, softened to room temperature
  • 1 cup (200g) granulated sugar
  • 2 large eggs
  • 1 teaspoon vanilla extract
  • 1 teaspoon lemon zest (from about 1 medium lemon)
  • ½ cup (120ml) buttermilk
  • 2 tablespoons fresh lemon juice

For the Citrus Icing:

  • 1 cup (120g) powdered sugar
  • 2 tablespoons fresh lemon juice
  • 1 tablespoon orange juice
  • 1 teaspoon lemon zest (for garnish, optional)

Let’s dive into the key ingredients that make this Lemon Poppy Seed Loaf so special. The all-purpose flour provides the structure and base for the loaf, while the baking powder and baking soda ensure it rises perfectly, giving the loaf a light texture. For a gluten-free variation, you could substitute the flour with a gluten-free all-purpose blend. Poppy seeds not only add a delightful crunch but also contribute to the unique flavor profile that pairs well with the citrus notes.

Unsalted butter is crucial for achieving the buttery richness that makes this loaf so moist. If you’re looking for a dairy-free option, coconut oil or a vegan butter can be used instead. The buttermilk is another essential component, providing acidity that activates the baking soda for a fluffy texture. If you don’t have buttermilk on hand, you can easily make a substitute by mixing ½ cup of milk with 1 tablespoon of vinegar or lemon juice and letting it sit for about 5 minutes.

Step-by-Step Instructions

  1. Preheat your oven to 350°F (175°C). Grease a 9×5-inch loaf pan or line it with parchment paper for easy removal later.
  2. In a medium mixing bowl, whisk together 1 ½ cups of all-purpose flour, 1 teaspoon of baking powder, ½ teaspoon of baking soda, ½ teaspoon of salt, and 3 tablespoons of poppy seeds. This helps to evenly distribute the baking agents and ensures a uniform rise.
  3. In a large mixing bowl, cream together ½ cup of softened unsalted butter and 1 cup of granulated sugar using an electric mixer on medium speed for about 3-4 minutes, until the mixture is light and fluffy. Make sure to scrape down the sides of the bowl occasionally.
  4. Add 2 large eggs, 1 teaspoon of vanilla extract, and 1 teaspoon of lemon zest to the creamed butter and sugar, mixing until fully combined. You want a smooth consistency, so ensure there are no lumps of butter.
  5. In a small bowl, combine ½ cup of buttermilk and 2 tablespoons of fresh lemon juice. Alternately add the dry ingredients and buttermilk mixture to the butter mixture, starting and ending with the dry ingredients. Mix just until combined; do not overmix, as this can lead to a dense loaf.
  6. Pour the batter into the prepared loaf pan. Smooth the top with a spatula, ensuring it’s even. Bake in the preheated oven for 50-60 minutes, or until a toothpick inserted in the center comes out clean. The edges should be lightly golden brown, and the center should feel just set.
  7. Once baked, remove the loaf from the oven and allow it to cool in the pan for about 10 minutes. Then, transfer it to a wire rack to cool completely. Resist the urge to slice too soon, as it will be crumbly if it’s still warm.
  8. While the loaf is cooling, prepare the citrus icing. In a medium bowl, whisk together 1 cup of powdered sugar, 2 tablespoons of fresh lemon juice, and 1 tablespoon of orange juice until smooth. If the icing is too thick, you can add a little more juice to reach your desired consistency.
  9. Once the loaf is completely cool, drizzle the citrus icing over the top. If you like, sprinkle with an additional teaspoon of lemon zest for an extra pop of flavor and color.

Pro Tips for the Best Lemon Poppy Seed Loaf With Citrus Icing

  • Be careful not to overmix your batter; this is a common mistake that can lead to a dense loaf. Mix just until the dry ingredients are incorporated for a light and fluffy texture.
  • Use room temperature ingredients, especially the butter and eggs. This helps to create a smoother batter and ensures even baking. Take your eggs out of the fridge about 30 minutes before you start.
  • For a more pronounced lemon flavor, consider adding a little lemon extract in addition to the zest and juice. Just a half teaspoon can elevate the citrus notes significantly.
  • When measuring your flour, spoon it into the measuring cup and level it off with a knife instead of scooping directly from the bag. This prevents packing and ensures you don’t end up with a dry loaf.
  • Invest in a good quality loaf pan; it makes a difference in heat distribution, which ensures even baking. If your pan is dark-coated, reduce the oven temperature by 25°F to prevent over-browning.

Variations & Serving Ideas

For a delightful twist, consider adding blueberries or raspberries to the batter for a fruity burst of flavor. You can also experiment with different citrus fruits—try lime or grapefruit zest and juice for a refreshing change. For a healthier option, substitute half of the all-purpose flour with whole wheat flour for added fiber without compromising too much on texture.

This Lemon Poppy Seed Loaf pairs beautifully with a light salad, such as a mixed greens salad with a vinaigrette, or a cup of tea for a cozy afternoon treat. It also complements a creamy cheese platter, as the acidity of the loaf balances rich cheeses perfectly. Lastly, a scoop of vanilla ice cream on the side creates a delightful contrast of temperatures and flavors!

Storage, Make-Ahead & Reheating

This Lemon Poppy Seed Loaf can be stored at room temperature for up to 3 days if wrapped tightly in plastic wrap. If you want to keep it longer, it freezes well for up to 3 months. To freeze, wrap the loaf tightly in plastic wrap and then in aluminum foil to prevent freezer burn.

When you’re ready to enjoy it again, simply thaw it in the fridge overnight. Reheat individual slices in the microwave for 15-20 seconds or in a toaster oven until warmed through. Interestingly, many people find that this loaf tastes even better the next day, as the flavors have time to meld!

Frequently Asked Questions

Can I make Lemon Poppy Seed Loaf With Citrus Icing ahead of time?

Yes — in fact, it tastes even better the next day! You can make the loaf a day in advance, allowing the flavors to develop. Just be sure to store it in an airtight container to maintain its moisture.

Can I substitute the poppy seeds?

Absolutely! If you don’t have poppy seeds on hand or prefer an alternative, you can use sesame seeds for a similar crunch or omit them entirely for a smooth loaf.

What can I use instead of buttermilk?

If you don’t have buttermilk, you can easily create a substitute by mixing ½ cup of milk (dairy or plant-based) with 1 tablespoon of vinegar or lemon juice. Let it sit for 5 minutes before using in the recipe.

How can I make this recipe gluten-free?

To make a gluten-free version of this Lemon Poppy Seed Loaf, substitute the all-purpose flour with a gluten-free all-purpose flour blend. Just ensure that the blend contains a binding agent like xanthan gum for the best results.

What is the best way to store leftover loaf?

Leftover Lemon Poppy Seed Loaf should be stored in an airtight container at room temperature for up to 3 days. For longer storage, wrap it tightly and freeze for up to 3 months. Thaw it before serving for the best texture.

Zesty Lemon Poppy Seed Delight

Final Thoughts

The Lemon Poppy Seed Loaf with Citrus Icing is truly a delightful treat that brings a burst of brightness to any occasion. The zesty lemon flavor combined with the subtle crunch of poppy seeds creates a satisfying balance, while the citrus icing adds a touch of sweetness that perfectly complements the loaf’s tanginess.

This is the kind of recipe I come back to again and again, especially when I want to brighten up a gloomy day or celebrate a small victory. The aroma that fills the kitchen as it bakes is absolutely heavenly! I encourage you to give this recipe a try; you might just find it becoming a beloved staple in your home. Don’t forget to share your results or even add your own unique twist—I can’t wait to see what you create!

Print
clock clock iconcutlery cutlery iconflag flag iconfolder folder iconinstagram instagram iconpinterest pinterest iconfacebook facebook iconprint print iconsquares squares iconheart heart iconheart solid heart solid icon

Lemon Poppy Seed Loaf


  • Author: Lily author
  • Total Time: 1 minute
  • Yield: 1 loaf 1x
Pin Recipe
Print Recipe

Description

This Lemon Poppy Seed Loaf is a delightful treat that combines zesty lemon flavor with crunchy poppy seeds. Topped with a citrus icing, it’s perfect for any occasion.


Ingredients

Scale
  • 1 ½ cups (190g) all-purpose flour
  • 1 teaspoon baking powder
  • ½ teaspoon baking soda
  • ½ teaspoon salt
  • 3 tablespoons poppy seeds
  • ½ cup (115g) unsalted butter, softened to room temperature
  • 1 cup (200g) granulated sugar
  • 2 large eggs
  • 1 teaspoon vanilla extract
  • 1 teaspoon lemon zest (from about 1 medium lemon)
  • ½ cup (120ml) buttermilk
  • 2 tablespoons fresh lemon juice
  • 1 cup (120g) powdered sugar
  • 2 tablespoons fresh lemon juice
  • 1 tablespoon orange juice
  • 1 teaspoon lemon zest (for garnish, optional)

Instructions

  1. Preheat your oven to 350°F (175°C). Grease a 9×5-inch loaf pan or line it with parchment paper for easy removal later.
  2. In a medium mixing bowl, whisk together 1 ½ cups of all-purpose flour, 1 teaspoon of baking powder, ½ teaspoon of baking soda, ½ teaspoon of salt, and 3 tablespoons of poppy seeds. This helps to evenly distribute the baking agents and ensures a uniform rise.
  3. In a large mixing bowl, cream together ½ cup of softened unsalted butter and 1 cup of granulated sugar using an electric mixer on medium speed for about 3-4 minutes, until the mixture is light and fluffy. Make sure to scrape down the sides of the bowl occasionally.
  4. Add 2 large eggs, 1 teaspoon of vanilla extract, and 1 teaspoon of lemon zest to the creamed butter and sugar, mixing until fully combined. You want a smooth consistency, so ensure there are no lumps of butter.
  5. In a small bowl, combine ½ cup of buttermilk and 2 tablespoons of fresh lemon juice. Alternately add the dry ingredients and buttermilk mixture to the butter mixture, starting and ending with the dry ingredients. Mix just until combined; do not overmix, as this can lead to a dense loaf.
  6. Pour the batter into the prepared loaf pan. Smooth the top with a spatula, ensuring it’s even. Bake in the preheated oven for 50-60 minutes, or until a toothpick inserted in the center comes out clean. The edges should be lightly golden brown, and the center should feel just set.
  7. Once baked, remove the loaf from the oven and allow it to cool in the pan for about 10 minutes. Then, transfer it to a wire rack to cool completely. Resist the urge to slice too soon, as it will be crumbly if it’s still warm.
  8. While the loaf is cooling, prepare the citrus icing. In a medium bowl, whisk together 1 cup of powdered sugar, 2 tablespoons of fresh lemon juice, and 1 tablespoon of orange juice until smooth. If the icing is too thick, you can add a little more juice to reach your desired consistency.
  9. Once the loaf is completely cool, drizzle the citrus icing over the top. If you like, sprinkle with an additional teaspoon of lemon zest for an extra pop of flavor and color.
  • Prep Time: 15 mins
  • Cook Time: 50-60 mins
  • Category: Dessert
  • Method: Baking
  • Cuisine: American

Nutrition

  • Serving Size: 1 slice
  • Calories: 200
  • Sugar: 15 g
  • Sodium: 150 mg
  • Fat: 8 g
  • Saturated Fat: 5 g
  • Unsaturated Fat: 3 g
  • Trans Fat: 0 g
  • Carbohydrates: 30 g
  • Fiber: 1 g
  • Protein: 3 g
  • Cholesterol: 40 mg

Keywords: Be careful not to overmix your batter; this is a common mistake that can lead to a dense loaf. Use room temperature ingredients for a smoother batter and even baking.

Did you make this recipe?

Share a photo and tag us — we can't wait to see what you've made!

  • Privacy Policy
  • Terms Of Service
  • Contact
  • About
  • GDPR

Copyright © 2025 Homesmad