Spicy Tuna Rice: Prepare to embark on a culinary adventure that will tantalize your taste buds and leave you craving more! Forget boring lunches and predictable dinners; this vibrant and flavorful dish is about to become your new go-to meal. Imagine perfectly seasoned, melt-in-your-mouth tuna, infused with a fiery kick, nestled atop a bed of fluffy, steaming rice. Are you drooling yet?
While the exact origins of Spicy Tuna Rice are debated, its popularity has exploded in recent years, particularly within the vibrant food scene of Los Angeles and other coastal cities. It’s a modern twist on traditional Japanese flavors, borrowing elements from sushi and poke bowls, and adapting them for a quick, easy, and incredibly satisfying meal. Think of it as deconstructed spicy tuna rolls, but even better!
What makes this dish so irresistible? It’s the perfect balance of textures and tastes. The creamy, spicy tuna contrasts beautifully with the soft, yielding rice. The heat from the chili flakes or sriracha is tempered by the richness of the mayonnaise and the freshness of the tuna. Plus, it’s incredibly versatile! You can customize it with your favorite toppings, like avocado, seaweed salad, or a sprinkle of sesame seeds. And the best part? It comes together in minutes, making it ideal for busy weeknights or a quick and delicious lunch. So, ditch the takeout and get ready to experience the magic of homemade Spicy Tuna Rice!

Ingredients:
- For the Spicy Tuna:
- 1 pound sushi-grade tuna, finely diced
- 1/4 cup mayonnaise (Japanese Kewpie preferred)
- 2 tablespoons sriracha (adjust to your spice preference)
- 1 tablespoon sesame oil
- 1 tablespoon soy sauce
- 1 teaspoon rice vinegar
- 1/2 teaspoon gochugaru (Korean chili powder, optional)
- 1 green onion, thinly sliced
- 1 tablespoon masago or tobiko (fish roe, optional)
- For the Rice:
- 2 cups sushi rice
- 2 1/4 cups water
- 1/4 cup rice vinegar
- 2 tablespoons sugar
- 1 teaspoon salt
- For the Toppings (Optional but Recommended!):
- Avocado, sliced
- Cucumber, thinly sliced
- Seaweed snacks (cut into strips)
- Sesame seeds (black and white)
- Spicy mayo (extra, for drizzling)
- Unagi sauce (eel sauce, for drizzling)
- Pickled ginger
- Wasabi
Preparing the Sushi Rice:
Okay, let’s start with the foundation of our Spicy Tuna Rice – the sushi rice! This is super important, so pay close attention. We want that perfect sticky, slightly sweet, and tangy rice.
- Rinse the Rice: Place the sushi rice in a fine-mesh sieve and rinse it under cold running water. Gently rub the rice between your fingers to remove excess starch. Keep rinsing until the water runs clear. This usually takes about 3-5 minutes. Trust me, this step is crucial for getting the right texture!
- Cook the Rice: There are a few ways to cook sushi rice. I prefer using a rice cooker because it’s foolproof. But if you don’t have one, a pot on the stovetop works just fine.
- Rice Cooker Method: Place the rinsed rice and 2 1/4 cups of water into your rice cooker. Close the lid and cook according to your rice cooker’s instructions for sushi rice.
- Stovetop Method: Combine the rinsed rice and 2 1/4 cups of water in a medium saucepan. Bring to a boil over high heat. Once boiling, reduce the heat to low, cover the pot tightly, and simmer for 18 minutes. After 18 minutes, remove the pot from the heat and let it sit, covered, for another 10 minutes. This allows the rice to steam and finish cooking properly. Don’t peek!
- Prepare the Sushi Vinegar: While the rice is cooking, let’s make the sushi vinegar. In a small saucepan, combine the rice vinegar, sugar, and salt. Heat over low heat, stirring constantly, until the sugar and salt are completely dissolved. Don’t let it boil! Remove from heat and let it cool slightly.
- Season the Rice: Once the rice is cooked, gently transfer it to a large wooden bowl (hangiri is ideal, but any large bowl will do). Immediately pour the sushi vinegar over the rice. Using a rice paddle or a wooden spoon, gently cut and fold the vinegar into the rice. Be careful not to mash the rice. You want to separate the grains, not create a paste. Fan the rice with a fan or a piece of cardboard while you’re mixing. This helps to cool the rice quickly and gives it a nice sheen. Continue mixing and fanning until the rice is cooled to room temperature. This usually takes about 15-20 minutes.
Making the Spicy Tuna:
Now for the star of the show – the spicy tuna! This is where you can really customize the flavor to your liking. I like mine pretty spicy, but feel free to adjust the sriracha to your taste.
- Prepare the Tuna: Make sure your tuna is sushi-grade and very fresh. Finely dice the tuna into small, even pieces. The smaller the pieces, the better it will mix with the other ingredients.
- Combine the Ingredients: In a medium bowl, combine the diced tuna, mayonnaise, sriracha, sesame oil, soy sauce, rice vinegar, and gochugaru (if using). Mix gently until everything is well combined. Be careful not to overmix, as this can make the tuna mushy.
- Add the Finishing Touches: Stir in the thinly sliced green onion and masago or tobiko (if using). These add a nice pop of flavor and texture.
- Taste and Adjust: Taste the spicy tuna mixture and adjust the seasonings as needed. You might want to add more sriracha for extra heat, a little more soy sauce for saltiness, or a touch of rice vinegar for tanginess.
- Chill (Optional): If you have time, cover the bowl and refrigerate the spicy tuna for at least 30 minutes. This allows the flavors to meld together and makes it even more delicious.
Assembling the Spicy Tuna Rice Bowl:
Alright, we’ve got our sushi rice and our spicy tuna ready to go. Now it’s time to assemble our delicious Spicy Tuna Rice Bowl! This is where you can get creative and add all your favorite toppings.
- Prepare Your Bowl: Choose a bowl that’s a good size for a satisfying meal.
- Layer the Rice: Spoon a generous portion of the sushi rice into the bottom of the bowl. Gently spread it out to create an even layer.
- Add the Spicy Tuna: Top the rice with a generous amount of the spicy tuna mixture.
- Add Your Toppings: This is where the fun begins! Arrange your favorite toppings around the spicy tuna. I love to use sliced avocado, thinly sliced cucumber, seaweed snacks, sesame seeds, and a drizzle of spicy mayo and unagi sauce.
- Garnish and Serve: Garnish with a sprinkle of sesame seeds and serve immediately. Don’t forget the pickled ginger and wasabi on the side!
Tips and Variations:
Want to take your Spicy Tuna Rice Bowl to the next level? Here are a few tips and variations to try:
- Make it Healthier: Use brown rice instead of white rice for a healthier option. You can also add more vegetables, like edamame or shredded carrots.
- Add Some Crunch: Add some crispy fried onions or tempura flakes for extra crunch.
- Make it Vegetarian: Substitute the tuna with marinated tofu or avocado for a vegetarian version.
- Use Different Sauces: Experiment with different sauces, like teriyaki sauce or ponzu sauce.
- Make it a Hand Roll: Instead of a bowl, serve the spicy tuna and rice with sheets of nori (seaweed) and let everyone make their own hand rolls.
- Spice Level: If you are sensitive to spice, start with a smaller amount of sriracha and add more to taste. You can also use a milder chili sauce.
- Tuna Quality: Always use sushi-grade tuna from a reputable source. This is important for both taste and safety.
- Rice Temperature: The rice should be cooled to room temperature before adding the sushi vinegar. This will prevent the vinegar from cooking the rice and making it mushy.
- Mixing the Rice: Be gentle when mixing the sushi vinegar into the rice. You want to separate the grains, not mash them.
- Storage: Leftover spicy tuna rice can be stored in the refrigerator for up to 24 hours. However, the rice may become a bit dry, so it’s best to eat it fresh.
Serving Suggestions:
Spicy Tuna Rice is a complete meal on its own, but here are a few serving suggestions to make it even more special:
- Serve with Miso Soup: A warm bowl of miso soup is the perfect accompaniment to Spicy Tuna Rice.
- Serve with a Side Salad: A simple green salad with a light vinaigrette will add some freshness to the meal.
- Serve with Edamame: Steamed edamame sprinkled with sea salt is a healthy and delicious snack to enjoy before or after your Spicy Tuna Rice.
- Serve with Japanese Pickles: A variety of Japanese pickles, like daikon radish and cucumber, will add a tangy and refreshing element to the meal.
Enjoy your homemade Spicy Tuna Rice! I hope you love it as much as I do!
Conclusion:
And there you have it! This Spicy Tuna Rice recipe is more than just a quick meal; it’s a flavor explosion waiting to happen. I truly believe this is a must-try dish for anyone who loves a little kick and appreciates the simplicity of a satisfying, home-cooked meal. The combination of the creamy avocado, the fiery tuna, and the perfectly seasoned rice creates a symphony of textures and tastes that will leave you wanting more.
But why is this recipe a must-try, you ask? Well, beyond the incredible flavor profile, it’s incredibly versatile and adaptable to your own preferences. It’s perfect for a busy weeknight dinner when you’re short on time but don’t want to compromise on taste. It’s also fantastic for meal prepping – just pack the components separately and assemble right before eating to keep everything fresh. And let’s be honest, who doesn’t love a dish that’s both delicious and easy to make?
Serving Suggestions and Variations:
The possibilities are truly endless! For a lighter meal, try serving the Spicy Tuna Rice in lettuce cups instead of a bowl. The crisp lettuce adds a refreshing crunch that complements the richness of the tuna. You could also add some chopped cucumber or shredded carrots for extra texture and nutrients.
Feeling adventurous? Try adding a drizzle of sriracha mayo for an extra layer of spice and creaminess. Or, if you’re a fan of seaweed, sprinkle some furikake over the top for a savory, umami boost. For a vegetarian option, you can easily substitute the tuna with seasoned tofu or even chickpeas. Just make sure to adjust the seasoning accordingly to match the flavor profile.
Another great variation is to add a fried egg on top. The runny yolk adds a luxurious richness that elevates the entire dish. Trust me, it’s a game-changer! You can also experiment with different types of rice. Brown rice adds a nutty flavor and extra fiber, while sushi rice provides a stickier texture that holds the ingredients together beautifully.
Spice Level Adjustments
If you’re sensitive to spice, start with a smaller amount of sriracha and gradually add more until you reach your desired level of heat. You can also use a milder chili sauce or even omit it altogether for a less spicy version. On the other hand, if you’re a spice enthusiast, feel free to add a pinch of cayenne pepper or a few slices of jalapeño for an extra kick.
Don’t Forget the Garnishes!
Garnishes are a great way to add visual appeal and enhance the flavor of your Spicy Tuna Rice. Some of my favorite garnishes include chopped green onions, sesame seeds, and a sprinkle of toasted nori seaweed. A squeeze of lime juice also adds a bright, citrusy note that balances the richness of the dish.
I’m so excited for you to try this recipe and make it your own! It’s a dish that I make regularly, and I’m always finding new ways to customize it to my liking. I encourage you to experiment with different ingredients and flavors to create your perfect version of Spicy Tuna Rice.
Now it’s your turn! Head to the kitchen, gather your ingredients, and get ready to create a culinary masterpiece. I’m confident that you’ll love this recipe as much as I do. And most importantly, don’t forget to share your experience with me! I’d love to hear about your variations, your serving suggestions, and any tips or tricks you discover along the way. Leave a comment below, tag me on social media, or simply send me a message. I can’t wait to see what you create! Happy cooking!
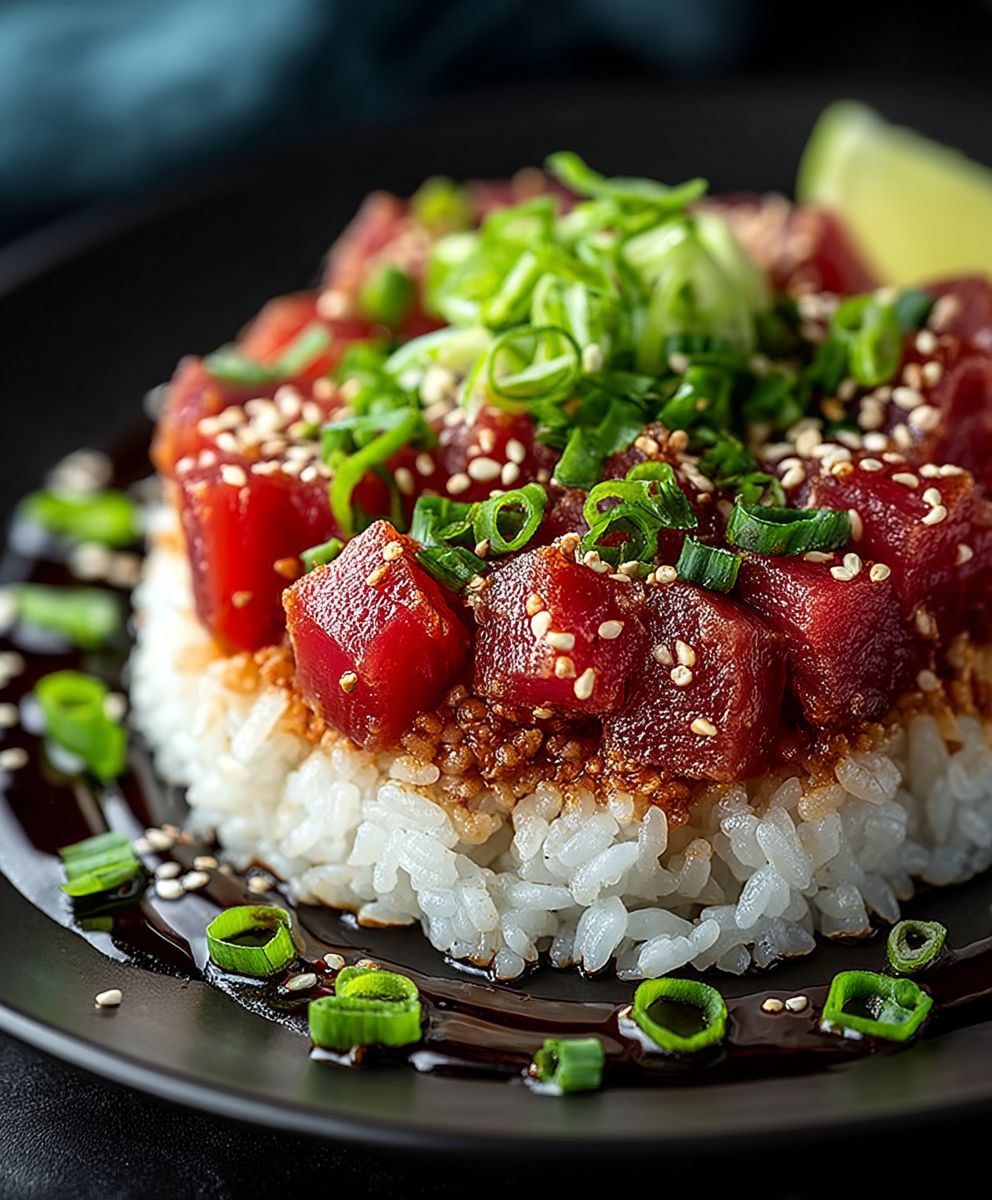
Spicy Tuna Rice: A Delicious and Easy Recipe
Deconstructed spicy tuna roll in a bowl! This Spicy Tuna Rice Bowl features seasoned sushi rice topped with a creamy, spicy tuna mixture and your favorite toppings like avocado, cucumber, and seaweed.
Ingredients
- 1 pound sushi-grade tuna, finely diced
- 1/4 cup mayonnaise (Japanese Kewpie preferred)
- 2 tablespoons sriracha (adjust to your spice preference)
- 1 tablespoon sesame oil
- 1 tablespoon soy sauce
- 1 teaspoon rice vinegar
- 1/2 teaspoon gochugaru (Korean chili powder, optional)
- 1 green onion, thinly sliced
- 1 tablespoon masago or tobiko (fish roe, optional)
- 2 cups sushi rice
- 2 1/4 cups water
- 1/4 cup rice vinegar
- 2 tablespoons sugar
- 1 teaspoon salt
- Avocado, sliced
- Cucumber, thinly sliced
- Seaweed snacks (cut into strips)
- Sesame seeds (black and white)
- Spicy mayo (extra, for drizzling)
- Unagi sauce (eel sauce, for drizzling)
- Pickled ginger
- Wasabi
Instructions
- Rinse the Rice: Place the sushi rice in a fine-mesh sieve and rinse it under cold running water. Gently rub the rice between your fingers to remove excess starch. Keep rinsing until the water runs clear (3-5 minutes).
- Cook the Rice (Rice Cooker Method): Place the rinsed rice and 2 1/4 cups of water into your rice cooker. Close the lid and cook according to your rice cooker’s instructions for sushi rice.
- Cook the Rice (Stovetop Method): Combine the rinsed rice and 2 1/4 cups of water in a medium saucepan. Bring to a boil over high heat. Once boiling, reduce the heat to low, cover the pot tightly, and simmer for 18 minutes. After 18 minutes, remove the pot from the heat and let it sit, covered, for another 10 minutes.
- Prepare the Sushi Vinegar: In a small saucepan, combine the rice vinegar, sugar, and salt. Heat over low heat, stirring constantly, until the sugar and salt are completely dissolved. Don’t let it boil! Remove from heat and let it cool slightly.
- Season the Rice: Once the rice is cooked, gently transfer it to a large wooden bowl (hangiri is ideal, but any large bowl will do). Immediately pour the sushi vinegar over the rice. Using a rice paddle or a wooden spoon, gently cut and fold the vinegar into the rice. Be careful not to mash the rice. Fan the rice with a fan or a piece of cardboard while you’re mixing. This helps to cool the rice quickly and gives it a nice sheen. Continue mixing and fanning until the rice is cooled to room temperature (15-20 minutes).
- Prepare the Tuna: Make sure your tuna is sushi-grade and very fresh. Finely dice the tuna into small, even pieces.
- Combine the Ingredients: In a medium bowl, combine the diced tuna, mayonnaise, sriracha, sesame oil, soy sauce, rice vinegar, and gochugaru (if using). Mix gently until everything is well combined. Be careful not to overmix, as this can make the tuna mushy.
- Add the Finishing Touches: Stir in the thinly sliced green onion and masago or tobiko (if using).
- Taste and Adjust: Taste the spicy tuna mixture and adjust the seasonings as needed. You might want to add more sriracha for extra heat, a little more soy sauce for saltiness, or a touch of rice vinegar for tanginess.
- Chill (Optional): If you have time, cover the bowl and refrigerate the spicy tuna for at least 30 minutes. This allows the flavors to meld together and makes it even more delicious.
- Prepare Your Bowl: Choose a bowl that’s a good size for a satisfying meal.
- Layer the Rice: Spoon a generous portion of the sushi rice into the bottom of the bowl. Gently spread it out to create an even layer.
- Add the Spicy Tuna: Top the rice with a generous amount of the spicy tuna mixture.
- Add Your Toppings: Arrange your favorite toppings around the spicy tuna. I love to use sliced avocado, thinly sliced cucumber, seaweed snacks, sesame seeds, and a drizzle of spicy mayo and unagi sauce.
- Garnish and Serve: Garnish with a sprinkle of sesame seeds and serve immediately. Don’t forget the pickled ginger and wasabi on the side!
Notes
- Spice Level: If you are sensitive to spice, start with a smaller amount of sriracha and add more to taste. You can also use a milder chili sauce.
- Tuna Quality: Always use sushi-grade tuna from a reputable source. This is important for both taste and safety.
- Rice Temperature: The rice should be cooled to room temperature before adding the sushi vinegar. This will prevent the vinegar from cooking the rice and making it mushy.
- Mixing the Rice: Be gentle when mixing the sushi vinegar into the rice. You want to separate the grains, not mash them.
- Storage: Leftover spicy tuna rice can be stored in the refrigerator for up to 24 hours. However, the rice may become a bit dry, so it’s best to eat it fresh.
- Make it Healthier: Use brown rice instead of white rice for a healthier option. You can also add more vegetables, like edamame or shredded carrots.
- Add Some Crunch: Add some crispy fried onions or tempura flakes for extra crunch.
- Make it Vegetarian: Substitute the tuna with marinated tofu or avocado for a vegetarian version.
- Use Different Sauces: Experiment with different sauces, like teriyaki sauce or ponzu sauce.
- Make it a Hand Roll: Instead of a bowl, serve the spicy tuna and rice with sheets of nori (seaweed) and let everyone make their own hand rolls.