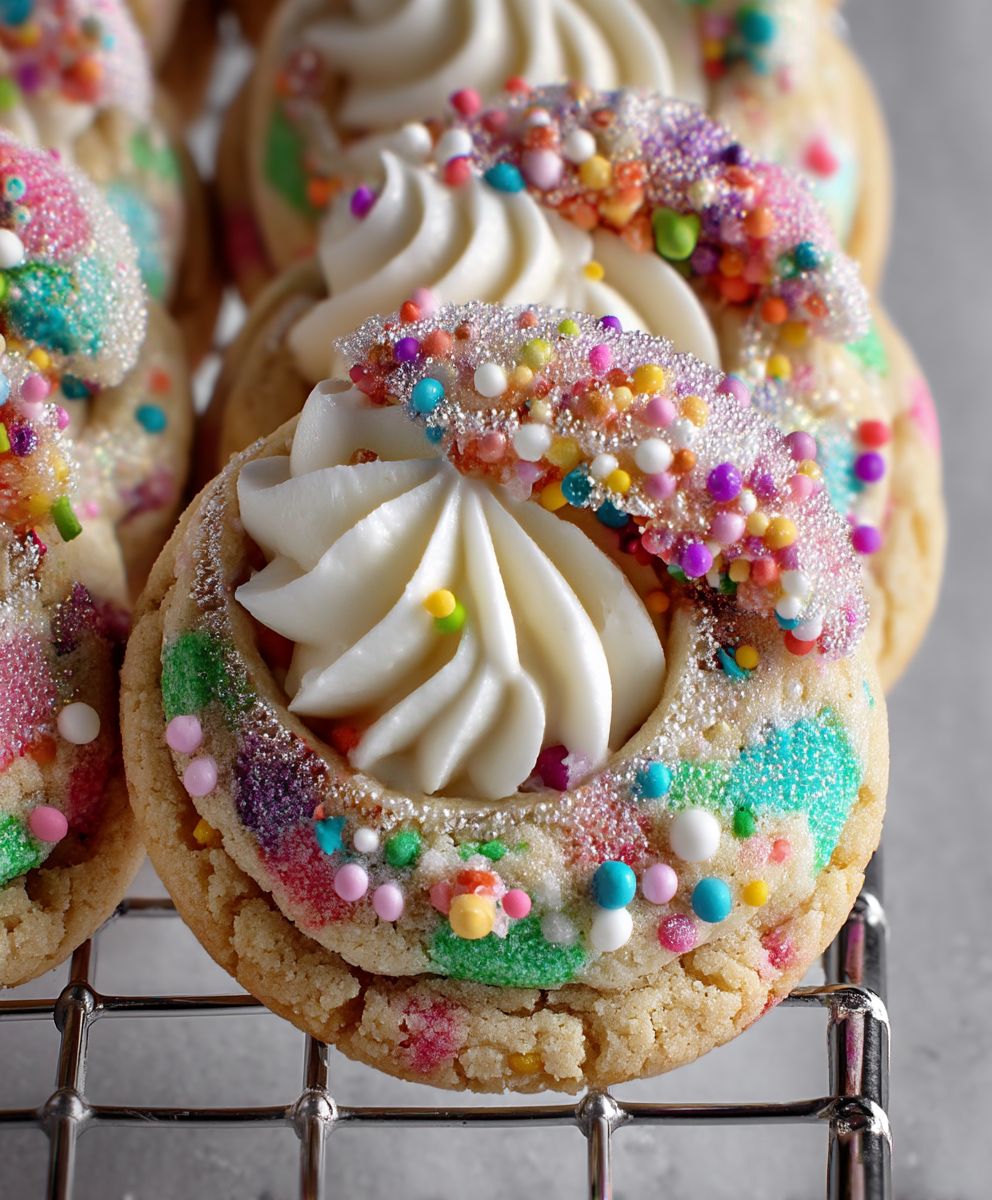
Sprinkle Thumbprint Cookies: Prepare to be enchanted by these delightful little gems! Imagine biting into a buttery, melt-in-your-mouth cookie, its delicate sweetness perfectly complemented by a vibrant burst of colorful sprinkles and a dollop of your favorite jam. These aren’t just cookies; they’re miniature celebrations on a plate, guaranteed to bring a smile to anyone’s face.
Thumbprint cookies, also known as “Hallongrotta” in Sweden, have a rich history, often associated with festive occasions and family gatherings. Passed down through generations, these cookies represent warmth, tradition, and the simple joy of sharing homemade treats. While the exact origins are debated, their enduring popularity speaks volumes about their irresistible appeal.
What makes Sprinkle Thumbprint Cookies so beloved? It’s the perfect combination of textures and flavors. The buttery shortbread base provides a satisfying crumb, while the jam filling adds a touch of fruity sweetness and a delightful chewiness. And, of course, the sprinkles! They add a playful visual element and a subtle crunch that elevates the entire experience. Plus, they are incredibly easy to make, making them the perfect choice for a quick and impressive dessert. Whether you’re baking for a holiday party, a bake sale, or simply a cozy night in, these cookies are sure to be a hit!

Ingredients:
- For the Cookies:
- 1 cup (2 sticks) unsalted butter, softened
- 1/2 cup granulated sugar
- 1/2 cup packed light brown sugar
- 2 large egg yolks
- 1 teaspoon vanilla extract
- 1/4 teaspoon almond extract (optional, but highly recommended!)
- 2 1/4 cups all-purpose flour
- 1/4 teaspoon salt
- For the Filling:
- 1/2 cup seedless raspberry jam (or your favorite flavor!)
- 1 tablespoon lemon juice (optional, to brighten the jam)
- For the Decoration:
- 1/2 cup rainbow sprinkles (or any sprinkles you like!)
Preparing the Cookie Dough:
- Cream the Butter and Sugars: In a large bowl (or the bowl of your stand mixer), cream together the softened butter, granulated sugar, and brown sugar until light and fluffy. This usually takes about 3-5 minutes. Make sure to scrape down the sides of the bowl occasionally to ensure everything is evenly mixed. This step is crucial for creating a tender cookie!
- Add the Egg Yolks and Extracts: Beat in the egg yolks one at a time, mixing well after each addition. Then, stir in the vanilla extract and almond extract (if using). The almond extract really enhances the flavor, but it’s perfectly fine to omit it if you don’t have any on hand.
- Combine Dry Ingredients: In a separate medium bowl, whisk together the all-purpose flour and salt. Whisking helps to evenly distribute the salt throughout the flour.
- Gradually Add Dry Ingredients to Wet Ingredients: Gradually add the dry ingredients to the wet ingredients, mixing on low speed until just combined. Be careful not to overmix the dough, as this can result in tough cookies. Overmixing develops the gluten in the flour, which we want to avoid. The dough should come together into a cohesive ball.
- Chill the Dough: Wrap the dough in plastic wrap and flatten it into a disc. This helps it chill more evenly. Refrigerate for at least 30 minutes, or up to 2 hours. Chilling the dough is essential because it prevents the cookies from spreading too much in the oven and makes them easier to handle.
Shaping and Filling the Cookies:
- Preheat Oven and Prepare Baking Sheets: Preheat your oven to 350°F (175°C). Line baking sheets with parchment paper or silicone baking mats. This will prevent the cookies from sticking and make cleanup a breeze.
- Shape the Cookies: Roll the chilled dough into 1-inch balls. You can use a small cookie scoop to ensure uniform size. Place the dough balls on the prepared baking sheets, leaving about 2 inches between each cookie.
- Make the Thumbprints: Use your thumb (or the back of a small spoon) to gently press an indentation into the center of each cookie. Be careful not to press all the way through the dough. You want to create a well for the filling.
- Prepare the Jam Filling: In a small bowl, stir together the raspberry jam and lemon juice (if using). The lemon juice adds a nice tanginess that complements the sweetness of the jam.
- Fill the Thumbprints: Spoon a small amount of the jam mixture into each thumbprint. Don’t overfill them, as the jam will spread during baking. A little goes a long way!
- Add Sprinkles: Immediately after filling the thumbprints, sprinkle the cookies generously with rainbow sprinkles. The sprinkles will adhere better to the jam while it’s still wet.
Baking and Cooling:
- Bake the Cookies: Bake for 10-12 minutes, or until the edges are lightly golden brown. Keep a close eye on them, as baking times can vary depending on your oven.
- Cool on Baking Sheets: Remove the baking sheets from the oven and let the cookies cool on the baking sheets for a few minutes before transferring them to a wire rack to cool completely. This allows the cookies to firm up slightly and prevents them from breaking.
- Enjoy! Once the cookies are completely cool, they’re ready to enjoy! These Sprinkle Thumbprint Cookies are perfect for holidays, parties, or any time you’re craving a sweet treat. They’re also great for gifting!
Tips and Variations:
- Jam Variations: Feel free to experiment with different flavors of jam. Apricot, strawberry, blueberry, or even fig jam would all be delicious.
- Nutella Filling: For a chocolatey twist, try filling the thumbprints with Nutella. Warm it slightly in the microwave for easier spreading.
- Peanut Butter Filling: Mix peanut butter with a little powdered sugar and milk to create a creamy peanut butter filling.
- Chocolate Drizzle: After the cookies have cooled, drizzle them with melted chocolate for an extra touch of indulgence.
- Nut Coating: Before baking, roll the dough balls in finely chopped nuts, such as pecans or walnuts.
- Gluten-Free Option: Use a gluten-free all-purpose flour blend to make these cookies gluten-free. Be sure to choose a blend that contains xanthan gum for best results.
- Vegan Option: Substitute the butter with vegan butter and the egg yolks with applesauce (1/4 cup applesauce per egg yolk).
- Storage: Store the cookies in an airtight container at room temperature for up to 3 days. They can also be frozen for longer storage.
Troubleshooting:
- Cookies Spreading Too Much: If your cookies are spreading too much in the oven, it could be due to a few reasons. Make sure your butter is not too soft (it should be softened, but not melted). Also, ensure that you chilled the dough for the recommended amount of time. If the problem persists, try adding a tablespoon or two of flour to the dough.
- Cookies are Dry: Overbaking can lead to dry cookies. Keep a close eye on them and remove them from the oven as soon as the edges are lightly golden brown.
- Jam is Boiling Over: If the jam is boiling over during baking, you may have overfilled the thumbprints. Use a smaller amount of jam next time.
Make Ahead Tips:
- The cookie dough can be made ahead of time and stored in the refrigerator for up to 2 days. Let it soften slightly before rolling into balls.
- The unbaked cookies can be assembled and frozen for up to 1 month. Bake directly from frozen, adding a few extra minutes to the baking time.
Conclusion:
So, there you have it! These Sprinkle Thumbprint Cookies are more than just a sweet treat; they’re a little burst of joy in every bite. I truly believe this recipe is a must-try for anyone looking to add a touch of whimsy and deliciousness to their baking repertoire. The combination of the buttery, melt-in-your-mouth cookie base with the sweet, colorful sprinkles is simply irresistible. And honestly, who can resist a cookie that looks this cheerful?
But the best part? They’re incredibly easy to make! Even if you’re a beginner baker, you’ll find this recipe straightforward and rewarding. The simple ingredients and clear instructions mean you’ll be enjoying warm, freshly baked cookies in no time. Forget complicated techniques and fussy decorations; these cookies are all about simplicity and fun.
Why are these Sprinkle Thumbprint Cookies a must-try? Because they’re:
- Incredibly delicious and satisfying.
- Easy to make, even for beginner bakers.
- Visually appealing and perfect for any occasion.
- Customizable with your favorite sprinkles and fillings.
- A guaranteed crowd-pleaser!
Now, let’s talk serving suggestions and variations! These cookies are fantastic on their own, of course, but they also pair beautifully with a cold glass of milk, a warm cup of coffee, or even a scoop of vanilla ice cream. Imagine serving them at your next tea party, birthday celebration, or holiday gathering – they’re sure to be a hit!
And don’t be afraid to get creative with the fillings! While I’ve used a simple jam in this recipe, you can easily substitute it with Nutella, peanut butter, lemon curd, or even a chocolate ganache. The possibilities are endless! You could even try different types of sprinkles to match the occasion or your personal preferences. Think pastel sprinkles for Easter, red and green sprinkles for Christmas, or even edible glitter for a touch of sparkle.
Another fun variation is to add a touch of flavor to the cookie dough itself. A teaspoon of vanilla extract, almond extract, or even lemon zest can elevate the flavor profile and add a unique twist. You could also experiment with different types of flour, such as almond flour or gluten-free flour, to cater to dietary restrictions.
Ready to bake your own batch of Sprinkle Thumbprint Cookies? I know you’ll love them! I’ve poured my heart into perfecting this recipe, and I’m confident that it will become a new favorite in your household.
So, grab your ingredients, preheat your oven, and get ready to create some magic in the kitchen. And most importantly, don’t forget to have fun! Baking should be a joyful experience, and these cookies are the perfect way to embrace that spirit.
I’m so excited for you to try this recipe and experience the joy of baking these delightful treats. Once you’ve made them, I’d absolutely love to hear about your experience! Share your photos and stories with me – what variations did you try? What did your family and friends think? Did you find that the Sprinkle Thumbprint Cookies brought a smile to everyone’s face? Let me know in the comments below! Happy baking!
Sprinkle Thumbprint Cookies: A Delicious and Easy Recipe
Soft, buttery thumbprint cookies filled with sweet raspberry jam and topped with colorful sprinkles. Perfect for any occasion!
Ingredients
Instructions
Recipe Notes
- Jam Variations: Feel free to experiment with different flavors of jam. Apricot, strawberry, blueberry, or even fig jam would all be delicious.
- Nutella Filling: For a chocolatey twist, try filling the thumbprints with Nutella. Warm it slightly in the microwave for easier spreading.
- Peanut Butter Filling: Mix peanut butter with a little powdered sugar and milk to create a creamy peanut butter filling.
- Chocolate Drizzle: After the cookies have cooled, drizzle them with melted chocolate for an extra touch of indulgence.
- Nut Coating: Before baking, roll the dough balls in finely chopped nuts, such as pecans or walnuts.
- Gluten-Free Option: Use a gluten-free all-purpose flour blend to make these cookies gluten-free. Be sure to choose a blend that contains xanthan gum for best results.
- Vegan Option: Substitute the butter with vegan butter and the egg yolks with applesauce (1/4 cup applesauce per egg yolk).
- Storage: Store the cookies in an airtight container at room temperature for up to 3 days. They can also be frozen for longer storage.
- Cookies Spreading Too Much: If your cookies are spreading too much in the oven, it could be due to a few reasons. Make sure your butter is not too soft (it should be softened, but not melted). Also, ensure that you chilled the dough for the recommended amount of time. If the problem persists, try adding a tablespoon or two of flour to the dough.
- Cookies are Dry: Overbaking can lead to dry cookies. Keep a close eye on them and remove them from the oven as soon as the edges are lightly golden brown.
- Jam is Boiling Over: If the jam is boiling over during baking, you may have overfilled the thumbprints. Use a smaller amount of jam next time.
- Make Ahead Tips: The cookie dough can be made ahead of time and stored in the refrigerator for up to 2 days. Let it soften slightly before rolling into balls. The unbaked cookies can be assembled and frozen for up to 1 month. Bake directly from frozen, adding a few extra minutes to the baking time.