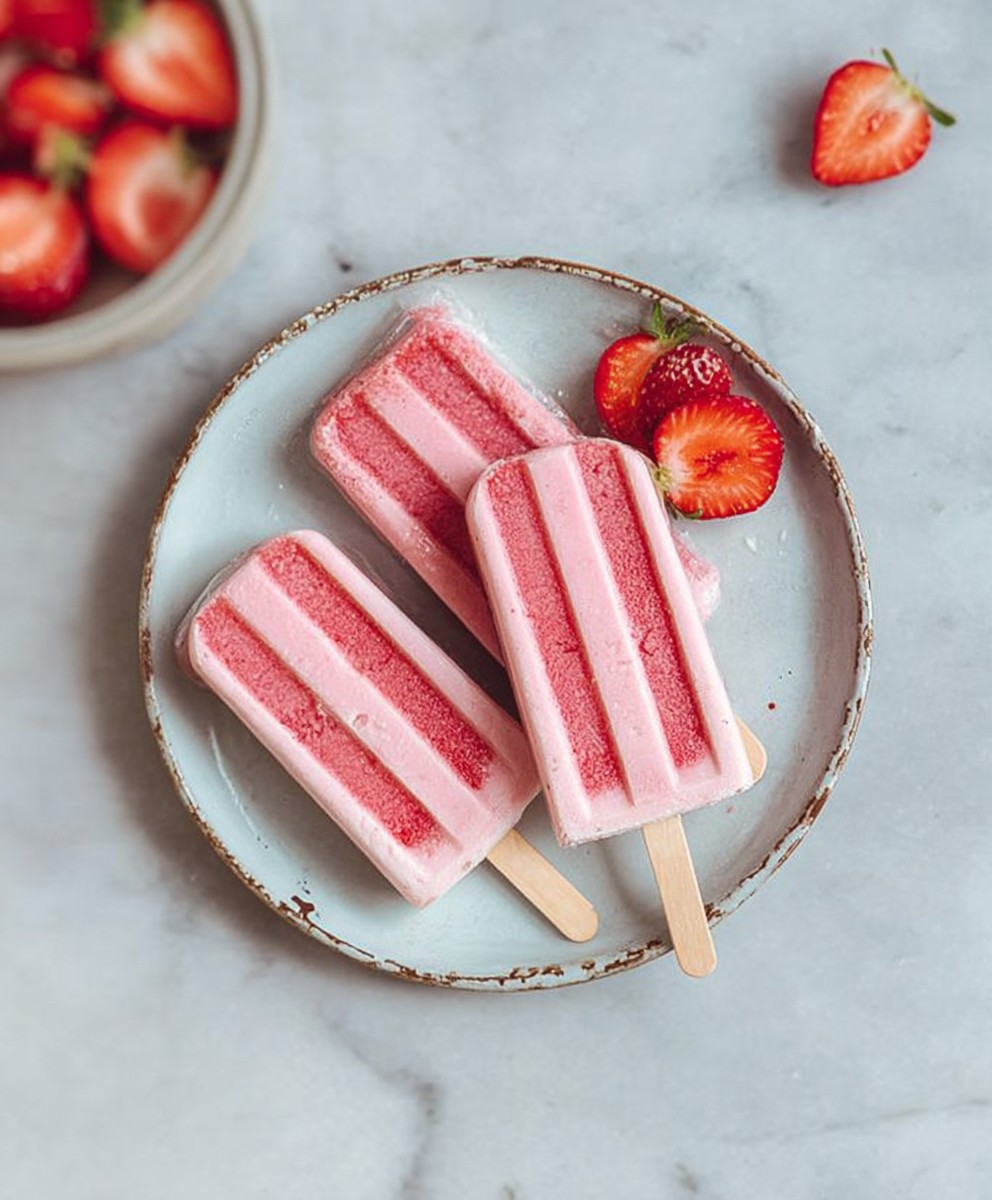
Strawberry Banana Popsicles: the quintessential taste of summer, frozen into a refreshing treat! Imagine biting into a creamy, fruity popsicle on a hot day – the perfect blend of sweet strawberries and mellow banana, instantly cooling you down. But these aren’t just any popsicles; they’re a delightful combination of simplicity and deliciousness that will transport you back to carefree childhood summers.
While the exact origin of the popsicle is debated, its popularity exploded in the early 20th century, quickly becoming a beloved treat for children and adults alike. The beauty of popsicles lies in their versatility and ease of preparation. And these Strawberry Banana Popsicles are no exception! They offer a healthy and satisfying alternative to store-bought options, allowing you to control the ingredients and avoid artificial flavors and excessive sugar.
People adore this particular flavor combination for its harmonious blend of textures and tastes. The sweetness of ripe bananas perfectly complements the slight tartness of fresh strawberries, creating a balanced and irresistible flavor profile. Plus, the creamy texture makes each bite a smooth and satisfying experience. Whether you’re looking for a quick and easy dessert, a healthy snack for your kids, or a refreshing way to beat the heat, these popsicles are guaranteed to be a hit. So, grab your blender and popsicle molds, and let’s create some frozen magic!

Ingredients:
- 4 ripe bananas, peeled and sliced
- 2 cups fresh strawberries, hulled and halved (or quartered if large)
- 1/2 cup plain Greek yogurt (for extra creaminess and protein!)
- 1/4 cup honey or maple syrup (adjust to your desired sweetness)
- 1/4 cup milk (dairy or non-dairy, your choice!)
- 1 teaspoon vanilla extract (optional, but adds a lovely flavor)
- Pinch of salt (enhances the sweetness)
- Popsicle molds (6-8 depending on size)
- Popsicle sticks
Preparing the Strawberry Banana Mixture
- Prepare the Fruit: First things first, let’s get our fruit ready. Make sure your bananas are nice and ripe – the riper, the sweeter! Peel them and slice them into roughly 1-inch pieces. Hull your strawberries and halve or quarter them, depending on their size. We want them to blend easily.
- Combine Ingredients in a Blender: Now, grab your blender. Add the sliced bananas, strawberries, Greek yogurt, honey (or maple syrup), milk, vanilla extract (if using), and a pinch of salt.
- Blend Until Smooth: This is the most important step! Blend everything together until you achieve a completely smooth and creamy consistency. You don’t want any chunks of fruit in your popsicles (unless you’re going for that texture, but for this recipe, we’re aiming for smooth). If the mixture seems too thick, add a tablespoon or two more of milk until it reaches your desired consistency. It should be pourable but not too watery.
- Taste and Adjust Sweetness: Give the mixture a taste! This is your chance to adjust the sweetness to your liking. If you prefer a sweeter popsicle, add a little more honey or maple syrup, a teaspoon at a time, and blend again until incorporated. Remember, freezing can sometimes dull the sweetness, so it’s okay if it tastes slightly sweeter than you’d normally prefer.
Filling the Popsicle Molds
- Prepare Your Popsicle Molds: Make sure your popsicle molds are clean and dry. This will help the popsicles release easily later on.
- Pour the Mixture into the Molds: Carefully pour the strawberry banana mixture into each popsicle mold, leaving a little bit of space at the top (about 1/4 inch) to allow for expansion during freezing.
- Tap the Molds (Optional): Gently tap the filled popsicle molds on the counter a few times. This helps to release any trapped air bubbles and ensures a more even freeze.
- Insert Popsicle Sticks: Insert a popsicle stick into the center of each mold. Make sure the sticks are inserted far enough down so they are secure, but not so far that they poke out the bottom.
Freezing the Popsicles
- Cover the Molds (Optional): If your popsicle molds don’t have lids, you can cover them with plastic wrap. This helps to prevent freezer burn and keeps the popsicles fresh. Secure the plastic wrap tightly with a rubber band if needed.
- Freeze for at Least 4-6 Hours: Place the filled popsicle molds in the freezer and freeze for at least 4-6 hours, or preferably overnight. You want the popsicles to be completely frozen solid before attempting to remove them from the molds. Patience is key here!
Releasing the Popsicles from the Molds
- Loosen the Popsicles: Once the popsicles are completely frozen, it’s time to release them from the molds. There are a few ways to do this:
- Warm Water Method: The easiest and most common method is to run the popsicle molds under warm water for a few seconds. Be careful not to get water inside the molds. The warmth will loosen the popsicles from the sides of the mold.
- Room Temperature Method: Alternatively, you can let the popsicle molds sit at room temperature for a few minutes. This will also help to loosen the popsicles.
- Gently Pull Out the Popsicles: Once the popsicles are loosened, gently pull them out of the molds by the popsicle sticks. If they’re still stuck, run the molds under warm water for a few more seconds.
- Enjoy Immediately or Store: Enjoy your delicious homemade strawberry banana popsicles immediately! If you’re not planning on eating them right away, you can wrap them individually in plastic wrap or place them in a freezer-safe bag or container to prevent freezer burn. They can be stored in the freezer for several weeks.
Tips and Variations
- Add-Ins: Get creative and add other ingredients to your popsicles! Some great options include:
- Chocolate chips
- Chopped nuts (almonds, walnuts, pecans)
- Shredded coconut
- Chia seeds (for added fiber and nutrients)
- Other fruits (blueberries, raspberries, mango)
- Yogurt Variations: Experiment with different flavors of Greek yogurt. Vanilla, strawberry, or banana yogurt would all be delicious additions.
- Sweetener Alternatives: If you don’t want to use honey or maple syrup, you can substitute other sweeteners like agave nectar, stevia, or even a little bit of sugar. Adjust the amount to your liking.
- Dairy-Free Option: To make these popsicles dairy-free, use a non-dairy yogurt alternative (such as coconut yogurt or almond yogurt) and a non-dairy milk (such as almond milk, soy milk, or oat milk).
- Layered Popsicles: For a fun and visually appealing treat, try layering different flavors of fruit puree in the popsicle molds. For example, you could layer strawberry puree, banana puree, and blueberry puree.
- Popsicle Mold Alternatives: If you don’t have popsicle molds, you can use small paper cups or even ice cube trays. Just make sure to insert the popsicle sticks before freezing.
- Preventing Freezer Burn: To prevent freezer burn, make sure to wrap the popsicles tightly in plastic wrap or store them in a freezer-safe bag or container. You can also add a tablespoon of lemon juice to the mixture before freezing, as the acidity helps to prevent ice crystals from forming.
- Making Ahead: These popsicles can be made well in advance and stored in the freezer for several weeks. This makes them a great option for a quick and easy dessert or snack.
Nutritional Information (Approximate):
(Per Popsicle, based on 8 servings)
Calories: Approximately 80-100 calories
Protein: 2-3 grams
Fat: 1-2 grams
Carbohydrates: 15-20 grams
Fiber: 1-2 grams
Note: Nutritional information may vary depending on the specific ingredients used.
Enjoy your refreshing and healthy Strawberry Banana Popsicles! They’re the perfect treat for a hot summer day or any time you’re craving something sweet and delicious.
Conclusion:
So there you have it! These Strawberry Banana Popsicles are more than just a frozen treat; they’re a burst of sunshine on a stick, a healthy and delicious way to cool down, and a guaranteed crowd-pleaser for kids and adults alike. I truly believe this recipe is a must-try for anyone looking for a simple, refreshing, and guilt-free dessert option. The combination of sweet strawberries and creamy bananas creates a flavor profile that’s both familiar and utterly irresistible.
But the best part? It’s incredibly versatile! Feel free to experiment with different variations to suit your taste preferences. For a richer, more decadent popsicle, try adding a dollop of Greek yogurt or a splash of coconut milk to the mixture before freezing. This will create a creamier texture and add a boost of protein. If you’re feeling adventurous, you could even swirl in a spoonful of peanut butter or Nutella for a truly indulgent treat.
Looking for serving suggestions? These popsicles are perfect on their own as a light and refreshing snack. But they also pair beautifully with other desserts. Imagine serving them alongside a slice of warm chocolate cake or a scoop of vanilla ice cream. They would also be a fantastic addition to a summer barbecue or picnic. For a more sophisticated presentation, try dipping the finished popsicles in melted dark chocolate and sprinkling them with chopped nuts or shredded coconut.
And don’t forget the kids! These Strawberry Banana Popsicles are a fantastic way to sneak in some extra fruit into their diets. They’ll love the sweet taste and vibrant color, and you’ll love knowing that they’re enjoying a healthy and nutritious treat. Get them involved in the making process – it’s a fun and easy activity that the whole family can enjoy together. Let them help wash the fruit, peel the bananas, and pour the mixture into the molds. It’s a great way to teach them about healthy eating habits and get them excited about cooking.
I’m confident that you’ll absolutely love these popsicles. They’re so easy to make, so delicious to eat, and so incredibly refreshing on a hot day. Plus, they’re a much healthier alternative to store-bought popsicles, which are often loaded with sugar and artificial ingredients. With this recipe, you can control exactly what goes into your popsicles, ensuring that you’re only using the freshest and healthiest ingredients.
So, what are you waiting for? Grab your blender, gather your ingredients, and get ready to make the best Strawberry Banana Popsicles you’ve ever tasted! I’m so excited for you to try this recipe and experience the joy of homemade frozen treats.
Once you’ve made them, I would absolutely love to hear about your experience! Did you try any variations? Did you add any special ingredients? What did your family and friends think? Please share your thoughts and photos in the comments below. Your feedback is invaluable and helps me to create even better recipes in the future. Happy popsicle making! I hope you enjoy this recipe as much as I do.
Strawberry Banana Popsicles: The Ultimate Refreshing Summer Treat
Creamy, refreshing Strawberry Banana Popsicles! Made with bananas, strawberries, Greek yogurt, and honey, they're a healthy and delicious treat.
Ingredients
Instructions
Recipe Notes
- Add-Ins: Get creative and add chocolate chips, chopped nuts, shredded coconut, chia seeds, or other fruits.
- Yogurt Variations: Experiment with different flavors of Greek yogurt like vanilla, strawberry, or banana.
- Sweetener Alternatives: Use agave nectar, stevia, or sugar instead of honey or maple syrup.
- Dairy-Free Option: Use non-dairy yogurt and milk alternatives.
- Layered Popsicles: Layer different fruit purees for a visually appealing treat.
- Popsicle Mold Alternatives: Use small paper cups or ice cube trays if you don’t have popsicle molds.
- Preventing Freezer Burn: Wrap popsicles tightly or add a tablespoon of lemon juice to the mixture.
- Making Ahead: These popsicles can be made in advance and stored in the freezer for several weeks.