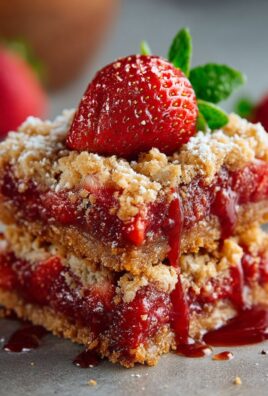
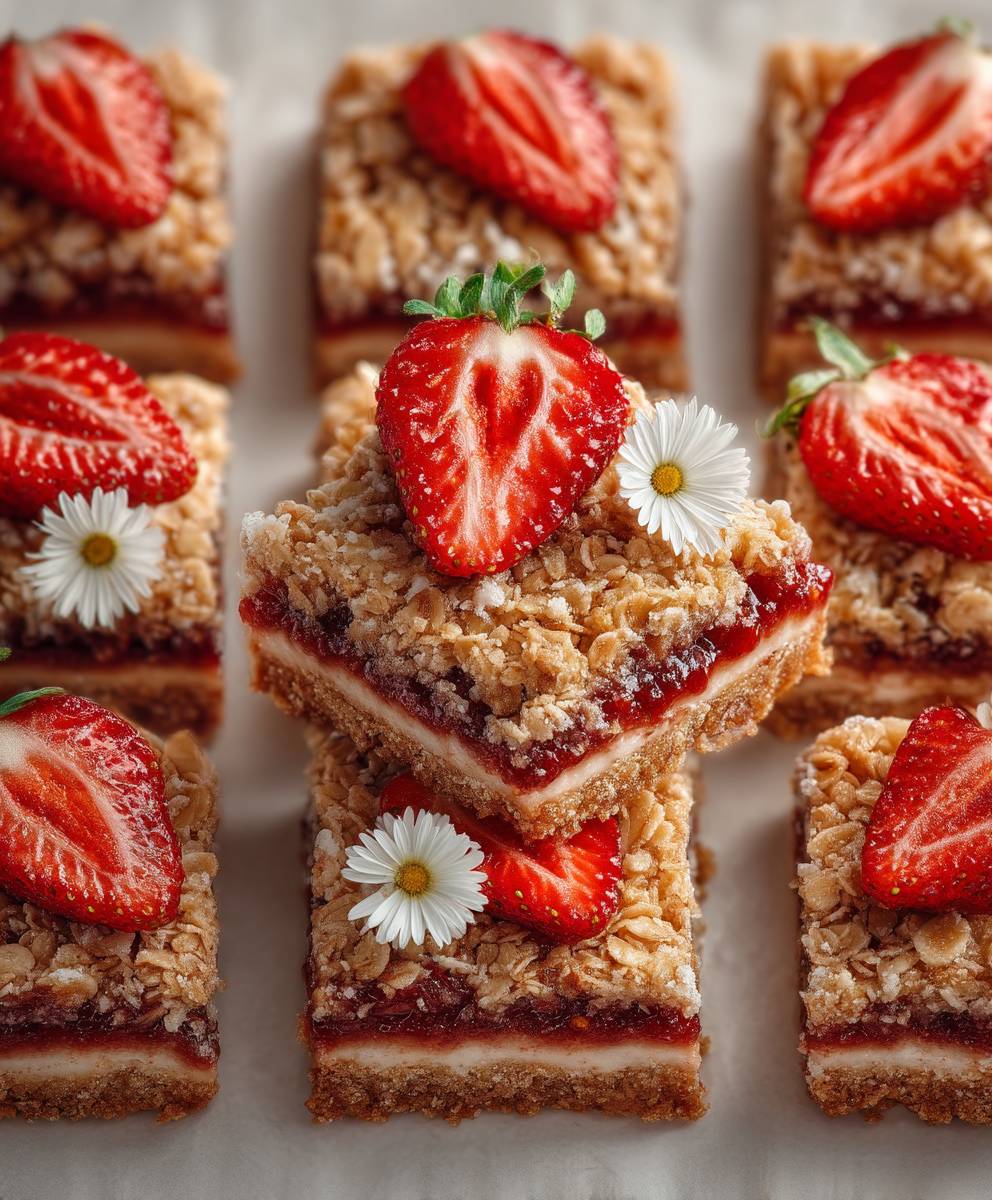
Strawberry oatmeal bars: Prepare to be captivated by a symphony of flavors and textures! Imagine sinking your teeth into a chewy, golden-brown oat base, bursting with the sweet, tangy essence of fresh strawberries. These aren’t your average granola bars; they’re a delightful treat that bridges the gap between a comforting breakfast and a satisfying dessert.
Oatmeal bars, in their essence, are a modern twist on traditional oatcakes and fruit crumbles. While their exact origins are somewhat hazy, the concept of combining oats with fruits and binding agents has been around for centuries. What makes strawberry oatmeal bars particularly special is the vibrant addition of strawberries, a fruit celebrated for its summery sweetness and nutritional benefits. Strawberries have been enjoyed for millennia, with evidence suggesting their cultivation dates back to ancient Rome. Their inclusion in these bars elevates them from a simple snack to a celebration of seasonal flavors.
People adore these bars for a multitude of reasons. The chewy texture of the oats provides a satisfying bite, while the juicy strawberries offer a burst of freshness. The subtle sweetness, often enhanced with a touch of honey or maple syrup, makes them a guilt-free indulgence. But perhaps the most compelling reason is their convenience. They’re incredibly easy to make, requiring minimal effort and readily available ingredients. Perfect for a quick breakfast on the go, a lunchbox treat, or an afternoon pick-me-up, strawberry oatmeal bars are a versatile and delicious option for any occasion. So, let’s embark on this culinary adventure and create these irresistible bars together!

Ingredients:
- For the Crust:
- 2 cups rolled oats (not instant)
- 1 cup all-purpose flour (or gluten-free blend)
- 1 cup packed light brown sugar
- 1 teaspoon baking soda
- 1/2 teaspoon salt
- 1 cup (2 sticks) cold unsalted butter, cut into cubes
- For the Strawberry Filling:
- 4 cups fresh strawberries, hulled and sliced
- 1/2 cup granulated sugar
- 2 tablespoons cornstarch
- 1 tablespoon lemon juice
- 1/4 teaspoon almond extract (optional, but delicious!)
- Optional Topping:
- 1/4 cup rolled oats
- 2 tablespoons all-purpose flour
- 2 tablespoons packed light brown sugar
- 2 tablespoons cold unsalted butter, cut into small pieces
Preparing the Strawberry Filling:
- Combine Strawberries and Sugar: In a medium saucepan, combine the sliced strawberries and granulated sugar. Stir gently to coat the strawberries evenly. This will help draw out their natural juices.
- Cook the Strawberries: Place the saucepan over medium heat. Bring the mixture to a simmer, stirring occasionally. As the strawberries heat up, they will release their juices and soften. Continue to simmer for about 5-7 minutes, or until the strawberries are softened and slightly broken down. Don’t overcook them, as you want them to retain some texture.
- Add Cornstarch and Lemon Juice: In a small bowl, whisk together the cornstarch and lemon juice until smooth. This will prevent any lumps from forming when you add it to the hot strawberry mixture. Pour the cornstarch mixture into the saucepan with the strawberries.
- Thicken the Filling: Stir the cornstarch mixture into the strawberries constantly until the filling begins to thicken. This should only take a minute or two. Be careful not to overcook it, as it will continue to thicken as it cools.
- Add Almond Extract (Optional): If you’re using almond extract, stir it in now. It adds a lovely depth of flavor that complements the strawberries beautifully.
- Cool the Filling: Remove the saucepan from the heat and let the strawberry filling cool slightly while you prepare the crust. This will prevent the crust from becoming soggy.
Making the Oatmeal Crust:
- Preheat Oven and Prepare Pan: Preheat your oven to 375°F (190°C). Grease and flour a 9×13 inch baking pan. You can also line the pan with parchment paper, leaving an overhang on the sides, for easy removal of the bars later.
- Combine Dry Ingredients: In a large bowl, whisk together the rolled oats, flour, brown sugar, baking soda, and salt. Make sure everything is well combined so that the baking soda is evenly distributed.
- Cut in the Butter: Add the cold, cubed butter to the dry ingredients. Use a pastry blender or your fingertips to cut the butter into the dry ingredients until the mixture resembles coarse crumbs. The butter should be evenly distributed throughout the mixture. This step is crucial for creating a tender and crumbly crust. If the butter gets too warm, the crust will be tough.
- Press Half into the Pan: Press about half of the oat mixture firmly into the bottom of the prepared baking pan. Use the bottom of a measuring cup or your fingers to create an even layer. This will form the base of your bars.
Assembling and Baking the Bars:
- Pour in the Strawberry Filling: Carefully pour the slightly cooled strawberry filling evenly over the pressed oat crust. Spread it out to cover the entire surface.
- Prepare the Optional Topping (if using): In a small bowl, combine the rolled oats, flour, and brown sugar for the topping. Cut in the cold butter until the mixture resembles coarse crumbs.
- Sprinkle Topping (if using): Sprinkle the topping evenly over the strawberry filling. If you’re not using the topping, you can simply crumble the remaining oat mixture over the filling.
- Crumble Remaining Oat Mixture (if no topping): If you skipped the topping, take the remaining oat mixture and crumble it evenly over the strawberry filling. Try to distribute it as evenly as possible.
- Bake: Bake in the preheated oven for 30-35 minutes, or until the crust is golden brown and the filling is bubbly. The topping (if using) should also be golden brown.
- Cool Completely: Remove the pan from the oven and let the bars cool completely in the pan before cutting. This is important because the filling will continue to set as it cools. If you try to cut them while they’re still warm, they will be messy and fall apart. I usually let them cool for at least 2-3 hours, or even overnight, for the best results.
- Cut and Serve: Once the bars are completely cool, cut them into squares or rectangles. Use a sharp knife for clean cuts. If you lined the pan with parchment paper, you can lift the bars out of the pan before cutting.
Tips and Variations:
- Gluten-Free Option: To make these bars gluten-free, simply use a gluten-free all-purpose flour blend in place of the regular flour. Make sure the blend contains xanthan gum for the best results.
- Other Fruit Fillings: Feel free to experiment with other fruit fillings. Blueberry, raspberry, or apple fillings would all be delicious. Adjust the sugar and spices to suit the fruit you’re using.
- Add Nuts: For extra crunch and flavor, add chopped nuts to the crust or topping. Pecans, walnuts, or almonds would all be great choices.
- Chocolate Chips: A sprinkle of chocolate chips over the strawberry filling before baking would add a touch of decadence.
- Storage: Store the cooled bars in an airtight container at room temperature for up to 3 days, or in the refrigerator for up to a week.
- Freezing: These bars freeze well. Wrap them individually in plastic wrap and then place them in a freezer-safe bag or container. They can be frozen for up to 2 months. Thaw them in the refrigerator before serving.
Troubleshooting:
- Crust is too dry: If your crust is too dry, you may have used too much flour or not enough butter. Make sure to measure the flour accurately and use cold butter.
- Filling is too runny: If your filling is too runny, you may not have cooked it long enough or used enough cornstarch. Make sure to simmer the filling until it thickens and use the correct amount of cornstarch.
- Bars are too crumbly: If your bars are too crumbly, you may not have pressed the crust firmly enough into the pan. Make sure to press it down evenly and firmly.
Enjoy your delicious homemade strawberry oatmeal bars! They’re perfect for breakfast, a snack, or even dessert.
Conclusion:
And there you have it! These strawberry oatmeal bars are more than just a snack; they’re a little slice of sunshine baked into a convenient, portable package. I truly believe this recipe is a must-try for anyone looking for a healthier, homemade alternative to store-bought bars, or simply craving a taste of summer any time of year. The combination of the chewy oats, the sweet and tangy strawberries, and that hint of cinnamon creates a symphony of flavors and textures that will leave you wanting more.
But why is this recipe a must-try, you ask? Well, beyond the incredible taste, it’s incredibly versatile and adaptable to your own preferences and dietary needs. Need a gluten-free option? Simply swap out the regular flour for a gluten-free blend. Want to add a little extra crunch? Throw in some chopped nuts like walnuts or pecans. Feeling adventurous? A drizzle of dark chocolate over the cooled bars elevates them to a whole new level of decadent deliciousness.
Speaking of serving suggestions, these bars are perfect for so many occasions. They make a fantastic grab-and-go breakfast on busy mornings, a satisfying afternoon snack to power you through the day, or even a delightful dessert served with a scoop of vanilla ice cream. Pack them in your kids’ lunchboxes, bring them on a picnic, or enjoy them with a cup of coffee or tea. The possibilities are endless!
Here are a few more variations to get your creative juices flowing:
Serving Suggestions and Variations:
* Berry Blast: Use a mix of strawberries, raspberries, and blueberries for an even more intense berry flavor.
* Nutty Delight: Add 1/2 cup of chopped walnuts, pecans, or almonds to the oat mixture for extra crunch and healthy fats.
* Chocolate Chip Surprise: Stir in 1/2 cup of chocolate chips (milk, dark, or white) for a touch of indulgence.
* Lemon Zest Zing: Add the zest of one lemon to the oat mixture for a bright and citrusy flavor.
* Spiced Up: Add 1/4 teaspoon of ground nutmeg or cardamom to the oat mixture for a warm and comforting spice.
* Peanut Butter Power: Swirl a tablespoon or two of peanut butter into the strawberry filling before baking for a nutty twist.
* Make it Vegan: Substitute the butter with coconut oil and ensure your oats are certified gluten-free. Use a flax egg (1 tablespoon flaxseed meal mixed with 3 tablespoons water) to replace the egg.
I’ve poured my heart into perfecting this recipe, and I’m so excited for you to try it. I truly believe you’ll love these strawberry oatmeal bars as much as I do. They’re easy to make, require simple ingredients, and are guaranteed to bring a smile to your face with every bite.
So, what are you waiting for? Head to your kitchen, gather your ingredients, and get baking! I promise you won’t regret it. And once you’ve made them, please, please, please come back and share your experience in the comments below. I’d love to hear what you think, what variations you tried, and how much you enjoyed them. Your feedback is invaluable and helps me continue to create and share delicious recipes that you’ll love. Happy baking! I can’t wait to hear all about your strawberry oatmeal bars success!
Strawberry Oatmeal Bars: Easy Recipe & Baking Tips
Buttery, crumbly strawberry oatmeal bars with a sweet, juicy filling. Great for breakfast, snacks, or dessert!
Ingredients
- 2 cups rolled oats (not instant)
- 1 cup all-purpose flour (or gluten-free blend)
- 1 cup packed light brown sugar
- 1 teaspoon baking soda
- 1/2 teaspoon salt
- 1 cup (2 sticks) cold unsalted butter, cut into cubes
- 4 cups fresh strawberries, hulled and sliced
- 1/2 cup granulated sugar
- 2 tablespoons cornstarch
- 1 tablespoon lemon juice
- 1/4 teaspoon almond extract (optional)
- 1/4 cup rolled oats
- 2 tablespoons all-purpose flour
- 2 tablespoons packed light brown sugar
- 2 tablespoons cold unsalted butter, cut into small pieces
Instructions
- In a medium saucepan, combine the sliced strawberries and granulated sugar. Stir gently to coat the strawberries evenly.
- Place the saucepan over medium heat. Bring the mixture to a simmer, stirring occasionally. Simmer for about 5-7 minutes, or until the strawberries are softened and slightly broken down.
- In a small bowl, whisk together the cornstarch and lemon juice until smooth. Pour the cornstarch mixture into the saucepan with the strawberries.
- Stir the cornstarch mixture into the strawberries constantly until the filling begins to thicken (1-2 minutes).
- If using, stir in the almond extract.
- Remove from heat and let the strawberry filling cool slightly while you prepare the crust.
- Preheat oven to 375°F (190°C). Grease and flour a 9×13 inch baking pan (or line with parchment paper).
- In a large bowl, whisk together the rolled oats, flour, brown sugar, baking soda, and salt.
- Add the cold, cubed butter to the dry ingredients. Use a pastry blender or your fingertips to cut the butter into the dry ingredients until the mixture resembles coarse crumbs.
- Press about half of the oat mixture firmly into the bottom of the prepared baking pan.
- Carefully pour the slightly cooled strawberry filling evenly over the pressed oat crust.
- In a small bowl, combine the rolled oats, flour, and brown sugar for the topping. Cut in the cold butter until the mixture resembles coarse crumbs.
- Sprinkle the topping evenly over the strawberry filling.
- If you skipped the topping, take the remaining oat mixture and crumble it evenly over the strawberry filling.
- Bake in the preheated oven for 30-35 minutes, or until the crust is golden brown and the filling is bubbly.
- Remove from the oven and let the bars cool completely in the pan before cutting (at least 2-3 hours, or overnight).
- Once the bars are completely cool, cut them into squares or rectangles.
Notes
- Gluten-Free: Use a gluten-free all-purpose flour blend.
- Other Fruit: Experiment with blueberry, raspberry, or apple fillings.
- Add Nuts: Add chopped pecans, walnuts, or almonds to the crust or topping.
- Chocolate Chips: Sprinkle chocolate chips over the strawberry filling before baking.
- Storage: Store in an airtight container at room temperature for up to 3 days, or in the refrigerator for up to a week.
- Freezing: Wrap individually and freeze for up to 2 months. Thaw in the refrigerator.
- Crust is too dry: Use cold butter and measure flour accurately.
- Filling is too runny: Simmer filling until thickened and use correct amount of cornstarch.
- Bars are too crumbly: Press crust firmly into the pan.