• Skip to primary navigation
  • Skip to main content
  • Skip to primary sidebar
Homesmad

Homesmad

  • Home
  • Breakfast & Brunch
  • Appetizers & Snacks
  • Dinner
  • Dessert
  • About
  • Privacy Policy
  • Contact
Homesmad
  • Home
  • Breakfast & Brunch
  • Appetizers & Snacks
  • Dinner
  • Dessert
  • About
  • Privacy Policy
  • Contact

Sweet Cheesecake Crescent Rolls: Quick & Delicious Dessert Idea

November 8, 2025 by Lily author

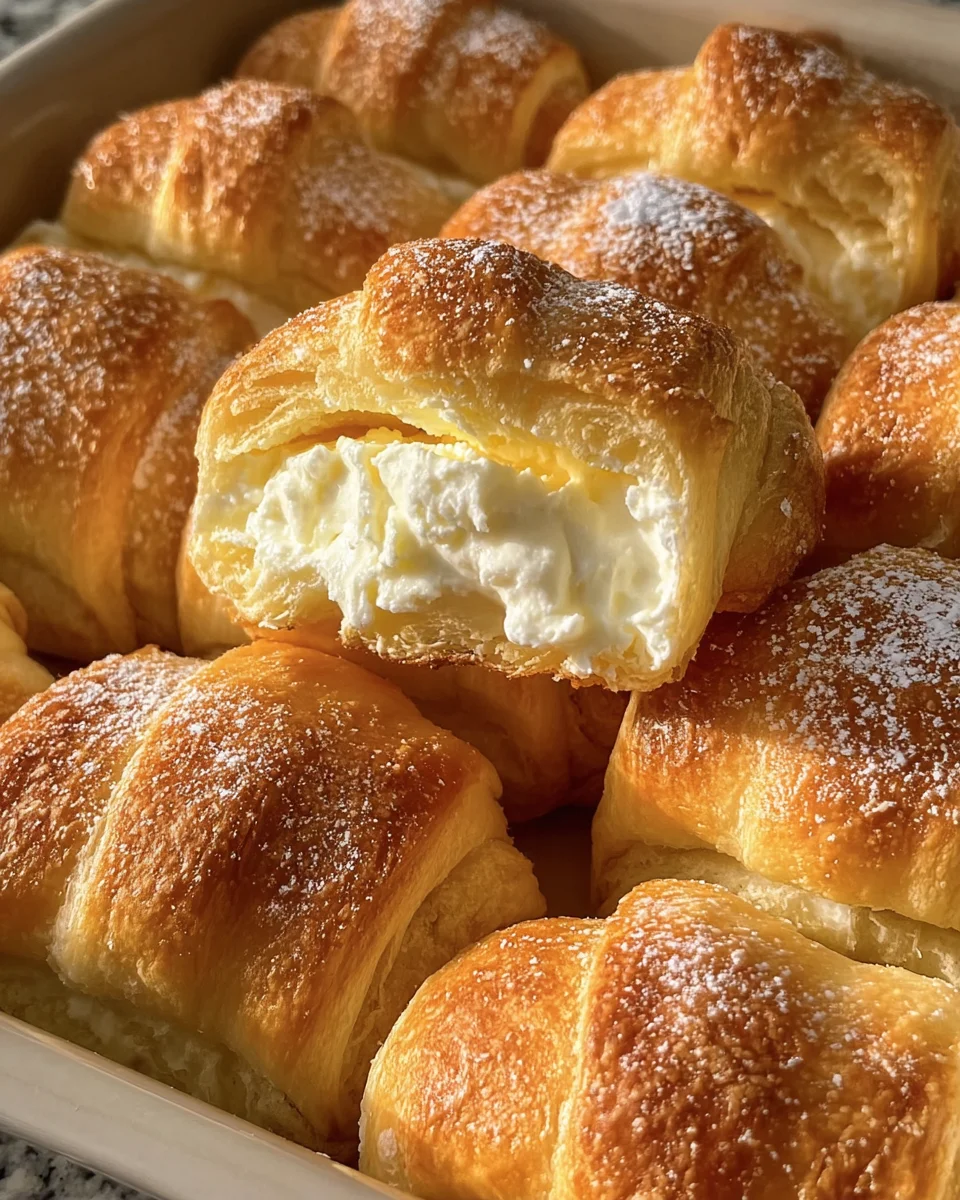
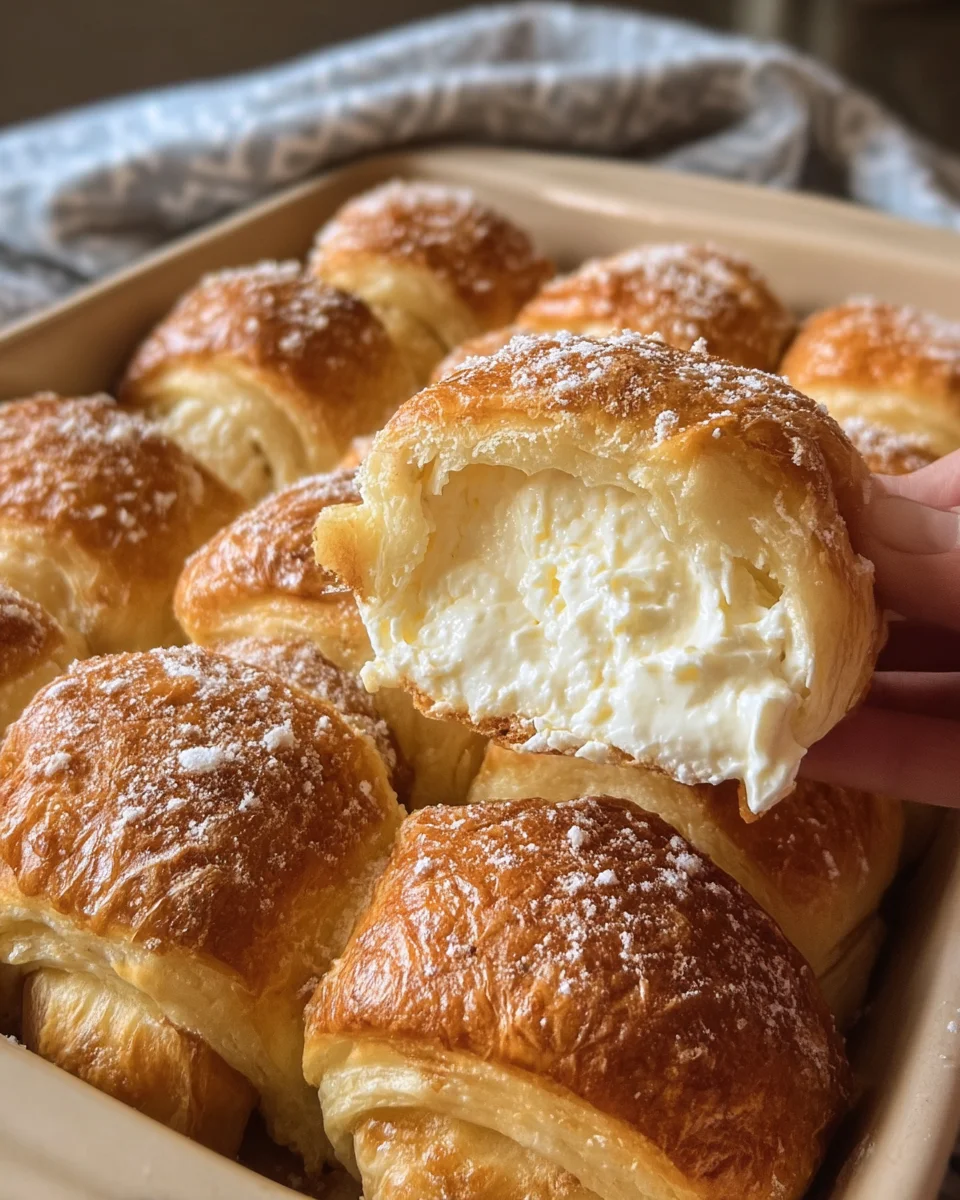
Cheesecake Crescent Rolls: Prepare yourself for a dessert experience that truly has it all! I’m absolutely delighted to share a recipe that marries the timeless, creamy indulgence of cheesecake with the golden, flaky comfort of a classic crescent roll. This isn’t just a dessert; it’s a brilliant culinary hack that brings together two beloved components into one incredibly satisfying and surprisingly simple treat, making it ideal for any occasion, from a spontaneous brunch to an elegant dessert spread.

While the individual histories of cheesecake and crescent rolls stretch back through various cultures and centuries, their harmonious combination is a more modern marvel. It’s a testament to the joy of fusion cuisine, offering the best of both worlds: the rich, tangy-sweet creaminess that defines a perfect cheesecake, beautifully encased within the buttery, delicate layers of a warm, fresh-baked pastry. I’ve discovered that people fall head over heels for this dish not only because of its exquisite taste and delightful contrast in textures but also for its remarkable convenience. You’ll be astounded by how quickly and easily you can craft such an impressive and utterly delicious dessert with these irresistible Cheesecake Crescent Rolls.

Sweet Cheesecake Crescent Rolls: Quick & Delicious Dessert Idea this RECIPE

Ingredients:

  • 2 (8-ounce) packages cream cheese, softened: This is the absolute star of our cheesecake filling, providing that signature rich and tangy flavor! For the best possible texture and taste in your Cheesecake Crescent Rolls, I always recommend using full-fat cream cheese. It yields a much richer, creamier, and more stable filling that won’t become watery or deflate too much during baking. The most critical aspect of this ingredient is ensuring it’s genuinely softened to room temperature before you begin. This isn’t just a suggestion; it’s a non-negotiable step that ensures a silky-smooth, lump-free filling. If your cream cheese is too cold, you’ll find yourself wrestling with stubborn clumps that are nearly impossible to smooth out, leading to an uneven and disappointing texture in your finished rolls. I typically take it out of the fridge at least an hour, sometimes even two, before I plan to start mixing. You should be able to press into it easily with your finger or a spoon, and it should feel pliable, not firm.
  • 1/2 cup granulated sugar: This provides the perfect touch of sweetness to balance the inherent tanginess of the cream cheese, creating that classic cheesecake flavor profile we all adore. Beyond just sweetness, the sugar also plays a role in the filling’s texture, helping it become slightly smoother and preventing it from being too dense. You have a little wiggle room to adjust this amount to your personal preference; if you have a particularly sweet tooth, you could add another tablespoon or two, but I find 1/2 cup is typically just right, especially considering we’ll be adding a sweet glaze later. It ensures the filling isn’t overpoweringly sweet on its own but perfectly complements the surrounding dough.
  • 1 teaspoon vanilla extract: Pure vanilla extract is a magical flavor enhancer and an absolute must-have for any cheesecake recipe, and our Cheesecake Crescent Rolls are no exception! It adds warmth, depth, and that unmistakably comforting classic cheesecake aroma and taste. Please, don’t skimp on good quality vanilla here; opting for pure vanilla extract over imitation makes a noticeable difference in the final product’s flavor complexity and overall deliciousness. It really brightens up the entire filling and elevates it from merely good to truly exceptional.
  • 1 large egg yolk: While some simpler recipes for cheesecake crescent rolls might omit this ingredient, I’ve found that adding a single large egg yolk is a fantastic secret weapon for a superior filling. It serves several crucial purposes: it helps to bind the filling ingredients together, making it more stable and significantly less likely to leak out of the crescent rolls during baking. Furthermore, it contributes to a richer, more luxurious, and custard-like texture that truly mimics a classic cheesecake. It also lends a lovely subtle golden hue to the filling once baked. It’s a small addition that makes a surprisingly big difference in the final product’s creaminess, structural integrity, and overall mouthfeel, ensuring your Cheesecake Crescent Rolls hold up beautifully.
  • 2 (8-ounce) cans refrigerated crescent roll dough: These convenient, flaky rolls are our trusty vehicles for the delightful cheesecake filling! Any brand of classic refrigerated crescent rolls will work wonderfully for this recipe. I often gravitate towards the original flaky kind for their excellent texture, but the buttery variety is also a superb choice if you prefer a richer dough. I would advise against using the “reduced fat” versions if possible, as they sometimes don’t brown as nicely or achieve the same satisfying texture as their full-fat counterparts. The crucial tip here is to keep the cans chilled in the refrigerator until the very moment you’re ready to unroll them; cold dough is significantly easier to handle, less sticky, and less prone to tearing. This quantity will provide us with a good number of rolls, perfect for serving a crowd or enjoying as a delightful treat over a few days.
  • For the optional glaze: While delicious on their own, a simple drizzle of glaze elevates these Cheesecake Crescent Rolls to bakery-level perfection.
    • 1 cup powdered sugar (confectioners’ sugar): This finely milled sugar dissolves beautifully to create a smooth, pourable glaze that dries to a lovely sheen. It’s essential for that classic bakery finish. While not strictly necessary if you whisk it vigorously, sifting the powdered sugar first can help ensure an even smoother, lump-free glaze.
    • 2-3 tablespoons milk (or cream): I personally prefer whole milk for glazes because it adds a bit more richness and body, but any type of milk you have on hand (skim, 2%, almond, etc.) will work just fine. Begin with 2 tablespoons and add more, just a tiny bit at a time, until you reach your desired consistency. You’re aiming for a glaze that’s thick enough to coat the back of a spoon but still thin enough to drizzle elegantly over your crescent rolls without being too runny. For an even richer, more decadent glaze, a tablespoon of heavy cream works absolutely wonders!
    • 1/2 teaspoon vanilla extract: Another dash of pure vanilla extract in the glaze isn’t just for show; it truly ties all the flavors together, adding another layer of delightful aroma and a familiar, comforting taste. Just like with the filling, opting for pure vanilla is the way to go for the best flavor.

Equipment You’ll Need:

Having the right tools makes the process of creating your Cheesecake Crescent Rolls much smoother and more enjoyable. Gather these essentials before you begin:

  • Large mixing bowl: You’ll need this generously sized bowl for combining our creamy cheesecake filling. A larger bowl makes it easier to work with the softened cream cheese without spills.
  • Electric mixer (handheld or stand mixer): While you could attempt to cream the ingredients by hand, an electric mixer is truly invaluable here. It makes quick, effortless work of getting that cream cheese perfectly smooth, light, and fluffy, which is crucial for the filling’s texture. It’s truly a game-changer for achieving professional results with minimal effort.
  • Rubber spatula: This humble tool is essential for thoroughly scraping down the sides and bottom of your mixing bowl. It ensures that all ingredients are fully incorporated and prevents any unmixed streaks, guaranteeing a uniform and consistent filling.
  • Baking sheets: You’ll most likely need two standard-sized baking sheets to accommodate all 16 of the assembled crescent rolls without overcrowding them. Overcrowding can lead to uneven baking, where rolls might steam instead of bake, resulting in a less crisp exterior.
  • Parchment paper or silicone baking mats: These are my absolute best friends in the kitchen, especially for sticky situations like these! They are fantastic for preventing your Cheesecake Crescent Rolls from sticking to the baking sheets and make cleanup an absolute breeze. I genuinely never bake these without them, and I highly recommend you do the same.
  • Small bowl and whisk (or fork): You’ll use these to effortlessly mix up that delectable powdered sugar glaze for the finishing touch. A small whisk ensures a smooth, lump-free consistency.

Let’s Get Started: Preparing the Cheesecake Filling

This initial phase is arguably the most crucial for ensuring the success and delectable texture of your Cheesecake Crescent Rolls. A well-prepared, perfectly smooth filling is the secret to a creamy, dreamy bite every single time. Trust me, taking a few extra moments to get this right will pay off immensely in the final result!

  1. Cream the Cream Cheese: Begin by placing the two packages of thoroughly softened cream cheese into your large mixing bowl. As I emphasized in the ingredients list, it’s absolutely imperative that your cream cheese is truly at room temperature. If it’s even slightly cold, it will remain lumpy, and no amount of enthusiastic mixing will fully smooth it out, leaving you with an undesirable texture. Attach your electric mixer (using either a stand mixer with the paddle attachment or a handheld mixer) and beat the cream cheese on medium speed for approximately 1-2 minutes. Your goal here is to whip it until it transforms into an incredibly smooth, light, and airy consistency—almost fluffy. During this process, make sure to occasionally pause and scrape down the sides and bottom of the bowl thoroughly with your rubber spatula. This ensures that all of the cream cheese gets evenly beaten and no unmixed, cold bits are left clinging to the bowl. This initial creaming step is the fundamental foundation for creating a luscious, irresistible filling that will shine in your Cheesecake Crescent Rolls.
  2. Incorporate Sugar and Vanilla: With the cream cheese now smooth, happy, and looking delightfully fluffy, it’s time to add the granulated sugar and the vanilla extract to the bowl. To prevent a sudden cloud of powdered sugar from dusting your entire kitchen (a common rookie mistake!), I recommend reducing your mixer speed to low before adding these ingredients. Mix gently until the sugar is fully incorporated into the cream cheese mixture and the entire concoction looks uniformly smooth. This should take another 1-2 minutes. Once the sugar seems to have disappeared, you can increase the speed slightly to medium-low for an additional 30 seconds to ensure everything is thoroughly combined and slightly aerated. As you mix, the wonderful aroma of vanilla will instantly begin to fill your kitchen, providing a delightful preview of the deliciousness that is yet to come from your Cheesecake Crescent Rolls.
  3. Add the Egg Yolk: The final addition to our magnificent cheesecake filling is the single large egg yolk. This is our secret weapon for binding the filling, enhancing its richness, and improving its structural integrity during baking! Add the egg yolk to the bowl and beat on low speed just until the yolk is fully and seamlessly combined into the mixture, which should only take about 30 seconds to 1 minute. It’s important to be careful not to overmix at this stage once the egg yolk has been added, as excessive mixing can incorporate too much air into the filling. Too much air might cause the filling to puff up excessively in the oven and then potentially lead to cracks or a slightly less dense, creamy texture after cooling. After mixing, take your spatula and scrape the bowl one last time to confirm that everything is perfectly blended and homogenous. Your cheesecake filling should now be wonderfully smooth, incredibly creamy, and perfectly poised for action. This perfectly prepared filling is undeniably key to achieving that delightful, authentic cheesecake taste and luxurious texture inside your Cheesecake Crescent Rolls!

Assembling Your Cheesecake Crescent Rolls

Now for the truly fun and satisfying part – bringing all the components together to create your delicious Cheesecake Crescent Rolls! This stage requires a little care and precision to ensure your rolls bake up beautifully, with no leaks, and achieve that perfect golden, flaky crust.

  1. Preheat and Prepare: Before you even think about cracking open those cans of crescent roll dough, make sure to go ahead and preheat your oven to a steady 375°F (190°C). Proper preheating is absolutely essential for achieving even baking, promoting proper dough expansion, and getting that lovely golden brown finish on your rolls. While the oven is diligently heating up, take a moment to line two large baking sheets with either parchment paper or silicone baking mats. This simple step is a true game-changer; it prevents any potential sticking of your Cheesecake Crescent Rolls and makes cleanup an absolute breeze, which is always a significant win in my book! Having your baking sheets fully prepared and ready means you can seamlessly transfer the assembled rolls directly from your workspace to the sheet without any unnecessary delay or rush.
  2. Unroll the Crescent Dough: With your oven preheating, it’s time to tackle the dough. Carefully open one can of refrigerated crescent roll dough. Gently unroll the entire sheet of dough onto a clean, lightly floured surface or a spacious cutting board. You’ll immediately notice that the dough is conveniently perforated into individual triangles. Carefully separate the dough along these perforations, creating 8 distinct crescent roll triangles. Repeat this exact process with the second can of dough, so that by the end, you should have a total of 16 perfectly formed crescent roll triangles ready for filling. It’s beneficial to work fairly quickly here, as the dough is significantly easier to handle and less prone to sticking or tearing when it’s still cool from the refrigerator. If it sits out for too long in a warm kitchen, it can become overly pliable, sticky, and frustrating to manage. Some bakers like to gently stretch each triangle just a tiny bit wider at the base to accommodate more filling, but if you choose to do this, exercise caution not to tear the delicate dough.
  3. Fill Each Triangle: Now for the moment we’ve been waiting for – adding the star of the show, our creamy cheesecake filling! Take a spoonful of your delicious, freshly prepared cheesecake filling. I generally find that about 1 to 1.5 tablespoons is the ideal amount for each crescent roll, though you can adjust slightly based on how generous you’re feeling and the specific size of your crescent roll triangles. Carefully place this filling at the widest end (the base) of each crescent roll triangle. It’s crucial not to spread the filling all the way to the very edges of the dough; instead, leave a small border, perhaps a quarter to half an inch. This untouched border will be invaluable in helping you effectively seal the filling within the dough, which is key to preventing any unfortunate oozy mishaps during the baking process. I cannot stress this enough: resist the urge to overfill! While more filling certainly sounds appealing, packing too much into each roll will almost guarantee that the dough will burst open during baking, causing your precious cheesecake filling to leak out onto your baking sheet. A moderate, well-contained amount is truly perfect for these Cheesecake Crescent Rolls.
  4. Roll ‘Em Up! With the filling in place, it’s time to roll. Starting from the wide end of the triangle where you’ve placed the filling, carefully and gently roll up each crescent roll triangle towards its narrower point. As you roll, it’s very important to gently tuck in the sides of the dough over the filling. This action helps to create a secure seal around the cheesecake filling. This is a critical step to ensure your delicious cheesecake filling remains neatly contained within its flaky crescent shell and doesn’t escape during baking. Once each crescent roll is fully rolled, you have the option to gently curve the ends inward to form the classic, iconic crescent shape, but this is entirely a matter of aesthetic preference and completely optional. Finally, carefully place each rolled crescent roll seam-side down onto your prepared baking sheets. It’s vital to ensure there’s sufficient space between each roll – aim for about 1-2 inches of separation. This ample spacing allows for proper airflow around each roll, which is essential for even baking and achieving that desirable beautiful golden brown crispness. If the rolls are placed too close together, they will tend to steam rather than bake, and you won’t get that wonderful, flaky, golden crust on your Cheesecake Crescent Rolls.

Baking Your Golden Cheesecake Crescent Rolls

The moment of truth is finally here! Baking these Cheesecake Crescent Rolls to perfection is quite straightforward, but paying attention to a few key pointers will ensure they turn out beautifully golden, wonderfully puffed, and delightfully tender with that irresistible creamy filling.

  1. Into the Hot Oven: With your crescent rolls perfectly arranged on their baking sheets, it’s time for them to meet the heat! Carefully transfer your baking sheets into the preheated 375°F (190°C) oven. If you are utilizing two baking sheets, which is highly recommended to prevent overcrowding, place one on the upper-middle rack and the other on the lower-middle rack. This strategic placement helps to ensure optimal heat distribution around all the rolls. Once they’re in, try your best not to open the oven door unnecessarily during the initial baking phase, as this can cause significant temperature fluctuations that might negatively impact the dough’s ability to rise properly and achieve that perfect golden browning. Patience here is a virtue that will be rewarded with perfectly baked Cheesecake Crescent Rolls.
  2. Bake to Golden Perfection: Allow your Cheesecake Crescent Rolls to bake for approximately 12-15 minutes. The precise timing can vary slightly depending on your individual oven and the specific thickness of your rolls, so keep an attentive eye on them. They are ready when they are beautifully puffed up, exhibit a rich, appetizing golden brown color all over, and appear thoroughly cooked through. Around the halfway point of the baking time (typically after about 7-8 minutes), I always make it a point to rotate the baking sheets from front to back and also swap their positions (moving the top sheet to the bottom rack and vice versa). This simple rotation and swapping technique is incredibly effective at ensuring even browning across all your rolls. Remember to keep a particularly close watch during the final few minutes of baking, as crescent rolls can transition from perfectly golden to slightly overdone quite quickly. The ultimate goal is a rich, deep, and inviting golden color, not just a pale yellow, as this indicates superior flavor and texture.
  3. Cooling Down: Once your Cheesecake Crescent Rolls have achieved that enviable golden perfection, carefully remove the baking sheets from the oven. At this stage, the rolls will be incredibly hot, and the luscious cheesecake filling within will be molten, so please exercise extreme caution to avoid any burns. Allow the rolls to cool on the baking sheets for about 5-10 minutes before you attempt to transfer them to a wire rack. This initial cooling period on the hot sheet is important because it allows the rolls to set up a bit, making them much easier and safer to handle without risking breakage or crumbling. Once they’ve firmed up slightly, carefully transfer them to a wire rack to cool completely. Cooling them entirely on a wire rack ensures that air can circulate all around each roll, preventing them from becoming soggy on the bottom and helping them maintain their wonderfully crisp and flaky exterior.

The Grand Finale: Drizzling the Glaze

While your delicious Cheesecake Crescent Rolls are cooling down, it’s the absolute perfect time to whip up that delightful and utterly irresistible glaze. This sweet and tangy finish truly takes them from merely great to absolutely unforgettable, adding that classic bakery touch!

  1. Prepare the Glaze: In a small, clean bowl, combine the powdered sugar, your initial 2 tablespoons of milk (or cream), and the 1/2 teaspoon of vanilla extract. Take a small whisk or even just a fork and whisk these ingredients vigorously until the mixture is completely smooth and entirely free of any lumps. The consistency of your glaze is absolutely key here. You are aiming for a glaze that’s thick enough to generously coat the back of a spoon, creating an opaque layer, but simultaneously thin enough to drizzle elegantly and beautifully over your cooled Cheesecake Crescent Rolls. If your glaze appears too thick and paste-like, simply add the remaining tablespoon of milk (or even just a tiny teaspoon at a time) until you achieve your desired flowy consistency. Conversely, if you accidentally make it too thin, don’t despair! You can easily whisk in another tablespoon or two of powdered sugar to thicken it up. Ensure it’s wonderfully smooth and has a lovely glossy sheen!
  2. Glaze and Serve: Once your Cheesecake Crescent Rolls have cooled sufficiently (they can still be slightly warm to the touch, which is actually quite lovely, but certainly not piping hot, otherwise the glaze will melt right off and disappear), it’s time for the delicious finishing touch. Drizzle the prepared glaze generously over them. You can use a simple spoon for a rustic look, or for a more controlled and professional-looking presentation, transfer the glaze to a small Ziploc bag, snip off a tiny corner, and carefully pipe it over the rolls in decorative lines or zigzags. Allow the glaze a few minutes to set and slightly firm up before serving. These delightful Cheesecake Crescent Rolls are absolutely heavenly when served warm, as this allows the creamy cheesecake filling to be at its most luxurious and gooey. However, I can attest that they are equally delicious and satisfying when enjoyed at room temperature, making them a versatile treat for any occasion!

Tips, Tricks, and Variations for Your Cheesecake Crescent Rolls

To truly master these delectable Cheesecake Crescent Rolls and empower you to make them uniquely your own, consider these additional insights, helpful hints, and creative twists. These tips will help you achieve perfect results every time and explore exciting new flavors.

Ensuring the Perfect Filling Every Time:

  • Softened Cream Cheese is Non-Negotiable: I genuinely cannot stress this point enough. If your cream cheese isn’t completely soft, you will absolutely struggle with stubborn lumps in your filling. To speed up the softening process, you can remove the cream cheese from its foil wrapper, cut it into 1-inch cubes, and let it sit on a plate at room temperature for 15-30 minutes. For an even faster method, you can microwave it on 50% power for very short 15-20 second intervals, checking and stirring after each burst, until it becomes pliable. Just be extremely careful not to melt it, as melted cream cheese will create a runny, not creamy, filling.
  • Don’t Overmix the Egg Yolk: As previously mentioned, once you’ve added the egg yolk to your filling mixture, mix just until it’s fully combined. Overmixing at this stage can incorporate an excessive amount of air, which might cause the filling to puff up too much during baking and then potentially deflate, leading to a slightly crumbly or less dense and creamy texture in your finished Cheesecake Crescent Rolls.
  • Taste and Adjust: Before you add the egg yolk (for food safety reasons, always taste before raw egg is added), give your cheesecake filling a little taste. This is your prime opportunity to customize the sweetness! If you prefer a more intensely sweet cheesecake, feel free to add another tablespoon or two of sugar. If you love a stronger vanilla presence, a tiny splash more pure vanilla extract certainly won’t hurt and will only enhance the aroma and flavor. This is your chance to truly personalize your Cheesecake Crescent Rolls!

Handling the Dough Like a Pro:

  • Keep it Cold: Refrigerated dough, especially delicate crescent roll dough, is always significantly easier to work with when it’s kept cold. If your kitchen tends to be warm or if you anticipate working slowly, consider opening and working with one can of dough at a time, keeping the other can chilling in the refrigerator until you’re absolutely ready to use it. This prevents the dough from becoming overly sticky, tearing easily, and becoming difficult to roll and shape.
  • Lightly Flour Your Surface: A very light dusting of all-purpose flour on your workspace, your hands, and even your rolling pin (if you’re using one to gently stretch the dough) can make a huge difference in preventing the dough from sticking, especially if you find it particularly difficult or tacky to handle. However, be cautious not to overdo it; too much flour can be absorbed by the dough, potentially making your Cheesecake Crescent Rolls tough rather than tender and flaky.
  • Seal the Deal: When you are rolling up the crescent dough with the filling, really focus on pinching and securely tucking the sides of the dough over the filling at the wide end of the triangle. This careful sealing is your primary defense against any leaks during baking. A gentle but firm squeeze along the entire seam after you’ve rolled each crescent can also help to further secure it and prevent the filling from escaping onto your baking sheet.

Flavor Variations to Explore:

  • Citrus Zest: For a wonderfully bright, fresh, and zesty twist, consider adding 1-2 teaspoons of finely grated lemon zest or orange zest to your cheesecake filling. Citrus zest beautifully complements the rich cream cheese and vanilla, adding a layer of sophisticated flavor that really makes these Cheesecake Crescent Rolls sing.
  • Spiced Filling: To create a cozy, warm, and inviting spiced note in your filling, try adding a pinch of ground cinnamon or a tiny dash of freshly grated nutmeg (about 1/4 teaspoon total) to the cheesecake mixture. This variation is especially lovely for fall or winter gatherings. You could even take it a step further by sprinkling a mixture of cinnamon sugar over the tops of the rolls just before baking for an extra layer of crunch and flavor.
  • Fruitful Additions: For a burst of fruity goodness, a few very small pieces of fresh fruit can be gently tucked into the filling before you roll up the crescent dough. Finely diced strawberries, tiny blueberries, or small raspberries work wonderfully. Be mindful not to add too much moisture from the fruit, and ensure the pieces are kept quite small to prevent tearing the delicate dough or causing leaks during baking.
  • Chocolate Lover’s Dream: If you’re a fan of chocolate and cheesecake, why not combine them? Stir in a few tablespoons of mini chocolate chips (or finely chopped chocolate) into your cheesecake filling for a delightful surprise. Alternatively, after your Cheesecake Crescent Rolls have baked and cooled, you could drizzle them with melted dark, milk, or white chocolate instead of, or in addition to, the vanilla glaze.

Make-Ahead and Storage:

  • Prepare the Filling Ahead: For convenience, you can absolutely prepare the cheesecake filling up to 2-3 days in advance. Simply store it in an airtight container in the refrigerator. When you’re ready to use it, just give it a good stir with a spoon or your mixer to bring it back to its creamy consistency, as it might stiffen slightly from being chilled.
  • Storage After Baking: Once baked and completely cooled, your Cheesecake Crescent Rolls are best stored in an airtight container in the refrigerator due to the perishable cream cheese filling. They will maintain their deliciousness and quality for up to 3-4 days when properly stored. While they are certainly delicious when enjoyed cold straight from the fridge, I highly, highly recommend a quick reheat for the ultimate experience!
  • Reheating Tips: To enjoy that wonderful warm, gooey cheesecake filling and flaky crust again, simply pop your Cheesecake Crescent Rolls into a toaster oven or a conventional oven preheated to 300°F (150°C) for about 5-7 minutes, or until they are just warmed through to your liking. For a much faster reheat, you can also microwave them for 15-20 seconds, but be aware that the oven method will do a better job of helping to retain that lovely crisp exterior.

Troubleshooting Common Issues:

  • Leaking Filling: If you find that your cheesecake filling is leaking out of the crescent rolls during baking, this usually points to one of two common issues: either the rolls were slightly overfilled, or they were not sealed properly. To prevent this next time, try using slightly less filling per roll, and really focus on carefully tucking and securely pinching the dough at the wide end when you are rolling them up to create a tight seal. A little practice makes perfect!
  • Pale Rolls: If your Cheesecake Crescent Rolls aren’t browning enough and are looking a bit pale after the recommended baking time, your oven might be running a bit cool, or they simply might need an extra minute or two in the heat. Double-check that your oven is fully preheated to the correct temperature before you put them in, and don’t be afraid to let them bake until they achieve a deep, rich golden color. A richer color often means a richer flavor and a perfectly crisp texture!

Sweet Cheesecake Crescent Rolls: Quick & Delicious Dessert Idea

Conclusion:

Well, friends, we’ve come to the delicious end of our journey, and I genuinely hope you’re feeling inspired, excited, and maybe just a little bit hungry! If there’s one recipe I could implore you to try this week, it would be this one. I know I might sound a little biased, but I truly believe this isn’t just another dessert; it’s a revelation. The sheer simplicity combined with an absolutely show-stopping flavor profile makes it an undeniable must-try for home bakers of all skill levels. We’re talking about golden, flaky pastry that yields to a warm, rich, and tangy cheesecake filling – a combination so perfect it feels like a warm hug on a plate.

Why This Recipe Will Be Your New Favorite:

What truly sets this recipe apart is its incredible versatility and the sheer joy it brings with minimal effort. Imagine whipping up something that tastes like it took hours of painstaking work, yet it comes together in a fraction of the time. That’s the magic we’re talking about here. The contrasting textures – the crisp, buttery exterior of the crescent roll against the smooth, creamy interior – create an experience that is nothing short of divine. It’s the kind of treat that will have everyone asking for the recipe, convinced you spent your entire afternoon in the kitchen, when in reality, it was a breeze. Trust me, the delightful surprise in every bite, where the familiar comfort of a crescent roll meets the sophisticated indulgence of cheesecake, is simply unbeatable. This isn’t just a dessert; it’s a celebration of simple pleasures executed brilliantly.

Elevate Your Experience: Serving Suggestions and Perfect Pairings

Now that you’re convinced these delectable treats are a must-bake, let’s talk about how to enjoy them to their fullest. These are incredibly versatile! For a morning indulgence, imagine them alongside your favorite cup of freshly brewed coffee or a soothing herbal tea. They make an absolutely fantastic addition to any brunch spread, perhaps served with a side of fresh berries or a dollop of homemade whipped cream. Thinking afternoon snack? They’re perfect as is, or with a light dusting of powdered sugar for that extra touch of elegance. And of course, as a dessert, they shine! Serve them warm with a scoop of vanilla bean ice cream, allowing the warmth of the pastry to gently melt the ice cream, creating a luscious sauce. A drizzle of warm caramel or a raspberry coulis would also elevate them to gourmet status without any extra fuss on your part. The possibilities are truly endless, making these “Cheesecake Crescent Rolls” a star for any occasion.

Unleash Your Creativity: Fun Variations to Try

One of the aspects I adore most about this recipe is how easily it lends itself to customization. Once you’ve mastered the basic technique, feel free to let your imagination run wild! Want to add a citrusy zing? Stir a teaspoon of lemon or orange zest into your cream cheese filling. For a hint of warmth, a pinch of cinnamon or nutmeg would be delightful. Chocolate lovers, rejoice! A handful of mini chocolate chips folded into the filling, or a drizzle of melted chocolate over the top after baking, would be absolutely decadent. You could also experiment with different extracts – almond extract in the filling would give it a subtle, sophisticated twist. Don’t be afraid to try different fruit fillings too; a small dollop of raspberry jam beneath the cheesecake mixture could add a wonderful fruity burst. Each variation creates a unique experience, ensuring these delectable bites never get boring.

I genuinely hope you take the plunge and give this recipe a try. I promise you won’t be disappointed. These Cheesecake Crescent Rolls are more than just a recipe; they’re an experience waiting to happen in your kitchen. Once you’ve baked them, savored them, and inevitably fallen in love with them, I would absolutely love to hear about your experience! Did you stick to the classic, or did you venture into exciting new variations? Please share your triumphs, your serving suggestions, and your creative twists. Happy baking, everyone! I can’t wait to hear how much you adore these!


Sweet Cheesecake Crescent Rolls: Quick & Delicious Dessert Idea

Prepare yourself for a dessert experience that truly has it all! This recipe marries the timeless, creamy indulgence of cheesecake with the golden, flaky comfort of a classic crescent roll. It’s a brilliant culinary hack that brings together two beloved components into one incredibly satisfying and surprisingly simple treat, ideal for any occasion. This dish offers the rich, tangy-sweet creaminess of cheesecake, beautifully encased within buttery, delicate layers of warm, fresh-baked pastry. You’ll be astounded by how quickly and easily you can craft such an impressive and utterly delicious dessert.

Prep Time
25 Minutes
Cook Time
15 Minutes
Total Time
40 Minutes
Servings
16 rolls

Ingredients


Instructions


Important Information

Nutrition Facts (Per Serving)

It is important to consider this information as approximate and not to use it as definitive health advice.

Allergy Information

Please check ingredients for potential allergens and consult a health professional if in doubt.

« Previous Post
Amazing Brownie Bottom Bars: Chewy, Gooey Delight!
Next Post »
Festive Christmas Chai Latte – Your Perfect Holiday Sip!

If you enjoyed this…

Strawberry Mousse Dessert: A Delightful Treat for Every Occasion

Peanut Butter Oat Cups: Easy Recipe & Healthy Snack Idea

Peach Cobbler Cheesecake Bars: A Delicious Dessert Recipe

Primary Sidebar

Browse by Diet

BreakfastDinnerLunchDessertAppetizer

Sweet Peach Yogurt Parfait Delight

One of my fondest memories is from a lazy summer afternoon spent at my grandmother’s house. The sun filtered through the kitchen window, casting a warm glow over the table where she would create her culinary magic. It was during one of those blissful moments that I first tasted her Peach Yogurt Parfait with Honey and Granola. The sweet aroma of ripe peaches mingling with creamy yogurt and the crunch of granola was nothing short of heavenly. It felt like summer captured in a bowl, and I still remember the joy of diving in with a spoon, each layer revealing a new burst of flavor.

When I think about that parfait, I can almost hear the gentle hum of the bees outside, reminding me of the floral notes that honey brings to every bite. The vibrant yellows and soft oranges of the peaches contrast beautifully with the creamy white yogurt and the golden crunch of granola. It’s a dish that not only looks delightful but also tastes like a celebration of fresh, wholesome ingredients.

What makes my version of this Peach Yogurt Parfait special is the careful balance of flavors and textures. I use ripe, juicy peaches, drizzled with locally sourced honey, and a homemade granola that’s bursting with nuts and seeds for an extra crunch. It’s a simple dish, but every layer is crafted with love and attention.

Let me show you exactly how to make this delightful parfait, so you can bring a bit of that summer magic into your kitchen!

Sweet Peach Yogurt Parfait Delight

Why You’ll Love This Recipe

  • Delightfully creamy texture from the Greek yogurt, paired with the juicy sweetness of fresh peaches.
  • Ready in under 20 minutes, making it a quick and satisfying breakfast or snack option.
  • Budget-friendly, using common ingredients that you may already have in your pantry.
  • Customizable with your favorite granola and nuts, allowing you to tailor each parfait to your taste.
  • Perfectly balanced flavors with the bright acidity of lemon juice and the sweetness of honey enhancing the peaches.

Ingredients

  • For the Parfait:
  • 2 cups plain Greek yogurt (or vanilla yogurt for a sweeter option)
  • 2 large ripe peaches, diced (about 2 cups)
  • 1 tablespoon fresh lemon juice (to prevent browning of peaches)
  • 2 tablespoons honey (plus more for drizzling)
  • 1 teaspoon vanilla extract (optional for extra flavor)
  • For the Granola:
  • 1 cup granola (store-bought or homemade; see notes for a simple granola recipe)
  • 1/4 cup sliced almonds (optional for added crunch)
  • 1/4 cup shredded coconut (optional for added flavor)

Let’s dive into some key ingredients that make this Peach Yogurt Parfait so delightful! First, the Greek yogurt is not only creamy but also packed with protein, making it a satisfying option for breakfast or a snack. If you’re looking for a sweeter option, you can easily substitute it with vanilla yogurt, though it may alter the overall flavor balance. Next, the ripe peaches are the star of the show; their natural sweetness shines through, so I recommend choosing peaches that yield slightly to pressure, indicating they’re perfectly ripe. If peaches aren’t in season, feel free to use nectarines or even frozen peaches—just thaw them before use. Finally, honey adds a lovely floral sweetness that ties everything together. If you prefer, maple syrup can serve as a delicious substitute.

Step-by-Step Instructions

  1. Start by preparing the peaches. Wash them thoroughly, then slice and dice them into bite-sized pieces. In a medium bowl, toss the diced peaches with 1 tablespoon of fresh lemon juice to prevent browning. Set aside for about 5 minutes while the lemon juice works its magic.
  2. In a separate bowl, combine the Greek yogurt, 2 tablespoons of honey, and 1 teaspoon of vanilla extract if using. Stir the mixture until smooth and thoroughly blended. This should take about a minute. Avoid overmixing to maintain the creaminess of the yogurt.
  3. Now it’s time to layer your parfait. Grab a clear glass or bowl to showcase your beautiful creation. Start with a generous spoonful of the yogurt mixture at the bottom—about 1/4 cup will do. Use a spoon to spread it evenly.
  4. Add a layer of the diced peaches over the yogurt, ensuring they cover the yogurt completely. You might want to use about half of what you have prepared—roughly 1 cup. This layer should be visually appealing, so arrange the peaches neatly.
  5. Sprinkle 1/4 cup of granola over the peaches. This adds a delightful crunch. Make sure to distribute it evenly to ensure every bite has that satisfying texture. Avoid packing it down too tightly, as you want it to maintain its crunch.
  6. Repeat the layers: spoon in another 1/4 cup of yogurt, followed by another cup of peaches, and another sprinkle of granola. You should have at least two layers, but feel free to add more depending on your glass size.
  7. Finish off your parfait with a drizzle of honey on top for added sweetness and a touch of elegance. If you’re using sliced almonds or shredded coconut, sprinkle them on top now. It adds a lovely visual contrast and extra flavor.
  8. Serve immediately or refrigerate for up to 30 minutes before serving to allow the flavors to meld together. However, I recommend enjoying it fresh to maintain the granola’s crunch.

Pro Tips for the Best Peach Yogurt Parfait With Honey And Granola

  • Make sure to choose ripe peaches for the best flavor and texture. A common mistake is using unripe fruit, which can lead to a less enjoyable parfait. Look for peaches that are fragrant and slightly soft to the touch.
  • Use a clear glass to assemble your parfait; this not only makes for a beautiful presentation but also allows you to see the colorful layers, which adds to the enjoyment of eating it.
  • For an even creamier texture, consider whipping the Greek yogurt with a hand mixer for a couple of minutes before layering. This small adjustment makes a huge difference in mouthfeel.
  • Be mindful of the granola-to-yogurt ratio. Too much granola can overwhelm the parfait, while too little can make it feel too creamy. Aim for about 1/4 cup of granola per layer for the perfect balance.
  • If you’re making this for a gathering, consider preparing the yogurt and peaches ahead of time and layering them just before serving. This ensures the granola stays crunchy!

Variations & Serving Ideas

There are so many ways to get creative with your Peach Yogurt Parfait! For a tropical twist, swap out the peaches for mangoes or pineapples and top with coconut flakes. If you prefer a berry flavor, mix in some blueberries or strawberries with the peaches for added color and taste. For a nutty version, incorporate chopped walnuts or pecans instead of almonds.

As for serving ideas, this parfait pairs beautifully with a side of scrambled eggs for a hearty breakfast or fresh fruit salad for a light lunch. You might also enjoy it alongside whole grain toast with almond butter for an energizing snack. The contrast of flavors and textures will elevate your meal experience!

Storage, Make-Ahead & Reheating

The Peach Yogurt Parfait is best enjoyed fresh, but you can prepare some components ahead of time. Store the layered parfait in an airtight container in the refrigerator for up to 24 hours. However, be cautious; the granola may lose its crunch if stored too long. You can freeze the yogurt and peach mixture for up to 2 months; just remember to thaw it in the refrigerator overnight before serving.

If you plan to enjoy this dish the next day, it can taste even better as the flavors meld together. Just remember to add the granola right before serving to keep its delightful crunch!

Frequently Asked Questions

Can I make Peach Yogurt Parfait With Honey And Granola ahead of time?

Yes — in fact, it tastes even better the next day as the flavors meld. However, I recommend waiting to add the granola until just before serving to maintain its crunch.

What can I substitute for Greek yogurt?

If you prefer a lighter option, you can substitute Greek yogurt with regular yogurt or a dairy-free alternative like coconut yogurt. Just remember that this may alter the creaminess and flavor profile slightly.

Can I use frozen peaches for this parfait?

Absolutely! Just make sure to thaw the frozen peaches before using them. They will still add great flavor, though the texture may be slightly softer than fresh peaches.

How do I make the parfait vegan?

To make a vegan version, substitute the Greek yogurt with a plant-based yogurt alternative, and replace honey with maple syrup or agave nectar. This keeps the parfait sweet while adhering to a vegan diet.

What other fruits can I use in this recipe?

You can mix and match fruits based on your preference. Try using strawberries, blueberries, raspberries, or even bananas. Just make sure to adjust the lemon juice as needed to prevent browning.

Sweet Peach Yogurt Parfait Delight

Final Thoughts

The Peach Yogurt Parfait with Honey and Granola is a delightful blend of creamy yogurt, sweet peaches, and crunchy granola that creates a satisfying and nourishing treat. Each layer bursts with flavor, making it a perfect choice for breakfast or a light dessert.

This is the kind of recipe I come back to again and again, especially when I want something refreshing and wholesome to start my day. The harmony of sweet and tart flavors, combined with the delightful crunch, never fails to lift my spirits!

I encourage you to give this parfait a try and indulge in its comforting goodness. Feel free to share your results or even add your own twist—perhaps a sprinkle of cinnamon or a handful of nuts. Enjoy creating your perfect parfait!

Print
clock clock iconcutlery cutlery iconflag flag iconfolder folder iconinstagram instagram iconpinterest pinterest iconfacebook facebook iconprint print iconsquares squares iconheart heart iconheart solid heart solid icon

Peach Yogurt Parfait


  • Author: Lily author
  • Total Time: 15 minutes
  • Yield: 4 servings 1x
Pin Recipe
Print Recipe

Description

This Peach Yogurt Parfait combines creamy Greek yogurt, juicy peaches, and crunchy granola for a delightful treat. It’s a perfect breakfast or snack that captures the essence of summer in every bite.


Ingredients

Scale
  • For the Parfait:
  • 2 cups plain Greek yogurt (or vanilla yogurt for a sweeter option)
  • 2 large ripe peaches, diced (about 2 cups)
  • 1 tablespoon fresh lemon juice (to prevent browning of peaches)
  • 2 tablespoons honey (plus more for drizzling)
  • 1 teaspoon vanilla extract (optional for extra flavor)
  • For the Granola:
  • 1 cup granola (store-bought or homemade; see notes for a simple granola recipe)
  • 1/4 cup sliced almonds (optional for added crunch)
  • 1/4 cup shredded coconut (optional for added flavor)

Instructions

  1. Start by preparing the peaches. Wash them thoroughly, then slice and dice them into bite-sized pieces. In a medium bowl, toss the diced peaches with 1 tablespoon of fresh lemon juice to prevent browning. Set aside for about 5 minutes while the lemon juice works its magic.
  2. In a separate bowl, combine the Greek yogurt, 2 tablespoons of honey, and 1 teaspoon of vanilla extract if using. Stir the mixture until smooth and thoroughly blended. This should take about a minute. Avoid overmixing to maintain the creaminess of the yogurt.
  3. Now it’s time to layer your parfait. Grab a clear glass or bowl to showcase your beautiful creation. Start with a generous spoonful of the yogurt mixture at the bottom—about 1/4 cup will do. Use a spoon to spread it evenly.
  4. Add a layer of the diced peaches over the yogurt, ensuring they cover the yogurt completely. You might want to use about half of what you have prepared—roughly 1 cup. This layer should be visually appealing, so arrange the peaches neatly.
  5. Sprinkle 1/4 cup of granola over the peaches. This adds a delightful crunch. Make sure to distribute it evenly to ensure every bite has that satisfying texture. Avoid packing it down too tightly, as you want it to maintain its crunch.
  6. Repeat the layers: spoon in another 1/4 cup of yogurt, followed by another cup of peaches, and another sprinkle of granola. You should have at least two layers, but feel free to add more depending on your glass size.
  7. Finish off your parfait with a drizzle of honey on top for added sweetness and a touch of elegance. If you’re using sliced almonds or shredded coconut, sprinkle them on top now. It adds a lovely visual contrast and extra flavor.
  8. Serve immediately or refrigerate for up to 30 minutes before serving to allow the flavors to meld together. However, I recommend enjoying it fresh to maintain the granola’s crunch.
  • Prep Time: 15 mins
  • Cook Time: 0 mins
  • Category: Breakfast
  • Method: No-cook
  • Cuisine: American

Nutrition

  • Serving Size: 1 parfait
  • Calories: 250
  • Sugar: 20 g
  • Sodium: 50 mg
  • Fat: 5 g
  • Saturated Fat: 2 g
  • Unsaturated Fat: 3 g
  • Trans Fat: 0 g
  • Carbohydrates: 40 g
  • Fiber: 3 g
  • Protein: 10 g
  • Cholesterol: 10 mg

Keywords: Choose ripe peaches for the best flavor and texture. Use a clear glass for a beautiful presentation. For creaminess, consider whipping the yogurt before layering. Be mindful of the granola-to-yogurt ratio. Prepare yogurt and peaches ahead of time for gatherings, layering just before serving.

Did you make this recipe?

Share a photo and tag us — we can't wait to see what you've made!

Sun-Kissed Frozen Orange Cream Slush

As a child, summer days felt like they lasted forever. I remember the sticky heat wrapping around me as I played outside, my laughter mingling with the sounds of the neighborhood. But nothing could cool me down quite like the moment I’d spot my grandmother, laboring over her blender, whipping up her famous Frozen Orange Creamsicle Slush. That vibrant orange treat, with its frosty texture and sweet citrus aroma, was like a burst of sunshine in a cup. Just one sip, and I could feel the coolness wash over me, sparking pure joy.

This Frozen Orange Creamsicle Slush has a way of making you feel like a kid again. Its creamy, dreamy consistency is a delightful balance of bright orange and soft vanilla, inviting you to dive right in. The refreshing tang of orange dances on your tongue, while the smooth creaminess envelops you in a comforting embrace. It’s a nostalgic treat that’s perfect for hot summer afternoons or anytime you need a little pick-me-up.

What makes my version of this slush stand out is the addition of a hint of vanilla bean, which elevates the flavor and adds an extra layer of richness. Plus, it’s super easy to whip up with just a few simple ingredients that you probably already have on hand! So, if you’re ready to relive those sun-soaked memories, let me show you exactly how to make it.

Sun-Kissed Frozen Orange Cream Slush

Why You’ll Love This Recipe

  • Each slush is a perfect blend of creamy vanilla and zesty orange, creating a nostalgic flavor reminiscent of summer days.
  • This refreshing treat is ready in under 15 minutes, making it an ideal quick dessert for unexpected guests or hot afternoons.
  • With just 8 simple ingredients, it’s budget-friendly, ensuring you don’t have to break the bank to enjoy a delicious slush.
  • The slush has a perfectly smooth texture, thanks to the combination of ice and ice cream, providing a delightful contrast to the bright citrus flavors.
  • It’s highly customizable; you can easily adjust the sweetness and add fresh herbs for a unique twist that suits your taste.

Ingredients

  • 2 cups orange juice (freshly squeezed or store-bought)
  • 1 cup vanilla ice cream
  • 1 cup crushed ice
  • 1/2 cup milk (whole or 2%)
  • 1/4 cup granulated sugar (adjust based on sweetness preference)
  • 1 teaspoon vanilla extract
  • Zest of 1 orange (for added flavor)
  • Fresh orange slices and mint leaves (for garnish)

The star of this Frozen Orange Creamsicle Slush is the orange juice, which provides the vibrant, citrusy base. Freshly squeezed juice will yield the brightest flavor, but store-bought options can be just as convenient. If you’re opting for store-bought, choose 100% pure juice with no added sugars for the best results. Another essential ingredient is the vanilla ice cream; it adds creaminess and sweetness. You can substitute it with dairy-free ice cream if you’re looking for a vegan option. Whole or 2% milk complements the ice cream, creating a smooth blend. If you want a lower-calorie version, almond or oat milk can be good alternatives.

Lastly, the granulated sugar can be adjusted based on your sweetness preference. If you prefer a more natural sweetener, consider using honey or agave syrup. The orange zest enhances the flavor profile, providing an aromatic pop that brings the whole slush together. Don’t skip it! It adds an extra layer of brightness that makes this slush truly special.

Step-by-Step Instructions

  1. Start by preparing your ingredients. Gather 2 cups of orange juice, 1 cup of vanilla ice cream, and 1 cup of crushed ice. Make sure the ice is finely crushed, as larger chunks can make blending difficult.
  2. In a blender, combine the orange juice, vanilla ice cream, crushed ice, and 1/2 cup of milk. Add 1/4 cup of granulated sugar and 1 teaspoon of vanilla extract. If you like a sweeter slush, consider adding a bit more sugar at this stage.
  3. Add the zest of 1 orange to the blender. This step is crucial for enhancing the citrus flavor of your slush. Make sure not to include the bitter white pith—only the flavorful zest.
  4. Blend the mixture on medium-high speed for about 30-45 seconds. Stop once the ingredients are fully combined and the slush has a smooth, even consistency. If you notice large chunks of ice, blend for an additional 10-15 seconds. Avoid over-blending, as this can make the slush too liquidy.
  5. Once blended, taste the slush. If it needs more sweetness, add a little more sugar and blend for a few more seconds. If it’s too thick, you can add a splash of milk to reach your desired consistency.
  6. Pour the slush into glasses. This recipe typically serves 4, but you can easily double it for larger gatherings. Use a spoon to help guide the slush into the glasses if needed.
  7. Garnish each serving with fresh orange slices and mint leaves. The mint not only adds a pop of color but also a refreshing aroma that complements the citrus flavors beautifully.
  8. Serve immediately and enjoy! If you’ve made extra, you can refrigerate it for a short time, but it’s best enjoyed fresh.

Pro Tips for the Best Frozen Orange Creamsicle Slush

  • Don’t skip the orange zest! It’s a game-changer for flavor. Always zest before juicing to make it easier.
  • Use a high-powered blender for the best texture. A standard blender may struggle with ice, leading to uneven consistency. If you have a food processor, that can work too, but ensure the ice is finely crushed.
  • Adjust the ice-to-liquid ratio carefully. If your slush is too thick, it won’t blend well. Start with less ice and add more until you reach your preferred texture.
  • Be cautious with the sugar! Always start with the lower amount, as you can easily add more, but it’s hard to fix an overly sweet slush.
  • For a fun twist, consider adding a splash of coconut milk or a handful of fresh fruit like strawberries or pineapple. This not only enhances the flavor but also adds a beautiful color contrast.

Variations & Serving Ideas

There are countless ways to put a spin on your Frozen Orange Creamsicle Slush. Consider making a tropical version by adding in some pineapple juice or coconut milk for a delightful tropical twist. If you’re feeling adventurous, try incorporating a handful of frozen mango or peach slices for added sweetness. For a lighter version, swap out the vanilla ice cream for Greek yogurt for a creamy yet tangy alternative.

As for serving ideas, this refreshing slush pairs wonderfully with light summer dishes like grilled chicken skewers, fish tacos, or a simple salad topped with citrus vinaigrette. The bright, zesty flavors of the slush complement these dishes perfectly, making them an ideal pairing for a sunny day.

Storage, Make-Ahead & Reheating

This Frozen Orange Creamsicle Slush is best enjoyed fresh, but if you have leftovers, you can store them in an airtight container in the fridge for up to 2 days. Just keep in mind that the slush may lose some of its texture over time as the ice melts. It doesn’t freeze well, as the ice will turn into a solid block. If you must freeze it, blend again after thawing to restore the slushy consistency. This treat is best the day you make it, as the flavors meld together beautifully overnight, enhancing its deliciousness.

Frequently Asked Questions

Can I make Frozen Orange Creamsicle Slush ahead of time?

Yes — in fact, it tastes even better the next day as the flavors meld. However, it’s best to enjoy it fresh, as the texture can change if stored for too long. If you need to prepare it ahead, keep it in the fridge and re-blend before serving.

What kind of orange juice should I use?

For the best flavor, use freshly squeezed orange juice. However, if you’re short on time, opt for 100% pure store-bought juice without added sugars. This will ensure that your slush remains flavorful and refreshing.

Can I substitute the vanilla ice cream?

Absolutely! If you’re looking for a dairy-free option, coconut milk ice cream or a non-dairy vanilla ice cream can work wonderfully. They will still provide the creamy texture and sweetness you desire.

How can I adjust the sweetness of my slush?

You can easily adjust the sweetness by modifying the amount of sugar added. Start with 1/4 cup and taste the mixture before blending. If you prefer it sweeter, add more sugar gradually until it reaches your desired level.

What should I do if my slush is too thick?

If your slush is too thick, simply add a splash of milk or orange juice and blend again. This will help achieve a more drinkable consistency while maintaining the slushy texture. Adjust gradually to reach your preferred thickness.

Sun-Kissed Frozen Orange Cream Slush

Final Thoughts

The Frozen Orange Creamsicle Slush is a delightful blend of refreshing citrus and creamy goodness, making it a perfect treat for warm days or any time you crave a taste of nostalgia. The way the bright orange flavor dances with the creamy texture truly elevates this slush, transforming it into a satisfying escape from the everyday.

This is the kind of recipe I come back to again and again, especially when I’m looking to cool down or impress guests at a summer gathering. It’s simple to make and always brings smiles all around! I encourage you to try this recipe for yourself—don’t hesitate to share your results or even put your own spin on it. Happy slushing!

Print
clock clock iconcutlery cutlery iconflag flag iconfolder folder iconinstagram instagram iconpinterest pinterest iconfacebook facebook iconprint print iconsquares squares iconheart heart iconheart solid heart solid icon

Frozen Orange Creamsicle Slush


  • Author: Lily author
  • Total Time: 15 minutes
  • Yield: 4 servings 1x
Pin Recipe
Print Recipe

Description

This Frozen Orange Creamsicle Slush is a refreshing treat that combines creamy vanilla and zesty orange flavors. Perfect for hot summer days, it brings back nostalgic memories with every sip.


Ingredients

Scale
  • 2 cups orange juice (freshly squeezed or store-bought)
  • 1 cup vanilla ice cream
  • 1 cup crushed ice
  • 1/2 cup milk (whole or 2%)
  • 1/4 cup granulated sugar (adjust based on sweetness preference)
  • 1 teaspoon vanilla extract
  • Zest of 1 orange (for added flavor)
  • Fresh orange slices and mint leaves (for garnish)

Instructions

  1. Start by preparing your ingredients. Gather 2 cups of orange juice, 1 cup of vanilla ice cream, and 1 cup of crushed ice. Make sure the ice is finely crushed, as larger chunks can make blending difficult.
  2. In a blender, combine the orange juice, vanilla ice cream, crushed ice, and 1/2 cup of milk. Add 1/4 cup of granulated sugar and 1 teaspoon of vanilla extract. If you like a sweeter slush, consider adding a bit more sugar at this stage.
  3. Add the zest of 1 orange to the blender. This step is crucial for enhancing the citrus flavor of your slush. Make sure not to include the bitter white pith—only the flavorful zest.
  4. Blend the mixture on medium-high speed for about 30-45 seconds. Stop once the ingredients are fully combined and the slush has a smooth, even consistency. If you notice large chunks of ice, blend for an additional 10-15 seconds. Avoid over-blending, as this can make the slush too liquidy.
  5. Once blended, taste the slush. If it needs more sweetness, add a little more sugar and blend for a few more seconds. If it’s too thick, you can add a splash of milk to reach your desired consistency.
  6. Pour the slush into glasses. This recipe typically serves 4, but you can easily double it for larger gatherings. Use a spoon to help guide the slush into the glasses if needed.
  7. Garnish each serving with fresh orange slices and mint leaves. The mint not only adds a pop of color but also a refreshing aroma that complements the citrus flavors beautifully.
  8. Serve immediately and enjoy! If you’ve made extra, you can refrigerate it for a short time, but it's best enjoyed fresh.
  • Prep Time: 15 min
  • Cook Time: 0 min
  • Category: Dessert
  • Method: Blending
  • Cuisine: American

Nutrition

  • Serving Size: 1 serving
  • Calories: 200
  • Sugar: 30 g
  • Sodium: 50 mg
  • Fat: 5 g
  • Saturated Fat: 3 g
  • Unsaturated Fat: 2 g
  • Trans Fat: 0 g
  • Carbohydrates: 40 g
  • Fiber: 1 g
  • Protein: 2 g
  • Cholesterol: 20 mg

Keywords: Don't skip the orange zest! It's a game-changer for flavor. Always zest before juicing to make it easier.

Did you make this recipe?

Share a photo and tag us — we can't wait to see what you've made!

Zesty Lemon Poppy Seed Delight

One rainy afternoon, I found myself in my grandmother’s cozy kitchen, the kind that always smelled like warmth and love. She was whipping up her famous Lemon Poppy Seed Loaf, a recipe that had been passed down through generations. As the batter came together, the zesty aroma of fresh lemons filled the air, mingling perfectly with the nutty fragrance of poppy seeds. I can still picture her, apron-clad, as she expertly drizzled a vibrant citrus icing over the loaf, creating a glossy, sun-kissed finish that beckoned us to dive in. It was a moment that sparked my own passion for baking, and this recipe has become a cherished staple in my home ever since.

When you take a bite of this Lemon Poppy Seed Loaf, it’s like a burst of sunshine on your palate. The loaf is beautifully golden, with a tender crumb that melts in your mouth. Each slice is speckled with tiny poppy seeds, adding a delightful crunch that contrasts beautifully with the tangy sweetness of the lemon. And that citrus icing? It’s the finishing touch that elevates this loaf from ordinary to extraordinary, with its bright, zesty flavor dancing on your taste buds.

This recipe stands out because it embraces simplicity while delivering on flavor. I’ve added a hint of vanilla to the batter, enhancing the overall taste and making it even more indulgent. Trust me, once you make this Lemon Poppy Seed Loaf With Citrus Icing, it’ll become a go-to in your baking repertoire.

So, let me show you exactly how to make it!

Zesty Lemon Poppy Seed Delight

Why You’ll Love This Recipe

  • Moist and tender crumb that melts in your mouth, thanks to the perfect balance of butter and buttermilk.
  • Bright, zesty lemon flavor paired with crunchy poppy seeds, creating a delightful texture and taste experience.
  • Easy to whip up in just about an hour, perfect for last-minute gatherings or a cozy afternoon treat.
  • Budget-friendly with everyday ingredients, making it an accessible option for all home bakers.
  • The citrus icing adds a sweet tang that elevates the loaf, turning a simple recipe into a showstopper!

Ingredients

  • 1 ½ cups (190g) all-purpose flour
  • 1 teaspoon baking powder
  • ½ teaspoon baking soda
  • ½ teaspoon salt
  • 3 tablespoons poppy seeds
  • ½ cup (115g) unsalted butter, softened to room temperature
  • 1 cup (200g) granulated sugar
  • 2 large eggs
  • 1 teaspoon vanilla extract
  • 1 teaspoon lemon zest (from about 1 medium lemon)
  • ½ cup (120ml) buttermilk
  • 2 tablespoons fresh lemon juice

For the Citrus Icing:

  • 1 cup (120g) powdered sugar
  • 2 tablespoons fresh lemon juice
  • 1 tablespoon orange juice
  • 1 teaspoon lemon zest (for garnish, optional)

Let’s dive into the key ingredients that make this Lemon Poppy Seed Loaf so special. The all-purpose flour provides the structure and base for the loaf, while the baking powder and baking soda ensure it rises perfectly, giving the loaf a light texture. For a gluten-free variation, you could substitute the flour with a gluten-free all-purpose blend. Poppy seeds not only add a delightful crunch but also contribute to the unique flavor profile that pairs well with the citrus notes.

Unsalted butter is crucial for achieving the buttery richness that makes this loaf so moist. If you’re looking for a dairy-free option, coconut oil or a vegan butter can be used instead. The buttermilk is another essential component, providing acidity that activates the baking soda for a fluffy texture. If you don’t have buttermilk on hand, you can easily make a substitute by mixing ½ cup of milk with 1 tablespoon of vinegar or lemon juice and letting it sit for about 5 minutes.

Step-by-Step Instructions

  1. Preheat your oven to 350°F (175°C). Grease a 9×5-inch loaf pan or line it with parchment paper for easy removal later.
  2. In a medium mixing bowl, whisk together 1 ½ cups of all-purpose flour, 1 teaspoon of baking powder, ½ teaspoon of baking soda, ½ teaspoon of salt, and 3 tablespoons of poppy seeds. This helps to evenly distribute the baking agents and ensures a uniform rise.
  3. In a large mixing bowl, cream together ½ cup of softened unsalted butter and 1 cup of granulated sugar using an electric mixer on medium speed for about 3-4 minutes, until the mixture is light and fluffy. Make sure to scrape down the sides of the bowl occasionally.
  4. Add 2 large eggs, 1 teaspoon of vanilla extract, and 1 teaspoon of lemon zest to the creamed butter and sugar, mixing until fully combined. You want a smooth consistency, so ensure there are no lumps of butter.
  5. In a small bowl, combine ½ cup of buttermilk and 2 tablespoons of fresh lemon juice. Alternately add the dry ingredients and buttermilk mixture to the butter mixture, starting and ending with the dry ingredients. Mix just until combined; do not overmix, as this can lead to a dense loaf.
  6. Pour the batter into the prepared loaf pan. Smooth the top with a spatula, ensuring it’s even. Bake in the preheated oven for 50-60 minutes, or until a toothpick inserted in the center comes out clean. The edges should be lightly golden brown, and the center should feel just set.
  7. Once baked, remove the loaf from the oven and allow it to cool in the pan for about 10 minutes. Then, transfer it to a wire rack to cool completely. Resist the urge to slice too soon, as it will be crumbly if it’s still warm.
  8. While the loaf is cooling, prepare the citrus icing. In a medium bowl, whisk together 1 cup of powdered sugar, 2 tablespoons of fresh lemon juice, and 1 tablespoon of orange juice until smooth. If the icing is too thick, you can add a little more juice to reach your desired consistency.
  9. Once the loaf is completely cool, drizzle the citrus icing over the top. If you like, sprinkle with an additional teaspoon of lemon zest for an extra pop of flavor and color.

Pro Tips for the Best Lemon Poppy Seed Loaf With Citrus Icing

  • Be careful not to overmix your batter; this is a common mistake that can lead to a dense loaf. Mix just until the dry ingredients are incorporated for a light and fluffy texture.
  • Use room temperature ingredients, especially the butter and eggs. This helps to create a smoother batter and ensures even baking. Take your eggs out of the fridge about 30 minutes before you start.
  • For a more pronounced lemon flavor, consider adding a little lemon extract in addition to the zest and juice. Just a half teaspoon can elevate the citrus notes significantly.
  • When measuring your flour, spoon it into the measuring cup and level it off with a knife instead of scooping directly from the bag. This prevents packing and ensures you don’t end up with a dry loaf.
  • Invest in a good quality loaf pan; it makes a difference in heat distribution, which ensures even baking. If your pan is dark-coated, reduce the oven temperature by 25°F to prevent over-browning.

Variations & Serving Ideas

For a delightful twist, consider adding blueberries or raspberries to the batter for a fruity burst of flavor. You can also experiment with different citrus fruits—try lime or grapefruit zest and juice for a refreshing change. For a healthier option, substitute half of the all-purpose flour with whole wheat flour for added fiber without compromising too much on texture.

This Lemon Poppy Seed Loaf pairs beautifully with a light salad, such as a mixed greens salad with a vinaigrette, or a cup of tea for a cozy afternoon treat. It also complements a creamy cheese platter, as the acidity of the loaf balances rich cheeses perfectly. Lastly, a scoop of vanilla ice cream on the side creates a delightful contrast of temperatures and flavors!

Storage, Make-Ahead & Reheating

This Lemon Poppy Seed Loaf can be stored at room temperature for up to 3 days if wrapped tightly in plastic wrap. If you want to keep it longer, it freezes well for up to 3 months. To freeze, wrap the loaf tightly in plastic wrap and then in aluminum foil to prevent freezer burn.

When you’re ready to enjoy it again, simply thaw it in the fridge overnight. Reheat individual slices in the microwave for 15-20 seconds or in a toaster oven until warmed through. Interestingly, many people find that this loaf tastes even better the next day, as the flavors have time to meld!

Frequently Asked Questions

Can I make Lemon Poppy Seed Loaf With Citrus Icing ahead of time?

Yes — in fact, it tastes even better the next day! You can make the loaf a day in advance, allowing the flavors to develop. Just be sure to store it in an airtight container to maintain its moisture.

Can I substitute the poppy seeds?

Absolutely! If you don’t have poppy seeds on hand or prefer an alternative, you can use sesame seeds for a similar crunch or omit them entirely for a smooth loaf.

What can I use instead of buttermilk?

If you don’t have buttermilk, you can easily create a substitute by mixing ½ cup of milk (dairy or plant-based) with 1 tablespoon of vinegar or lemon juice. Let it sit for 5 minutes before using in the recipe.

How can I make this recipe gluten-free?

To make a gluten-free version of this Lemon Poppy Seed Loaf, substitute the all-purpose flour with a gluten-free all-purpose flour blend. Just ensure that the blend contains a binding agent like xanthan gum for the best results.

What is the best way to store leftover loaf?

Leftover Lemon Poppy Seed Loaf should be stored in an airtight container at room temperature for up to 3 days. For longer storage, wrap it tightly and freeze for up to 3 months. Thaw it before serving for the best texture.

Zesty Lemon Poppy Seed Delight

Final Thoughts

The Lemon Poppy Seed Loaf with Citrus Icing is truly a delightful treat that brings a burst of brightness to any occasion. The zesty lemon flavor combined with the subtle crunch of poppy seeds creates a satisfying balance, while the citrus icing adds a touch of sweetness that perfectly complements the loaf’s tanginess.

This is the kind of recipe I come back to again and again, especially when I want to brighten up a gloomy day or celebrate a small victory. The aroma that fills the kitchen as it bakes is absolutely heavenly! I encourage you to give this recipe a try; you might just find it becoming a beloved staple in your home. Don’t forget to share your results or even add your own unique twist—I can’t wait to see what you create!

Print
clock clock iconcutlery cutlery iconflag flag iconfolder folder iconinstagram instagram iconpinterest pinterest iconfacebook facebook iconprint print iconsquares squares iconheart heart iconheart solid heart solid icon

Lemon Poppy Seed Loaf


  • Author: Lily author
  • Total Time: 23 minute
  • Yield: 1 loaf 1x
Pin Recipe
Print Recipe

Description

This Lemon Poppy Seed Loaf is a delightful treat that combines zesty lemon flavor with crunchy poppy seeds. Topped with a citrus icing, it’s perfect for any occasion.


Ingredients

Scale
  • 1 ½ cups (190g) all-purpose flour
  • 1 teaspoon baking powder
  • ½ teaspoon baking soda
  • ½ teaspoon salt
  • 3 tablespoons poppy seeds
  • ½ cup (115g) unsalted butter, softened to room temperature
  • 1 cup (200g) granulated sugar
  • 2 large eggs
  • 1 teaspoon vanilla extract
  • 1 teaspoon lemon zest (from about 1 medium lemon)
  • ½ cup (120ml) buttermilk
  • 2 tablespoons fresh lemon juice
  • 1 cup (120g) powdered sugar
  • 2 tablespoons fresh lemon juice
  • 1 tablespoon orange juice
  • 1 teaspoon lemon zest (for garnish, optional)

Instructions

  1. Preheat your oven to 350°F (175°C). Grease a 9×5-inch loaf pan or line it with parchment paper for easy removal later.
  2. In a medium mixing bowl, whisk together 1 ½ cups of all-purpose flour, 1 teaspoon of baking powder, ½ teaspoon of baking soda, ½ teaspoon of salt, and 3 tablespoons of poppy seeds. This helps to evenly distribute the baking agents and ensures a uniform rise.
  3. In a large mixing bowl, cream together ½ cup of softened unsalted butter and 1 cup of granulated sugar using an electric mixer on medium speed for about 3-4 minutes, until the mixture is light and fluffy. Make sure to scrape down the sides of the bowl occasionally.
  4. Add 2 large eggs, 1 teaspoon of vanilla extract, and 1 teaspoon of lemon zest to the creamed butter and sugar, mixing until fully combined. You want a smooth consistency, so ensure there are no lumps of butter.
  5. In a small bowl, combine ½ cup of buttermilk and 2 tablespoons of fresh lemon juice. Alternately add the dry ingredients and buttermilk mixture to the butter mixture, starting and ending with the dry ingredients. Mix just until combined; do not overmix, as this can lead to a dense loaf.
  6. Pour the batter into the prepared loaf pan. Smooth the top with a spatula, ensuring it’s even. Bake in the preheated oven for 50-60 minutes, or until a toothpick inserted in the center comes out clean. The edges should be lightly golden brown, and the center should feel just set.
  7. Once baked, remove the loaf from the oven and allow it to cool in the pan for about 10 minutes. Then, transfer it to a wire rack to cool completely. Resist the urge to slice too soon, as it will be crumbly if it’s still warm.
  8. While the loaf is cooling, prepare the citrus icing. In a medium bowl, whisk together 1 cup of powdered sugar, 2 tablespoons of fresh lemon juice, and 1 tablespoon of orange juice until smooth. If the icing is too thick, you can add a little more juice to reach your desired consistency.
  9. Once the loaf is completely cool, drizzle the citrus icing over the top. If you like, sprinkle with an additional teaspoon of lemon zest for an extra pop of flavor and color.
  • Prep Time: 15 mins
  • Cook Time: 50-60 mins
  • Category: Dessert
  • Method: Baking
  • Cuisine: American

Nutrition

  • Serving Size: 1 slice
  • Calories: 200
  • Sugar: 15 g
  • Sodium: 150 mg
  • Fat: 8 g
  • Saturated Fat: 5 g
  • Unsaturated Fat: 3 g
  • Trans Fat: 0 g
  • Carbohydrates: 30 g
  • Fiber: 1 g
  • Protein: 3 g
  • Cholesterol: 40 mg

Keywords: Be careful not to overmix your batter; this is a common mistake that can lead to a dense loaf. Use room temperature ingredients for a smoother batter and even baking.

Did you make this recipe?

Share a photo and tag us — we can't wait to see what you've made!

  • Privacy Policy
  • Terms Of Service
  • Contact
  • About
  • GDPR

Copyright © 2025 Homesmad