Sweet Chili Chicken, a symphony of sweet, spicy, and savory flavors, is about to become your new weeknight obsession! Imagine tender, juicy chicken pieces, glazed in a vibrant, sticky sauce that dances on your tongue. Are you ready to experience a culinary adventure that’s both incredibly delicious and surprisingly easy to make?
While the exact origins of Sweet Chili Chicken are debated, the combination of sweet and spicy flavors has deep roots in Southeast Asian cuisine. Many believe it evolved from traditional Thai and Malaysian dishes, where chilies, garlic, and sweetness from palm sugar or honey are frequently used to create complex and balanced sauces. Over time, this flavor profile has been adapted and refined, resulting in the globally beloved dish we know today.
What makes this dish so irresistible? It’s the perfect balance of contrasting tastes and textures. The sweetness, often derived from sugar or honey, beautifully complements the fiery kick of chili peppers. The chicken, whether baked, fried, or grilled, provides a satisfying protein base that soaks up all that glorious sauce. People adore Sweet Chili Chicken because it’s incredibly versatile – serve it over rice, noodles, or even in lettuce wraps for a light and refreshing meal. Plus, it’s a fantastic crowd-pleaser, guaranteed to impress your family and friends with its bold and unforgettable flavor. Get ready to unlock the secrets to creating the perfect Sweet Chili Chicken right in your own kitchen!

Ingredients:
- For the Chicken:
- 2 lbs boneless, skinless chicken breasts, cut into 1-inch cubes
- 1/2 cup cornstarch
- 1/4 cup all-purpose flour
- 1 teaspoon garlic powder
- 1 teaspoon onion powder
- 1/2 teaspoon paprika
- 1/4 teaspoon salt
- 1/4 teaspoon black pepper
- 2 large eggs, beaten
- 1/4 cup milk
- Vegetable oil, for frying
- For the Sweet Chili Sauce:
- 1 cup sweet chili sauce (store-bought or homemade)
- 2 tablespoons rice vinegar
- 1 tablespoon soy sauce (low sodium preferred)
- 1 tablespoon honey or maple syrup (optional, for extra sweetness)
- 1 teaspoon sesame oil
- 1 clove garlic, minced
- 1/2 teaspoon red pepper flakes (adjust to taste)
- 1 tablespoon cornstarch
- 2 tablespoons water
- For Serving (Optional):
- Cooked white rice or brown rice
- Sesame seeds, for garnish
- Chopped green onions, for garnish
- Steamed broccoli or other vegetables
Preparing the Chicken
Alright, let’s get started with the chicken! This is where we’ll create that crispy, golden coating that makes this dish so irresistible. Don’t worry, it’s easier than it looks!
- Cut the Chicken: First things first, make sure your chicken breasts are cut into even, bite-sized cubes. About 1-inch is perfect. This ensures they cook evenly and are easy to eat.
- Prepare the Dry Coating: In a large bowl, whisk together the cornstarch, flour, garlic powder, onion powder, paprika, salt, and pepper. This is our secret weapon for that crispy texture! Make sure everything is well combined.
- Prepare the Wet Mixture: In a separate bowl, whisk together the eggs and milk. This will help the dry coating adhere to the chicken.
- Coat the Chicken: Now comes the fun part! Take a handful of chicken cubes and toss them into the dry coating mixture. Make sure each piece is thoroughly coated. You can use your hands or a large spoon to do this.
- Dip in Egg Mixture: Next, dip the coated chicken pieces into the egg mixture, ensuring they are fully submerged. Let the excess drip off.
- Double Coat (Optional, but Recommended!): For an extra crispy coating, return the chicken to the dry coating mixture and toss again. This double coating makes a HUGE difference!
- Set Aside: Place the coated chicken on a plate or baking sheet while you prepare the oil for frying. This prevents the coating from getting soggy.
Making the Sweet Chili Sauce
While the chicken is resting, let’s whip up that amazing sweet chili sauce. You can use store-bought, but making it from scratch is surprisingly easy and allows you to customize the flavor to your liking!
- Combine Sauce Ingredients: In a medium saucepan, combine the sweet chili sauce, rice vinegar, soy sauce, honey (if using), sesame oil, minced garlic, and red pepper flakes.
- Simmer the Sauce: Place the saucepan over medium heat and bring the sauce to a gentle simmer. Stir occasionally to prevent sticking.
- Thicken the Sauce: In a small bowl, whisk together the cornstarch and water to create a slurry. This will thicken the sauce.
- Add Slurry to Sauce: Slowly pour the cornstarch slurry into the simmering sauce, whisking constantly. Continue to simmer for 1-2 minutes, or until the sauce has thickened to your desired consistency.
- Taste and Adjust: Taste the sauce and adjust the seasonings as needed. If you prefer a sweeter sauce, add a little more honey. If you want more heat, add more red pepper flakes.
- Keep Warm: Remove the sauce from the heat and keep it warm until the chicken is ready. You can cover the saucepan to prevent the sauce from drying out.
Frying the Chicken
Now for the main event – frying the chicken! This is where the magic happens and we transform those coated chicken cubes into crispy, golden nuggets of deliciousness. Safety first, though! Be careful when working with hot oil.
- Heat the Oil: Pour enough vegetable oil into a large, deep skillet or pot to reach a depth of about 2-3 inches. Heat the oil over medium-high heat until it reaches a temperature of 350-375°F (175-190°C). You can use a deep-fry thermometer to monitor the temperature. If you don’t have a thermometer, you can test the oil by dropping a small piece of chicken into it. If it sizzles and turns golden brown in a few minutes, the oil is ready.
- Fry in Batches: Carefully add the coated chicken to the hot oil in batches, being careful not to overcrowd the skillet. Overcrowding will lower the oil temperature and result in soggy chicken.
- Cook Until Golden Brown: Fry the chicken for 3-5 minutes per batch, turning occasionally, until it is golden brown and cooked through. The internal temperature of the chicken should reach 165°F (74°C).
- Remove and Drain: Use a slotted spoon or spider to remove the fried chicken from the oil and place it on a wire rack lined with paper towels to drain excess oil.
- Repeat: Repeat the frying process with the remaining chicken, making sure to maintain the oil temperature.
Assembling and Serving
Almost there! Now it’s time to bring everything together and enjoy our hard work. This is the best part, right?
- Combine Chicken and Sauce: In a large bowl, combine the fried chicken and the sweet chili sauce. Toss gently to coat the chicken evenly with the sauce.
- Serve Immediately: Serve the sweet chili chicken immediately over cooked white rice or brown rice.
- Garnish (Optional): Garnish with sesame seeds and chopped green onions for added flavor and visual appeal.
- Add Vegetables (Optional): Serve with steamed broccoli or other vegetables for a complete and balanced meal.
Tips for Success:
- Don’t Overcrowd the Pan: Frying in batches is crucial for achieving crispy chicken. Overcrowding lowers the oil temperature and results in soggy chicken.
- Maintain Oil Temperature: Use a deep-fry thermometer to monitor the oil temperature and adjust the heat as needed to maintain a consistent temperature of 350-375°F (175-190°C).
- Double Coating for Extra Crispiness: The double coating of cornstarch and flour makes a HUGE difference in the crispiness of the chicken. Don’t skip this step!
- Adjust Sweetness and Heat: Taste the sweet chili sauce and adjust the sweetness and heat to your liking. Add more honey for a sweeter sauce or more red pepper flakes for a spicier sauce.
- Serve Immediately: Sweet chili chicken is best served immediately while the chicken is still crispy and the sauce is warm.
Variations:
- Spicy Sweet Chili Chicken: Add more red pepper flakes to the sweet chili sauce for a spicier kick. You can also add a pinch of cayenne pepper to the dry coating for the chicken.
- Honey Garlic Sweet Chili Chicken: Add 1-2 tablespoons of honey and 1-2 cloves of minced garlic to the sweet chili sauce for a sweeter and more flavorful sauce.
- Sesame Sweet Chili Chicken: Add 1-2 tablespoons of sesame seeds to the sweet chili sauce and sprinkle sesame seeds over the finished dish for a nutty flavor and added texture.
- Baked Sweet Chili Chicken: For a healthier option, you can bake the chicken instead of frying it. Preheat your oven to 400°F (200°C). Place the coated chicken on a baking sheet lined with parchment paper and bake for 20-25 minutes, or until golden brown and cooked through. Toss with the sweet chili sauce before serving.
Conclusion:
And there you have it! This Sweet Chili Chicken recipe is truly a game-changer, and I genuinely believe it deserves a permanent spot in your regular dinner rotation. Why? Because it’s the perfect trifecta of flavor, convenience, and crowd-pleasing appeal. We’re talking about succulent chicken, coated in a vibrant, sweet, and subtly spicy sauce that will tantalize your taste buds and leave you craving more. It’s quick enough for a weeknight meal, yet impressive enough to serve to guests. What more could you ask for?
But the best part? It’s incredibly versatile! While I’ve outlined my favorite way to prepare it, feel free to experiment and make it your own.
Serving Suggestions and Variations:
* Classic Rice Bowl: Serve it over a bed of fluffy jasmine rice for a simple and satisfying meal. Garnish with chopped green onions and sesame seeds for an extra touch of elegance.
* Noodle Nirvana: Toss the Sweet Chili Chicken with your favorite noodles – think egg noodles, udon, or even spaghetti! Add some stir-fried vegetables like broccoli, bell peppers, and carrots for a complete and balanced dish.
* Lettuce Wraps: For a lighter option, serve the chicken in crisp lettuce cups. Top with shredded carrots, bean sprouts, and a drizzle of sriracha mayo for a refreshing and flavorful bite.
* Sweet Chili Chicken Salad: Dice the chicken and add it to a vibrant salad with mixed greens, cucumbers, tomatoes, and a light vinaigrette.
* Spice it Up: If you’re a fan of heat, add a pinch of red pepper flakes or a dash of your favorite hot sauce to the sauce.
* Make it Vegetarian: Substitute the chicken with tofu or tempeh for a delicious vegetarian alternative. Just be sure to press the tofu well to remove excess moisture before cooking.
* Pineapple Power: Add chunks of pineapple to the stir-fry for a tropical twist. The sweetness of the pineapple complements the chili sauce perfectly.
* Peanut Perfection: Sprinkle chopped peanuts over the finished dish for added crunch and nutty flavor.
I’m confident that once you try this recipe, you’ll be hooked. It’s the kind of dish that everyone loves, and it’s so easy to make that you’ll find yourself whipping it up again and again. The beauty of this Sweet Chili Chicken lies in its simplicity and adaptability. You can easily adjust the ingredients and flavors to suit your own preferences and dietary needs.
So, what are you waiting for? Head to your kitchen, gather your ingredients, and get cooking! I promise you won’t be disappointed. And most importantly, don’t be afraid to have fun and experiment. Cooking should be an enjoyable experience, so relax, put on some music, and let your creativity flow.
I’m so excited for you to try this recipe and experience the deliciousness for yourself. Once you do, I would absolutely love to hear about your experience! Share your photos, comments, and variations in the comments section below. Let me know what you thought of the recipe, what you changed, and how you served it. Your feedback is invaluable and helps me to continue creating recipes that you’ll love. Happy cooking!
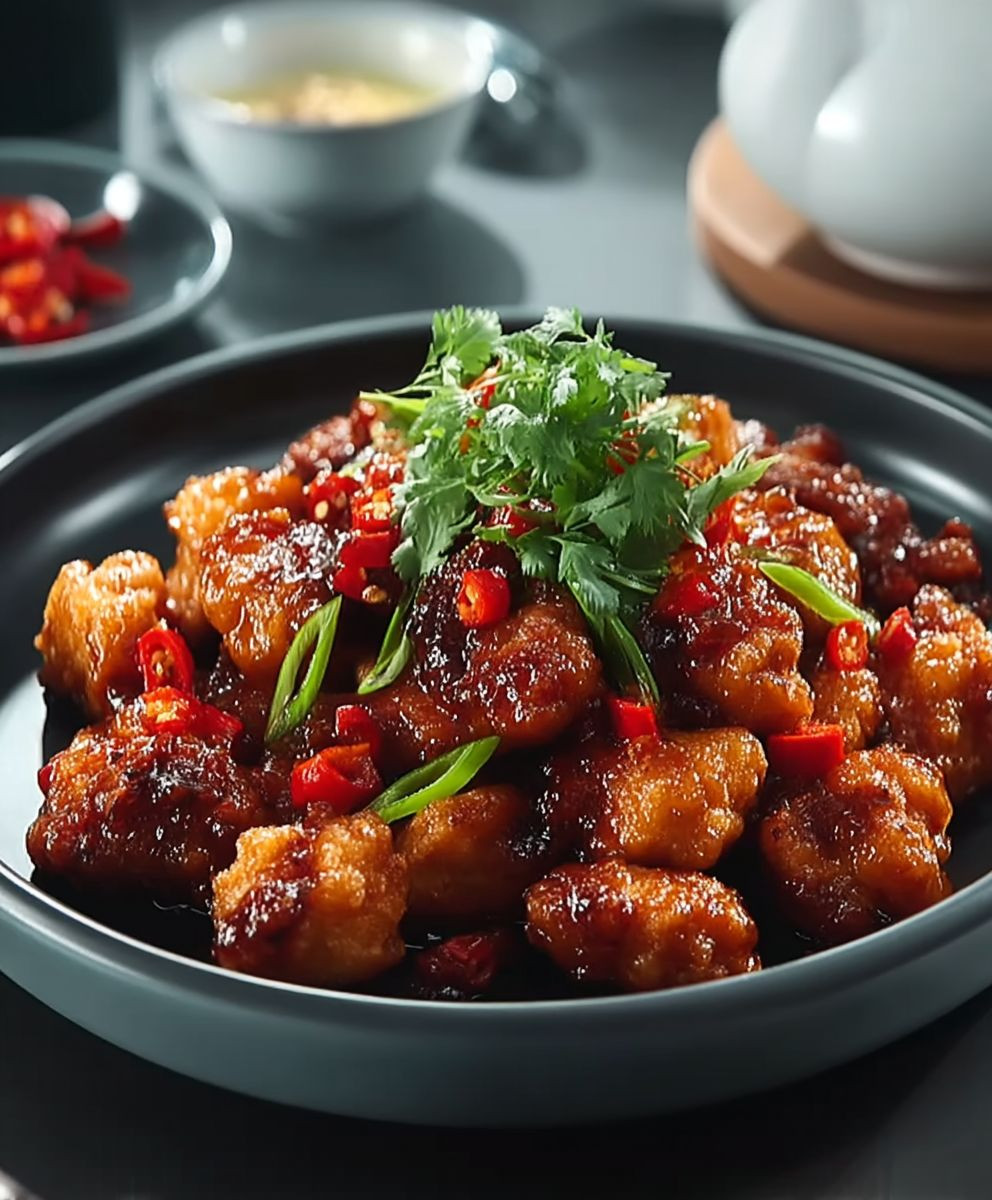
Sweet Chili Chicken: The Ultimate Recipe for Flavorful Chicken
Crispy, golden chicken bites tossed in a flavorful homemade sweet chili sauce. Perfect served over rice with your favorite veggies!
Ingredients
Instructions
Recipe Notes
- Don’t Overcrowd the Pan: Frying in batches is crucial for achieving crispy chicken. Overcrowding lowers the oil temperature and results in soggy chicken.
- Maintain Oil Temperature: Use a deep-fry thermometer to monitor the oil temperature and adjust the heat as needed to maintain a consistent temperature of 350-375°F (175-190°C).
- Double Coating for Extra Crispiness: The double coating of cornstarch and flour makes a HUGE difference in the crispiness of the chicken. Don’t skip this step!
- Adjust Sweetness and Heat: Taste the sweet chili sauce and adjust the sweetness and heat to your liking. Add more honey for a sweeter sauce or more red pepper flakes for a spicier sauce.
- Serve Immediately: Sweet chili chicken is best served immediately while the chicken is still crispy and the sauce is warm.