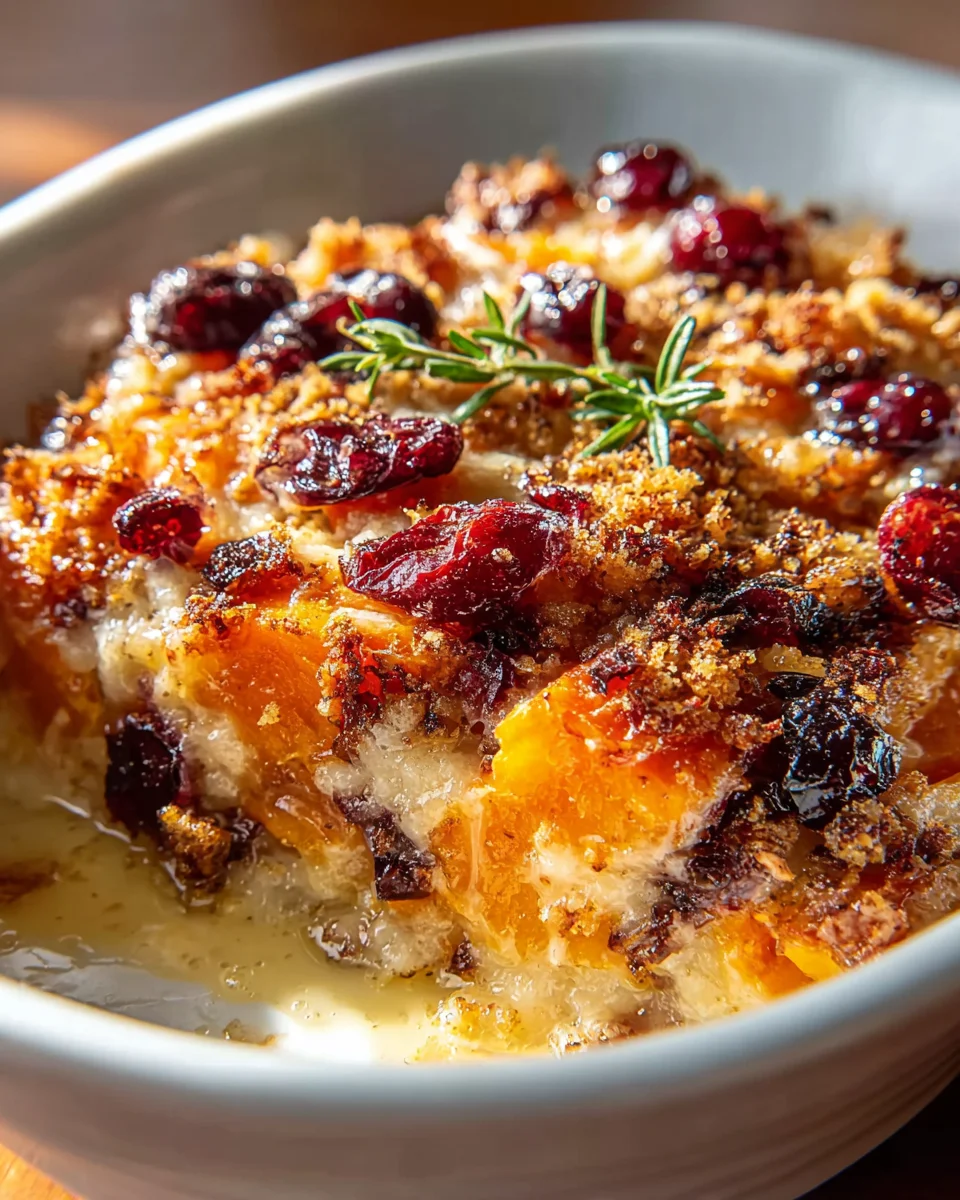
Sweet Potato Cranberry Gratin Festive Recipe is truly a dish that captures the spirit of the holidays in every delightful spoonful. Have you ever wished for a side dish that not only complements your main course but also steals a little bit of the spotlight with its vibrant colors and irresistible aroma? If so, then look no further!
I find that the humble gratin, with its origins rooted in classic French cuisine, offers a wonderful canvas for elevating simple ingredients into something extraordinary. When we bring together the earthy sweetness of tender sweet potatoes and the bright, tart pop of cranberries, we create a symphony of flavors perfect for any celebratory table. This isn’t just another side; it’s a testament to how traditional techniques can embrace seasonal ingredients to create a truly magical culinary experience.
Why This Dish Will Be Your New Holiday Favorite
People absolutely adore this dish not just for its stunning visual appeal, but for the incredible balance of taste and texture it delivers. Imagine: fork-tender sweet potatoes mingling with jewel-toned cranberries, all baked to a golden, slightly caramelized perfection under a savory-sweet crust. It offers a comforting creaminess beautifully contrasted with the refreshing tartness of the cranberries, preventing it from being overly rich. It’s elegant enough for Christmas dinner, yet comforting enough for a cozy family gathering, and the convenience of preparing parts of it ahead of time also makes it a stress-free addition to your holiday menu.
This Sweet Potato Cranberry Gratin Festive Recipe is destined to become a cherished part of your holiday traditions, bringing warmth and cheer to your guests.
Ingredients:
Hello there, fellow food enthusiasts! I’m so excited to share this incredible Sweet Potato Cranberry Gratin Festive Recipe with you. It’s truly a showstopper, combining the earthy sweetness of sweet potatoes with the tart burst of cranberries, all enveloped in a rich, spiced cream sauce. This dish is perfect for holiday gatherings or any occasion where you want to impress with something both comforting and elegant. Let’s gather our wonderful ingredients:
- 3 pounds sweet potatoes: I usually opt for the vibrant orange-fleshed varieties, sometimes labeled as yams, for their natural sweetness and beautiful color. Look for firm, unblemished potatoes of a similar size to ensure even cooking. We’ll be peeling them and slicing them thinly for that classic gratin texture.
- 1 ½ cups fresh or frozen cranberries: If using fresh, give them a good rinse. If using frozen, there’s no need to thaw them beforehand; they’ll cook down beautifully within the gratin. The tartness of the cranberries is absolutely essential here to cut through the richness and sweetness of the other components, creating a perfect balance.
- ¾ cup light brown sugar, packed: Brown sugar lends a lovely caramel note that complements the sweet potatoes wonderfully. I prefer light brown sugar for its milder molasses flavor, which allows the other spices to shine.
- ½ cup unsalted butter: This will be divided for various stages – some for greasing the dish, some for melting into our glorious cream mixture, and a little extra for dotting on top to achieve that irresistible golden crust. Unsalted butter gives us precise control over the overall saltiness of the dish.
- 1 ½ cups heavy cream: This is where a lot of the magic happens! Heavy cream creates an incredibly rich, luxurious sauce that binds all the layers together. It becomes beautifully infused with the spices as it bakes, transforming into a silky, savory-sweet delight. You could technically use half-and-half for a slightly lighter version, but for that truly festive, indulgent experience, heavy cream is my top recommendation.
- 2 teaspoons ground cinnamon: A cornerstone spice for any sweet potato dish, cinnamon brings warmth and a familiar, comforting aroma.
- ½ teaspoon ground nutmeg: Freshly grated nutmeg, if you have it, will elevate the flavor even further, adding a delicate, earthy sweetness that pairs perfectly with sweet potatoes and cream.
- ¼ teaspoon ground ginger: Just a touch of ground ginger provides a subtle zest and warmth, enhancing the overall spice profile without being overpowering.
- ⅛ teaspoon ground cloves (optional, but highly recommended): Cloves, used sparingly, add a deep, aromatic complexity that screams “holiday season.” It’s that secret ingredient that makes people wonder, “What is that delicious flavor?”
- 1 teaspoon pure vanilla extract: Vanilla enhances all the sweet notes and adds a layer of sophisticated fragrance to the dish. Always opt for pure vanilla extract for the best flavor.
- 1 large orange: We’ll be using both the zest and a splash of juice from this. The orange zest provides a bright, aromatic lift that really ties the cranberries and spices together, while the juice adds a little acidity and fresh flavor.
- ½ teaspoon salt: Crucial for balancing all the sweet flavors and ensuring the dish isn’t cloyingly sweet. I usually use kosher salt for its clean taste and easy measurement.
- ½ cup chopped pecans or walnuts (optional): For a delightful textural contrast and nutty flavor, these are fantastic sprinkled on top during the last part of baking. Toasted beforehand, they’re even better!
- Non-stick cooking spray or additional butter for greasing the baking dish.
Preparing Our Sweet Potato Cranberry Gratin Festive Recipe
Alright, with our ingredients ready, let’s dive into the creation of this stunning Sweet Potato Cranberry Gratin Festive Recipe. The process might seem like it has a few steps, but each one is simple, and the layering is quite therapeutic. You’ll love watching this come together!
- Preheat and Prepare Your Dish: My first step is always to get the oven ready. Preheat your oven to 375°F (190°C). Then, take a 9×13-inch baking dish (or a similarly sized oval gratin dish, which looks particularly elegant) and generously grease it. I usually use a pat of butter, ensuring every corner and side is coated, or a good spray of non-stick cooking spray. This prevents any glorious sweet potato or cranberry from sticking, making cleanup a breeze and ensuring every serving comes out perfectly.
- Sweet Potato Prep – The Foundation: This is where we get hands-on with our star ingredient. Carefully peel all of your sweet potatoes using a sturdy vegetable peeler. Now, for the slicing: the key to a successful gratin is thin, even slices. I highly recommend using a mandoline slicer if you have one; it makes quick work of this task and ensures uniformity, which is vital for even cooking and a beautiful presentation. Aim for slices that are about ⅛-inch thick. If you’re using a knife, take your time and try to keep them as consistent as possible. Place the sliced sweet potatoes into a large bowl as you go.
- Crafting the Cranberry-Spice Symphony: In a separate medium-sized bowl, let’s bring together those vibrant cranberries and wonderful spices. Add the fresh or frozen cranberries, ½ cup of the light brown sugar, all 2 teaspoons of ground cinnamon, the ½ teaspoon of ground nutmeg, the ¼ teaspoon of ground ginger, and if you’re using them, the ⅛ teaspoon of ground cloves. Now, for that bright citrus note: carefully zest the entire orange over this mixture. Try to get only the orange part, avoiding the bitter white pith. Then, slice the orange in half and squeeze about 1-2 tablespoons of fresh orange juice into the bowl. Give everything a good stir with a spoon or your hands to ensure the cranberries are well coated with the sugar and spices. The aroma at this stage is absolutely intoxicating!
- The Velvety Cream Sauce: Now for the rich, binding element. In a small saucepan, melt ¼ cup of the unsalted butter over medium-low heat. Once melted, pour in the 1 ½ cups of heavy cream. Add the remaining ¼ cup of light brown sugar, the ½ teaspoon of salt, and the 1 teaspoon of pure vanilla extract. Whisk gently until the sugar and salt have dissolved and the mixture is well combined and slightly warmed through. You don’t want it to boil, just to become cohesive and warm, allowing the flavors to meld. This creamy mixture is going to seep into every nook and cranny of our gratin, creating that luscious texture.
- The First Layer of Sweet Potatoes: It’s layering time, which is my favorite part! Take about a third of your thinly sliced sweet potatoes and arrange them in an even layer at the bottom of your prepared baking dish. I like to shingle them slightly, overlapping each slice just a bit, which not only looks beautiful but also helps to hold the structure of the gratin together. Don’t worry if it’s not absolutely perfect; the rustic charm is part of its appeal.
- The Burst of Cranberry Goodness: Spoon about half of your cranberry-spice mixture evenly over the sweet potato layer. Try to distribute the cranberries and spices as uniformly as possible so every bite gets a taste of that sweet-tart magic. The vibrant red of the cranberries against the orange of the sweet potatoes is just gorgeous.
- A Drizzle of Creamy Indulgence: Now, pour about a third of the warm heavy cream mixture over the cranberry and sweet potato layers. Allow it to slowly seep down, beginning its journey of infusing everything with richness and flavor. This initial pour helps to moisten the bottom layers, ensuring they cook tenderly.
- Repeat the Layers: Now, we repeat the process! Add another third of the sweet potato slices, shingling them over the cranberry and cream layer. Follow this with the remaining half of the cranberry-spice mixture. Then, pour another third of the creamy sauce over these layers. You should have one layer of sweet potatoes left and about a third of the cream sauce.
- The Grand Finale Layer: Finish with your last third of sweet potato slices, carefully arranging them on top. Pour the remaining heavy cream mixture evenly over the final layer of sweet potatoes, ensuring that as many slices as possible are coated. This top layer will absorb the cream and bake up beautifully golden. If you’re using the optional chopped pecans or walnuts, sprinkle about half of them over the top now. They will toast lovely during the initial bake.
- Initial Covered Bake: Cover the baking dish tightly with aluminum foil. This is a crucial step! Baking it covered helps to steam the sweet potatoes, ensuring they become incredibly tender and cooked through without drying out. Place the covered dish into your preheated 375°F (190°C) oven and bake for 45 minutes to 1 hour. The exact time can vary depending on the thickness of your sweet potato slices and your oven, so keep an eye on it. You’re looking for the sweet potatoes to be nearly fork-tender at this stage.
- Uncovered Bake for Golden Perfection: After the initial covered baking time, carefully remove the foil. If you reserved some of the chopped pecans or walnuts, sprinkle them over the top now, along with an optional sprinkle of an additional tablespoon of brown sugar for extra caramelization, or a few small dots of butter here and there for added richness and shine. Return the uncovered dish to the oven and continue baking for another 25-35 minutes, or until the sweet potatoes are completely fork-tender, the top is beautifully golden brown and caramelized, and the cream sauce is bubbly and thickened. The sweet potato cranberry gratin festive recipe should smell absolutely heavenly at this point, filling your kitchen with a festive aroma.
- The All-Important Rest: Once baked to perfection, carefully remove the gratin from the oven. This next step is perhaps the hardest but most important part: let the gratin rest for at least 15-20 minutes before serving. This resting period allows the sauce to fully set and settle, ensuring that when you scoop out a portion, it holds its shape beautifully rather than being a soupy mess. It also allows the incredible flavors to meld even further, intensifying the deliciousness of your Sweet Potato Cranberry Gratin Festive Recipe.
- Serve and Enjoy: Serve this warm as a stunning side dish for your holiday feast or any special meal. The combination of tender sweet potatoes, tart cranberries, crunchy nuts (if using), and a rich, spiced cream sauce is truly irresistible. Each bite offers a harmonious blend of textures and festive flavors, making it a standout dish that your guests will surely rave about. It’s truly a celebration in a dish!
Assembling Your Sweet Potato Cranberry Gratin Festive Recipe
Baking and Finishing Touches
Conclusion:
Well, there you have it, my friends! We’ve reached the end of our culinary journey for what I truly believe is one of the most delightful and essential dishes you can add to your repertoire, especially as the cooler months roll in. This isn’t just another side dish; it’s an experience, a symphony of flavors that will undoubtedly steal the show at any gathering. I’ve poured my heart into perfecting this recipe, and I’m genuinely excited for you to discover its magic.
Why is this particular dish a must-try? Let me count the ways! First and foremost, the taste is simply unparalleled. Imagine the natural sweetness of tender sweet potatoes, perfectly balanced by the bright, tart burst of cranberries, all enveloped in a creamy, aromatic sauce. Then, there’s that subtle, savory hint from the herbs and perhaps a touch of cheese, creating a complex yet harmonious flavor profile that dances on your palate. It’s comforting, it’s vibrant, and it’s utterly addictive. The textures are equally captivating – fork-tender sweet potatoes, soft cranberries, and if you’ve followed my tips, a beautiful golden-brown top that adds just a touch of crispness. It’s rich without being heavy, and decadent without being overly complicated to prepare.
This dish truly shines because it elevates humble ingredients into something extraordinary. It has a way of making even the simplest meal feel special, transforming an ordinary weeknight dinner into a festive occasion. Moreover, it offers a refreshing alternative to traditional side dishes, bringing a unique twist to your table that will have everyone asking for the recipe. I’ve seen firsthand how people light up when they try this for the first time, and that joy is precisely why I wanted to share it with all of you. It’s a guaranteed crowd-pleaser, suitable for even the most discerning palates, and surprisingly straightforward to put together, even if you consider yourself a novice in the kitchen. For all these reasons, I wholeheartedly recommend that you make this Sweet Potato Cranberry Gratin Festive Recipe a staple in your home. It’s truly one of those dishes that makes memories.
Now, let’s talk about how you can make this wonderful dish even more versatile and personal. While it’s absolutely perfect as written, I always encourage a little experimentation!
Serving Suggestions & Creative Variations:
For your holiday spreads, this gratin is an impeccable partner for roasted turkey, succulent ham, or a classic beef roast. Its sweetness and tartness cut through the richness of meats beautifully. Don’t relegate it just to holidays, though! It’s equally fantastic alongside a simple grilled chicken breast or pork loin for an elevated weeknight meal. Consider serving it with a sprinkle of fresh chopped pecans or walnuts just before serving for an added textural crunch and nutty depth. A dollop of crème fraîche or a dollop of plain Greek yogurt on the side can also offer a lovely tangy contrast, or you could even drizzle a little maple syrup just before serving for an extra layer of cozy sweetness.
If you’re looking to adapt this recipe, the possibilities are vast.
For a vegan version, simply swap out dairy milk or cream for a full-fat coconut milk or a rich oat milk, and use your favorite plant-based cheese or nutritional yeast for that cheesy umami. Ensure your butter is plant-based as well.
Want to add more spices? A pinch of nutmeg, a dash of allspice, or even a tiny hint of ginger can deepen the “festive” feel and bring out those warm, autumnal notes.
Instead of just cranberries, try a mix of dried cranberries and chopped dried apricots or cherries for a different fruity dimension, or even a handful of fresh blueberries for a burst of summer sweetness if you’re making it off-season.
Feeling adventurous? Layer in some thinly sliced apples or pears with your sweet potatoes for an extra layer of fruitiness and complexity that pairs wonderfully with the cranberries.
For a spicier kick, a tiny pinch of cayenne pepper in the sauce can create a delightful contrast that wakes up the palate without overpowering the delicate flavors.
You can also prepare this dish a day in advance, refrigerate it, and then bake it just before serving, making your holiday prep much less stressful. Just remember to let it come closer to room temperature before baking to ensure even cooking. If you have leftovers, they make a fantastic breakfast hash with a fried egg on top, or can be repurposed into a warm salad with a handful of fresh greens.
I genuinely hope this conclusion has conveyed my enthusiasm for this outstanding recipe. I truly believe it’s a game-changer for anyone looking to add a touch of gourmet elegance and incredible flavor to their table without fuss. Please, don’t just read about it; go ahead and give it a try! Dive into your kitchen, gather these wonderful ingredients, and create something truly memorable. And once you do, I would absolutely love to hear about your experience! Share your photos, your tweaks, your triumphs, and your family’s reactions. Your feedback and stories are what inspire me most to keep sharing these culinary adventures with you. Happy cooking, and may your tables be filled with delicious moments!
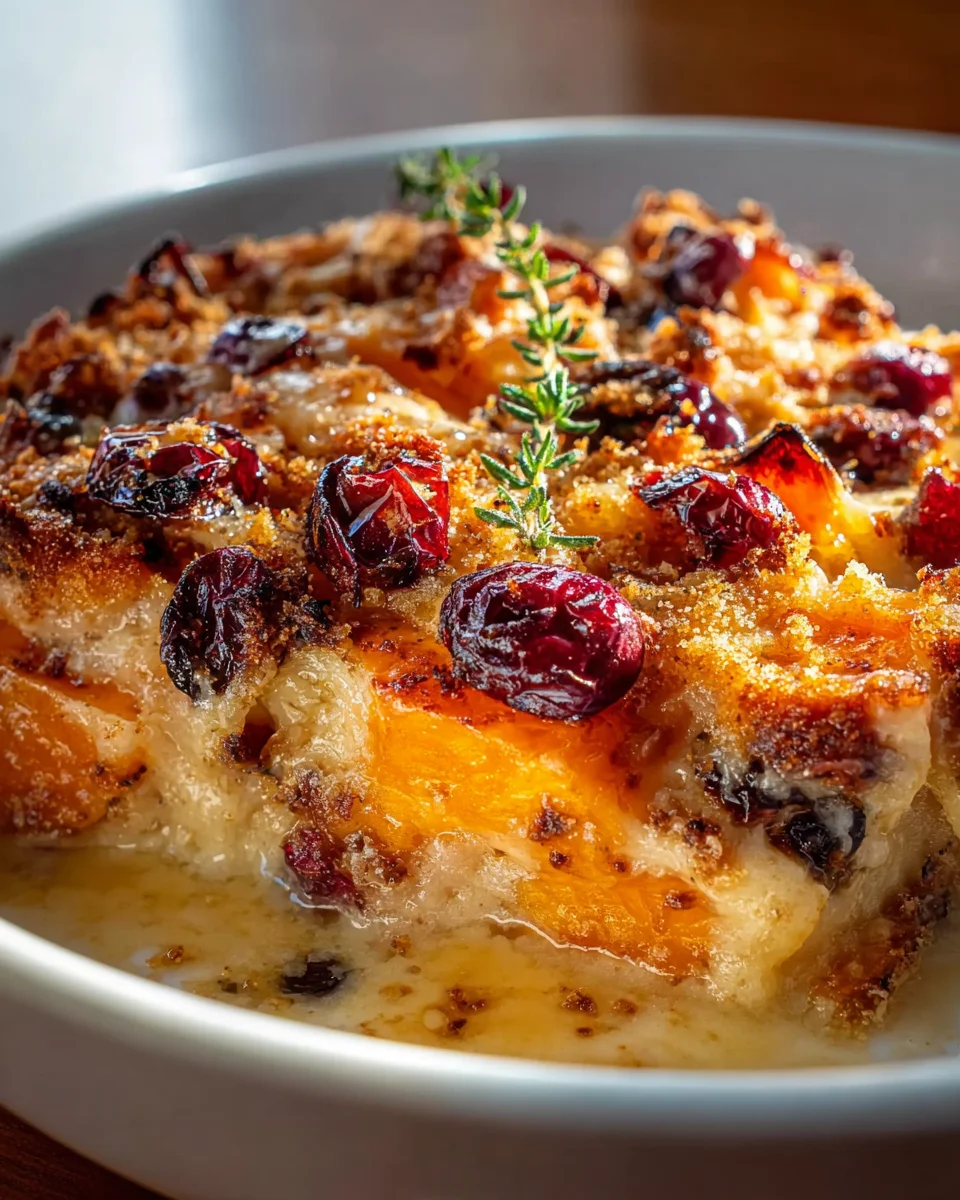
Sweet Potato Cranberry Gratin: Festive & Flavorful
This festive Sweet Potato Cranberry Gratin is a delightful side dish that captures the spirit of the holidays. Combining the earthy sweetness of tender sweet potatoes with the bright, tart pop of cranberries, and baked to a golden perfection with a rich, spiced cream sauce and a cheesy breadcrumb topping, it’s an elegant yet comforting addition to any celebratory table.
Ingredients
Instructions
Important Information
Nutrition Facts (Per Serving)
It is important to consider this information as approximate and not to use it as definitive health advice.
Allergy Information
Please check ingredients for potential allergens and consult a health professional if in doubt.