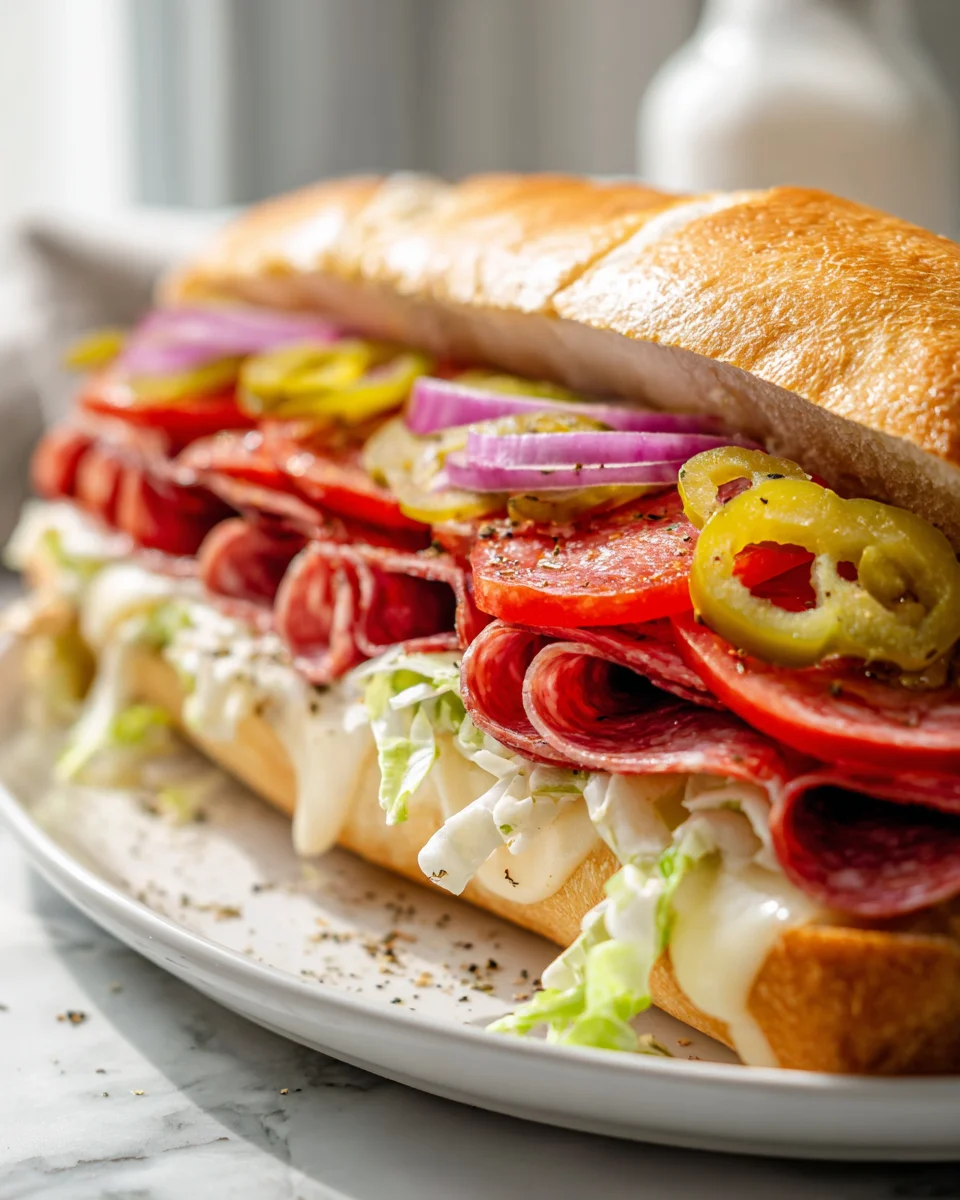
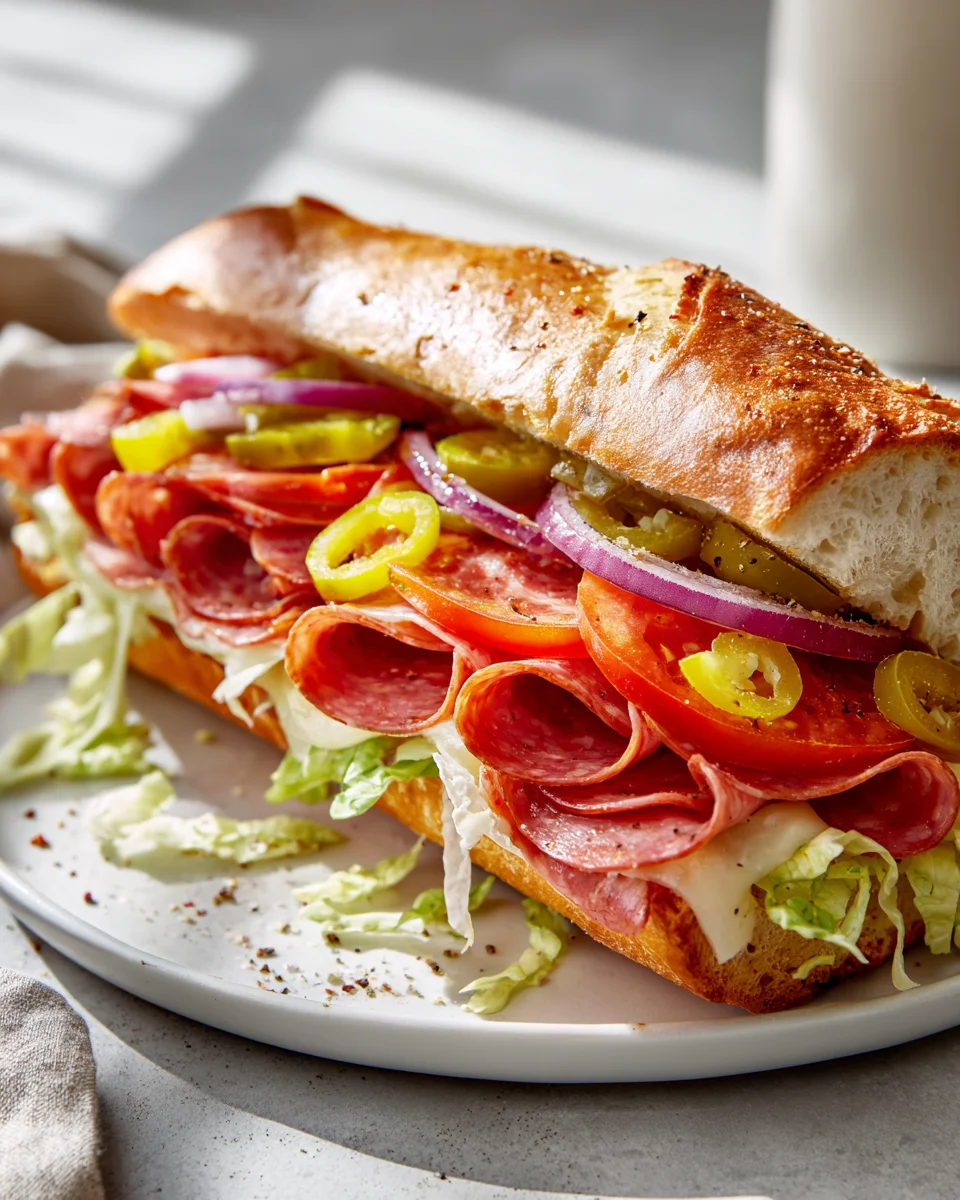
Baked Italian Sub Sandwich An Amazing Ultimate Recipe
Oh, get ready, because I am so excited to share with you what I truly believe is the absolute pinnacle of sandwich perfection: Baked Italian Sub Sandwich An Amazing Ultimate Recipe. Forget everything you thought you knew about sub sandwiches, because we’re taking it to a whole new level here! What makes this recipe so special, you ask? Well, it’s not just a cold collection of ingredients; it’s an incredible symphony of flavors, baked until everything is warm, melty, and irresistibly aromatic. Imagine crusty bread, piled high with a generous assortment of savory beef-based Italian cured meats, creamy provolone, and your favorite fresh veggies, all brought together with a zesty oil and vinegar dressing. Then, it goes into the oven, transforming into a golden, bubbly, flavor-packed masterpiece.
You are absolutely going to adore this recipe. It’s the kind of dish that makes ordinary lunches feel like a celebration, perfect for a cozy weeknight dinner, or a definite crowd-pleaser for any gathering. The magic happens in the oven, where the cheeses get wonderfully gooey, the meats warm up and release their incredible flavors, and the bread turns perfectly toasty on the outside while remaining soft inside. It’s hearty, satisfying, and bursting with that classic Italian deli taste we all crave, but amplified. Trust me, once you try this baked version, you’ll never look back. It’s truly an ultimate experience!
Ingredient Notes
Oh, prepare yourselves! This Baked Italian Sub Sandwich isn’t just a sandwich; it’s an experience. It’s what I consider the ultimate version, bringing together incredible flavors and textures that really sing. Getting the right ingredients is paramount, so let’s dive into what makes this sub truly spectacular.
The Roll is Your Foundation
- Submarine Rolls: This is non-negotiable for a truly amazing baked sub. I always go for a good quality, sturdy sub roll or hero bread. You want something that can handle being toasted, loaded with fillings, and baked without becoming soggy or falling apart. A crusty exterior with a soft interior is ideal.
The Meats: A Symphony of Italian Flavors
For this ultimate version, I love a robust blend of cured Italian meats. To adhere to our preferences, I focus on delicious beef alternatives:
- Beef Pepperoni: Those spicy, smoky disks that crisp up beautifully in the oven? Yes, please! Beef pepperoni offers that classic Italian zest without compromise.
- Beef Salami: A good quality beef salami provides a wonderful savory depth. I often look for a Genoa-style beef salami for its rich flavor.
- Beef Mortadella: This is a game-changer! Its unique texture and delicate, slightly spiced flavor add a layer of sophistication that truly elevates the sub.
- Spicy Cured Beef Slices: To mimic the kick and flavor profile of traditional capicola, I use thinly sliced spicy cured beef. It brings a fantastic peppery heat that’s essential for a true Italian sub.
The Cheese: Melty Perfection
- Provolone Cheese: For me, provolone is the undisputed champion for Italian subs. It melts beautifully, offers a sharp yet creamy taste, and holds everything together once baked. I always use a generous amount!
- Substitutions: If you’re out of provolone, fresh mozzarella or even a blend of mozzarella and a mild cheddar could work in a pinch, but provolone truly shines here.
Freshness & Flavor Boosters
- Lettuce, Tomato, Red Onion: These are crucial for the post-bake freshness and crunch. I prefer iceberg or romaine lettuce for that classic deli crispness. Slice your tomatoes and onions thinly.
- Banana Peppers & Dill Pickles: These add a fantastic tangy counterpoint to the rich meats and cheese. Don’t skip them if you love a little zing!
- Olive Oil: A good quality extra virgin olive oil is key for drizzling.
- Red Wine Vinegar: For that essential Italian dressing tang.
- Dried Oregano: Essential for that classic Italian flavor.
- Mayonnaise (Optional but Recommended): A thin layer on the roll before layering helps create a barrier and adds richness.
- Italian Dressing: A good quality store-bought or homemade Italian dressing works wonders for flavor.
- Substitutions: Feel free to add other fresh toppings like thinly sliced bell peppers or black olives if you like.
Step-by-Step Instructions
Alright, let’s get this ultimate Baked Italian Sub assembled and into the oven! This is where the magic happens, turning simple ingredients into a warm, gooey, flavor-packed masterpiece.
- Preheat Your Oven and Prep the Rolls:
- First things first, preheat your oven to a nice and toasty 375°F (190°C).
- Take your submarine rolls and slice them horizontally, almost all the way through, leaving a small hinge on one side. This keeps everything together while you load it up. If your rolls are a bit soft, a quick 2-3 minute toast in the oven before loading can help them crisp up and withstand the fillings better.
- The Mayo & Cheese Foundation:
- If you’re using mayonnaise (and I highly recommend it!), spread a thin, even layer on the inside of both halves of the roll. This acts as a delicious barrier and prevents the bread from getting too soggy.
- Now for the cheese! Lay down a generous layer of provolone cheese on both the top and bottom halves of the roll. This isn’t just for flavor; it creates a protective shield for the bread and ensures gooey cheesy goodness throughout.
- Layering the Meats:
- This is where we build the flavor! I like to layer my beef pepperoni, beef salami, beef mortadella, and spicy cured beef slices in an alternating fashion. Don’t be shy – pile them high! Fan them out a bit to ensure every bite gets a taste of everything. Aim for about 1/4 to 1/2 pound of meat per sub, depending on its size.
- As you layer, you can lightly fold some of the meat slices to create height and texture. This isn’t just pretty; it makes for a more satisfying bite.
- Season and Drizzle:
- Once your meats are perfectly piled, drizzle a little extra virgin olive oil over the meats. Follow this with a generous splash of red wine vinegar and some of your favorite Italian dressing.
- Sprinkle a good amount of dried oregano over the fillings. A pinch of garlic powder and a dash of black pepper wouldn’t hurt either, enhancing those savory notes.
- Bake to Perfection:
- Carefully close your sub sandwich. If it’s overflowing (which it should be!), you can gently press it down.
- Place your assembled subs directly onto a baking sheet.
- Bake in the preheated oven for about 10-15 minutes, or until the cheese is beautifully melted and bubbly, the meats are slightly crisped at the edges, and the roll is golden brown and toasted. Keep an eye on it to prevent over-browning.
- The Fresh Finish:
- Once your sub comes out of the oven, immediately open it up.
- Now, add your fresh toppings: a generous handful of shredded lettuce, thin slices of fresh tomato, red onion, banana peppers, and dill pickles. The contrast of the hot, gooey sub with the cool, crisp veggies is what makes this truly ultimate!
- For an extra burst of flavor, I always give it one last drizzle of red wine vinegar and olive oil, and sometimes another sprinkle of oregano.
- Slice and Serve:
- Carefully slice your glorious Baked Italian Sub in half or into thirds, depending on how you like to serve it.
- Serve immediately and prepare for happy groans of satisfaction!
Tips & Suggestions
Crafting the ultimate Baked Italian Sub is an art, and I’ve picked up a few tricks over the years that I love to share to help you achieve perfection every time. These suggestions are designed to elevate your sub from great to absolutely unforgettable!
- Don’t Skimp on the Bread: This is probably my number one tip. A good quality, sturdy sub roll is the backbone of your sandwich. If the bread is too soft, it’ll get soggy. If it’s too tough, it won’t be enjoyable. Seek out a roll that has a slightly crusty exterior but a soft, yielding interior that can stand up to the heat and all those delicious fillings. Sometimes, a quick pre-toast of the open roll can help it maintain its integrity during baking.
- Cheese on Both Sides: My secret for optimal cheesiness and structural integrity! Placing provolone on both the bottom and top halves of the roll before the meats helps create a delicious melted barrier. It prevents the bottom bread from getting too wet from the meat juices and ensures every bite is packed with gooey cheese.
- Layering is Key: Don’t just pile the meats randomly. Fan them out, alternate your varieties (beef pepperoni, salami, mortadella, spicy cured beef). This ensures an even distribution of flavor and makes the sub look incredibly appealing when sliced. A little folding of the meats also adds wonderful volume and texture.
- The Hot and Cold Contrast: This is what truly makes a baked sub special. The warmth of the melted cheese, the slightly crisped meats, and the toasted bread combined with the cool, fresh crunch of lettuce, tomato, and onion added after baking is pure magic. Resist the urge to bake your fresh veggies!
- Customize Your Tang: The red wine vinegar and banana peppers are crucial for cutting through the richness of the meats and cheese. If you love a lot of tang, don’t be shy with the vinegar drizzle! You can also experiment with other pickled items like giardiniera for an extra layer of flavor.
- Spice it Up: If you’re a fan of heat, consider adding a pinch of red pepper flakes to your meats before baking. The spicy cured beef already provides a good kick, but extra heat is always welcome in my book!
- Serve Immediately: These subs are at their absolute best fresh out of the oven, while the cheese is still gooey and the bread is perfectly toasted. Gather everyone around the moment they’re ready!
Storage
While this Baked Italian Sub is definitely best enjoyed fresh from the oven, I understand that sometimes you might have leftovers, or perhaps you’re planning ahead. Here’s how I handle storage to keep it as delicious as possible:
For Leftovers
- Cool Completely: If you have any remaining sub, let it cool down to room temperature first. This prevents condensation from building up and making the bread soggy in storage.
- Separate Fresh Toppings: If possible, remove any fresh lettuce, tomato, or other moisture-rich toppings before storing. These tend to get watery and wilted, which isn’t ideal for reheating.
- Airtight Container: Wrap the leftover sub (without fresh toppings) tightly in foil, then place it in an airtight container or a resealable plastic bag. This helps keep the bread from drying out and the flavors locked in.
- Refrigerate: Store the wrapped sub in the refrigerator for up to 2-3 days.
Reheating
- Oven is Best: For the best results, I always recommend reheating in the oven or a toaster oven.
- Method: Remove the sub from the fridge and unwrap it. Place it directly on a baking sheet. Reheat in a preheated oven at 300-325°F (150-160°C) for about 10-15 minutes, or until the cheese is re-melted and the bread is warm and slightly crisp again. Avoid microwaving, as it can make the bread chewy and the meats rubbery.
- Add Fresh Toppings: Once reheated, add fresh lettuce, tomato, and any other desired cold toppings back to the sub for that crucial hot and cold contrast.
Final Thoughts
Well, there you have it! We’ve journeyed together through the creation of what I truly believe is one of the most satisfying sandwiches you’ll ever sink your teeth into. This Baked Italian Sub Sandwich An Amazing Ultimate Recipe has a way of transforming simple ingredients into something truly extraordinary.
From the perfectly toasted bread to the melty cheese, the robust blend of beef, and the vibrant tang of the non-alcohol alternative-infused dressing, every single bite is a symphony of flavor and texture. It’s not just a sandwich; it’s an experience, a hearty meal that’s perfect for game day, a casual dinner, or impressing friends and family.
I encourage you to give this recipe a try. You’ll understand exactly why I call it the Baked Italian Sub Sandwich An Amazing Ultimate Recipe – it lives up to its name in every delicious way. Get ready to discover your new favorite comfort food!

Ultimate Baked Italian Sub Sandwich: An Incredible Meal!
- Total Time: 30 minutes
- Yield: 4 servings
Description
Experience the pinnacle of sandwich perfection with this Ultimate Baked Italian Sub Sandwich. Loaded with savory beef-based Italian cured meats, creamy provolone, and fresh veggies, this dish is a warm, gooey masterpiece that will elevate any meal.
Ingredients
- Submarine Rolls
- Beef Pepperoni
- Beef Salami
- Beef Mortadella
- Spicy Cured Beef Slices
- Provolone Cheese
- Lettuce
- Tomato
- Red Onion
- Banana Peppers
- Dill Pickles
- Olive Oil
- Red Wine Vinegar
- Dried Oregano
- Mayonnaise (Optional but Recommended)
- Italian Dressing
Instructions
- Preheat your oven to 375°F (190°C).
- Slice the submarine rolls horizontally, almost all the way through, leaving a small hinge on one side.
- Spread a thin, even layer of mayonnaise on the inside of both halves of the roll.
- Lay down a generous layer of provolone cheese on both the top and bottom halves of the roll.
- Layer the beef pepperoni, beef salami, beef mortadella, and spicy cured beef slices in an alternating fashion.
- Drizzle extra virgin olive oil over the meats, followed by a splash of red wine vinegar and Italian dressing.
- Sprinkle dried oregano over the fillings, along with a pinch of garlic powder and a dash of black pepper.
- Carefully close the sub sandwich and place it on a baking sheet.
- Bake in the preheated oven for about 10-15 minutes, or until the cheese is melted and bubbly.
- Once out of the oven, open the sub and add shredded lettuce, thin slices of tomato, red onion, banana peppers, and dill pickles.
- Drizzle with red wine vinegar and olive oil, and sprinkle with oregano.
- Slice the Baked Italian Sub in half or into thirds and serve immediately.
- Prep Time: 15 mins
- Cook Time: 15 mins
- Category: Dinner
- Method: Baking
- Cuisine: Italian
Nutrition
- Serving Size: 1 sub
- Calories: 600
- Sugar: 4 g
- Sodium: 1200 mg
- Fat: 35 g
- Saturated Fat: 15 g
- Unsaturated Fat: 10 g
- Trans Fat: 0 g
- Carbohydrates: 50 g
- Fiber: 3 g
- Protein: 25 g
- Cholesterol: 70 mg
Keywords: Use a good quality, sturdy sub roll to prevent sogginess. Layer provolone on both sides of the roll for optimal cheesiness. Fresh toppings should be added after baking for the best texture contrast.