Hey there, fellow food lovers!
Are you ready for a meal that will make everyone at your table cheer? I know I am! Today, I’m thrilled to share a recipe that perfectly blends two of the world’s most beloved comfort foods into one incredible dish. Get ready to dive into a world of flavor and fun!
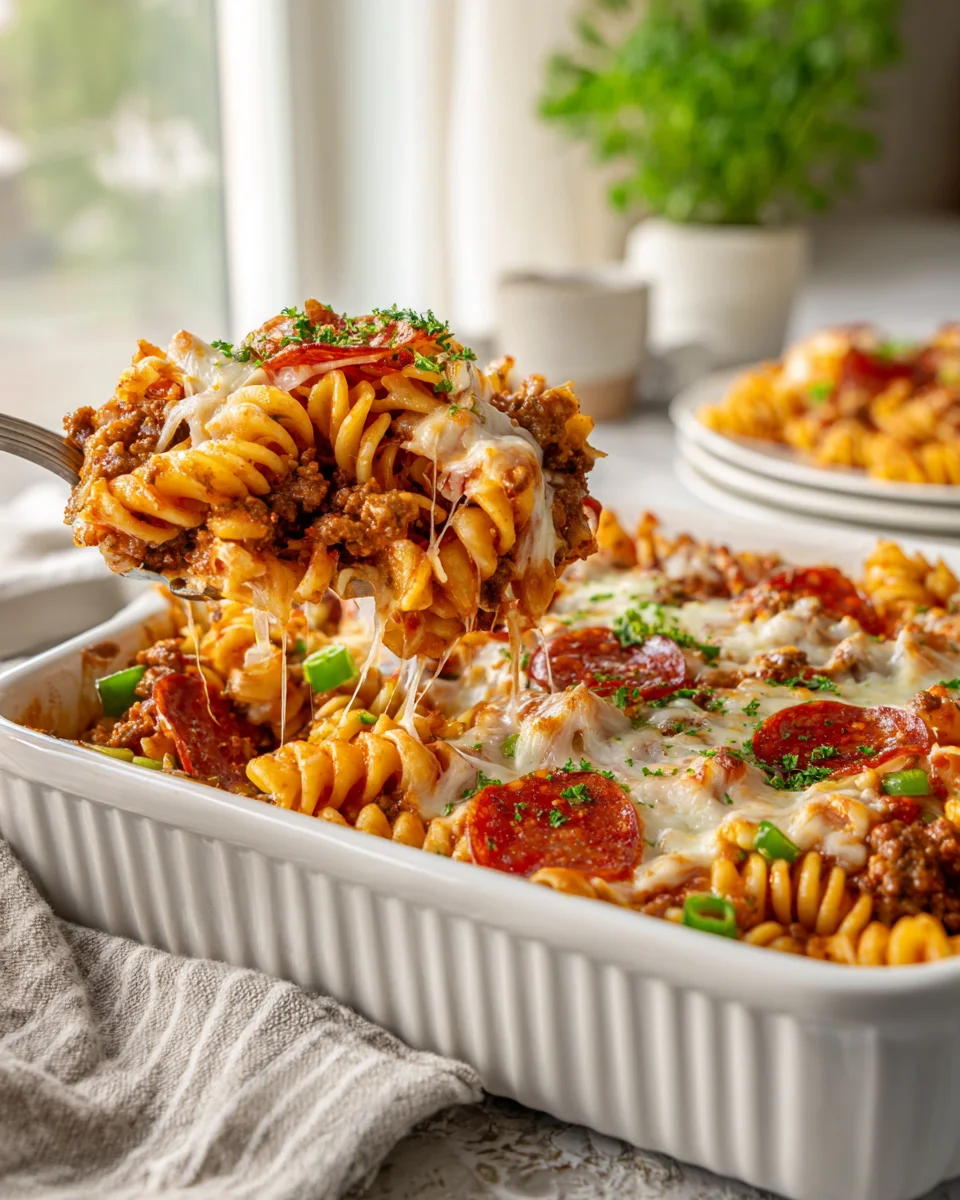
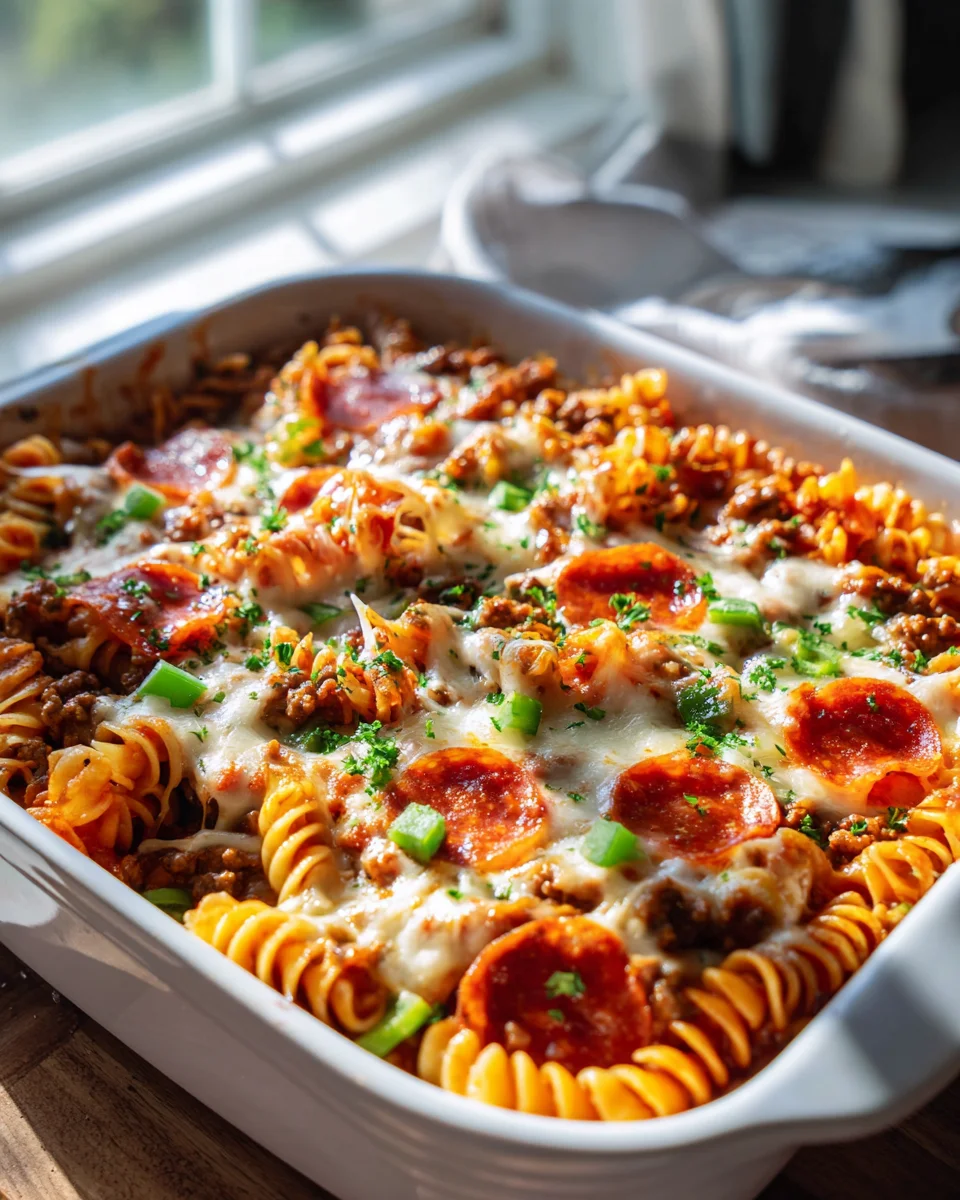
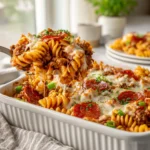
Deliciously Cheesy Pizza Pasta Casserole For Family Fun
Oh my goodness, where do I even begin with this absolute showstopper? I’m so excited about this recipe because it truly delivers on its promise: it’s deliciously cheesy, full of pizza flavor, packed with pasta, and designed for maximum family fun! What makes this casserole so special, you ask? Well, imagine all the glorious, satisfying flavors of your favorite pizza – the tangy tomato sauce, the savory toppings like seasoned beef, the melty, gooey cheese – all expertly combined with perfectly cooked pasta and baked together in one magnificent dish. It’s the ultimate mash-up, taking away the “pizza or pasta?” dinner dilemma once and for all!
You and your family are absolutely going to adore this for so many reasons. For starters, it’s an instant crowd-pleaser, making it perfect for busy weeknights when you need something hearty and satisfying, or for fun weekend gatherings where everyone can dig in. It’s incredibly versatile, allowing you to customize it with your family’s favorite pizza toppings (think colorful bell peppers, black olives, mushrooms, or even a sprinkle of red pepper flakes for a little kick). Plus, it’s a wonderful way to bring smiles to faces, creating a joyful, communal eating experience with minimal fuss. No more battling over pizza slices or worrying about separate dishes – just one glorious pan of bubbling, cheesy goodness!
So, what exactly are we talking about here? Picture this: tender pasta, perhaps some rotini or penne, nestled in a rich, zesty tomato sauce that sings with classic pizza herbs and spices. Layered throughout and on top is an abundance of luscious, melt-in-your-mouth mozzarella, along with your chosen tasty additions like crumbled, seasoned beef and vibrant veggies. Everything bakes together until it’s hot, bubbly, golden-brown, and absolutely irresistible. It’s hearty, comforting, and guaranteed to become a new family favorite that you’ll be making again and again. Trust me, this casserole is pure happiness in a dish!
<h2>Ingredient Notes</h2>
<p>For my Deliciously Cheesy Pizza Pasta Casserole, choosing the right ingredients makes all the difference for that perfect family-fun meal. Here’s what I recommend to get that amazing pizza-meets-pasta flavor:</p>
<ul>
<li><strong>Pasta:</strong> I love using sturdy pasta like penne, ziti, or rotini for this casserole. They hold onto the cheesy sauce beautifully and create those satisfying bites. Cook it al dente – remember, it’s going to bake further in the oven, so you don’t want mushy pasta! A little firmness is key.</li>
<li><strong>Ground Beef:</strong> For that hearty, satisfying bite, I opt for lean ground beef (90/10 or 85/15 works great). It browns up perfectly and mixes into the sauce without making the casserole greasy. If you’re looking for a different flavor profile, a good quality crumbled beef Italian sausage would also be phenomenal.</li>
<li><strong>Pizza Sauce:</strong> This is where the “pizza” magic truly happens! A good quality pizza sauce is essential. You can use your favorite store-bought brand or even a homemade one if you have extra time and a secret family recipe. While marinara works, a dedicated pizza sauce often has those extra herbs and spices that give it that classic taste we’re aiming for.</li>
<li><strong>Cheeses:</strong> Oh, the CHEESE! This casserole lives up to its name for a reason. I use a generous amount of shredded mozzarella for that epic pull and melt. A sprinkle of grated Parmesan adds a salty, nutty depth. For an extra layer of flavor and creaminess, you could even add some provolone or a touch of ricotta to the sauce mixture.</li>
<li><strong>Pepperoni:</strong> Mini pepperoni slices are fantastic here because they distribute evenly throughout the casserole, ensuring a burst of savory, slightly spicy flavor in almost every bite. If you only have regular-sized pepperoni, just give them a rough chop before adding them.</li>
<li><strong>Vegetables:</strong> To boost the flavor, texture, and nutrition, I always include diced onion, bell pepper (any color!), and sliced mushrooms. Sautéing them first brings out their sweetness and adds a wonderful bite. Feel free to customize these – black olives, corn, or even finely chopped spinach (sautéed and squeezed dry) are great additions.</li>
<li><strong>Seasonings:</strong> Italian seasoning, garlic powder, onion powder, salt, and black pepper are my go-to’s. They enhance all the other flavors and truly bring that classic Italian-American comfort food vibe. Don’t be shy with the Italian seasoning!</li>
</ul>
<h2>Step-by-Step Instructions</h2>
<p>Making this casserole is a breeze, perfect for getting the family involved! Follow these steps for a deliciously cheesy result:</p>
<ul>
<li><strong>Step 1: Prep Your Pasta.</strong> Start by preheating your oven to 375°F (190°C). Then, bring a large pot of salted water to a rolling boil. Add your chosen pasta (penne, ziti, or rotini work best) and cook according to package directions until it’s al dente – slightly firm to the bite. Drain it well and set aside. I usually toss it with a tiny bit of olive oil to prevent sticking.</li>
<li><strong>Step 2: Brown the Beef.</strong> While the pasta cooks, heat a large skillet over medium-high heat. Add your lean ground beef and cook, breaking it up with a spoon, until it’s completely browned. Drain off any excess fat thoroughly. This step is crucial for a non-greasy, flavorful casserole.</li>
<li><strong>Step 3: Sauté the Veggies.</strong> To the same skillet (or clean it quickly), add a drizzle of olive oil. Toss in your diced onion, bell pepper, and sliced mushrooms. Sauté for about 5-7 minutes, until the vegetables are softened and fragrant. If using minced garlic, add it in the last minute of sautéing to prevent burning.</li>
<li><strong>Step 4: Build the Flavorful Sauce.</strong> Return the browned ground beef to the skillet with the sautéed vegetables. Pour in your favorite pizza sauce. Stir in the Italian seasoning, garlic powder, onion powder, salt, and black pepper. Let the mixture simmer gently for 5-10 minutes, allowing all those delicious flavors to meld together. If you prefer a slightly thinner sauce, a splash of beef broth can be added here.</li>
<li><strong>Step 5: Combine & Layer.</strong> In a large mixing bowl, combine the cooked pasta with about two-thirds of the beef and pizza sauce mixture. Stir gently until the pasta is well coated. Now, grab a 9×13 inch baking dish. Spread about half of the pasta mixture evenly in the bottom of the dish. Sprinkle with half of the shredded mozzarella and half of the mini pepperoni. Top with the remaining pasta mixture, then spoon the rest of the beef and sauce mixture over the top.</li>
<li><strong>Step 6: The Cheesy Finish!</strong> Generously sprinkle the remaining shredded mozzarella and Parmesan cheese over the top of the casserole. Arrange any extra mini pepperoni or other desired pizza toppings (like black olives) artfully on top for that classic pizza look.</li>
<li><strong>Step 7: Bake to Perfection.</strong> Transfer the baking dish to your preheated oven. Bake for 20-25 minutes, or until the casserole is bubbling around the edges and the cheese on top is beautifully melted and lightly golden brown.</li>
<li><strong>Step 8: Rest and Serve.</strong> Once out of the oven, let the casserole rest for about 5-10 minutes. This helps the flavors settle and makes it easier to serve neatly. Then, dish out generous portions and enjoy your Deliciously Cheesy Pizza Pasta Casserole!</li>
</ul>
<h2>Tips & Suggestions</h2>
<p>To make your Deliciously Cheesy Pizza Pasta Casserole even better and fit your family’s preferences, here are a few of my favorite tips and suggestions:</p>
<ul>
<li><strong>Make Ahead Magic:</strong> This casserole is fantastic for meal prep! You can assemble the entire dish up to the “The Cheesy Finish!” step (before baking), cover it tightly with plastic wrap or foil, and refrigerate it for up to 24 hours. When you’re ready to bake, let it sit at room temperature for about 30 minutes while your oven preheats, then bake as directed, adding an extra 10-15 minutes to the baking time if it’s going in cold from the fridge.</li>
<li><strong>Veggie Power-Up:</strong> Don’t be shy about adding more vegetables! Finely chopped spinach (sautéed and squeezed dry), shredded carrots, zucchini, or even roasted red peppers would all be delicious additions. It’s a great way to sneak in extra nutrients for the family without them even noticing!</li>
<li><strong>Spice It Up (or Down!):</strong> If your family loves a little heat, add a pinch of red pepper flakes to the sauce mixture. For younger palates or those sensitive to spice, you can omit the flakes entirely or use a milder pizza sauce.</li>
<li><strong>Topping Extravaganza:</strong> Think of this casserole as a canvas for your favorite pizza toppings! Besides pepperoni and black olives, consider cooked, crumbled beef Italian sausage, sliced bell peppers, or even a sprinkle of fresh basil after baking for a burst of freshness.</li>
<li><strong>Serving Suggestions:</strong> This hearty casserole pairs perfectly with a simple green salad with a light vinaigrette to balance the richness. A side of warm garlic bread or cheesy breadsticks is also a must for soaking up any extra delicious sauce.</li>
<li><strong>Get the Kids Involved:</strong> This truly is a “Family Fun” dish! Let your kids help with safe tasks like stirring the cooked pasta, sprinkling the cheese layers, or arranging the pepperoni on top before baking. They’ll love eating a meal they helped create, and it fosters a love for cooking!</li>
</ul>
<h2>Storage</h2>
<p>This Deliciously Cheesy Pizza Pasta Casserole is just as good, if not better, the next day! Here’s how I store it:</p>
<ul>
<li><strong>Refrigeration:</strong> Leftovers of this casserole store wonderfully! Allow the casserole to cool completely to room temperature. Then, transfer any remaining portions to an airtight container. It will keep well in the refrigerator for up to 3-4 days. To reheat, individual servings can be warmed in the microwave, or a larger portion can be reheated, covered, in the oven at 350°F (175°C) until heated through.</li>
<li><strong>Freezing:</strong> Yes, you can freeze this casserole! For best results, I recommend freezing the baked and cooled casserole. Wrap individual slices or the entire casserole tightly in plastic wrap, then an additional layer of aluminum foil to prevent freezer burn. It can be frozen for up to 2-3 months. To reheat, thaw overnight in the refrigerator, then bake covered at 350°F (175°C) until warm, uncovering for the last 10-15 minutes to crisp up the cheese. You can also bake directly from frozen (covered) at the same temperature, though it will take considerably longer (likely 1 hour or more), then uncover for the final crisping.</li>
</ul>
Final Thoughts
There you have it! I truly believe that Deliciously Cheesy Pizza Pasta Casserole For Family Fun is more than just a meal; it’s an experience waiting to happen in your kitchen. This incredible casserole effortlessly marries the vibrant, beloved flavors of pizza – the rich tomato sauce, the savory beef, and, let’s not forget, that incredible blanket of gooey, melted cheese – with the comforting heartiness of pasta. It’s the perfect solution for those busy weeknights when you need something satisfying and easy, or for a fun-filled family gathering where everyone can dig in and enjoy together.
I promise you, Deliciously Cheesy Pizza Pasta Casserole For Family Fun is a guaranteed crowd-pleaser that will quickly become a cherished favorite in your home. It’s designed to bring smiles, warmth, and delicious memories around your dinner table. So, go ahead, gather your ingredients, and prepare to create some truly fun and flavorful moments with this fantastic dish!
Ultimate Cheesy Pizza Pasta Casserole – Family Dinner Fun!
- Total Time: 45 minutes
- Yield: 6 servings
Description
This Deliciously Cheesy Pizza Pasta Casserole combines the best of pizza and pasta into one hearty dish that your family will love. It’s perfect for busy weeknights or fun weekend gatherings, delivering a burst of flavor in every bite.
Ingredients
- Pasta (penne, ziti, or rotini)
- Lean ground beef (90/10 or 85/15)
- Pizza sauce
- Shredded mozzarella cheese
- Grated Parmesan cheese
- Mini pepperoni slices
- Diced onion
- Bell pepper (any color)
- Sliced mushrooms
- Olive oil
- Italian seasoning
- Garlic powder
- Onion powder
- Salt
- Black pepper
Instructions
- Step 1: Prep Your Pasta. Start by preheating your oven to 375°F (190°C). Then, bring a large pot of salted water to a rolling boil. Add your chosen pasta (penne, ziti, or rotini) and cook according to package directions until it's al dente – slightly firm to the bite. Drain it well and set aside. I usually toss it with a tiny bit of olive oil to prevent sticking.
- Step 2: Brown the Beef. While the pasta cooks, heat a large skillet over medium-high heat. Add your lean ground beef and cook, breaking it up with a spoon, until it's completely browned. Drain off any excess fat thoroughly.
- Step 3: Sauté the Veggies. To the same skillet (or clean it quickly), add a drizzle of olive oil. Toss in your diced onion, bell pepper, and sliced mushrooms. Sauté for about 5-7 minutes, until the vegetables are softened and fragrant. If using minced garlic, add it in the last minute of sautéing to prevent burning.
- Step 4: Build the Flavorful Sauce. Return the browned ground beef to the skillet with the sautéed vegetables. Pour in your favorite pizza sauce. Stir in the Italian seasoning, garlic powder, onion powder, salt, and black pepper. Let the mixture simmer gently for 5-10 minutes.
- Step 5: Combine & Layer. In a large mixing bowl, combine the cooked pasta with about two-thirds of the beef and pizza sauce mixture. Stir gently until the pasta is well coated. Spread about half of the pasta mixture evenly in the bottom of a 9×13 inch baking dish. Sprinkle with half of the shredded mozzarella and half of the mini pepperoni. Top with the remaining pasta mixture, then spoon the rest of the beef and sauce mixture over the top.
- Step 6: The Cheesy Finish! Generously sprinkle the remaining shredded mozzarella and Parmesan cheese over the top of the casserole. Arrange any extra mini pepperoni or other desired pizza toppings artfully on top.
- Step 7: Bake to Perfection. Transfer the baking dish to your preheated oven. Bake for 20-25 minutes, or until the casserole is bubbling around the edges and the cheese on top is beautifully melted and lightly golden brown.
- Step 8: Rest and Serve. Once out of the oven, let the casserole rest for about 5-10 minutes. Then, dish out generous portions and enjoy your Deliciously Cheesy Pizza Pasta Casserole!
- Prep Time: 15 mins
- Cook Time: 30 mins
- Category: Dinner
- Method: Baking
- Cuisine: Italian
Nutrition
- Serving Size: 1 serving
- Calories: 450
- Sugar: 6 g
- Sodium: 800 mg
- Fat: 20 g
- Saturated Fat: 10 g
- Unsaturated Fat: 8 g
- Trans Fat: 0 g
- Carbohydrates: 45 g
- Fiber: 3 g
- Protein: 25 g
- Cholesterol: 70 mg
Keywords: This casserole is fantastic for meal prep! You can assemble it up to the 'The Cheesy Finish!' step and refrigerate it for up to 24 hours. Feel free to add more vegetables or customize the toppings to suit your family's preferences.