• Skip to primary navigation
  • Skip to main content
  • Skip to primary sidebar
Homesmad

Homesmad

  • Home
  • Breakfast & Brunch
  • Appetizers & Snacks
  • Dinner
  • Dessert
  • About
  • Privacy Policy
  • Contact
Homesmad
  • Home
  • Breakfast & Brunch
  • Appetizers & Snacks
  • Dinner
  • Dessert
  • About
  • Privacy Policy
  • Contact

Vegan Pumpkin Wild Rice Soup: Hearty & Flavorful!

November 24, 2025 by Lily author

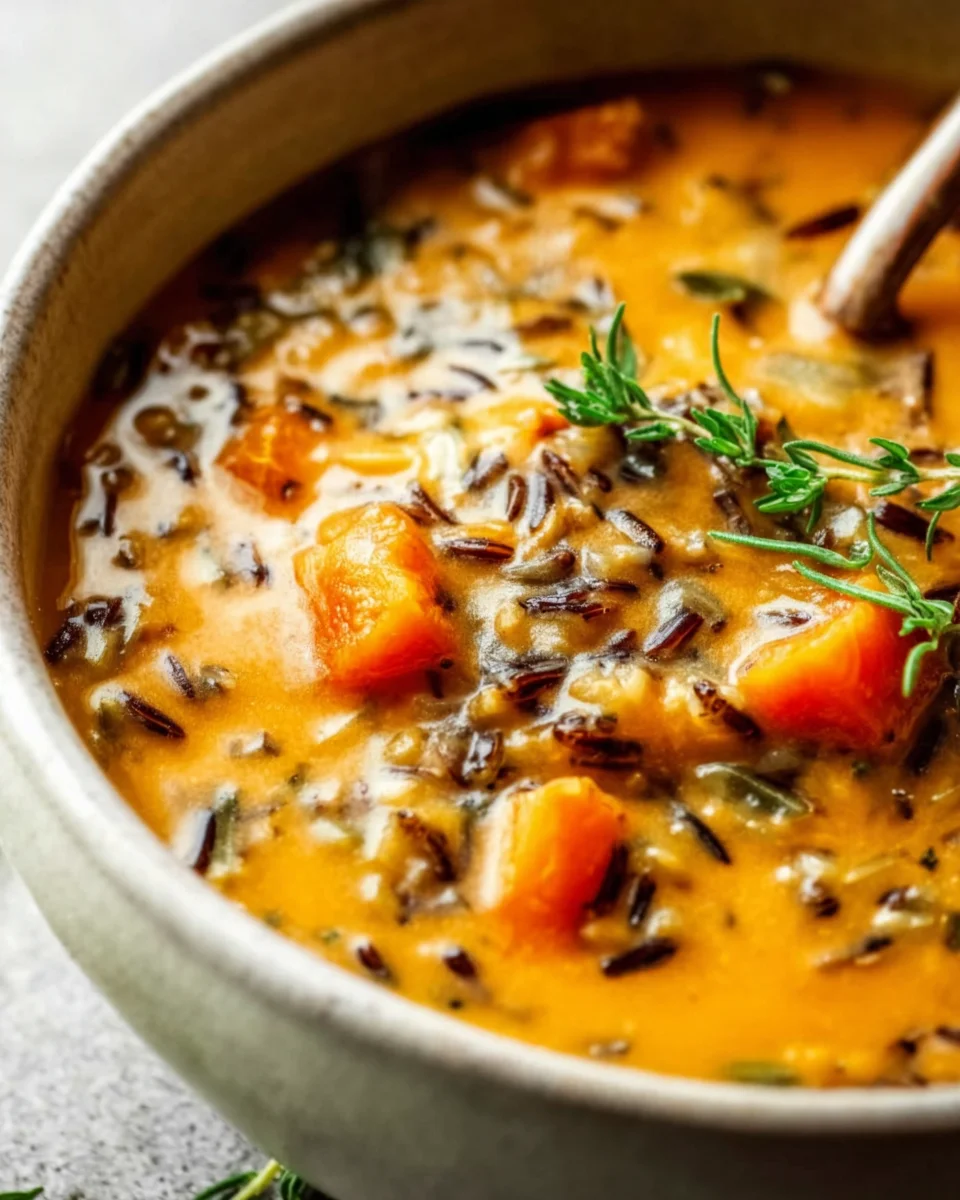
Vegan Pumpkin Wild Rice Soup is more than just a meal; it’s a warm embrace in a bowl, a vibrant celebration of autumn’s bounty that promises to nourish both body and soul. Have you ever craved a dish that perfectly captures the essence of cozy evenings and crisp air, yet remains wonderfully wholesome and entirely plant-based? This recipe is precisely that!

The rich heritage of its key ingredients adds significantly to its allure. Pumpkins, a beloved symbol of harvest and abundance, have been cultivated for thousands of years, revered in cuisines across continents for their versatility and natural sweetness. Wild rice, indigenous to North America, was a sacred grain for many Native American tribes, cherished for its unique nutty flavor and impressive nutritional profile. Bringing these two ancient staples together in a modern, plant-forward preparation creates a dish that feels both timeless and innovative.

People absolutely adore this soup for so many wonderful reasons. Its velvety texture, the subtle sweetness of the pumpkin harmonizing perfectly with savory herbs, and the delightful chewiness of the wild rice create a symphony of flavors and sensations in every spoonful. It’s incredibly comforting, surprisingly easy to prepare, and packed with nutrients, making it a perfect hearty meal for chilly evenings or a wholesome lunch. When you’re seeking ultimate comfort without compromise, our Vegan Pumpkin Wild Rice Soup is truly unparalleled.

Vegan Pumpkin Wild Rice Soup: Hearty & Flavorful! this RECIPE

Ingredients:

  • For the Aromatic Base:
    • 2 tablespoons olive oil, or other neutral cooking oil
    • 1 large yellow onion, diced (about 1.5 cups)
    • 2 medium carrots, peeled and diced (about 1 cup)
    • 2 stalks celery, diced (about 1 cup)
    • 4 cloves garlic, minced
  • For the Richness and Texture:
    • 1 cup wild rice blend (ensure it contains actual wild rice, not just brown rice)
    • 1 (15-ounce) can pumpkin puree (not pumpkin pie filling)
    • 1 (13.5-ounce) can full-fat coconut milk, well shaken
    • 4 cups vegetable broth, plus more if needed
    • 1 cup filtered water, or additional broth
  • For the Spices and Herbs:
    • 1.5 teaspoons dried thyme
    • 1 teaspoon dried sage
    • 0.5 teaspoon dried rosemary, crushed
    • 0.25 teaspoon ground cinnamon
    • Pinch of ground nutmeg
    • 1 bay leaf
    • 1 teaspoon sea salt, plus more to taste
    • 0.5 teaspoon freshly ground black pepper, plus more to taste
  • For the Finishing Touches & Optional Additions:
    • 2 cups packed fresh kale or spinach, tough stems removed and roughly chopped
    • 1 tablespoon maple syrup or agave nectar (optional, for balancing flavors)
    • 1 teaspoon apple cider vinegar (optional, for brightness)
    • Fresh parsley or thyme, chopped, for garnish
    • Toasted pumpkin seeds (pepitas), for garnish

Phase 1: Preparing Your Ingredients for Vegan Pumpkin Wild Rice Soup

Creating a truly delicious and comforting pot of Vegan Pumpkin Wild Rice Soup begins long before any heat touches the pan. This preparatory phase is all about setting yourself up for success, ensuring all your ingredients are ready to go when it’s time to cook. Trust me, a little prep work makes the entire cooking process smooth, enjoyable, and less stressful, especially when you’re aiming for that deeply flavorful and satisfying soup.

  1. Gather Your Tools and Ingredients: First, I always like to lay out all my ingredients on the counter. This helps me ensure I haven’t forgotten anything and allows me to visualize the amounts I’ll be working with. Make sure you have a large, heavy-bottomed pot or a Dutch oven ready, as well as a sturdy cutting board and a sharp knife. For this Vegan Pumpkin Wild Rice Soup, a good pot is essential for even cooking and simmering.
  2. Prepare the Aromatics: Let’s start with the cornerstone of almost any great soup: the aromatics. I carefully peel the large yellow onion, ensuring no papery skin remains. Then, I dice it into small, uniform pieces, aiming for about 1/4 to 1/2 inch in size. Uniformity is key here because it ensures even cooking. Next, I move on to the carrots. After a thorough wash and peel, I dice them to a similar size as the onion. You want them small enough to soften nicely within the cooking time but still substantial enough to provide a pleasant texture. Finally, the celery stalks are washed, trimmed, and diced to match the other vegetables.
  3. Mince the Garlic: The garlic adds an incredible depth of flavor to our Vegan Pumpkin Wild Rice Soup. I peel my four cloves and then mince them very finely. If you prefer a milder garlic flavor, you can crush them or even slice them thinly, but mincing allows their delicious essence to permeate the entire soup more effectively. I like to set the minced garlic aside; it gets added a little later in the cooking process to prevent it from burning.
  4. Measure the Wild Rice Blend: Carefully measure out your cup of wild rice blend. While some people like to rinse wild rice, I typically don’t find it necessary for soup, especially if it’s a good quality blend. Just ensure your wild rice is indeed a blend that includes true wild rice, as its unique texture and nutty flavor are crucial for this recipe. Set it aside, as it will go into the pot once our aromatic base is established.
  5. Open Cans and Measure Liquids: Open your can of pumpkin puree and your can of full-fat coconut milk. For the coconut milk, it’s a good idea to give the can a good shake before opening to recombine the cream with the liquid, ensuring a smooth, uniform texture when added to the soup. Measure out your vegetable broth and water. Having these liquids ready prevents any frantic searching mid-cooking.
  6. Prepare Herbs and Spices: I measure out all my dried herbs and spices – the thyme, sage, rosemary, cinnamon, and nutmeg – and place them in a small bowl. This technique, often called "mise en place," ensures nothing is forgotten and makes the seasoning process quick and efficient. Don’t forget your bay leaf, salt, and pepper – have them ready!
  7. Chop the Greens (Optional, but Recommended): If using, wash your fresh kale or spinach thoroughly. Remove any tough stems from the kale, then roughly chop the leaves into bite-sized pieces. Spinach generally requires less chopping but make sure it’s clean. These greens are added towards the end to maintain their vibrant color and delicate texture.
  8. Prepare Garnishes: While not strictly part of the "cooking," thinking about your garnishes now can save time later. If you plan to use toasted pumpkin seeds, you can quickly toast them in a dry skillet over medium heat until fragrant and slightly browned – keep an eye on them, as they can burn quickly. Chop some fresh parsley or thyme if you like. These small touches really elevate the final presentation and add a burst of fresh flavor to your Vegan Pumpkin Wild Rice Soup.

Phase 2: Building the Flavor Base for Your Vegan Pumpkin Wild Rice Soup

With all our ingredients meticulously prepped, we’re now ready to embark on the most crucial stage of any soup: building the deep, rich flavor base. This is where the magic truly begins for our Vegan Pumpkin Wild Rice Soup, as we coax out the natural sweetness and aromas from the vegetables and infuse them with warming spices. Don’t rush this part; patience here will reward you with an incredibly satisfying soup.

  1. Heat the Oil: Place your large, heavy-bottomed pot or Dutch oven over medium heat. Add the 2 tablespoons of olive oil. Allow the oil to heat gently for about a minute until it shimmers slightly. You want it hot enough to sauté, but not smoking, as smoking oil can impart a bitter flavor.
  2. Sauté the "Mirepoix": Add the diced onion, carrots, and celery to the hot oil. This classic trio, often called a mirepoix, forms the aromatic backbone of countless dishes, and our Vegan Pumpkin Wild Rice Soup is no exception. Stir the vegetables frequently with a wooden spoon or spatula. Your goal here is to "sweat" them – to soften them and allow their natural sugars to caramelize slightly, which deepens their flavor. This process typically takes about 8 to 10 minutes. Watch for the onions to become translucent and the carrots and celery to begin softening. You’ll notice the wonderful aroma starting to fill your kitchen; this is a sign that the flavors are developing beautifully.
  3. Add the Garlic and Spices: Once the mirepoix is soft and fragrant, it’s time to introduce the minced garlic. Stir the garlic into the vegetables and cook for just about 1 minute. Be careful not to burn the garlic, as burnt garlic can become bitter. You’ll know it’s ready when you can smell its intoxicating aroma strongly. Immediately after, add the dried thyme, dried sage, crushed dried rosemary, ground cinnamon, and a pinch of ground nutmeg. Stir these fragrant spices into the vegetable mixture, cooking for another 30 seconds to 1 minute. This brief toasting of the spices in the hot oil helps to "bloom" them, releasing their essential oils and intensifying their flavor, making them even more aromatic in our Vegan Pumpkin Wild Rice Soup.
  4. Deglaze (Optional, but Recommended for Depth): If you notice any delicious browned bits sticking to the bottom of your pot – a good sign of flavor development – you can deglaze the pan at this point. Pour in a splash (about 1/4 cup) of your vegetable broth. Use your wooden spoon to scrape up all those flavorful bits from the bottom of the pot. These browned bits are packed with concentrated flavor and will add another layer of complexity to your soup. Let the broth simmer for a minute until it mostly evaporates.

Phase 3: Simmering and Cooking the Vegan Pumpkin Wild Rice Soup

Now that our flavor base is robust and fragrant, it’s time to bring all the main components of our Vegan Pumpkin Wild Rice Soup together and let them meld into a harmonious, soul-warming meal. This phase involves adding the star ingredients and allowing them to simmer gently, ensuring every bite is rich with the distinct notes of pumpkin and the satisfying chew of wild rice.

  1. Introduce the Pumpkin Puree: Pour the entire can of pumpkin puree into the pot with the aromatic vegetables and spices. Stir well to combine everything. The pumpkin will immediately contribute a beautiful orange hue and a subtle sweetness that is characteristic of a hearty autumn soup. Ensure there are no lumps of pumpkin puree and that it’s thoroughly mixed with the other ingredients.
  2. Add the Wild Rice: Next, add the measured cup of wild rice blend to the pot. Give it a good stir, ensuring the wild rice is coated with the pumpkin and vegetable mixture. This initial coating helps to infuse the wild rice with flavor right from the start. Do not rinse the wild rice if you want to retain any natural starches that might contribute to thickening the soup.
  3. Pour in the Liquids and Herbs: Carefully pour in the 4 cups of vegetable broth and the 1 cup of filtered water (or additional broth, if you prefer an even richer soup). Add the bay leaf, 1 teaspoon of sea salt, and 0.5 teaspoon of freshly ground black pepper. Give everything a good stir to combine all the ingredients thoroughly. At this stage, the soup will look quite liquidy, but don’t worry; the wild rice will absorb a lot of that liquid as it cooks and expands.
  4. Bring to a Boil, Then Simmer: Increase the heat to medium-high and bring the soup to a rolling boil. Once it reaches a boil, immediately reduce the heat to low, cover the pot with a lid, and let it simmer gently. This low, slow simmer is crucial for perfectly cooking the wild rice and allowing all the flavors to deepen and meld together without the vegetables becoming mushy.
  5. The Long Simmer: Allow the Vegan Pumpkin Wild Rice Soup to simmer for approximately 45 to 55 minutes, or until the wild rice is tender and has "burst" open. Wild rice takes longer to cook than regular rice, so patience is key here. I recommend checking it around the 45-minute mark. You’ll notice the grains have expanded and many will have split open, revealing their lighter interior. This is a sign of perfectly cooked wild rice. During this simmering period, stir the soup occasionally – every 10 to 15 minutes – to prevent the wild rice from sticking to the bottom of the pot and to ensure even cooking. If you find the soup is thickening too much or the liquid is evaporating too quickly, you can add a little more vegetable broth or water, about half a cup at a time, until you reach your desired consistency. The aroma filling your kitchen at this point will be absolutely incredible – earthy, sweet, and warmly spiced.
  6. Check for Doneness: To confirm the wild rice is perfectly cooked, take a small spoonful and taste it. It should be tender with a pleasant chew, not hard or crunchy, and certainly not mushy. If it’s still too firm, continue to simmer, checking every 5-10 minutes. The consistency of the soup should also be noticeably thicker now, thanks to the starches released by the wild rice and the natural thickening power of the pumpkin puree.

Phase 4: Finishing Touches and Serving Your Vegan Pumpkin Wild Rice Soup

We’re almost at the finish line for our magnificent Vegan Pumpkin Wild Rice Soup! This final phase is all about adding the last flourishes, adjusting the flavors to perfection, and preparing it for serving. These steps will elevate your soup from merely delicious to truly unforgettable.

  1. Stir in the Coconut Milk: Once the wild rice is fully cooked and tender, remove the bay leaf from the pot – we’ve extracted all the flavor we need from it. Give your can of full-fat coconut milk one final good shake and then pour it into the soup. Stir gently to incorporate the creamy coconut milk evenly throughout the soup. This adds a wonderful richness, a velvety texture, and a subtle sweetness that beautifully complements the pumpkin and spices. Do not bring the soup back to a rolling boil after adding the coconut milk, as it can sometimes curdle or separate. Just heat it through gently for a few minutes until it’s warmed.
  2. Add the Fresh Greens: Now, add the chopped fresh kale or spinach to the pot. Stir it into the hot soup. The residual heat of the soup will be enough to wilt the greens perfectly without overcooking them, preserving their vibrant color and nutritional value. Continue to stir until the kale or spinach has just wilted, which usually takes only 2 to 3 minutes.
  3. Adjust Seasoning and Flavor Balance: This is a crucial step for any great cook – tasting and adjusting. Take a spoonful of the soup and taste it carefully. Does it need more salt? A little more pepper? Perhaps it could benefit from a touch more sweetness to balance the earthy flavors, in which case I might stir in the optional 1 tablespoon of maple syrup or agave nectar. If you feel the soup needs a little brightness or acidity to make the flavors "pop," a teaspoon of apple cider vinegar can work wonders. Add these optional ingredients gradually, tasting after each addition, until the soup reaches your preferred flavor profile. Your palate is your best guide here!
  4. Final Simmer (Optional): If you added any additional seasonings or liquids, allow the soup to simmer for just another 5 minutes to allow all the new flavors to fully integrate. Keep the heat very low.
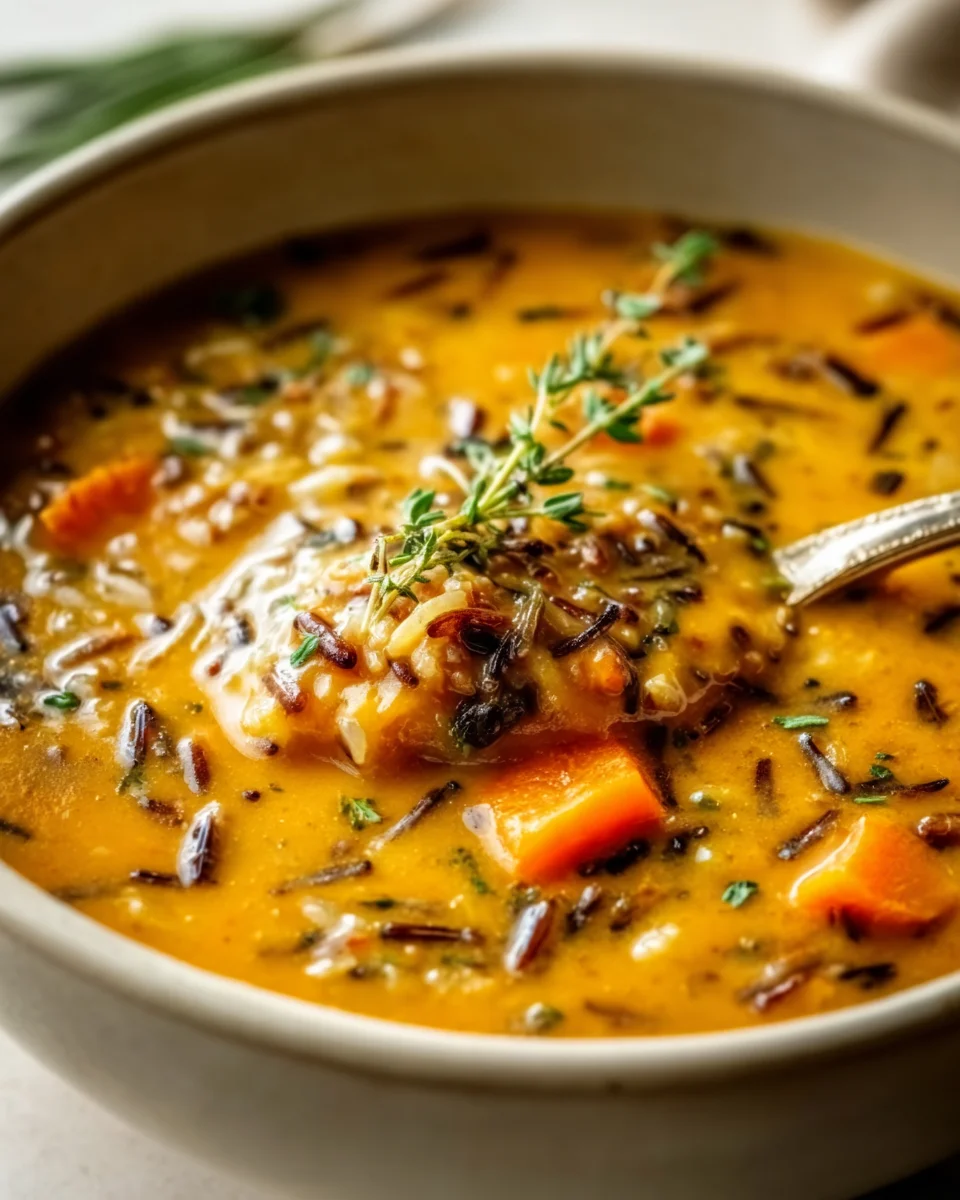
  5. Serve and Garnish: Ladle generous portions of your perfectly cooked Vegan Pumpkin Wild Rice Soup into warm bowls. For an extra touch of flavor and texture, sprinkle each serving with some fresh chopped parsley or thyme. The herbaceous freshness provides a lovely contrast to the rich soup. Finally, scatter a few toasted pumpkin seeds (pepitas) over the top for a delightful crunch and nutty finish.

Tips for the Best Vegan Pumpkin Wild Rice Soup Experience

Making a truly exceptional batch of Vegan Pumpkin Wild Rice Soup goes beyond just following the steps; it involves understanding little nuances and how to make the recipe your own. Here are some of my favorite tips to ensure your soup is always a resounding success and brings maximum comfort.

Enhancing the Wild Rice:

One of the stars of this soup is, of course, the wild rice. While it adds a fantastic nutty flavor and chewy texture, it can be a little inconsistent in its cooking time depending on the blend. If you find your wild rice isn’t softening as much as you’d like, even after the recommended simmering time, don’t despair! Sometimes adding a little more liquid – either broth or water – and continuing to simmer for another 10-15 minutes, while keeping the lid on, will do the trick. A good quality wild rice blend will have most grains "burst" open when cooked, which is when they’re at their most tender and visually appealing. If you prefer a faster cooking time, you can pre-soak the wild rice for an hour or two before adding it to the soup, but I find the slow simmer in the broth truly infuses it with flavor.

Making it Creamier or Chunkier:

The beauty of this Vegan Pumpkin Wild Rice Soup is its versatility. If you prefer an even creamier, silkier texture, you have a couple of options. Once the soup is cooked and the wild rice is tender, you can carefully use an immersion blender to partially blend a portion of the soup directly in the pot. I usually just blend about a quarter to a third of the soup, leaving plenty of chunky vegetables and wild rice intact for texture. This creates a beautifully thick base while retaining the satisfying bite of the unblended ingredients. Alternatively, for an extra creamy touch without blending, you could add an additional half can of full-fat coconut milk in the final step, adjusting seasonings accordingly. If you prefer an even chunkier soup, consider adding a cup of diced butternut squash or sweet potato along with the carrots and celery in Phase 2. They will soften beautifully and contribute even more hearty substance and sweetness.

Storage and Leftovers:

This Vegan Pumpkin Wild Rice Soup is absolutely fantastic as leftovers, and often, the flavors deepen even further overnight. Allow the soup to cool completely before transferring it to airtight containers. It will keep well in the refrigerator for up to 4-5 days. It also freezes beautifully! For freezing, portion the cooled soup into freezer-safe containers or bags, leaving a little headspace for expansion. It can be stored in the freezer for up to 3 months. When reheating, I recommend doing so gently on the stovetop over medium-low heat, stirring occasionally. You may find that the wild rice has absorbed more liquid, making the soup very thick. Don’t hesitate to add a splash of vegetable broth or water to thin it back to your desired consistency. Taste and adjust seasonings after reheating, as flavors can sometimes mellow in the fridge or freezer.

Serving Suggestions and Pairings:

While this Vegan Pumpkin Wild Rice Soup is certainly hearty enough to be a meal on its own, it pairs wonderfully with a few simple accompaniments. A crusty loaf of artisanal bread or some warm, soft dinner rolls are perfect for soaking up every last drop. A simple side salad with a light vinaigrette would also be a lovely, fresh counterpoint to the richness of the soup. For an extra special presentation, especially during the fall holidays, consider serving it in small hollowed-out pumpkin or squash bowls! Remember, garnishes like fresh herbs (parsley, chives, or a sprig of thyme) and toasted nuts or seeds (pecans, walnuts, or pepitas) add not only visual appeal but also additional layers of flavor and texture that truly complete the dish.

Customizing Your Spices:

The spice blend in this recipe creates a classic, warming profile, but don’t be afraid to experiment! If you love a bit of heat, a pinch of cayenne pepper or red pepper flakes added with the other spices can give it a nice kick. For a more pronounced "fall spice" flavor, you could increase the cinnamon and nutmeg slightly, or even add a tiny pinch of ground ginger or allspice. If you have fresh herbs on hand, feel free to substitute them for their dried counterparts, just remember that you’ll need about three times the amount of fresh herbs compared to dried for equivalent flavor. For example, 1.5 teaspoons dried thyme would be roughly 1.5 tablespoons of fresh thyme leaves. This Vegan Pumpkin Wild Rice Soup is incredibly forgiving and delicious, so make it your own!

Vegan Pumpkin Wild Rice Soup: Hearty & Flavorful!

Conclusion:

And there you have it, my friends! We’ve journeyed through the creation of what I truly believe will become a staple in your autumn and winter culinary repertoire. This isn’t just another meal; it’s an experience, a warm embrace in a bowl that promises to delight your senses and nourish your soul. I cannot emphasize enough how much I adore this particular concoction, and after making it countless times, I’m confident you’ll feel the same. The harmonious blend of earthy wild rice, sweet, creamy pumpkin, and a symphony of aromatic spices creates a depth of flavor that is simply unparalleled. It’s hearty without being heavy, satisfyingly rich yet remarkably wholesome, and surprisingly easy to bring to life in your own kitchen.

What makes this Vegan Pumpkin Wild Rice Soup an absolute must-try isn’t just its incredible taste, but also its versatility and the sheer comfort it brings. Imagine a chilly evening, a steaming bowl cradled in your hands, the warmth spreading from your fingertips right through you. Every spoonful is a testament to the magic of plant-based cooking, proving that wholesome ingredients can combine to create something truly spectacular and deeply comforting. It’s a dish that feels gourmet yet accessible, perfect for a cozy night in or for sharing with loved ones around the dinner table. Its vibrant color is an invitation, and its complex flavor profile keeps you coming back for more.

Elevating Your Experience: Serving Suggestions and Delicious Variations

While this soup is magnificent all on its own, I love to offer a few ideas to make your experience even more memorable. For a truly satisfying meal, I highly recommend serving it with a generous slice of crusty sourdough bread, perfect for soaking up every last drop of that velvety broth. A light, peppery arugula salad with a bright vinaigrette also makes a fantastic accompaniment, offering a refreshing counterpoint to the soup’s richness. Don’t forget the toppings! A sprinkle of toasted pumpkin seeds adds a delightful crunch and extra nutty flavor, while a swirl of coconut cream (or even a dollop of vegan sour cream) can enhance its luxurious texture. Fresh herbs like chopped parsley or chives also add a beautiful touch of color and freshness.

But the fun doesn’t stop there! One of the joys of cooking is personalizing a dish, and this soup is wonderfully adaptable. If you like a little extra kick, a pinch of red pepper flakes or a dash of hot sauce stirred in at the end can transform it. For an even more robust flavor, consider adding some sautéed mushrooms or wilted kale during the last few minutes of cooking; they absorb the flavors beautifully. You could even experiment with different root vegetables like sweet potato or parsnip alongside the pumpkin for a unique twist. And if you’re looking to boost the protein content further, a handful of cooked chickpeas or lentils would be a seamless addition. Feel free to adjust the spice blend to your preference – perhaps a touch more ginger or a hint of smoked paprika for a different aromatic profile. The possibilities are truly endless, allowing you to make this already fantastic soup uniquely yours.

Your Culinary Adventure Awaits!

So, what are you waiting for? I sincerely hope you’ll take the plunge and whip up this delightful recipe soon. It’s an incredibly rewarding cooking experience, and the end result is nothing short of pure comfort and joy. Whether you’re a seasoned vegan chef or just beginning to explore plant-based cuisine, this soup is designed to impress and satisfy. I encourage you to embrace the process, savor the aromas that will fill your kitchen, and then most importantly, enjoy every single spoonful of your homemade goodness. And please, once you’ve tried it, come back and share your thoughts! I’d love to hear about your experience, your favorite serving suggestions, or any clever variations you came up with. Happy cooking, my friends!


Vegan Pumpkin Wild Rice Soup

A warm and hearty vegan soup, blending the earthy richness of pumpkin with the satisfying chew of wild rice and aromatic spices, perfect for cozy evenings.

Prep Time
20 Minutes
Cook Time
70 Minutes
Total Time
90 Minutes
Servings
6-8 servings

Ingredients


Instructions


Important Information

Nutrition Facts (Per Serving)

It is important to consider this information as approximate and not to use it as definitive health advice.

Allergy Information

Please check ingredients for potential allergens and consult a health professional if in doubt.

« Previous Post
Fall Spiced Apple Cinnamon Snickerdoodle Cookies Recipe
Next Post »
Ultimate Sourdough Pesto Grilled Cheese - Easy Recipe

If you enjoyed this…

Flavorful Cantonese Beef Chow Mein Recipe – Quick & Easy!

Shredded BBQ Chicken Mac and Cheese

BBQ Chicken Mac and Cheese

Hot Honey And Cheese

Crispy Hot Honey Feta Chicken Recipe – Bold, Sweet Heat Meets Golden Crunch

Primary Sidebar

Browse by Diet

BreakfastDinnerLunchDessertAppetizer

Sweet Peach Yogurt Parfait Delight

One of my fondest memories is from a lazy summer afternoon spent at my grandmother’s house. The sun filtered through the kitchen window, casting a warm glow over the table where she would create her culinary magic. It was during one of those blissful moments that I first tasted her Peach Yogurt Parfait with Honey and Granola. The sweet aroma of ripe peaches mingling with creamy yogurt and the crunch of granola was nothing short of heavenly. It felt like summer captured in a bowl, and I still remember the joy of diving in with a spoon, each layer revealing a new burst of flavor.

When I think about that parfait, I can almost hear the gentle hum of the bees outside, reminding me of the floral notes that honey brings to every bite. The vibrant yellows and soft oranges of the peaches contrast beautifully with the creamy white yogurt and the golden crunch of granola. It’s a dish that not only looks delightful but also tastes like a celebration of fresh, wholesome ingredients.

What makes my version of this Peach Yogurt Parfait special is the careful balance of flavors and textures. I use ripe, juicy peaches, drizzled with locally sourced honey, and a homemade granola that’s bursting with nuts and seeds for an extra crunch. It’s a simple dish, but every layer is crafted with love and attention.

Let me show you exactly how to make this delightful parfait, so you can bring a bit of that summer magic into your kitchen!

Sweet Peach Yogurt Parfait Delight

Why You’ll Love This Recipe

  • Delightfully creamy texture from the Greek yogurt, paired with the juicy sweetness of fresh peaches.
  • Ready in under 20 minutes, making it a quick and satisfying breakfast or snack option.
  • Budget-friendly, using common ingredients that you may already have in your pantry.
  • Customizable with your favorite granola and nuts, allowing you to tailor each parfait to your taste.
  • Perfectly balanced flavors with the bright acidity of lemon juice and the sweetness of honey enhancing the peaches.

Ingredients

  • For the Parfait:
  • 2 cups plain Greek yogurt (or vanilla yogurt for a sweeter option)
  • 2 large ripe peaches, diced (about 2 cups)
  • 1 tablespoon fresh lemon juice (to prevent browning of peaches)
  • 2 tablespoons honey (plus more for drizzling)
  • 1 teaspoon vanilla extract (optional for extra flavor)
  • For the Granola:
  • 1 cup granola (store-bought or homemade; see notes for a simple granola recipe)
  • 1/4 cup sliced almonds (optional for added crunch)
  • 1/4 cup shredded coconut (optional for added flavor)

Let’s dive into some key ingredients that make this Peach Yogurt Parfait so delightful! First, the Greek yogurt is not only creamy but also packed with protein, making it a satisfying option for breakfast or a snack. If you’re looking for a sweeter option, you can easily substitute it with vanilla yogurt, though it may alter the overall flavor balance. Next, the ripe peaches are the star of the show; their natural sweetness shines through, so I recommend choosing peaches that yield slightly to pressure, indicating they’re perfectly ripe. If peaches aren’t in season, feel free to use nectarines or even frozen peaches—just thaw them before use. Finally, honey adds a lovely floral sweetness that ties everything together. If you prefer, maple syrup can serve as a delicious substitute.

Step-by-Step Instructions

  1. Start by preparing the peaches. Wash them thoroughly, then slice and dice them into bite-sized pieces. In a medium bowl, toss the diced peaches with 1 tablespoon of fresh lemon juice to prevent browning. Set aside for about 5 minutes while the lemon juice works its magic.
  2. In a separate bowl, combine the Greek yogurt, 2 tablespoons of honey, and 1 teaspoon of vanilla extract if using. Stir the mixture until smooth and thoroughly blended. This should take about a minute. Avoid overmixing to maintain the creaminess of the yogurt.
  3. Now it’s time to layer your parfait. Grab a clear glass or bowl to showcase your beautiful creation. Start with a generous spoonful of the yogurt mixture at the bottom—about 1/4 cup will do. Use a spoon to spread it evenly.
  4. Add a layer of the diced peaches over the yogurt, ensuring they cover the yogurt completely. You might want to use about half of what you have prepared—roughly 1 cup. This layer should be visually appealing, so arrange the peaches neatly.
  5. Sprinkle 1/4 cup of granola over the peaches. This adds a delightful crunch. Make sure to distribute it evenly to ensure every bite has that satisfying texture. Avoid packing it down too tightly, as you want it to maintain its crunch.
  6. Repeat the layers: spoon in another 1/4 cup of yogurt, followed by another cup of peaches, and another sprinkle of granola. You should have at least two layers, but feel free to add more depending on your glass size.
  7. Finish off your parfait with a drizzle of honey on top for added sweetness and a touch of elegance. If you’re using sliced almonds or shredded coconut, sprinkle them on top now. It adds a lovely visual contrast and extra flavor.
  8. Serve immediately or refrigerate for up to 30 minutes before serving to allow the flavors to meld together. However, I recommend enjoying it fresh to maintain the granola’s crunch.

Pro Tips for the Best Peach Yogurt Parfait With Honey And Granola

  • Make sure to choose ripe peaches for the best flavor and texture. A common mistake is using unripe fruit, which can lead to a less enjoyable parfait. Look for peaches that are fragrant and slightly soft to the touch.
  • Use a clear glass to assemble your parfait; this not only makes for a beautiful presentation but also allows you to see the colorful layers, which adds to the enjoyment of eating it.
  • For an even creamier texture, consider whipping the Greek yogurt with a hand mixer for a couple of minutes before layering. This small adjustment makes a huge difference in mouthfeel.
  • Be mindful of the granola-to-yogurt ratio. Too much granola can overwhelm the parfait, while too little can make it feel too creamy. Aim for about 1/4 cup of granola per layer for the perfect balance.
  • If you’re making this for a gathering, consider preparing the yogurt and peaches ahead of time and layering them just before serving. This ensures the granola stays crunchy!

Variations & Serving Ideas

There are so many ways to get creative with your Peach Yogurt Parfait! For a tropical twist, swap out the peaches for mangoes or pineapples and top with coconut flakes. If you prefer a berry flavor, mix in some blueberries or strawberries with the peaches for added color and taste. For a nutty version, incorporate chopped walnuts or pecans instead of almonds.

As for serving ideas, this parfait pairs beautifully with a side of scrambled eggs for a hearty breakfast or fresh fruit salad for a light lunch. You might also enjoy it alongside whole grain toast with almond butter for an energizing snack. The contrast of flavors and textures will elevate your meal experience!

Storage, Make-Ahead & Reheating

The Peach Yogurt Parfait is best enjoyed fresh, but you can prepare some components ahead of time. Store the layered parfait in an airtight container in the refrigerator for up to 24 hours. However, be cautious; the granola may lose its crunch if stored too long. You can freeze the yogurt and peach mixture for up to 2 months; just remember to thaw it in the refrigerator overnight before serving.

If you plan to enjoy this dish the next day, it can taste even better as the flavors meld together. Just remember to add the granola right before serving to keep its delightful crunch!

Frequently Asked Questions

Can I make Peach Yogurt Parfait With Honey And Granola ahead of time?

Yes — in fact, it tastes even better the next day as the flavors meld. However, I recommend waiting to add the granola until just before serving to maintain its crunch.

What can I substitute for Greek yogurt?

If you prefer a lighter option, you can substitute Greek yogurt with regular yogurt or a dairy-free alternative like coconut yogurt. Just remember that this may alter the creaminess and flavor profile slightly.

Can I use frozen peaches for this parfait?

Absolutely! Just make sure to thaw the frozen peaches before using them. They will still add great flavor, though the texture may be slightly softer than fresh peaches.

How do I make the parfait vegan?

To make a vegan version, substitute the Greek yogurt with a plant-based yogurt alternative, and replace honey with maple syrup or agave nectar. This keeps the parfait sweet while adhering to a vegan diet.

What other fruits can I use in this recipe?

You can mix and match fruits based on your preference. Try using strawberries, blueberries, raspberries, or even bananas. Just make sure to adjust the lemon juice as needed to prevent browning.

Sweet Peach Yogurt Parfait Delight

Final Thoughts

The Peach Yogurt Parfait with Honey and Granola is a delightful blend of creamy yogurt, sweet peaches, and crunchy granola that creates a satisfying and nourishing treat. Each layer bursts with flavor, making it a perfect choice for breakfast or a light dessert.

This is the kind of recipe I come back to again and again, especially when I want something refreshing and wholesome to start my day. The harmony of sweet and tart flavors, combined with the delightful crunch, never fails to lift my spirits!

I encourage you to give this parfait a try and indulge in its comforting goodness. Feel free to share your results or even add your own twist—perhaps a sprinkle of cinnamon or a handful of nuts. Enjoy creating your perfect parfait!

Print
clock clock iconcutlery cutlery iconflag flag iconfolder folder iconinstagram instagram iconpinterest pinterest iconfacebook facebook iconprint print iconsquares squares iconheart heart iconheart solid heart solid icon

Peach Yogurt Parfait


  • Author: Lily author
  • Total Time: 15 minutes
  • Yield: 4 servings 1x
Pin Recipe
Print Recipe

Description

This Peach Yogurt Parfait combines creamy Greek yogurt, juicy peaches, and crunchy granola for a delightful treat. It’s a perfect breakfast or snack that captures the essence of summer in every bite.


Ingredients

Scale
  • For the Parfait:
  • 2 cups plain Greek yogurt (or vanilla yogurt for a sweeter option)
  • 2 large ripe peaches, diced (about 2 cups)
  • 1 tablespoon fresh lemon juice (to prevent browning of peaches)
  • 2 tablespoons honey (plus more for drizzling)
  • 1 teaspoon vanilla extract (optional for extra flavor)
  • For the Granola:
  • 1 cup granola (store-bought or homemade; see notes for a simple granola recipe)
  • 1/4 cup sliced almonds (optional for added crunch)
  • 1/4 cup shredded coconut (optional for added flavor)

Instructions

  1. Start by preparing the peaches. Wash them thoroughly, then slice and dice them into bite-sized pieces. In a medium bowl, toss the diced peaches with 1 tablespoon of fresh lemon juice to prevent browning. Set aside for about 5 minutes while the lemon juice works its magic.
  2. In a separate bowl, combine the Greek yogurt, 2 tablespoons of honey, and 1 teaspoon of vanilla extract if using. Stir the mixture until smooth and thoroughly blended. This should take about a minute. Avoid overmixing to maintain the creaminess of the yogurt.
  3. Now it’s time to layer your parfait. Grab a clear glass or bowl to showcase your beautiful creation. Start with a generous spoonful of the yogurt mixture at the bottom—about 1/4 cup will do. Use a spoon to spread it evenly.
  4. Add a layer of the diced peaches over the yogurt, ensuring they cover the yogurt completely. You might want to use about half of what you have prepared—roughly 1 cup. This layer should be visually appealing, so arrange the peaches neatly.
  5. Sprinkle 1/4 cup of granola over the peaches. This adds a delightful crunch. Make sure to distribute it evenly to ensure every bite has that satisfying texture. Avoid packing it down too tightly, as you want it to maintain its crunch.
  6. Repeat the layers: spoon in another 1/4 cup of yogurt, followed by another cup of peaches, and another sprinkle of granola. You should have at least two layers, but feel free to add more depending on your glass size.
  7. Finish off your parfait with a drizzle of honey on top for added sweetness and a touch of elegance. If you’re using sliced almonds or shredded coconut, sprinkle them on top now. It adds a lovely visual contrast and extra flavor.
  8. Serve immediately or refrigerate for up to 30 minutes before serving to allow the flavors to meld together. However, I recommend enjoying it fresh to maintain the granola’s crunch.
  • Prep Time: 15 mins
  • Cook Time: 0 mins
  • Category: Breakfast
  • Method: No-cook
  • Cuisine: American

Nutrition

  • Serving Size: 1 parfait
  • Calories: 250
  • Sugar: 20 g
  • Sodium: 50 mg
  • Fat: 5 g
  • Saturated Fat: 2 g
  • Unsaturated Fat: 3 g
  • Trans Fat: 0 g
  • Carbohydrates: 40 g
  • Fiber: 3 g
  • Protein: 10 g
  • Cholesterol: 10 mg

Keywords: Choose ripe peaches for the best flavor and texture. Use a clear glass for a beautiful presentation. For creaminess, consider whipping the yogurt before layering. Be mindful of the granola-to-yogurt ratio. Prepare yogurt and peaches ahead of time for gatherings, layering just before serving.

Did you make this recipe?

Share a photo and tag us — we can't wait to see what you've made!

Sun-Kissed Frozen Orange Cream Slush

As a child, summer days felt like they lasted forever. I remember the sticky heat wrapping around me as I played outside, my laughter mingling with the sounds of the neighborhood. But nothing could cool me down quite like the moment I’d spot my grandmother, laboring over her blender, whipping up her famous Frozen Orange Creamsicle Slush. That vibrant orange treat, with its frosty texture and sweet citrus aroma, was like a burst of sunshine in a cup. Just one sip, and I could feel the coolness wash over me, sparking pure joy.

This Frozen Orange Creamsicle Slush has a way of making you feel like a kid again. Its creamy, dreamy consistency is a delightful balance of bright orange and soft vanilla, inviting you to dive right in. The refreshing tang of orange dances on your tongue, while the smooth creaminess envelops you in a comforting embrace. It’s a nostalgic treat that’s perfect for hot summer afternoons or anytime you need a little pick-me-up.

What makes my version of this slush stand out is the addition of a hint of vanilla bean, which elevates the flavor and adds an extra layer of richness. Plus, it’s super easy to whip up with just a few simple ingredients that you probably already have on hand! So, if you’re ready to relive those sun-soaked memories, let me show you exactly how to make it.

Sun-Kissed Frozen Orange Cream Slush

Why You’ll Love This Recipe

  • Each slush is a perfect blend of creamy vanilla and zesty orange, creating a nostalgic flavor reminiscent of summer days.
  • This refreshing treat is ready in under 15 minutes, making it an ideal quick dessert for unexpected guests or hot afternoons.
  • With just 8 simple ingredients, it’s budget-friendly, ensuring you don’t have to break the bank to enjoy a delicious slush.
  • The slush has a perfectly smooth texture, thanks to the combination of ice and ice cream, providing a delightful contrast to the bright citrus flavors.
  • It’s highly customizable; you can easily adjust the sweetness and add fresh herbs for a unique twist that suits your taste.

Ingredients

  • 2 cups orange juice (freshly squeezed or store-bought)
  • 1 cup vanilla ice cream
  • 1 cup crushed ice
  • 1/2 cup milk (whole or 2%)
  • 1/4 cup granulated sugar (adjust based on sweetness preference)
  • 1 teaspoon vanilla extract
  • Zest of 1 orange (for added flavor)
  • Fresh orange slices and mint leaves (for garnish)

The star of this Frozen Orange Creamsicle Slush is the orange juice, which provides the vibrant, citrusy base. Freshly squeezed juice will yield the brightest flavor, but store-bought options can be just as convenient. If you’re opting for store-bought, choose 100% pure juice with no added sugars for the best results. Another essential ingredient is the vanilla ice cream; it adds creaminess and sweetness. You can substitute it with dairy-free ice cream if you’re looking for a vegan option. Whole or 2% milk complements the ice cream, creating a smooth blend. If you want a lower-calorie version, almond or oat milk can be good alternatives.

Lastly, the granulated sugar can be adjusted based on your sweetness preference. If you prefer a more natural sweetener, consider using honey or agave syrup. The orange zest enhances the flavor profile, providing an aromatic pop that brings the whole slush together. Don’t skip it! It adds an extra layer of brightness that makes this slush truly special.

Step-by-Step Instructions

  1. Start by preparing your ingredients. Gather 2 cups of orange juice, 1 cup of vanilla ice cream, and 1 cup of crushed ice. Make sure the ice is finely crushed, as larger chunks can make blending difficult.
  2. In a blender, combine the orange juice, vanilla ice cream, crushed ice, and 1/2 cup of milk. Add 1/4 cup of granulated sugar and 1 teaspoon of vanilla extract. If you like a sweeter slush, consider adding a bit more sugar at this stage.
  3. Add the zest of 1 orange to the blender. This step is crucial for enhancing the citrus flavor of your slush. Make sure not to include the bitter white pith—only the flavorful zest.
  4. Blend the mixture on medium-high speed for about 30-45 seconds. Stop once the ingredients are fully combined and the slush has a smooth, even consistency. If you notice large chunks of ice, blend for an additional 10-15 seconds. Avoid over-blending, as this can make the slush too liquidy.
  5. Once blended, taste the slush. If it needs more sweetness, add a little more sugar and blend for a few more seconds. If it’s too thick, you can add a splash of milk to reach your desired consistency.
  6. Pour the slush into glasses. This recipe typically serves 4, but you can easily double it for larger gatherings. Use a spoon to help guide the slush into the glasses if needed.
  7. Garnish each serving with fresh orange slices and mint leaves. The mint not only adds a pop of color but also a refreshing aroma that complements the citrus flavors beautifully.
  8. Serve immediately and enjoy! If you’ve made extra, you can refrigerate it for a short time, but it’s best enjoyed fresh.

Pro Tips for the Best Frozen Orange Creamsicle Slush

  • Don’t skip the orange zest! It’s a game-changer for flavor. Always zest before juicing to make it easier.
  • Use a high-powered blender for the best texture. A standard blender may struggle with ice, leading to uneven consistency. If you have a food processor, that can work too, but ensure the ice is finely crushed.
  • Adjust the ice-to-liquid ratio carefully. If your slush is too thick, it won’t blend well. Start with less ice and add more until you reach your preferred texture.
  • Be cautious with the sugar! Always start with the lower amount, as you can easily add more, but it’s hard to fix an overly sweet slush.
  • For a fun twist, consider adding a splash of coconut milk or a handful of fresh fruit like strawberries or pineapple. This not only enhances the flavor but also adds a beautiful color contrast.

Variations & Serving Ideas

There are countless ways to put a spin on your Frozen Orange Creamsicle Slush. Consider making a tropical version by adding in some pineapple juice or coconut milk for a delightful tropical twist. If you’re feeling adventurous, try incorporating a handful of frozen mango or peach slices for added sweetness. For a lighter version, swap out the vanilla ice cream for Greek yogurt for a creamy yet tangy alternative.

As for serving ideas, this refreshing slush pairs wonderfully with light summer dishes like grilled chicken skewers, fish tacos, or a simple salad topped with citrus vinaigrette. The bright, zesty flavors of the slush complement these dishes perfectly, making them an ideal pairing for a sunny day.

Storage, Make-Ahead & Reheating

This Frozen Orange Creamsicle Slush is best enjoyed fresh, but if you have leftovers, you can store them in an airtight container in the fridge for up to 2 days. Just keep in mind that the slush may lose some of its texture over time as the ice melts. It doesn’t freeze well, as the ice will turn into a solid block. If you must freeze it, blend again after thawing to restore the slushy consistency. This treat is best the day you make it, as the flavors meld together beautifully overnight, enhancing its deliciousness.

Frequently Asked Questions

Can I make Frozen Orange Creamsicle Slush ahead of time?

Yes — in fact, it tastes even better the next day as the flavors meld. However, it’s best to enjoy it fresh, as the texture can change if stored for too long. If you need to prepare it ahead, keep it in the fridge and re-blend before serving.

What kind of orange juice should I use?

For the best flavor, use freshly squeezed orange juice. However, if you’re short on time, opt for 100% pure store-bought juice without added sugars. This will ensure that your slush remains flavorful and refreshing.

Can I substitute the vanilla ice cream?

Absolutely! If you’re looking for a dairy-free option, coconut milk ice cream or a non-dairy vanilla ice cream can work wonderfully. They will still provide the creamy texture and sweetness you desire.

How can I adjust the sweetness of my slush?

You can easily adjust the sweetness by modifying the amount of sugar added. Start with 1/4 cup and taste the mixture before blending. If you prefer it sweeter, add more sugar gradually until it reaches your desired level.

What should I do if my slush is too thick?

If your slush is too thick, simply add a splash of milk or orange juice and blend again. This will help achieve a more drinkable consistency while maintaining the slushy texture. Adjust gradually to reach your preferred thickness.

Sun-Kissed Frozen Orange Cream Slush

Final Thoughts

The Frozen Orange Creamsicle Slush is a delightful blend of refreshing citrus and creamy goodness, making it a perfect treat for warm days or any time you crave a taste of nostalgia. The way the bright orange flavor dances with the creamy texture truly elevates this slush, transforming it into a satisfying escape from the everyday.

This is the kind of recipe I come back to again and again, especially when I’m looking to cool down or impress guests at a summer gathering. It’s simple to make and always brings smiles all around! I encourage you to try this recipe for yourself—don’t hesitate to share your results or even put your own spin on it. Happy slushing!

Print
clock clock iconcutlery cutlery iconflag flag iconfolder folder iconinstagram instagram iconpinterest pinterest iconfacebook facebook iconprint print iconsquares squares iconheart heart iconheart solid heart solid icon

Frozen Orange Creamsicle Slush


  • Author: Lily author
  • Total Time: 15 minutes
  • Yield: 4 servings 1x
Pin Recipe
Print Recipe

Description

This Frozen Orange Creamsicle Slush is a refreshing treat that combines creamy vanilla and zesty orange flavors. Perfect for hot summer days, it brings back nostalgic memories with every sip.


Ingredients

Scale
  • 2 cups orange juice (freshly squeezed or store-bought)
  • 1 cup vanilla ice cream
  • 1 cup crushed ice
  • 1/2 cup milk (whole or 2%)
  • 1/4 cup granulated sugar (adjust based on sweetness preference)
  • 1 teaspoon vanilla extract
  • Zest of 1 orange (for added flavor)
  • Fresh orange slices and mint leaves (for garnish)

Instructions

  1. Start by preparing your ingredients. Gather 2 cups of orange juice, 1 cup of vanilla ice cream, and 1 cup of crushed ice. Make sure the ice is finely crushed, as larger chunks can make blending difficult.
  2. In a blender, combine the orange juice, vanilla ice cream, crushed ice, and 1/2 cup of milk. Add 1/4 cup of granulated sugar and 1 teaspoon of vanilla extract. If you like a sweeter slush, consider adding a bit more sugar at this stage.
  3. Add the zest of 1 orange to the blender. This step is crucial for enhancing the citrus flavor of your slush. Make sure not to include the bitter white pith—only the flavorful zest.
  4. Blend the mixture on medium-high speed for about 30-45 seconds. Stop once the ingredients are fully combined and the slush has a smooth, even consistency. If you notice large chunks of ice, blend for an additional 10-15 seconds. Avoid over-blending, as this can make the slush too liquidy.
  5. Once blended, taste the slush. If it needs more sweetness, add a little more sugar and blend for a few more seconds. If it’s too thick, you can add a splash of milk to reach your desired consistency.
  6. Pour the slush into glasses. This recipe typically serves 4, but you can easily double it for larger gatherings. Use a spoon to help guide the slush into the glasses if needed.
  7. Garnish each serving with fresh orange slices and mint leaves. The mint not only adds a pop of color but also a refreshing aroma that complements the citrus flavors beautifully.
  8. Serve immediately and enjoy! If you’ve made extra, you can refrigerate it for a short time, but it's best enjoyed fresh.
  • Prep Time: 15 min
  • Cook Time: 0 min
  • Category: Dessert
  • Method: Blending
  • Cuisine: American

Nutrition

  • Serving Size: 1 serving
  • Calories: 200
  • Sugar: 30 g
  • Sodium: 50 mg
  • Fat: 5 g
  • Saturated Fat: 3 g
  • Unsaturated Fat: 2 g
  • Trans Fat: 0 g
  • Carbohydrates: 40 g
  • Fiber: 1 g
  • Protein: 2 g
  • Cholesterol: 20 mg

Keywords: Don't skip the orange zest! It's a game-changer for flavor. Always zest before juicing to make it easier.

Did you make this recipe?

Share a photo and tag us — we can't wait to see what you've made!

Zesty Lemon Poppy Seed Delight

One rainy afternoon, I found myself in my grandmother’s cozy kitchen, the kind that always smelled like warmth and love. She was whipping up her famous Lemon Poppy Seed Loaf, a recipe that had been passed down through generations. As the batter came together, the zesty aroma of fresh lemons filled the air, mingling perfectly with the nutty fragrance of poppy seeds. I can still picture her, apron-clad, as she expertly drizzled a vibrant citrus icing over the loaf, creating a glossy, sun-kissed finish that beckoned us to dive in. It was a moment that sparked my own passion for baking, and this recipe has become a cherished staple in my home ever since.

When you take a bite of this Lemon Poppy Seed Loaf, it’s like a burst of sunshine on your palate. The loaf is beautifully golden, with a tender crumb that melts in your mouth. Each slice is speckled with tiny poppy seeds, adding a delightful crunch that contrasts beautifully with the tangy sweetness of the lemon. And that citrus icing? It’s the finishing touch that elevates this loaf from ordinary to extraordinary, with its bright, zesty flavor dancing on your taste buds.

This recipe stands out because it embraces simplicity while delivering on flavor. I’ve added a hint of vanilla to the batter, enhancing the overall taste and making it even more indulgent. Trust me, once you make this Lemon Poppy Seed Loaf With Citrus Icing, it’ll become a go-to in your baking repertoire.

So, let me show you exactly how to make it!

Zesty Lemon Poppy Seed Delight

Why You’ll Love This Recipe

  • Moist and tender crumb that melts in your mouth, thanks to the perfect balance of butter and buttermilk.
  • Bright, zesty lemon flavor paired with crunchy poppy seeds, creating a delightful texture and taste experience.
  • Easy to whip up in just about an hour, perfect for last-minute gatherings or a cozy afternoon treat.
  • Budget-friendly with everyday ingredients, making it an accessible option for all home bakers.
  • The citrus icing adds a sweet tang that elevates the loaf, turning a simple recipe into a showstopper!

Ingredients

  • 1 ½ cups (190g) all-purpose flour
  • 1 teaspoon baking powder
  • ½ teaspoon baking soda
  • ½ teaspoon salt
  • 3 tablespoons poppy seeds
  • ½ cup (115g) unsalted butter, softened to room temperature
  • 1 cup (200g) granulated sugar
  • 2 large eggs
  • 1 teaspoon vanilla extract
  • 1 teaspoon lemon zest (from about 1 medium lemon)
  • ½ cup (120ml) buttermilk
  • 2 tablespoons fresh lemon juice

For the Citrus Icing:

  • 1 cup (120g) powdered sugar
  • 2 tablespoons fresh lemon juice
  • 1 tablespoon orange juice
  • 1 teaspoon lemon zest (for garnish, optional)

Let’s dive into the key ingredients that make this Lemon Poppy Seed Loaf so special. The all-purpose flour provides the structure and base for the loaf, while the baking powder and baking soda ensure it rises perfectly, giving the loaf a light texture. For a gluten-free variation, you could substitute the flour with a gluten-free all-purpose blend. Poppy seeds not only add a delightful crunch but also contribute to the unique flavor profile that pairs well with the citrus notes.

Unsalted butter is crucial for achieving the buttery richness that makes this loaf so moist. If you’re looking for a dairy-free option, coconut oil or a vegan butter can be used instead. The buttermilk is another essential component, providing acidity that activates the baking soda for a fluffy texture. If you don’t have buttermilk on hand, you can easily make a substitute by mixing ½ cup of milk with 1 tablespoon of vinegar or lemon juice and letting it sit for about 5 minutes.

Step-by-Step Instructions

  1. Preheat your oven to 350°F (175°C). Grease a 9×5-inch loaf pan or line it with parchment paper for easy removal later.
  2. In a medium mixing bowl, whisk together 1 ½ cups of all-purpose flour, 1 teaspoon of baking powder, ½ teaspoon of baking soda, ½ teaspoon of salt, and 3 tablespoons of poppy seeds. This helps to evenly distribute the baking agents and ensures a uniform rise.
  3. In a large mixing bowl, cream together ½ cup of softened unsalted butter and 1 cup of granulated sugar using an electric mixer on medium speed for about 3-4 minutes, until the mixture is light and fluffy. Make sure to scrape down the sides of the bowl occasionally.
  4. Add 2 large eggs, 1 teaspoon of vanilla extract, and 1 teaspoon of lemon zest to the creamed butter and sugar, mixing until fully combined. You want a smooth consistency, so ensure there are no lumps of butter.
  5. In a small bowl, combine ½ cup of buttermilk and 2 tablespoons of fresh lemon juice. Alternately add the dry ingredients and buttermilk mixture to the butter mixture, starting and ending with the dry ingredients. Mix just until combined; do not overmix, as this can lead to a dense loaf.
  6. Pour the batter into the prepared loaf pan. Smooth the top with a spatula, ensuring it’s even. Bake in the preheated oven for 50-60 minutes, or until a toothpick inserted in the center comes out clean. The edges should be lightly golden brown, and the center should feel just set.
  7. Once baked, remove the loaf from the oven and allow it to cool in the pan for about 10 minutes. Then, transfer it to a wire rack to cool completely. Resist the urge to slice too soon, as it will be crumbly if it’s still warm.
  8. While the loaf is cooling, prepare the citrus icing. In a medium bowl, whisk together 1 cup of powdered sugar, 2 tablespoons of fresh lemon juice, and 1 tablespoon of orange juice until smooth. If the icing is too thick, you can add a little more juice to reach your desired consistency.
  9. Once the loaf is completely cool, drizzle the citrus icing over the top. If you like, sprinkle with an additional teaspoon of lemon zest for an extra pop of flavor and color.

Pro Tips for the Best Lemon Poppy Seed Loaf With Citrus Icing

  • Be careful not to overmix your batter; this is a common mistake that can lead to a dense loaf. Mix just until the dry ingredients are incorporated for a light and fluffy texture.
  • Use room temperature ingredients, especially the butter and eggs. This helps to create a smoother batter and ensures even baking. Take your eggs out of the fridge about 30 minutes before you start.
  • For a more pronounced lemon flavor, consider adding a little lemon extract in addition to the zest and juice. Just a half teaspoon can elevate the citrus notes significantly.
  • When measuring your flour, spoon it into the measuring cup and level it off with a knife instead of scooping directly from the bag. This prevents packing and ensures you don’t end up with a dry loaf.
  • Invest in a good quality loaf pan; it makes a difference in heat distribution, which ensures even baking. If your pan is dark-coated, reduce the oven temperature by 25°F to prevent over-browning.

Variations & Serving Ideas

For a delightful twist, consider adding blueberries or raspberries to the batter for a fruity burst of flavor. You can also experiment with different citrus fruits—try lime or grapefruit zest and juice for a refreshing change. For a healthier option, substitute half of the all-purpose flour with whole wheat flour for added fiber without compromising too much on texture.

This Lemon Poppy Seed Loaf pairs beautifully with a light salad, such as a mixed greens salad with a vinaigrette, or a cup of tea for a cozy afternoon treat. It also complements a creamy cheese platter, as the acidity of the loaf balances rich cheeses perfectly. Lastly, a scoop of vanilla ice cream on the side creates a delightful contrast of temperatures and flavors!

Storage, Make-Ahead & Reheating

This Lemon Poppy Seed Loaf can be stored at room temperature for up to 3 days if wrapped tightly in plastic wrap. If you want to keep it longer, it freezes well for up to 3 months. To freeze, wrap the loaf tightly in plastic wrap and then in aluminum foil to prevent freezer burn.

When you’re ready to enjoy it again, simply thaw it in the fridge overnight. Reheat individual slices in the microwave for 15-20 seconds or in a toaster oven until warmed through. Interestingly, many people find that this loaf tastes even better the next day, as the flavors have time to meld!

Frequently Asked Questions

Can I make Lemon Poppy Seed Loaf With Citrus Icing ahead of time?

Yes — in fact, it tastes even better the next day! You can make the loaf a day in advance, allowing the flavors to develop. Just be sure to store it in an airtight container to maintain its moisture.

Can I substitute the poppy seeds?

Absolutely! If you don’t have poppy seeds on hand or prefer an alternative, you can use sesame seeds for a similar crunch or omit them entirely for a smooth loaf.

What can I use instead of buttermilk?

If you don’t have buttermilk, you can easily create a substitute by mixing ½ cup of milk (dairy or plant-based) with 1 tablespoon of vinegar or lemon juice. Let it sit for 5 minutes before using in the recipe.

How can I make this recipe gluten-free?

To make a gluten-free version of this Lemon Poppy Seed Loaf, substitute the all-purpose flour with a gluten-free all-purpose flour blend. Just ensure that the blend contains a binding agent like xanthan gum for the best results.

What is the best way to store leftover loaf?

Leftover Lemon Poppy Seed Loaf should be stored in an airtight container at room temperature for up to 3 days. For longer storage, wrap it tightly and freeze for up to 3 months. Thaw it before serving for the best texture.

Zesty Lemon Poppy Seed Delight

Final Thoughts

The Lemon Poppy Seed Loaf with Citrus Icing is truly a delightful treat that brings a burst of brightness to any occasion. The zesty lemon flavor combined with the subtle crunch of poppy seeds creates a satisfying balance, while the citrus icing adds a touch of sweetness that perfectly complements the loaf’s tanginess.

This is the kind of recipe I come back to again and again, especially when I want to brighten up a gloomy day or celebrate a small victory. The aroma that fills the kitchen as it bakes is absolutely heavenly! I encourage you to give this recipe a try; you might just find it becoming a beloved staple in your home. Don’t forget to share your results or even add your own unique twist—I can’t wait to see what you create!

Print
clock clock iconcutlery cutlery iconflag flag iconfolder folder iconinstagram instagram iconpinterest pinterest iconfacebook facebook iconprint print iconsquares squares iconheart heart iconheart solid heart solid icon

Lemon Poppy Seed Loaf


  • Author: Lily author
  • Total Time: 25 minute
  • Yield: 1 loaf 1x
Pin Recipe
Print Recipe

Description

This Lemon Poppy Seed Loaf is a delightful treat that combines zesty lemon flavor with crunchy poppy seeds. Topped with a citrus icing, it’s perfect for any occasion.


Ingredients

Scale
  • 1 ½ cups (190g) all-purpose flour
  • 1 teaspoon baking powder
  • ½ teaspoon baking soda
  • ½ teaspoon salt
  • 3 tablespoons poppy seeds
  • ½ cup (115g) unsalted butter, softened to room temperature
  • 1 cup (200g) granulated sugar
  • 2 large eggs
  • 1 teaspoon vanilla extract
  • 1 teaspoon lemon zest (from about 1 medium lemon)
  • ½ cup (120ml) buttermilk
  • 2 tablespoons fresh lemon juice
  • 1 cup (120g) powdered sugar
  • 2 tablespoons fresh lemon juice
  • 1 tablespoon orange juice
  • 1 teaspoon lemon zest (for garnish, optional)

Instructions

  1. Preheat your oven to 350°F (175°C). Grease a 9×5-inch loaf pan or line it with parchment paper for easy removal later.
  2. In a medium mixing bowl, whisk together 1 ½ cups of all-purpose flour, 1 teaspoon of baking powder, ½ teaspoon of baking soda, ½ teaspoon of salt, and 3 tablespoons of poppy seeds. This helps to evenly distribute the baking agents and ensures a uniform rise.
  3. In a large mixing bowl, cream together ½ cup of softened unsalted butter and 1 cup of granulated sugar using an electric mixer on medium speed for about 3-4 minutes, until the mixture is light and fluffy. Make sure to scrape down the sides of the bowl occasionally.
  4. Add 2 large eggs, 1 teaspoon of vanilla extract, and 1 teaspoon of lemon zest to the creamed butter and sugar, mixing until fully combined. You want a smooth consistency, so ensure there are no lumps of butter.
  5. In a small bowl, combine ½ cup of buttermilk and 2 tablespoons of fresh lemon juice. Alternately add the dry ingredients and buttermilk mixture to the butter mixture, starting and ending with the dry ingredients. Mix just until combined; do not overmix, as this can lead to a dense loaf.
  6. Pour the batter into the prepared loaf pan. Smooth the top with a spatula, ensuring it’s even. Bake in the preheated oven for 50-60 minutes, or until a toothpick inserted in the center comes out clean. The edges should be lightly golden brown, and the center should feel just set.
  7. Once baked, remove the loaf from the oven and allow it to cool in the pan for about 10 minutes. Then, transfer it to a wire rack to cool completely. Resist the urge to slice too soon, as it will be crumbly if it’s still warm.
  8. While the loaf is cooling, prepare the citrus icing. In a medium bowl, whisk together 1 cup of powdered sugar, 2 tablespoons of fresh lemon juice, and 1 tablespoon of orange juice until smooth. If the icing is too thick, you can add a little more juice to reach your desired consistency.
  9. Once the loaf is completely cool, drizzle the citrus icing over the top. If you like, sprinkle with an additional teaspoon of lemon zest for an extra pop of flavor and color.
  • Prep Time: 15 mins
  • Cook Time: 50-60 mins
  • Category: Dessert
  • Method: Baking
  • Cuisine: American

Nutrition

  • Serving Size: 1 slice
  • Calories: 200
  • Sugar: 15 g
  • Sodium: 150 mg
  • Fat: 8 g
  • Saturated Fat: 5 g
  • Unsaturated Fat: 3 g
  • Trans Fat: 0 g
  • Carbohydrates: 30 g
  • Fiber: 1 g
  • Protein: 3 g
  • Cholesterol: 40 mg

Keywords: Be careful not to overmix your batter; this is a common mistake that can lead to a dense loaf. Use room temperature ingredients for a smoother batter and even baking.

Did you make this recipe?

Share a photo and tag us — we can't wait to see what you've made!

  • Privacy Policy
  • Terms Of Service
  • Contact
  • About
  • GDPR

Copyright © 2025 Homesmad