• Skip to primary navigation
  • Skip to main content
  • Skip to primary sidebar
Homesmad

Homesmad

  • Home
  • Breakfast & Brunch
  • Appetizers & Snacks
  • Dinner
  • Dessert
  • About
  • Privacy Policy
  • Contact
Homesmad
  • Home
  • Breakfast & Brunch
  • Appetizers & Snacks
  • Dinner
  • Dessert
  • About
  • Privacy Policy
  • Contact

Witch’s Potion Punch: Spooky Non-Alcohol Halloween Drink

November 22, 2025 by Lily author

Witchs Potion Punch Recipe Halloween Party Drink – Are you ready to conjure up some magic this Halloween? If you’re looking to cast a spell of deliciousness over your guests, then you’ve definitely come to the right place! Every year, as the leaves turn and the air grows crisp, I eagerly anticipate the night of ghouls, goblins, and, of course, delightfully eerie treats. This isn’t just any beverage; it’s a centerpiece, a conversation starter, and an absolute must-have for any festive gathering. I’ve always found that the best Halloween parties are those where every detail, right down to the drinks, contributes to the overall spooky spectacle. While the history of punch dates back centuries, its transformation into a mystical brew for Halloween is a modern, much-loved tradition, perfectly capturing the playful spirit of the holiday. People adore this dish – or rather, this drink – because it’s not only incredibly fun to look at with its vibrant, mysterious hues and bubbling effects, but it also boasts a refreshingly fruity flavor that appeals to all ages. It’s surprisingly simple to prepare in a large batch, making it the ultimate convenient crowd-pleaser for busy hosts. Get ready to mix up this fantastic Witchs Potion Punch Recipe Halloween Party Drink and become the star of your Halloween bash!

Witch's Potion Punch: Spooky Non-Alcohol Halloween Drink this RECIPE

Ingredients:

  • 64 ounces (2 liters) Lemon-Lime Soda: I personally love using a well-chilled, bubbly lemon-lime soda as the effervescent base for our magnificent Witch’s Potion Punch Recipe Halloween Party Drink. Its crisp, sweet, and slightly tart notes are absolutely essential for that refreshing zing, cutting through the sweetness of the other juices and providing that delightful fizz that makes a punch truly special.
  • 64 ounces (2 liters) Hawaiian Punch Green Berry Rush: This vibrant green juice is the secret to achieving that truly iconic, ghastly green hue that screams “witch’s brew!” It also adds a wonderful, fruity berry flavor that complements the other ingredients beautifully, making our Witch’s Potion Punch Recipe Halloween Party Drink irresistibly delicious and visually stunning. This is the cornerstone of its spooky color.
  • 46 ounces (about 5.75 cups) Pineapple Juice: For a delightful tropical sweetness and a touch of tang that balances the other flavors, pineapple juice is a must. It helps to round out the fruit profile of our potion, adding a layer of complexity without overpowering the signature green berry taste. I find it adds a lovely depth that makes every sip a magical experience.
  • 2 liters Ginger Ale: A second layer of fizz and a subtle ginger spice, ginger ale adds complexity and extra sparkle to our Witch’s Potion Punch Recipe Halloween Party Drink. It’s less sweet than some sodas, which helps prevent the punch from becoming overly saccharine, ensuring a balanced and refreshing taste that appeals to a wide range of palates.
  • 1.75 quarts (1.65 liters) Lime Sherbet: Oh, the lime sherbet! This is where a lot of the magic truly happens. Not only does it enhance the green color and lime flavor, but when it’s added to the punch, it creates an incredible, frothy, “bubbly cauldron” effect that is absolutely perfect for a Witch’s Potion Punch. It also adds a creamy, sweet-tart element that guests will adore, making the texture as exciting as the taste.
  • 1 bag (5-10 lbs) Dry Ice (optional, but highly recommended for visual effect): To achieve that iconic, eerie, bubbling fog that makes this Witch’s Potion Punch Recipe Halloween Party Drink truly unforgettable, dry ice is your best friend. Remember, safety first with this ingredient! It transforms a great punch into an absolute showstopper.
  • Garnishes (choose a selection):
    • Lime Slices or Wheels: Fresh and vibrant, these add a lovely citrus aroma and a pop of natural green, enhancing the potion’s theme.
    • Orange Slices or Wheels: While the punch is green, a contrasting orange slice can look quite striking, especially if you’re going for a ‘toxic’ or ‘glowing’ theme.
    • Gummy Worms or Spiders: Draped over the rim of glasses or floating mysteriously in the punch bowl, these creepy crawlies are a fun and spooky touch for any Halloween party, much to the delight of younger (and some older!) guests.
    • Plastic Eyeballs: These are fantastic for adding a truly ghoulish element without altering the taste. They float eerily on the surface, creating a watchful, spooky presence in your cauldron.
    • Edible Glitter (green or silver): For an extra touch of enchantment, a sprinkle of edible glitter can make your potion sparkle like it’s straight out of a fairy tale (or a witch’s spellbook!).
    • Fresh Mint Sprigs: For a burst of freshness and a sophisticated touch that still fits the “herbal potion” vibe, offering a subtle aromatic lift.

Equipment You’ll Need:

  • Large Punch Bowl (preferably cauldron-shaped): A generously sized punch bowl is absolutely essential for holding all of this glorious potion. If you can find one that resembles a witch’s cauldron, you’ll instantly elevate the spooky factor of your Witch’s Potion Punch Recipe Halloween Party Drink presentation, making it a focal point of your Halloween decor.
  • Ladle: For easy and sanitary serving of your mystical brew, ensuring everyone gets a perfect scoop of your potion.
  • Measuring Cups and Spoons: To ensure accurate liquid measurements for the perfect flavor balance. Precision leads to perfection!
  • Long Tongs or Heat-Resistant Gloves: Absolutely critical for safely handling dry ice. Never touch dry ice with bare hands, as it can cause severe frostbite. Safety first!
  • Insulated Cooler (for dry ice storage): If you’re using dry ice, you’ll need a safe place to store it until you’re ready to use it. A cooler with the lid slightly ajar (never sealed!) is ideal for maintaining its temperature and allowing CO2 gas to escape safely.
  • Serving Glasses: Theme-appropriate glasses can add to the fun. Think beakers, spooky mugs, or even small plastic cauldrons to serve your individual potions.

Preparing Your Cauldron (The Punch Bowl):

Before we even begin mixing our enchanting concoction, it’s a good idea to set up your serving station. Choose a prominent spot for your punch bowl where guests can easily access it and admire your handiwork. This spot should ideally be on a stable surface, away from high traffic areas where it might be accidentally bumped. If you’re using a cauldron-style punch bowl, make sure it’s stable and ready to hold a significant amount of liquid – remember, this recipe makes a generous batch! I always like to ensure my punch bowl is sparkling clean and dry – no one wants a dusty potion contaminating their delicious Witch’s Potion Punch Recipe Halloween Party Drink!

Crafting the Witch’s Potion Base:

  1. Chill All Ingredients Thoroughly: This is a crucial first step for any fantastic punch, especially our Witch’s Potion Punch Recipe Halloween Party Drink. Make sure your lemon-lime soda, Hawaiian Punch Green Berry Rush, pineapple juice, and ginger ale are all well-chilled in the refrigerator for at least 4-6 hours, or even overnight. Starting with cold ingredients means your punch will stay colder longer, which is particularly important if you’re using ice or dry ice later, preventing them from melting too quickly and diluting your magnificent brew. A well-chilled base truly makes a difference in the overall enjoyment of the punch.
  2. Combine the Main Liquids: In your very large punch bowl (or cauldron, if you’re lucky enough to have one that size!), gently pour in the entire 64 ounces of Hawaiian Punch Green Berry Rush. Its vibrant green color will immediately set the tone for our spooky potion, making it visually appealing right from the start. Next, carefully add the 46 ounces of pineapple juice. Give these two a gentle stir with your ladle to combine their flavors and create a foundational layer for our Witch’s Potion Punch. I find that mixing these first ensures a consistent color and flavor profile throughout the punch, preventing any one ingredient from settling at the bottom.
  3. Add the First Layer of Fizz: Now, slowly pour in the 64 ounces of chilled lemon-lime soda. Do this gently to minimize the loss of carbonation; we want that delightful fizz to last throughout the party! Stir just enough to integrate it with the juices. You’ll already start to see the beautiful, eerie green hue intensify and become more translucent, making it look more and more like a true witch’s brew. This initial carbonation layer adds a refreshing crispness that guests will love.

Adding the Mystical Fizz and Froth:

  1. Introduce the Sherbet for Froth and Flavor: This is arguably the most exciting part for many, especially the kids! Just before serving, or when guests are about to arrive, take your lime sherbet out of the freezer. Using a large spoon or an ice cream scoop, carefully add scoops of the lime sherbet directly into the punch bowl. You’ll notice immediately that as the cold sherbet hits the liquids, it will begin to melt and create a spectacular, frothy, bubbly foam on the surface of your punch. This isn’t just for show; the sherbet also adds a wonderful creamy texture and a delightful sweet-tart lime flavor that perfectly complements the other ingredients, truly enhancing the “Witchs Potion Punch Recipe Halloween Party Drink” experience. I usually add about half the container at first, then add more as needed throughout the party to keep the frothy effect going, ensuring a continuous visual spectacle.
  2. Top with Ginger Ale for Extra Sparkle: Once the sherbet is in and bubbling away, gently pour in the 2 liters of chilled ginger ale. This final carbonated addition provides an extra layer of sparkle and a subtle, warming ginger note that adds depth to the overall flavor profile. The ginger ale’s delicate spice acts as a perfect counterpoint to the sweetness of the other juices. Again, pour slowly and carefully to preserve the fizz. Stir very gently once more, just enough to combine without deflating all that wonderful carbonation. Your Witch’s Potion Punch is now looking, smelling, and almost tasting perfect, ready for its final enchanting touches!

The Bewitching Embellishments:

  1. Garnish Your Potion: Now for the artistic, spooky touches that truly bring your Witch’s Potion Punch Recipe Halloween Party Drink to life! Arrange your chosen garnishes strategically around and in the punch bowl to create an inviting yet eerie presentation.
    • For Limes and Oranges: Float lime and orange slices directly in the punch, allowing their colors to pop against the green liquid, or thread them onto skewers placed artfully across the bowl’s rim. The green of the lime especially enhances the potion’s theme, making it look more botanical and mysterious.
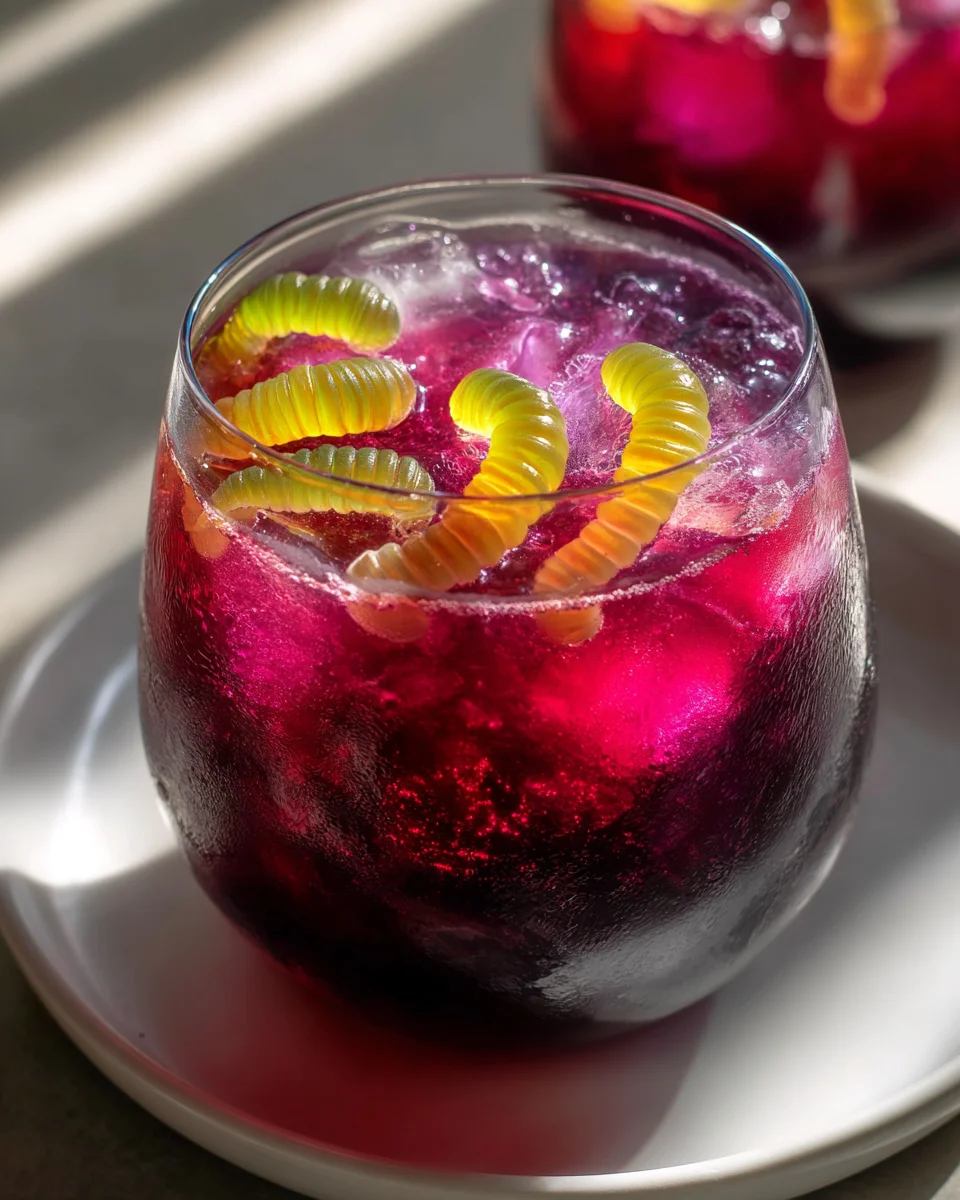
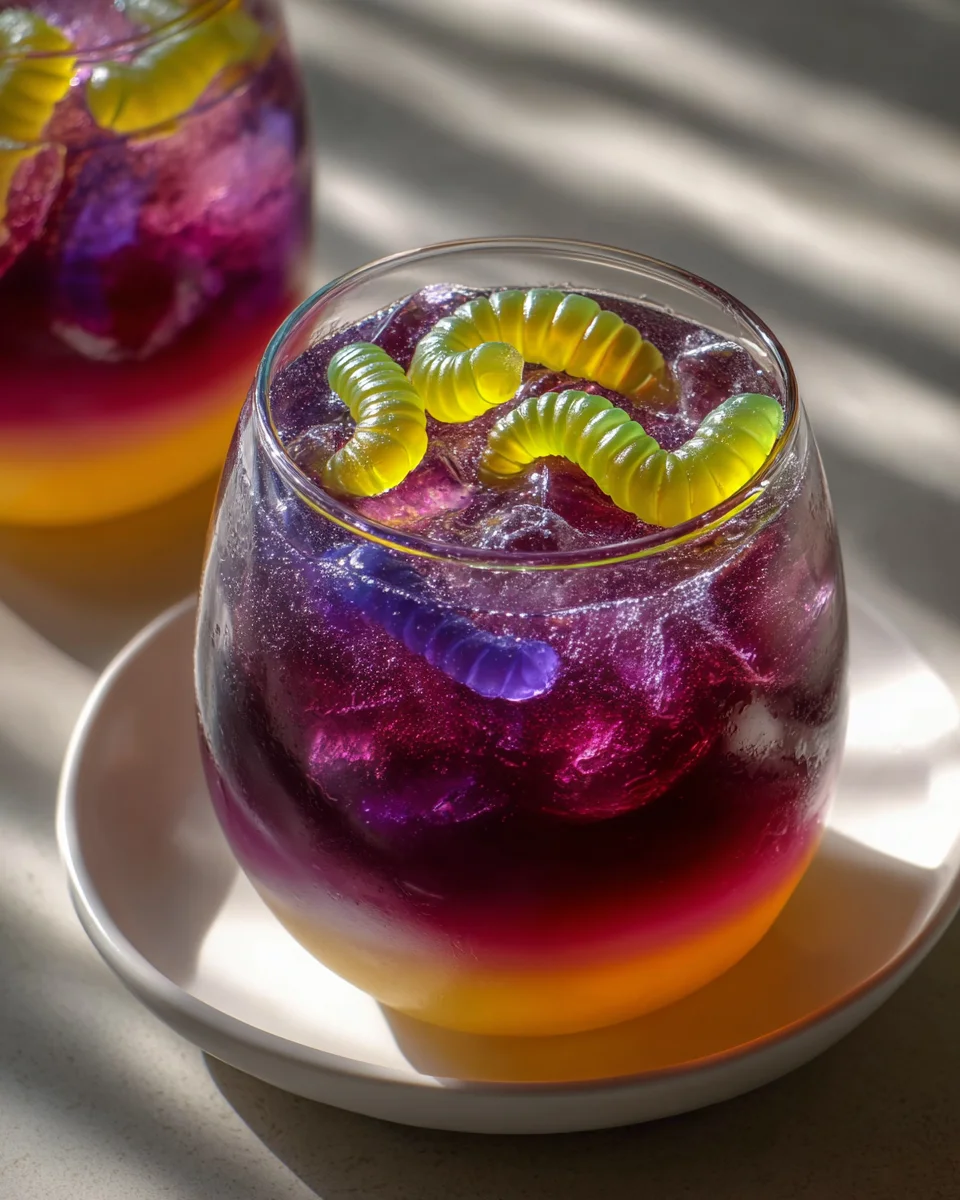
    • For Gummy Creatures: Drape gummy worms or spiders over the edge of the punch bowl, allowing some to “fall” into the liquid as if they’re escaping the brew. You can also place them directly into individual serving cups for a personal creepy surprise.
    • For Eyeballs: Scatter plastic eyeballs (make sure they are food-safe and clean!) on the surface of the punch. They float wonderfully and add a truly creepy, watchful element to your Witch’s Potion Punch, making guests feel like they’re being observed by the potion itself.
    • For Edible Glitter: For a touch of ethereal sparkle, gently sprinkle a small amount of green or silver edible glitter over the surface of the punch. It will shimmer and catch the light, making your potion look truly magical and enchanted, like it’s brewing with otherworldly dust.
    • For Mint Sprigs: Place fresh mint sprigs strategically around the bowl or directly in the punch for an aromatic and visually appealing fresh element. The vibrant green of the mint contrasts beautifully with the punch’s hue.

Unleashing the Spooky Fog (Dry Ice Safety!):

This step is absolutely critical for transforming your delicious brew into a truly mesmerizing Witch’s Potion Punch Recipe Halloween Party Drink. However, dry ice must be handled with extreme caution. Please read and follow these safety guidelines carefully to ensure a safe and spooky experience for everyone.

  1. Prepare for Dry Ice:
    • Safety First: Never, ever touch dry ice with your bare hands. Always use thick gloves (oven mitts or insulated gloves) and long tongs. Dry ice is extremely cold (-109.3°F or -78.5°C) and can cause severe frostbite if it comes into direct contact with skin. Treat it with the respect it demands.
    • Ventilation: Ensure the area where you’re using dry ice is well-ventilated. Dry ice is frozen carbon dioxide (CO2), and while harmless in small amounts, large concentrations in poorly ventilated areas can displace oxygen, which is dangerous. Keep windows open or use it in a large, open space.
    • Placement: For safety, I always recommend placing the dry ice in a separate, smaller container inside the punch bowl, or in a specialized dry ice cage designed for beverages. This prevents guests from accidentally scooping up a piece of dry ice and consuming it, which is extremely dangerous. If you don’t have a cage, place larger chunks at the bottom of the punch bowl before adding the liquid, or only add very large chunks that are easily visible and won’t fit into a ladle. The goal is visual effect, not ingestion.
  2. Adding the Dry Ice: Using your tongs and gloves, carefully break off a few small to medium-sized pieces of dry ice (about 1-2 inches in diameter). Gently lower them into the punch bowl. As the dry ice comes into contact with the liquid, it will begin to “sublimate,” turning directly from solid to gas, creating that spectacular, heavy fog that cascades over the edges of your punch bowl and across the table. This is the ultimate visual effect for a Witch’s Potion Punch Recipe Halloween Party Drink, instantly transforming your setup into an eerie, bubbling cauldron!
  3. Maintain the Fog: The fog effect will typically last for about 10-15 minutes per piece of dry ice, depending on the size of the piece and the temperature of your punch. You can add more pieces periodically throughout your party to keep the mysterious ambiance going. Remember to always use gloves and tongs, and be mindful of the safe handling guidelines. Adding dry ice as guests arrive or during key moments of the party creates a truly memorable experience.

Serving Your Witch’s Potion Punch:

Your breathtaking Witch’s Potion Punch Recipe Halloween Party Drink is now ready to enchant your guests! Place your punch bowl in a central, accessible location where it can be admired and easily served. Have a sturdy ladle ready for serving, ensuring it’s long enough to reach the bottom of the bowl. Encourage guests to help themselves, but also politely remind them about the dry ice and to avoid consuming it if you’ve placed it directly in the punch. For individual servings, provide cups that complement your Halloween theme, perhaps clear plastic ones to show off the vibrant green color and any floating garnishes.

Serve into individual cups, making sure each guest gets a swirl of the beautiful green liquid, a bit of the frothy sherbet, and perhaps a fun gummy garnish. Watch their eyes light up as they approach your bubbling cauldron – it’s always a crowd-pleaser and truly makes a Halloween party unforgettable!

Tips for a Truly Spooktacular Halloween Punch:

Making Your Witch’s Potion Punch Recipe Halloween Party Drink Even More Magical:

  • Adult Version (Witch’s Brew for Grown-Ups): If you’re hosting an adult Halloween party, you can easily turn this into an alcoholic Witch’s Potion Punch. I suggest adding 1-2 cups of white rum, vodka, or even gin to the punch base (after the juices, before the sodas and sherbet). Taste as you go to achieve your desired strength, starting with less and adding more if needed. For a truly unique flavor, consider a spiced rum or a gin with botanical notes. Always label alcoholic punches clearly and provide a non-alcoholic alternative for designated drivers and those who prefer not to drink.
  • Ice Ring Magic: Instead of regular ice cubes (which will melt quickly and dilute your punch), consider making a festive ice ring. Fill a bundt pan or a gelatin mold with water, then add creepy elements like gummy worms, plastic spiders, cranberry “blood cells,” or even food-safe plastic vampire teeth before freezing. This will keep your Witch’s Potion Punch cold for longer and add another layer of visual interest without watering it down.
  • Green Glow: For an extra spooky effect, place small, battery-operated LED lights (designed for beverages) or green glow sticks underneath or around your punch bowl. The green glow will truly make your potion look like it’s emanating from another dimension, especially in dimly lit party environments, enhancing the “Witchs Potion Punch Recipe Halloween Party Drink” aesthetic.
  • Quantity Adjustments: This recipe makes a very large batch, perfect for a big Halloween gathering with many guests. If you’re hosting a smaller, more intimate party, you can easily halve all the ingredients. Just ensure you maintain the proportions for the best flavor balance and impact.
  • Make-Ahead Prep: You can mix the Hawaiian Punch Green Berry Rush and pineapple juice together several hours or even a day in advance and keep it chilled in the refrigerator. Wait to add the carbonated beverages (lemon-lime soda, ginger ale) and especially the lime sherbet and dry ice until just before your party starts to maintain maximum fizz, froth, and dramatic effect.
  • Presentation is Key: Don’t underestimate the power of a good display! Surround your Witch’s Potion Punch with other Halloween decorations – spiderwebs, plastic bats, flickering LED candles, or even a witch’s hat and broomstick placed nearby. The overall ambiance will significantly enhance the experience of your “Witchs Potion Punch Recipe Halloween Party Drink” and create a truly immersive party atmosphere.

Frequently Asked Questions About Witch’s Potion Punch:

All Your Burning Questions About This Enchanting Halloween Party Drink Answered!

  • Can I make this Witch’s Potion Punch ahead of time?

    You can certainly do some prep work in advance to save time on party day! I recommend mixing the Hawaiian Punch Green Berry Rush and pineapple juice together and chilling them thoroughly. However, for the best fizz and froth, wait until about 30 minutes before your guests arrive to add the lemon-lime soda, ginger ale, and especially the lime sherbet. The dry ice should always be added last, just as you’re ready to serve, for the maximum spooky effect and safe handling.

  • Is dry ice safe to use in a punch?

    Yes, dry ice is safe to use in punch for visual effect, provided it is handled correctly and with extreme caution. Never touch dry ice with bare hands. Always use gloves and tongs. Crucially, ensure that dry ice is never consumed. It should be placed in a way that prevents guests from scooping it into their cups – ideally in a separate container inside the punch bowl or using a specific dry ice cage. The fog it creates is just carbon dioxide gas, which is harmless in well-ventilated areas. As long as you follow safety precautions, it adds an unparalleled spooky touch to your Witch’s Potion Punch Recipe Halloween Party Drink.

  • What if I can’t find green lime sherbet?

    No problem at all! While lime sherbet is ideal for its color and flavor, you can substitute it with other flavors. Rainbow sherbet will still give you a frothy effect with varied colors, which can also be quite fun and mysterious, offering a different kind of magical look. If you want to maintain the green theme, you could try a lemon or pineapple sherbet and add a drop or two of green food coloring to the sherbet itself before scooping, though this is a bit more work. Another excellent option is a good quality vanilla ice cream, which will still provide froth and creaminess, though it won’t be green, it offers a delicious creamy counterpoint.

  • How much punch does this recipe make?

    This recipe for Witch’s Potion Punch is quite generous! It yields approximately 4 gallons (about 15 liters) of punch, which is enough to serve 25-30 people with an 8-ounce serving each. It’s truly perfect for a large Halloween party or gathering where you want to impress a crowd with a spectacular “Witchs Potion Punch Recipe Halloween Party Drink” that won’t run out too quickly!

  • What are some other fun garnish ideas for this Halloween party drink?

    Beyond the suggested garnishes, you can get incredibly creative to personalize your potion! Consider making “ice hands” by freezing water in clean rubber gloves, then peeling away the glove and floating the ice hand in the punch for a truly chilling effect. Gummy eyeballs or brain candies are also fantastic and add to the gruesome fun. For an extra creepy touch, try cutting grapes in half and freezing them to resemble tiny eyes, or use lychees with blueberries tucked inside for a realistic eyeball look. A few drops of red food coloring swirled gently just before serving can create a “bloody” effect. You can also rim your serving glasses with green or black sanding sugar for an extra festive touch that ties into the “Witchs Potion Punch Recipe Halloween Party Drink” theme perfectly!

Witch's Potion Punch: Spooky Non-Alcohol Halloween Drink

Conclusion:

Well, we’ve journeyed through the mystical concoction that I truly believe will be the star of your next spooky gathering! As we wrap up, I simply have to reiterate just how phenomenal this drink truly is. It’s more than just a beverage; it’s an experience, a conversation starter, and an absolute delight for anyone who dares to take a sip. I’ve personally seen faces light up, curiosity pique, and smiles spread as guests behold its eerie glow and savor its tantalizing flavor. This isn’t just a basic drink mix; it’s a carefully balanced symphony of sweet, tart, and utterly refreshing notes that perfectly encapsulates the spirit of the season. Imagine the scene: your guests arriving, greeted by the sight of this bubbling, vibrant elixir, truly setting the mood for a night of ghoulish fun. It’s incredibly easy to prepare, meaning you won’t be chained to the kitchen when you should be enjoying your own party. Trust me, the minimal effort yields maximum impact, leaving you free to revel in the festivities alongside your friends and family. This recipe delivers on all fronts: visual appeal, fantastic taste, and pure, unadulterated Halloween spirit. It truly embodies everything a great party drink should be, transforming ordinary ingredients into something truly magical and memorable.

Now, let’s talk about making this enchanting brew truly your own and ensuring it serves your guests perfectly. For optimal enjoyment, I always recommend serving the punch thoroughly chilled. A large dispenser with a tap is ideal for self-service, allowing guests to help themselves and keeping your hands free. For that truly show-stopping effect, a block of food-grade dry ice added just before guests arrive will create an amazing, smoky, bubbling cauldron appearance that will mesmerize everyone. Just remember to handle dry ice with gloves and ensure it’s not ingested! If dry ice isn’t an option, a fog machine nearby can still give off an eerie vibe. Garnish is key for any memorable drink. For this particular potion, consider floating plastic spiders, gummy worms, or even edible googly eyes directly in the punch. For a more sophisticated yet still spooky touch, consider freezing dark berries like blackberries or blueberries into ice cubes – they’ll chill the drink without diluting it and add a sinister color as they slowly melt.

Thinking about variations? Oh, there are so many fun ways to customize this recipe! If you’re hosting an adults-only event, a splash of vodka, rum, or even a spiced apple liqueur can turn this into an even more potent brew. Start with a modest amount and taste as you go to achieve your desired potency. For those who prefer a less sweet drink, you can easily reduce the amount of added sugar or use a diet soda as part of the base. On the other hand, if your sweet tooth is calling, a little extra grenadine or a splash of cherry syrup can deepen both the color and the sweetness. For a delightful texture, consider adding scoops of lime or raspberry sherbet directly into the punch bowl right before serving. It will slowly melt, creating a frothy, creamy layer that adds another dimension of flavor and visual appeal, making it look even more like a bubbling cauldron. You could also experiment with different fruit juice combinations – perhaps a little cranberry or grape juice to alter the color and tartness. Don’t be afraid to get creative! This recipe is incredibly forgiving and open to your personal touch, allowing you to tailor it perfectly to your guests’ preferences and your party’s theme.

So, my friends, what are you waiting for? This is your invitation, your call to action, to unleash your inner mad scientist and brew up this incredible drink. I genuinely can’t stress enough how much joy and excitement this particular concoction brings to any Halloween gathering. It’s more than just a beverage; it’s a centerpiece, a conversation starter, and a true embodiment of festive fun. Imagine the delight on your guests’ faces when they discover this enchanting elixir waiting for them! I promise you, making this will be one of the easiest and most rewarding decisions you make for your spooky celebration. Once you’ve mixed up your own batch of the Witchs Potion Punch Recipe Halloween Party Drink, I would absolutely love to hear all about it! Did you add any unique garnishes? Did you try a fun variation? Please, share your experiences, your triumphs, and even your funny anecdotes from serving it up! Snap a photo and tell me how it went. Your feedback and creativity inspire me, and I’m always thrilled to see how you bring these recipes to life in your own kitchens and at your own parties. Go forth, brew some magic, and make this Halloween unforgettable!


Witch’s Potion Punch

Conjure up some magic this Halloween with a vibrant, refreshing, non-alcoholic Witch’s Potion Punch. This easy-to-make, spooky drink is perfect for all ages, featuring a delightful mix of fruity flavors that will enchant your guests.

Prep Time
10 Minutes
Cook Time
PT0S
Total Time
10 Minutes
Servings
8-9 servings

Ingredients


Instructions


Important Information

Nutrition Facts (Per Serving)

It is important to consider this information as approximate and not to use it as definitive health advice.

Allergy Information

Please check ingredients for potential allergens and consult a health professional if in doubt.

« Previous Post
Rich Chocolate Espresso Banana Bread for Coffee Lovers
Next Post »
Coffee Butter Cookies: Rich, Aromatic & Deliciously Simple!

If you enjoyed this…

Mexican Street Corn Dip: The Ultimate Guide to a Delicious Dip

Crispy Shrimp & Avocado Taquitos: A Flavorful Treat!

Cheesy Pepperoni Rolls: The Ultimate Snack Recipe for Pizza Lovers

Primary Sidebar

Browse by Diet

BreakfastDinnerLunchDessertAppetizer

Sweet Peach Yogurt Parfait Delight

One of my fondest memories is from a lazy summer afternoon spent at my grandmother’s house. The sun filtered through the kitchen window, casting a warm glow over the table where she would create her culinary magic. It was during one of those blissful moments that I first tasted her Peach Yogurt Parfait with Honey and Granola. The sweet aroma of ripe peaches mingling with creamy yogurt and the crunch of granola was nothing short of heavenly. It felt like summer captured in a bowl, and I still remember the joy of diving in with a spoon, each layer revealing a new burst of flavor.

When I think about that parfait, I can almost hear the gentle hum of the bees outside, reminding me of the floral notes that honey brings to every bite. The vibrant yellows and soft oranges of the peaches contrast beautifully with the creamy white yogurt and the golden crunch of granola. It’s a dish that not only looks delightful but also tastes like a celebration of fresh, wholesome ingredients.

What makes my version of this Peach Yogurt Parfait special is the careful balance of flavors and textures. I use ripe, juicy peaches, drizzled with locally sourced honey, and a homemade granola that’s bursting with nuts and seeds for an extra crunch. It’s a simple dish, but every layer is crafted with love and attention.

Let me show you exactly how to make this delightful parfait, so you can bring a bit of that summer magic into your kitchen!

Sweet Peach Yogurt Parfait Delight

Why You’ll Love This Recipe

  • Delightfully creamy texture from the Greek yogurt, paired with the juicy sweetness of fresh peaches.
  • Ready in under 20 minutes, making it a quick and satisfying breakfast or snack option.
  • Budget-friendly, using common ingredients that you may already have in your pantry.
  • Customizable with your favorite granola and nuts, allowing you to tailor each parfait to your taste.
  • Perfectly balanced flavors with the bright acidity of lemon juice and the sweetness of honey enhancing the peaches.

Ingredients

  • For the Parfait:
  • 2 cups plain Greek yogurt (or vanilla yogurt for a sweeter option)
  • 2 large ripe peaches, diced (about 2 cups)
  • 1 tablespoon fresh lemon juice (to prevent browning of peaches)
  • 2 tablespoons honey (plus more for drizzling)
  • 1 teaspoon vanilla extract (optional for extra flavor)
  • For the Granola:
  • 1 cup granola (store-bought or homemade; see notes for a simple granola recipe)
  • 1/4 cup sliced almonds (optional for added crunch)
  • 1/4 cup shredded coconut (optional for added flavor)

Let’s dive into some key ingredients that make this Peach Yogurt Parfait so delightful! First, the Greek yogurt is not only creamy but also packed with protein, making it a satisfying option for breakfast or a snack. If you’re looking for a sweeter option, you can easily substitute it with vanilla yogurt, though it may alter the overall flavor balance. Next, the ripe peaches are the star of the show; their natural sweetness shines through, so I recommend choosing peaches that yield slightly to pressure, indicating they’re perfectly ripe. If peaches aren’t in season, feel free to use nectarines or even frozen peaches—just thaw them before use. Finally, honey adds a lovely floral sweetness that ties everything together. If you prefer, maple syrup can serve as a delicious substitute.

Step-by-Step Instructions

  1. Start by preparing the peaches. Wash them thoroughly, then slice and dice them into bite-sized pieces. In a medium bowl, toss the diced peaches with 1 tablespoon of fresh lemon juice to prevent browning. Set aside for about 5 minutes while the lemon juice works its magic.
  2. In a separate bowl, combine the Greek yogurt, 2 tablespoons of honey, and 1 teaspoon of vanilla extract if using. Stir the mixture until smooth and thoroughly blended. This should take about a minute. Avoid overmixing to maintain the creaminess of the yogurt.
  3. Now it’s time to layer your parfait. Grab a clear glass or bowl to showcase your beautiful creation. Start with a generous spoonful of the yogurt mixture at the bottom—about 1/4 cup will do. Use a spoon to spread it evenly.
  4. Add a layer of the diced peaches over the yogurt, ensuring they cover the yogurt completely. You might want to use about half of what you have prepared—roughly 1 cup. This layer should be visually appealing, so arrange the peaches neatly.
  5. Sprinkle 1/4 cup of granola over the peaches. This adds a delightful crunch. Make sure to distribute it evenly to ensure every bite has that satisfying texture. Avoid packing it down too tightly, as you want it to maintain its crunch.
  6. Repeat the layers: spoon in another 1/4 cup of yogurt, followed by another cup of peaches, and another sprinkle of granola. You should have at least two layers, but feel free to add more depending on your glass size.
  7. Finish off your parfait with a drizzle of honey on top for added sweetness and a touch of elegance. If you’re using sliced almonds or shredded coconut, sprinkle them on top now. It adds a lovely visual contrast and extra flavor.
  8. Serve immediately or refrigerate for up to 30 minutes before serving to allow the flavors to meld together. However, I recommend enjoying it fresh to maintain the granola’s crunch.

Pro Tips for the Best Peach Yogurt Parfait With Honey And Granola

  • Make sure to choose ripe peaches for the best flavor and texture. A common mistake is using unripe fruit, which can lead to a less enjoyable parfait. Look for peaches that are fragrant and slightly soft to the touch.
  • Use a clear glass to assemble your parfait; this not only makes for a beautiful presentation but also allows you to see the colorful layers, which adds to the enjoyment of eating it.
  • For an even creamier texture, consider whipping the Greek yogurt with a hand mixer for a couple of minutes before layering. This small adjustment makes a huge difference in mouthfeel.
  • Be mindful of the granola-to-yogurt ratio. Too much granola can overwhelm the parfait, while too little can make it feel too creamy. Aim for about 1/4 cup of granola per layer for the perfect balance.
  • If you’re making this for a gathering, consider preparing the yogurt and peaches ahead of time and layering them just before serving. This ensures the granola stays crunchy!

Variations & Serving Ideas

There are so many ways to get creative with your Peach Yogurt Parfait! For a tropical twist, swap out the peaches for mangoes or pineapples and top with coconut flakes. If you prefer a berry flavor, mix in some blueberries or strawberries with the peaches for added color and taste. For a nutty version, incorporate chopped walnuts or pecans instead of almonds.

As for serving ideas, this parfait pairs beautifully with a side of scrambled eggs for a hearty breakfast or fresh fruit salad for a light lunch. You might also enjoy it alongside whole grain toast with almond butter for an energizing snack. The contrast of flavors and textures will elevate your meal experience!

Storage, Make-Ahead & Reheating

The Peach Yogurt Parfait is best enjoyed fresh, but you can prepare some components ahead of time. Store the layered parfait in an airtight container in the refrigerator for up to 24 hours. However, be cautious; the granola may lose its crunch if stored too long. You can freeze the yogurt and peach mixture for up to 2 months; just remember to thaw it in the refrigerator overnight before serving.

If you plan to enjoy this dish the next day, it can taste even better as the flavors meld together. Just remember to add the granola right before serving to keep its delightful crunch!

Frequently Asked Questions

Can I make Peach Yogurt Parfait With Honey And Granola ahead of time?

Yes — in fact, it tastes even better the next day as the flavors meld. However, I recommend waiting to add the granola until just before serving to maintain its crunch.

What can I substitute for Greek yogurt?

If you prefer a lighter option, you can substitute Greek yogurt with regular yogurt or a dairy-free alternative like coconut yogurt. Just remember that this may alter the creaminess and flavor profile slightly.

Can I use frozen peaches for this parfait?

Absolutely! Just make sure to thaw the frozen peaches before using them. They will still add great flavor, though the texture may be slightly softer than fresh peaches.

How do I make the parfait vegan?

To make a vegan version, substitute the Greek yogurt with a plant-based yogurt alternative, and replace honey with maple syrup or agave nectar. This keeps the parfait sweet while adhering to a vegan diet.

What other fruits can I use in this recipe?

You can mix and match fruits based on your preference. Try using strawberries, blueberries, raspberries, or even bananas. Just make sure to adjust the lemon juice as needed to prevent browning.

Sweet Peach Yogurt Parfait Delight

Final Thoughts

The Peach Yogurt Parfait with Honey and Granola is a delightful blend of creamy yogurt, sweet peaches, and crunchy granola that creates a satisfying and nourishing treat. Each layer bursts with flavor, making it a perfect choice for breakfast or a light dessert.

This is the kind of recipe I come back to again and again, especially when I want something refreshing and wholesome to start my day. The harmony of sweet and tart flavors, combined with the delightful crunch, never fails to lift my spirits!

I encourage you to give this parfait a try and indulge in its comforting goodness. Feel free to share your results or even add your own twist—perhaps a sprinkle of cinnamon or a handful of nuts. Enjoy creating your perfect parfait!

Print
clock clock iconcutlery cutlery iconflag flag iconfolder folder iconinstagram instagram iconpinterest pinterest iconfacebook facebook iconprint print iconsquares squares iconheart heart iconheart solid heart solid icon

Peach Yogurt Parfait


  • Author: Lily author
  • Total Time: 15 minutes
  • Yield: 4 servings 1x
Pin Recipe
Print Recipe

Description

This Peach Yogurt Parfait combines creamy Greek yogurt, juicy peaches, and crunchy granola for a delightful treat. It’s a perfect breakfast or snack that captures the essence of summer in every bite.


Ingredients

Scale
  • For the Parfait:
  • 2 cups plain Greek yogurt (or vanilla yogurt for a sweeter option)
  • 2 large ripe peaches, diced (about 2 cups)
  • 1 tablespoon fresh lemon juice (to prevent browning of peaches)
  • 2 tablespoons honey (plus more for drizzling)
  • 1 teaspoon vanilla extract (optional for extra flavor)
  • For the Granola:
  • 1 cup granola (store-bought or homemade; see notes for a simple granola recipe)
  • 1/4 cup sliced almonds (optional for added crunch)
  • 1/4 cup shredded coconut (optional for added flavor)

Instructions

  1. Start by preparing the peaches. Wash them thoroughly, then slice and dice them into bite-sized pieces. In a medium bowl, toss the diced peaches with 1 tablespoon of fresh lemon juice to prevent browning. Set aside for about 5 minutes while the lemon juice works its magic.
  2. In a separate bowl, combine the Greek yogurt, 2 tablespoons of honey, and 1 teaspoon of vanilla extract if using. Stir the mixture until smooth and thoroughly blended. This should take about a minute. Avoid overmixing to maintain the creaminess of the yogurt.
  3. Now it’s time to layer your parfait. Grab a clear glass or bowl to showcase your beautiful creation. Start with a generous spoonful of the yogurt mixture at the bottom—about 1/4 cup will do. Use a spoon to spread it evenly.
  4. Add a layer of the diced peaches over the yogurt, ensuring they cover the yogurt completely. You might want to use about half of what you have prepared—roughly 1 cup. This layer should be visually appealing, so arrange the peaches neatly.
  5. Sprinkle 1/4 cup of granola over the peaches. This adds a delightful crunch. Make sure to distribute it evenly to ensure every bite has that satisfying texture. Avoid packing it down too tightly, as you want it to maintain its crunch.
  6. Repeat the layers: spoon in another 1/4 cup of yogurt, followed by another cup of peaches, and another sprinkle of granola. You should have at least two layers, but feel free to add more depending on your glass size.
  7. Finish off your parfait with a drizzle of honey on top for added sweetness and a touch of elegance. If you’re using sliced almonds or shredded coconut, sprinkle them on top now. It adds a lovely visual contrast and extra flavor.
  8. Serve immediately or refrigerate for up to 30 minutes before serving to allow the flavors to meld together. However, I recommend enjoying it fresh to maintain the granola’s crunch.
  • Prep Time: 15 mins
  • Cook Time: 0 mins
  • Category: Breakfast
  • Method: No-cook
  • Cuisine: American

Nutrition

  • Serving Size: 1 parfait
  • Calories: 250
  • Sugar: 20 g
  • Sodium: 50 mg
  • Fat: 5 g
  • Saturated Fat: 2 g
  • Unsaturated Fat: 3 g
  • Trans Fat: 0 g
  • Carbohydrates: 40 g
  • Fiber: 3 g
  • Protein: 10 g
  • Cholesterol: 10 mg

Keywords: Choose ripe peaches for the best flavor and texture. Use a clear glass for a beautiful presentation. For creaminess, consider whipping the yogurt before layering. Be mindful of the granola-to-yogurt ratio. Prepare yogurt and peaches ahead of time for gatherings, layering just before serving.

Did you make this recipe?

Share a photo and tag us — we can't wait to see what you've made!

Sun-Kissed Frozen Orange Cream Slush

As a child, summer days felt like they lasted forever. I remember the sticky heat wrapping around me as I played outside, my laughter mingling with the sounds of the neighborhood. But nothing could cool me down quite like the moment I’d spot my grandmother, laboring over her blender, whipping up her famous Frozen Orange Creamsicle Slush. That vibrant orange treat, with its frosty texture and sweet citrus aroma, was like a burst of sunshine in a cup. Just one sip, and I could feel the coolness wash over me, sparking pure joy.

This Frozen Orange Creamsicle Slush has a way of making you feel like a kid again. Its creamy, dreamy consistency is a delightful balance of bright orange and soft vanilla, inviting you to dive right in. The refreshing tang of orange dances on your tongue, while the smooth creaminess envelops you in a comforting embrace. It’s a nostalgic treat that’s perfect for hot summer afternoons or anytime you need a little pick-me-up.

What makes my version of this slush stand out is the addition of a hint of vanilla bean, which elevates the flavor and adds an extra layer of richness. Plus, it’s super easy to whip up with just a few simple ingredients that you probably already have on hand! So, if you’re ready to relive those sun-soaked memories, let me show you exactly how to make it.

Sun-Kissed Frozen Orange Cream Slush

Why You’ll Love This Recipe

  • Each slush is a perfect blend of creamy vanilla and zesty orange, creating a nostalgic flavor reminiscent of summer days.
  • This refreshing treat is ready in under 15 minutes, making it an ideal quick dessert for unexpected guests or hot afternoons.
  • With just 8 simple ingredients, it’s budget-friendly, ensuring you don’t have to break the bank to enjoy a delicious slush.
  • The slush has a perfectly smooth texture, thanks to the combination of ice and ice cream, providing a delightful contrast to the bright citrus flavors.
  • It’s highly customizable; you can easily adjust the sweetness and add fresh herbs for a unique twist that suits your taste.

Ingredients

  • 2 cups orange juice (freshly squeezed or store-bought)
  • 1 cup vanilla ice cream
  • 1 cup crushed ice
  • 1/2 cup milk (whole or 2%)
  • 1/4 cup granulated sugar (adjust based on sweetness preference)
  • 1 teaspoon vanilla extract
  • Zest of 1 orange (for added flavor)
  • Fresh orange slices and mint leaves (for garnish)

The star of this Frozen Orange Creamsicle Slush is the orange juice, which provides the vibrant, citrusy base. Freshly squeezed juice will yield the brightest flavor, but store-bought options can be just as convenient. If you’re opting for store-bought, choose 100% pure juice with no added sugars for the best results. Another essential ingredient is the vanilla ice cream; it adds creaminess and sweetness. You can substitute it with dairy-free ice cream if you’re looking for a vegan option. Whole or 2% milk complements the ice cream, creating a smooth blend. If you want a lower-calorie version, almond or oat milk can be good alternatives.

Lastly, the granulated sugar can be adjusted based on your sweetness preference. If you prefer a more natural sweetener, consider using honey or agave syrup. The orange zest enhances the flavor profile, providing an aromatic pop that brings the whole slush together. Don’t skip it! It adds an extra layer of brightness that makes this slush truly special.

Step-by-Step Instructions

  1. Start by preparing your ingredients. Gather 2 cups of orange juice, 1 cup of vanilla ice cream, and 1 cup of crushed ice. Make sure the ice is finely crushed, as larger chunks can make blending difficult.
  2. In a blender, combine the orange juice, vanilla ice cream, crushed ice, and 1/2 cup of milk. Add 1/4 cup of granulated sugar and 1 teaspoon of vanilla extract. If you like a sweeter slush, consider adding a bit more sugar at this stage.
  3. Add the zest of 1 orange to the blender. This step is crucial for enhancing the citrus flavor of your slush. Make sure not to include the bitter white pith—only the flavorful zest.
  4. Blend the mixture on medium-high speed for about 30-45 seconds. Stop once the ingredients are fully combined and the slush has a smooth, even consistency. If you notice large chunks of ice, blend for an additional 10-15 seconds. Avoid over-blending, as this can make the slush too liquidy.
  5. Once blended, taste the slush. If it needs more sweetness, add a little more sugar and blend for a few more seconds. If it’s too thick, you can add a splash of milk to reach your desired consistency.
  6. Pour the slush into glasses. This recipe typically serves 4, but you can easily double it for larger gatherings. Use a spoon to help guide the slush into the glasses if needed.
  7. Garnish each serving with fresh orange slices and mint leaves. The mint not only adds a pop of color but also a refreshing aroma that complements the citrus flavors beautifully.
  8. Serve immediately and enjoy! If you’ve made extra, you can refrigerate it for a short time, but it’s best enjoyed fresh.

Pro Tips for the Best Frozen Orange Creamsicle Slush

  • Don’t skip the orange zest! It’s a game-changer for flavor. Always zest before juicing to make it easier.
  • Use a high-powered blender for the best texture. A standard blender may struggle with ice, leading to uneven consistency. If you have a food processor, that can work too, but ensure the ice is finely crushed.
  • Adjust the ice-to-liquid ratio carefully. If your slush is too thick, it won’t blend well. Start with less ice and add more until you reach your preferred texture.
  • Be cautious with the sugar! Always start with the lower amount, as you can easily add more, but it’s hard to fix an overly sweet slush.
  • For a fun twist, consider adding a splash of coconut milk or a handful of fresh fruit like strawberries or pineapple. This not only enhances the flavor but also adds a beautiful color contrast.

Variations & Serving Ideas

There are countless ways to put a spin on your Frozen Orange Creamsicle Slush. Consider making a tropical version by adding in some pineapple juice or coconut milk for a delightful tropical twist. If you’re feeling adventurous, try incorporating a handful of frozen mango or peach slices for added sweetness. For a lighter version, swap out the vanilla ice cream for Greek yogurt for a creamy yet tangy alternative.

As for serving ideas, this refreshing slush pairs wonderfully with light summer dishes like grilled chicken skewers, fish tacos, or a simple salad topped with citrus vinaigrette. The bright, zesty flavors of the slush complement these dishes perfectly, making them an ideal pairing for a sunny day.

Storage, Make-Ahead & Reheating

This Frozen Orange Creamsicle Slush is best enjoyed fresh, but if you have leftovers, you can store them in an airtight container in the fridge for up to 2 days. Just keep in mind that the slush may lose some of its texture over time as the ice melts. It doesn’t freeze well, as the ice will turn into a solid block. If you must freeze it, blend again after thawing to restore the slushy consistency. This treat is best the day you make it, as the flavors meld together beautifully overnight, enhancing its deliciousness.

Frequently Asked Questions

Can I make Frozen Orange Creamsicle Slush ahead of time?

Yes — in fact, it tastes even better the next day as the flavors meld. However, it’s best to enjoy it fresh, as the texture can change if stored for too long. If you need to prepare it ahead, keep it in the fridge and re-blend before serving.

What kind of orange juice should I use?

For the best flavor, use freshly squeezed orange juice. However, if you’re short on time, opt for 100% pure store-bought juice without added sugars. This will ensure that your slush remains flavorful and refreshing.

Can I substitute the vanilla ice cream?

Absolutely! If you’re looking for a dairy-free option, coconut milk ice cream or a non-dairy vanilla ice cream can work wonderfully. They will still provide the creamy texture and sweetness you desire.

How can I adjust the sweetness of my slush?

You can easily adjust the sweetness by modifying the amount of sugar added. Start with 1/4 cup and taste the mixture before blending. If you prefer it sweeter, add more sugar gradually until it reaches your desired level.

What should I do if my slush is too thick?

If your slush is too thick, simply add a splash of milk or orange juice and blend again. This will help achieve a more drinkable consistency while maintaining the slushy texture. Adjust gradually to reach your preferred thickness.

Sun-Kissed Frozen Orange Cream Slush

Final Thoughts

The Frozen Orange Creamsicle Slush is a delightful blend of refreshing citrus and creamy goodness, making it a perfect treat for warm days or any time you crave a taste of nostalgia. The way the bright orange flavor dances with the creamy texture truly elevates this slush, transforming it into a satisfying escape from the everyday.

This is the kind of recipe I come back to again and again, especially when I’m looking to cool down or impress guests at a summer gathering. It’s simple to make and always brings smiles all around! I encourage you to try this recipe for yourself—don’t hesitate to share your results or even put your own spin on it. Happy slushing!

Print
clock clock iconcutlery cutlery iconflag flag iconfolder folder iconinstagram instagram iconpinterest pinterest iconfacebook facebook iconprint print iconsquares squares iconheart heart iconheart solid heart solid icon

Frozen Orange Creamsicle Slush


  • Author: Lily author
  • Total Time: 15 minutes
  • Yield: 4 servings 1x
Pin Recipe
Print Recipe

Description

This Frozen Orange Creamsicle Slush is a refreshing treat that combines creamy vanilla and zesty orange flavors. Perfect for hot summer days, it brings back nostalgic memories with every sip.


Ingredients

Scale
  • 2 cups orange juice (freshly squeezed or store-bought)
  • 1 cup vanilla ice cream
  • 1 cup crushed ice
  • 1/2 cup milk (whole or 2%)
  • 1/4 cup granulated sugar (adjust based on sweetness preference)
  • 1 teaspoon vanilla extract
  • Zest of 1 orange (for added flavor)
  • Fresh orange slices and mint leaves (for garnish)

Instructions

  1. Start by preparing your ingredients. Gather 2 cups of orange juice, 1 cup of vanilla ice cream, and 1 cup of crushed ice. Make sure the ice is finely crushed, as larger chunks can make blending difficult.
  2. In a blender, combine the orange juice, vanilla ice cream, crushed ice, and 1/2 cup of milk. Add 1/4 cup of granulated sugar and 1 teaspoon of vanilla extract. If you like a sweeter slush, consider adding a bit more sugar at this stage.
  3. Add the zest of 1 orange to the blender. This step is crucial for enhancing the citrus flavor of your slush. Make sure not to include the bitter white pith—only the flavorful zest.
  4. Blend the mixture on medium-high speed for about 30-45 seconds. Stop once the ingredients are fully combined and the slush has a smooth, even consistency. If you notice large chunks of ice, blend for an additional 10-15 seconds. Avoid over-blending, as this can make the slush too liquidy.
  5. Once blended, taste the slush. If it needs more sweetness, add a little more sugar and blend for a few more seconds. If it’s too thick, you can add a splash of milk to reach your desired consistency.
  6. Pour the slush into glasses. This recipe typically serves 4, but you can easily double it for larger gatherings. Use a spoon to help guide the slush into the glasses if needed.
  7. Garnish each serving with fresh orange slices and mint leaves. The mint not only adds a pop of color but also a refreshing aroma that complements the citrus flavors beautifully.
  8. Serve immediately and enjoy! If you’ve made extra, you can refrigerate it for a short time, but it's best enjoyed fresh.
  • Prep Time: 15 min
  • Cook Time: 0 min
  • Category: Dessert
  • Method: Blending
  • Cuisine: American

Nutrition

  • Serving Size: 1 serving
  • Calories: 200
  • Sugar: 30 g
  • Sodium: 50 mg
  • Fat: 5 g
  • Saturated Fat: 3 g
  • Unsaturated Fat: 2 g
  • Trans Fat: 0 g
  • Carbohydrates: 40 g
  • Fiber: 1 g
  • Protein: 2 g
  • Cholesterol: 20 mg

Keywords: Don't skip the orange zest! It's a game-changer for flavor. Always zest before juicing to make it easier.

Did you make this recipe?

Share a photo and tag us — we can't wait to see what you've made!

Zesty Lemon Poppy Seed Delight

One rainy afternoon, I found myself in my grandmother’s cozy kitchen, the kind that always smelled like warmth and love. She was whipping up her famous Lemon Poppy Seed Loaf, a recipe that had been passed down through generations. As the batter came together, the zesty aroma of fresh lemons filled the air, mingling perfectly with the nutty fragrance of poppy seeds. I can still picture her, apron-clad, as she expertly drizzled a vibrant citrus icing over the loaf, creating a glossy, sun-kissed finish that beckoned us to dive in. It was a moment that sparked my own passion for baking, and this recipe has become a cherished staple in my home ever since.

When you take a bite of this Lemon Poppy Seed Loaf, it’s like a burst of sunshine on your palate. The loaf is beautifully golden, with a tender crumb that melts in your mouth. Each slice is speckled with tiny poppy seeds, adding a delightful crunch that contrasts beautifully with the tangy sweetness of the lemon. And that citrus icing? It’s the finishing touch that elevates this loaf from ordinary to extraordinary, with its bright, zesty flavor dancing on your taste buds.

This recipe stands out because it embraces simplicity while delivering on flavor. I’ve added a hint of vanilla to the batter, enhancing the overall taste and making it even more indulgent. Trust me, once you make this Lemon Poppy Seed Loaf With Citrus Icing, it’ll become a go-to in your baking repertoire.

So, let me show you exactly how to make it!

Zesty Lemon Poppy Seed Delight

Why You’ll Love This Recipe

  • Moist and tender crumb that melts in your mouth, thanks to the perfect balance of butter and buttermilk.
  • Bright, zesty lemon flavor paired with crunchy poppy seeds, creating a delightful texture and taste experience.
  • Easy to whip up in just about an hour, perfect for last-minute gatherings or a cozy afternoon treat.
  • Budget-friendly with everyday ingredients, making it an accessible option for all home bakers.
  • The citrus icing adds a sweet tang that elevates the loaf, turning a simple recipe into a showstopper!

Ingredients

  • 1 ½ cups (190g) all-purpose flour
  • 1 teaspoon baking powder
  • ½ teaspoon baking soda
  • ½ teaspoon salt
  • 3 tablespoons poppy seeds
  • ½ cup (115g) unsalted butter, softened to room temperature
  • 1 cup (200g) granulated sugar
  • 2 large eggs
  • 1 teaspoon vanilla extract
  • 1 teaspoon lemon zest (from about 1 medium lemon)
  • ½ cup (120ml) buttermilk
  • 2 tablespoons fresh lemon juice

For the Citrus Icing:

  • 1 cup (120g) powdered sugar
  • 2 tablespoons fresh lemon juice
  • 1 tablespoon orange juice
  • 1 teaspoon lemon zest (for garnish, optional)

Let’s dive into the key ingredients that make this Lemon Poppy Seed Loaf so special. The all-purpose flour provides the structure and base for the loaf, while the baking powder and baking soda ensure it rises perfectly, giving the loaf a light texture. For a gluten-free variation, you could substitute the flour with a gluten-free all-purpose blend. Poppy seeds not only add a delightful crunch but also contribute to the unique flavor profile that pairs well with the citrus notes.

Unsalted butter is crucial for achieving the buttery richness that makes this loaf so moist. If you’re looking for a dairy-free option, coconut oil or a vegan butter can be used instead. The buttermilk is another essential component, providing acidity that activates the baking soda for a fluffy texture. If you don’t have buttermilk on hand, you can easily make a substitute by mixing ½ cup of milk with 1 tablespoon of vinegar or lemon juice and letting it sit for about 5 minutes.

Step-by-Step Instructions

  1. Preheat your oven to 350°F (175°C). Grease a 9×5-inch loaf pan or line it with parchment paper for easy removal later.
  2. In a medium mixing bowl, whisk together 1 ½ cups of all-purpose flour, 1 teaspoon of baking powder, ½ teaspoon of baking soda, ½ teaspoon of salt, and 3 tablespoons of poppy seeds. This helps to evenly distribute the baking agents and ensures a uniform rise.
  3. In a large mixing bowl, cream together ½ cup of softened unsalted butter and 1 cup of granulated sugar using an electric mixer on medium speed for about 3-4 minutes, until the mixture is light and fluffy. Make sure to scrape down the sides of the bowl occasionally.
  4. Add 2 large eggs, 1 teaspoon of vanilla extract, and 1 teaspoon of lemon zest to the creamed butter and sugar, mixing until fully combined. You want a smooth consistency, so ensure there are no lumps of butter.
  5. In a small bowl, combine ½ cup of buttermilk and 2 tablespoons of fresh lemon juice. Alternately add the dry ingredients and buttermilk mixture to the butter mixture, starting and ending with the dry ingredients. Mix just until combined; do not overmix, as this can lead to a dense loaf.
  6. Pour the batter into the prepared loaf pan. Smooth the top with a spatula, ensuring it’s even. Bake in the preheated oven for 50-60 minutes, or until a toothpick inserted in the center comes out clean. The edges should be lightly golden brown, and the center should feel just set.
  7. Once baked, remove the loaf from the oven and allow it to cool in the pan for about 10 minutes. Then, transfer it to a wire rack to cool completely. Resist the urge to slice too soon, as it will be crumbly if it’s still warm.
  8. While the loaf is cooling, prepare the citrus icing. In a medium bowl, whisk together 1 cup of powdered sugar, 2 tablespoons of fresh lemon juice, and 1 tablespoon of orange juice until smooth. If the icing is too thick, you can add a little more juice to reach your desired consistency.
  9. Once the loaf is completely cool, drizzle the citrus icing over the top. If you like, sprinkle with an additional teaspoon of lemon zest for an extra pop of flavor and color.

Pro Tips for the Best Lemon Poppy Seed Loaf With Citrus Icing

  • Be careful not to overmix your batter; this is a common mistake that can lead to a dense loaf. Mix just until the dry ingredients are incorporated for a light and fluffy texture.
  • Use room temperature ingredients, especially the butter and eggs. This helps to create a smoother batter and ensures even baking. Take your eggs out of the fridge about 30 minutes before you start.
  • For a more pronounced lemon flavor, consider adding a little lemon extract in addition to the zest and juice. Just a half teaspoon can elevate the citrus notes significantly.
  • When measuring your flour, spoon it into the measuring cup and level it off with a knife instead of scooping directly from the bag. This prevents packing and ensures you don’t end up with a dry loaf.
  • Invest in a good quality loaf pan; it makes a difference in heat distribution, which ensures even baking. If your pan is dark-coated, reduce the oven temperature by 25°F to prevent over-browning.

Variations & Serving Ideas

For a delightful twist, consider adding blueberries or raspberries to the batter for a fruity burst of flavor. You can also experiment with different citrus fruits—try lime or grapefruit zest and juice for a refreshing change. For a healthier option, substitute half of the all-purpose flour with whole wheat flour for added fiber without compromising too much on texture.

This Lemon Poppy Seed Loaf pairs beautifully with a light salad, such as a mixed greens salad with a vinaigrette, or a cup of tea for a cozy afternoon treat. It also complements a creamy cheese platter, as the acidity of the loaf balances rich cheeses perfectly. Lastly, a scoop of vanilla ice cream on the side creates a delightful contrast of temperatures and flavors!

Storage, Make-Ahead & Reheating

This Lemon Poppy Seed Loaf can be stored at room temperature for up to 3 days if wrapped tightly in plastic wrap. If you want to keep it longer, it freezes well for up to 3 months. To freeze, wrap the loaf tightly in plastic wrap and then in aluminum foil to prevent freezer burn.

When you’re ready to enjoy it again, simply thaw it in the fridge overnight. Reheat individual slices in the microwave for 15-20 seconds or in a toaster oven until warmed through. Interestingly, many people find that this loaf tastes even better the next day, as the flavors have time to meld!

Frequently Asked Questions

Can I make Lemon Poppy Seed Loaf With Citrus Icing ahead of time?

Yes — in fact, it tastes even better the next day! You can make the loaf a day in advance, allowing the flavors to develop. Just be sure to store it in an airtight container to maintain its moisture.

Can I substitute the poppy seeds?

Absolutely! If you don’t have poppy seeds on hand or prefer an alternative, you can use sesame seeds for a similar crunch or omit them entirely for a smooth loaf.

What can I use instead of buttermilk?

If you don’t have buttermilk, you can easily create a substitute by mixing ½ cup of milk (dairy or plant-based) with 1 tablespoon of vinegar or lemon juice. Let it sit for 5 minutes before using in the recipe.

How can I make this recipe gluten-free?

To make a gluten-free version of this Lemon Poppy Seed Loaf, substitute the all-purpose flour with a gluten-free all-purpose flour blend. Just ensure that the blend contains a binding agent like xanthan gum for the best results.

What is the best way to store leftover loaf?

Leftover Lemon Poppy Seed Loaf should be stored in an airtight container at room temperature for up to 3 days. For longer storage, wrap it tightly and freeze for up to 3 months. Thaw it before serving for the best texture.

Zesty Lemon Poppy Seed Delight

Final Thoughts

The Lemon Poppy Seed Loaf with Citrus Icing is truly a delightful treat that brings a burst of brightness to any occasion. The zesty lemon flavor combined with the subtle crunch of poppy seeds creates a satisfying balance, while the citrus icing adds a touch of sweetness that perfectly complements the loaf’s tanginess.

This is the kind of recipe I come back to again and again, especially when I want to brighten up a gloomy day or celebrate a small victory. The aroma that fills the kitchen as it bakes is absolutely heavenly! I encourage you to give this recipe a try; you might just find it becoming a beloved staple in your home. Don’t forget to share your results or even add your own unique twist—I can’t wait to see what you create!

Print
clock clock iconcutlery cutlery iconflag flag iconfolder folder iconinstagram instagram iconpinterest pinterest iconfacebook facebook iconprint print iconsquares squares iconheart heart iconheart solid heart solid icon

Lemon Poppy Seed Loaf


  • Author: Lily author
  • Total Time: 38 minute
  • Yield: 1 loaf 1x
Pin Recipe
Print Recipe

Description

This Lemon Poppy Seed Loaf is a delightful treat that combines zesty lemon flavor with crunchy poppy seeds. Topped with a citrus icing, it’s perfect for any occasion.


Ingredients

Scale
  • 1 ½ cups (190g) all-purpose flour
  • 1 teaspoon baking powder
  • ½ teaspoon baking soda
  • ½ teaspoon salt
  • 3 tablespoons poppy seeds
  • ½ cup (115g) unsalted butter, softened to room temperature
  • 1 cup (200g) granulated sugar
  • 2 large eggs
  • 1 teaspoon vanilla extract
  • 1 teaspoon lemon zest (from about 1 medium lemon)
  • ½ cup (120ml) buttermilk
  • 2 tablespoons fresh lemon juice
  • 1 cup (120g) powdered sugar
  • 2 tablespoons fresh lemon juice
  • 1 tablespoon orange juice
  • 1 teaspoon lemon zest (for garnish, optional)

Instructions

  1. Preheat your oven to 350°F (175°C). Grease a 9×5-inch loaf pan or line it with parchment paper for easy removal later.
  2. In a medium mixing bowl, whisk together 1 ½ cups of all-purpose flour, 1 teaspoon of baking powder, ½ teaspoon of baking soda, ½ teaspoon of salt, and 3 tablespoons of poppy seeds. This helps to evenly distribute the baking agents and ensures a uniform rise.
  3. In a large mixing bowl, cream together ½ cup of softened unsalted butter and 1 cup of granulated sugar using an electric mixer on medium speed for about 3-4 minutes, until the mixture is light and fluffy. Make sure to scrape down the sides of the bowl occasionally.
  4. Add 2 large eggs, 1 teaspoon of vanilla extract, and 1 teaspoon of lemon zest to the creamed butter and sugar, mixing until fully combined. You want a smooth consistency, so ensure there are no lumps of butter.
  5. In a small bowl, combine ½ cup of buttermilk and 2 tablespoons of fresh lemon juice. Alternately add the dry ingredients and buttermilk mixture to the butter mixture, starting and ending with the dry ingredients. Mix just until combined; do not overmix, as this can lead to a dense loaf.
  6. Pour the batter into the prepared loaf pan. Smooth the top with a spatula, ensuring it’s even. Bake in the preheated oven for 50-60 minutes, or until a toothpick inserted in the center comes out clean. The edges should be lightly golden brown, and the center should feel just set.
  7. Once baked, remove the loaf from the oven and allow it to cool in the pan for about 10 minutes. Then, transfer it to a wire rack to cool completely. Resist the urge to slice too soon, as it will be crumbly if it’s still warm.
  8. While the loaf is cooling, prepare the citrus icing. In a medium bowl, whisk together 1 cup of powdered sugar, 2 tablespoons of fresh lemon juice, and 1 tablespoon of orange juice until smooth. If the icing is too thick, you can add a little more juice to reach your desired consistency.
  9. Once the loaf is completely cool, drizzle the citrus icing over the top. If you like, sprinkle with an additional teaspoon of lemon zest for an extra pop of flavor and color.
  • Prep Time: 15 mins
  • Cook Time: 50-60 mins
  • Category: Dessert
  • Method: Baking
  • Cuisine: American

Nutrition

  • Serving Size: 1 slice
  • Calories: 200
  • Sugar: 15 g
  • Sodium: 150 mg
  • Fat: 8 g
  • Saturated Fat: 5 g
  • Unsaturated Fat: 3 g
  • Trans Fat: 0 g
  • Carbohydrates: 30 g
  • Fiber: 1 g
  • Protein: 3 g
  • Cholesterol: 40 mg

Keywords: Be careful not to overmix your batter; this is a common mistake that can lead to a dense loaf. Use room temperature ingredients for a smoother batter and even baking.

Did you make this recipe?

Share a photo and tag us — we can't wait to see what you've made!

  • Privacy Policy
  • Terms Of Service
  • Contact
  • About
  • GDPR

Copyright © 2025 Homesmad